maanantai 20. lokakuuta 2025

PictureCorrect.com: Camera Settings for Birds in Flight

Witnessing birds in flight is an awe-inspiring experience, their graceful movements and unparalleled agility painting a vivid portrait of nature’s aerial ballet. For photographers, capturing these fleeting moments presents a unique challenge that demands technical prowess, artistic vision, and an understanding of avian behavior. In this article, we delve into the world of avian photography, focusing on the optimal camera settings for immortalizing birds in flight.

Almost gone forever! Only 1 day left: The Complete Photography Bundle 2025
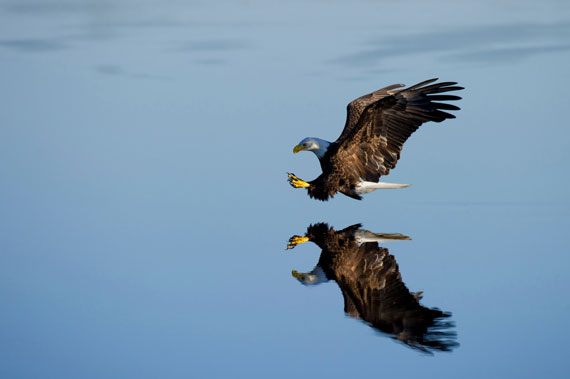
birds in flight

Photo captured by Ray Hennessy

Equipment:

  • Camera: Use a DSLR or mirrorless camera with fast autofocus and high continuous shooting speed (frames per second).
  • Lens: Choose a telephoto lens (preferably 300mm or longer) for a closer view of the bird.
  • Tripod or monopod: A sturdy tripod or monopod can help with stability, particularly when using a heavy lens.

Camera settings:

  • Autofocus: Set your camera to continuous autofocus mode (AF-C) to track the bird’s movement.
  • Focus points: Use a group of focus points or a single, flexible focus point to maintain focus on the bird.
  • Burst mode: Set your camera to continuous high-speed shooting mode to capture multiple frames per second.
  • Shutter speed: Use a fast shutter speed (1/1000s or faster) to freeze the bird’s motion.
  • Aperture: Use a wide aperture (low f-stop number) to create a shallow depth of field, isolating the bird from its background.
  • ISO: Adjust the ISO to achieve a correct exposure. Higher ISOs may be necessary in low light conditions, but keep in mind that this may introduce noise in your images.

Technique:

  • Pre-focus: Pre-focus your lens on the area where you expect the bird to appear. This will help your camera lock onto the subject faster.
  • Tracking: Keep both eyes open while looking through the viewfinder. Use your peripheral vision to track the bird’s movement, then pan smoothly with the bird’s flight path.
  • Timing: Be patient and wait for the right moment to capture the bird’s most interesting poses or actions.

Capturing the breathtaking spectacle of birds in flight is a rewarding yet challenging endeavor that requires a fine balance of technical skills, patience, and a keen eye for detail. Practice is key. The more you photograph birds in flight, the better you’ll become at anticipating their movements and capturing stunning images.

For Further Training, Deal Ending Soon:

The 5 Day Photography Deal is back and includes over $1000 worth of the best photography products online from dozens of world-class photographers. Tutorials, eBooks, photo editing presets, software and much more. At over 90% off but only until October 21.

photo bundle

Leading photography educators & brands have been selected to contribute products to the bundle. It’s one of the best photography deals of the year so you may want to check it out.

Only 1 day left: The 5 Day Photography Bundle 2025

The post Camera Settings for Birds in Flight first appeared on PictureCorrect.


from PictureCorrect https://ift.tt/2KjVm1M
via IFTTT
lauantai 18. lokakuuta 2025

PictureCorrect.com: Character Portrait Photography Tips & Techniques

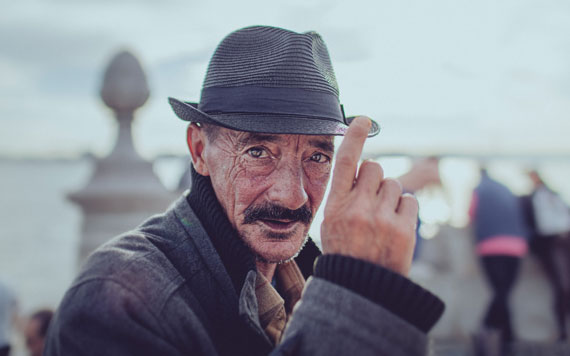
Capturing character through portraits has always been a real and true representation of people photography. The magazines always show us perfection by misrepresenting the imperfections of models and actors and other celebrities. Character portraits capture reality and the essence of the subject.

So how do we go about capturing a true character photo that is genuinely representative of the person being photographed?

Relevant note: only 2 days left for The Photography Bundle Deal of 2025

character portrait

Photo captured by McGill Productions; ISO 100, f/2.0, 1/2000s.

1. Treat the subject with dignity

The role of the photographer is always subservient in the relationship with the character being photographed. The subject is the most important and needs to be treated with respect and dignity. Without these key elements the resulting images may be detrimentally affected. The character is giving you time and this needs to be remembered.

2. Capture the face

A full face photograph is always a great way to start. Isolate it from the rest of the seen with a telephoto or zoom lens. You want to get in close and tight and see the detail and character lines of the face. This is where you will read the history and experience of your character.

travel photo

Photo by Sandeepa and Chetan; ISO 100, f/2.8, 1/1000 exposure.

3. Planning

This is an essential part of your shoot. Get to know who you are going to shoot and the circumstances of their life, career or pastime. Knowing your shots, angles and framing is vital if you are going to make a success, so work out a shot list before.

4. Add some environment

A person is a part or product of their environment. Environments say a lot about the person’s character and their world. Add a little of this to the image and contextualise them. The tools of their trade, hobby or pastime will reveal some of the passion of the subject. Be careful not to make it too busy as you’ll not want to have elements competing with the subject.

shopkeeper

Photo captured by Remy Baudouin; ISO 800, f/2.8, 1/80s.

5. Relax your subject

A relaxed subject is always going to make a better portrait than someone who is nervous or stressed by the shoot. Engage your subject and perhaps have a third person involved who can chat with the subject and help with the relaxation.

6. Focus on the hands

A face captures expression but hands can show just as much expression. Carefully watch how the person uses their hands and isolate in a tight image. Tradesmen or people who use their hands will show a different aspect with scars and reflections of their work.

7. Black and white

A lot of character photography is done using monochrome. There is just something about a contrasty black and white image. Watch your lighting and think black and white. Some colors when shot in monochrome look very similar and lack contrast so it’s important to try some test shots and. Make sure your subject has an alternative set of clothes of different colors to counter this.

musician portrait

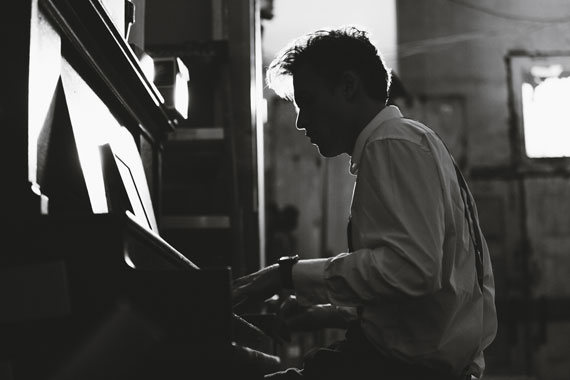
Photo captured by ian dooley; ISO 250, f/2.8, 1/125s, 70mm.

8. Use available light

You don’t want to go into a character session with huge lights, softboxes and umbrellas. Beside the inconvenience of it all it can unsettle the subject. Use available light. By planning well and using the right time of day for the setting you’ll be able to find the right location in the person’s environment to shoot. Available light from a window, doorway or skylight can be sufficient with maybe a little fill in flash from an off camera strobe. But, use your available light effectively and you’ll get some stunning images.

Character photography is all about capturing the essence of your subject and conveying who they are and what they do. Vary your lenses and be prepared to experiment. Each setting is different and needs thought and attention to detail.

About the Author:
Wayne Turner has been teaching photography for 25 years and has written three books on photography. He has produced 21 Steps to Perfect Photos; a program of learner-based training using outcomes based education.

For Further Training, Deal Ending Soon:

The 5 Day Photography Deal is back and includes over $1000 worth of the best photography products online from dozens of world-class photographers. Tutorials, eBooks, photo editing presets, software and much more. At over 90% off but only until October 21.

photo bundle

Leading photography educators & brands have been selected to contribute products to the bundle. It’s one of the best photography deals of the year so you may want to check it out.

Only 2 days left: The 5 Day Photography Bundle 2025

The post Character Portrait Photography Tips & Techniques first appeared on PictureCorrect.


from PictureCorrect https://ift.tt/p8PBM1L
via IFTTT

perjantai 17. lokakuuta 2025

PictureCorrect.com: Photographing Wave Motion at Sunset with Bracketing

Don’t miss it! Only a few days left for The Photography Deal of the Year

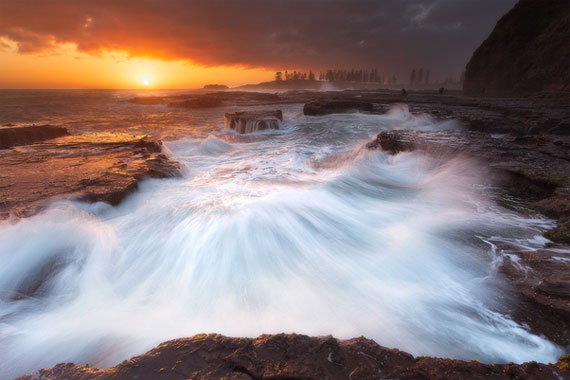
Here’s a shot that contains two of my favorite things when it comes to taking photos.

  1. The challenge of shooting directly into the sun.
  2. Capturing water in motion

wave motion

Sometimes the weather conditions can help make the first one a little easier, like in this shot where the sea mist created a haze that softened the harsh sunlight.

I would have needed 3 – 5 bracketed exposures if it weren’t for the haziness.

But believe it or not I only needed 2 this time.

The dark exposure for the sky was at 1/13th of a second and the other was 0.3 seconds, which I find to be a great shutter speed for capturing moving water up close.

It is long enough to capture the sense of movement, whilst short enough that it retains lots of nice detail.

When trying to time a wave like this, I’m in manual mode on my camera and exposing for the bright wave.

Then once I capture a shot where the shape of the wave looks good, I’ll quickly turn the dial a few clicks to adjust the shutter speed up or down 1-2 stops each time to capture the rest of the exposures I need.

This way, I get the required bracketed exposures as close together as possible (time-wise) which makes them easier to blend (especially if the clouds are moving between shots).

I rarely use auto-bracket mode because it’s harder to time the perfect wave if it comes along and your camera’s still taking the other exposures.

I allowed myself a little creative license when processing this shot too, drawing the attention to the wave in the middle by darkening the rocks and pushing the whites of the wave to their brightest limits.

But I like processing my shots how I remember seeing them and how they made me feel when I took them – not necessarily like true-to-life documentary captures.

The technical side of processing this shot was a clinic in luminosity masking.

Being able to blend and adjust the water separately from the sky, separately from the rocks and distant trees, separating them all based on their brightness was critical.

If you’d like to learn to master these techniques yourself, then this will help:

For Further Training, Deal Ending Soon:

The 5 Day Photography Deal is back and includes over $1000 worth of the best photography products online from dozens of world-class photographers. Tutorials, eBooks, photo editing presets, software and much more. At over 90% off but only until October 21.

photo bundle

Leading photography educators & brands have been selected to contribute products to the bundle. It’s one of the best photography deals of the year so you may want to check it out.

Only a few days left: The 5 Day Photography Bundle 2025

The post Photographing Wave Motion at Sunset with Bracketing first appeared on PictureCorrect.


from PictureCorrect https://ift.tt/Xl0kvGM
via IFTTT

torstai 16. lokakuuta 2025

PictureCorrect.com: 5 Ways to Avoid Blurry Soft Photography

You’ve just returned from the 1 hour photo shop with a pack of your prints or you’re having a look on your computer monitor and what do you see? The image that you saw on your LCD isn’t as sharp as you thought. The problem? Slight movement as you pressed the shutter. How do we prevent this?

Related reminder: only a few days left for The Photography Bundle Deal of 2025

All of us have this problem to some degree some of the time. It is frustrating yet simple to correct if you just follow a few steps.

no camera movement

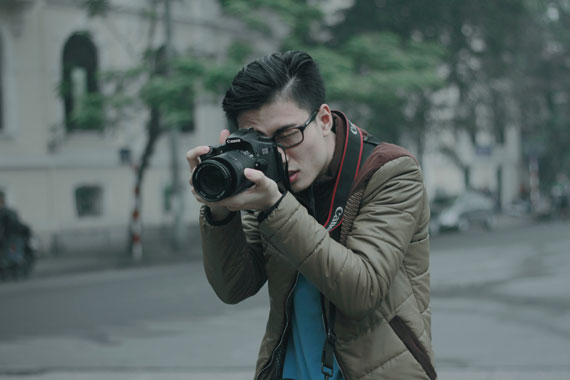
Photo captured by Duong Tran Quoc; ISO 250, f/2.2, 1/320s.

1. Holding the camera

Never hand hold a camera while using a shutter speed less that the focal length of your lens. Simply stated this means if you are using a focal length of 100mm then never shoot below 1/100th a second. The nearer you get to this limit the more chances of blur occur.

2. Using the correct shutter speed

If you are shooting movement then use a faster shutter speed. Any movement will appear blurred if a shutter speed is used that is too slow for the action. Slower speeds can be used for stationery subjects but even then be careful that it’s not your hand movement that is causing the blur and not the subject or object you are photographing.

3. Support the camera

When holding your camera, support it by holding it with both hands and tucking your arms tightly against your sides. Stand with your feet slightly apart in a comfortable position. Take a deep breath before you shoot and then release it gently and then press the shutter. If the light is not good and you need to use a slower shutter speed, brace yourself against something solid, rest your elbows on a solid surface or sit or kneel firmly on the ground.

4. Use a tripod

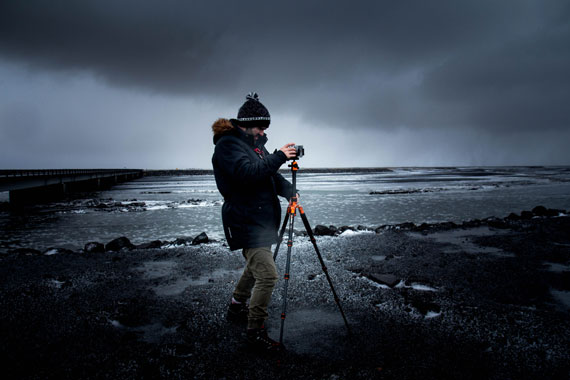
Of course the ultimate way of eliminating movement from your images is a tripod. Make sure that the one you purchase is solid and not flimsy as wind can affect it. Make sure your tripod is firmly placed so that it doesn’t fall over and damage your camera.

use tripod

Photo captured by Blair Fraser; ISO 400, f/5.6, 1/30s.

5. Use the self-timer or a remote control

When you are in a situation where you cannot hold your camera, place it on a solid surface or use a tripod. This still may not eliminate all movement and vibration so use the self-timer. After switching it on and pressing the shutter there will be a 10 second delay before the shutter releases. This will give time for micro-vibrations caused by pressing the button to subside. An optional extra is a remote shutter release which is connected either by a cable, radio waves or infra red. This allows you to press the shutter without causing any vibrations.

By doing these five simple steps you are guaranteed to take images that have minimal or no vibration. By exercising care each time you shoot an image you will see a dramatic improvement.

About the Author:
Wayne Turner has been teaching photography for 25 years and has written three books on photography. He has produced 21 Steps to Perfect Photos; a program of learner-based training using outcomes based education.

For Further Training, Deal Ending Soon:

The 5 Day Photography Deal is back and includes over $1000 worth of the best photography products online from dozens of world-class photographers. Tutorials, eBooks, photo editing presets, software and much more. At over 90% off but only until October 21.

photo bundle

Leading photography educators & brands have been selected to contribute products to the bundle. It’s one of the best photography deals of the year so you may want to check it out.

Only a few days left: The 5 Day Photography Bundle 2025

The post 5 Ways to Avoid Blurry Soft Photography first appeared on PictureCorrect.


from PictureCorrect https://ift.tt/VDhtMqH
via IFTTT

tiistai 14. lokakuuta 2025

PictureCorrect.com: Early Bird Discount: Photography Bundle 2025

If you’ve been waiting for the perfect moment to level up your photography skills, the time is now. The 5DayDeal Photography Bundle 2025 is back — and for a limited time, you can grab it at an early bird discount and maximize your savings.

photo bundle

Unlock the ultimate photography kit! This bundle brings together powerful resources from top educators. With expert-led courses on techniques, time-saving workflows, and advanced editing skills, this bundle will help you master the art of capturing and crafting breathtaking images in any environment.

Whether you’re shooting landscapes, portraits, weddings, or building your photography business, this bundle is stacked with resources to help you grow and thrive.

And the best part? Part of every sale goes to charity, helping you create change while honing your craft.

What’s the Deal?

  • The full bundle is packed with $1,000+ in retail value, yet during the deal period it’s priced at $98.
  • With the early bird pricing, you save an extra $5, meaning you can get in for just $93.

Early Bird Discount Ending Soon: Photography Bundle 2025

The post Early Bird Discount: Photography Bundle 2025 first appeared on PictureCorrect.


from PictureCorrect https://ift.tt/hkwCTdN
via IFTTT

maanantai 13. lokakuuta 2025

PictureCorrect.com: Photographing Lightning Over a City

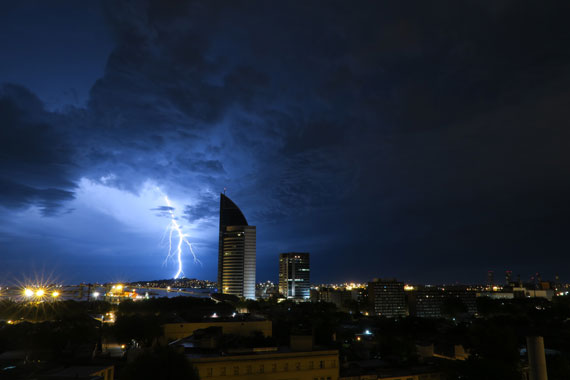
Cityscapes are great. The complexity of a cityscape is a representation of how far our civilization has come. But no matter how advanced we think of ourselves, mother nature never fails to amaze us. As photographers if you are able to capture the complexity of cityscapes in conjunction with the superiority of nature, then that’ll make for an awesome photo. What better way to do so than taking cityscapes during a lightning storm. Stay safe though, going outside in lightning is NEVER recommended – try to photograph from the safety of an apartment window or shelter.

Related note: offer ending soon for the Photo Adventure Cheat Sheets 🍂 Autumn Sale

cityscape lightning

Photo by Baltasar Henderson; ISO 125, f/11.0, 10 seconds.

Lightning is unpredictable. You cannot predict the exact moment when it’ll strike. To add to that, even the intensity varies every time making it difficult to nail exposure. The bad weather and low light conditions make your work as a photographer even more difficult. But, with patience and a bit of luck, you can capture images that’s well worth the effort. Just be sure to use the right techniques and settings:

Meaningful composition. Don’t get tempted to point your camera directly to the sky just because all the drama’s happening up there. An image with lightning in the sky could be from anywhere. The idea is to make the image relevant by adding context. Include the city that you’re photographing in. Include a landmark, an iconic building, or a popular spot of the city in your composition. Doing so will make the image so much relevant and impactful.

Get most things in focus. Aim to have the lightning bolt and the cityscape in focus. This can be achieved by working at narrower apertures ranging between f/8 to f/11. And since you cannot predict where lightning will strike, it is a good idea to set the focus manually to infinity.

Use a lightning trigger. You cannot predict the timing of lighting at all, making it challenging for you to click that shutter release button. A convenient way is to use a lightning trigger. The device connects to your camera and releases the shutter as soon as it detects lightning. Think of it as a camera trap used in wildlife photography – but for lightning. Their quick response time helps you take lightning photos with ease.

Use bulb mode. If you’re not using a lightning trigger, bulb mode can come in handy. In bulb mode, you can control the start and end of the camera’s exposure manually. For better control in bulb mode, consider using a remote release. Try to anticipate (or guess) when the lightning will occur and open the shutter. Then once the lightning strikes, close the shutter shortly after. Leaving the shutter open for too long will result in a washed out image. In case the lightning does not strike while the shutter is open, close the shutter and start over. This is where anticipation and luck plays a vital role.

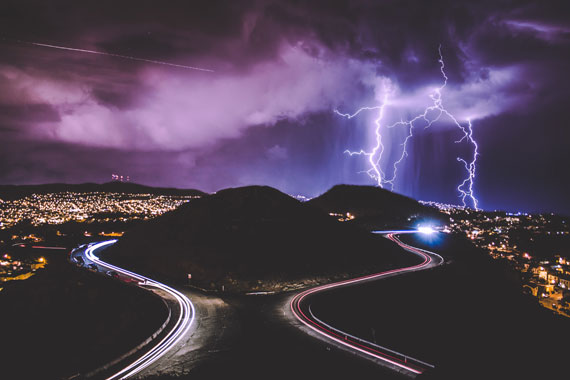
lightning with traffic

Photo by Emil Jarfelt; ISO 100, 30 seconds.

Avoid camera shake. Since you will be working with slower shutter speed, it is important that you avoid any kind of camera shake. Get a sturdy tripod. If it gets windy, a tripod that you can add load to for better stability will work better. If you have a DSLR, enable the mirror lock-up function to reduce in-camera vibration. And using a remote shutter release will further let you prevent camera shake caused when pressing the camera’s shutter release button.

Be safe. Being outside during a thunderstorm is quite risky. So, be sure to take utmost precautions. Even your tripod can act as a lightning rod and attract lightning. So, shoot from under a roof, from the inside of a room, or a balcony. This will also prevent your gear from getting wet. If you’re taking the risk and shooting from the streets of the city, don’t stand next to your tripod or a power line. Take safety as the utmost priority.

Brilliant lightning images need a lot of patience, and a bit of luck. Besides capturing lightning, even nailing the exposure is more of a hit and trial. So, don’t lose hope if things don’t work out immediately. Have patience and keep on practicing.

For Further Training:

For help remembering the camera settings for difficult situations like this, a set of Photography Adventure Cheat Sheets are designed to help. They are currently 80% off for an Autumn Sale 🍂 which ends soon if you want to check them out.

photography adventure

New! Cheat Sheets for Your Photography Adventures (see how they work)

The perfect companion for any photographer. Print one out whenever you need it. Whether you’re going on vacation or seeking out a specific photography adventure, these cheat sheets can provide you with the knowledge and inspiration you need to create your best work yet.

Deal ending soon: Photo Adventure Cheat Sheets 🍂 Autumn Sale

The post Photographing Lightning Over a City first appeared on PictureCorrect.


from PictureCorrect https://ift.tt/2clsPew
via IFTTT