torstai 14. elokuuta 2025

PictureCorrect.com: Final Day: Peak Design Pro Tripod Kickstarter Offer

Last Chance! Only hours left for the Peak Design Pro Tripod Kickstarter Offer

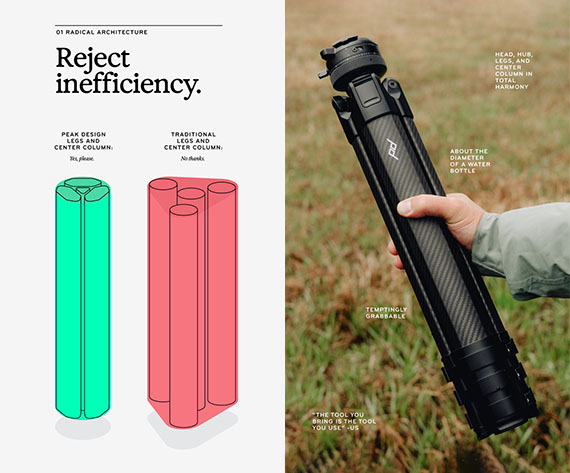
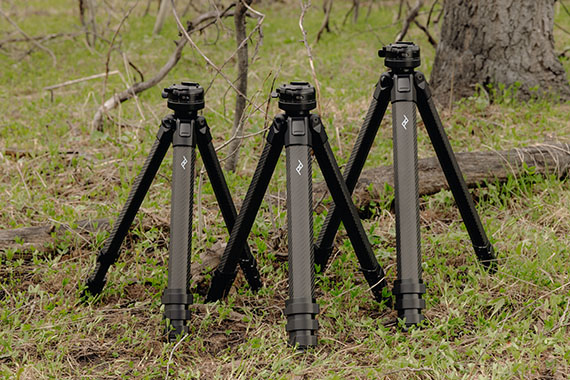
Peak Design has launched a brand-new lineup of professional-grade tripods—Pro Lite, Pro, and Pro Tall—via Kickstarter, building on the success of its award-winning Travel Tripod. Co-developed with renowned adventure photographer Jimmy Chin, this new series is aimed squarely at pros and serious enthusiasts seeking portability without compromise.
pro-tripods

What Makes the Pro Series Stand Out

  • Carbon Fiber Construction for Serious Load Capacity – All models use robust carbon-fiber legs and a CNC-machined hub, supporting up to 40 pounds of camera gear—double the weight capacity of the original Travel Tripod.
  • Three Models Tailored for Unique Needs – Peak Design’s lineup includes the lightweight Pro Lite, the standard Pro, and the towering Pro Tall. Each model maintains a compact diameter of just 3.66 inches, while offering varying maximum heights and weight capacities to fit different shooting needs.
  • Redesigned Ball Head with Fluid Panning – The updated ball head features an enhanced Arca-type quick-lock system with a secure safety toggle. A built-in fluid pan feature offers smoother movement for video work, and an optional Tilt Mod adds full pan-tilt head functionality.
  • Portability Meets Functionality – Despite their robust build, all models pack down small enough to fit into a backpack side pocket. Clever features like a stowable phone mount and hidden hex tool inside the center column remain from the original Travel Tripod.

Pro-Level Upgrades You’ll Appreciate

The Pro series introduces fast-deploy cam locks and flush angle adjusters, making setup and breakdown quicker than ever. Ergonomic CNC hardware ensures smoother handling and long-term durability. Peak Design has also developed optional accessories like spike feet, the Tilt Mod, and a Pro leveling base to further expand professional use.

photographer using tripod

Pricing & Kickstarter Details

Through the Kickstarter campaign, early backers can access significant discounts compared to the eventual retail pricing. Early-bird backers can expect to receive their units starting in late 2025, with general availability following afterward.

Why Professionals Will Be Intrigued

This new lineup doubles the load capacity compared to Peak Design’s original Travel Tripod, making it suitable for heavier cinema and photography setups. The Pro Tall reaches nearly two meters in height, ideal for taller users or for slider use with minimal center-column extension. Integrated panning and the optional Tilt Mod also make it a highly capable hybrid solution for both photo and video work.

Final Take

Early reviewers are already praising the stiffer build, improved ball head, and refined design. The Pro Lite stands out for travel and photography use, while the Pro and Pro Tall models offer serious stability for heavy-duty video and cinema applications. The carefully engineered design allows for professional-grade performance without sacrificing portability.

pro tripod

Should You Back the Kickstarter?

A strong yes if you:

  • Shoot heavy gear for photography or video.
  • Want a rugged tripod that’s still travel-compatible.
  • Like the idea of fluid panning and tilt options integrated into a ball head.

A possible wait if you:

  • Already own a high-end professional tripod.
  • Prefer detachable video heads with leveling bases.
  • Are willing to wait for full reviews after the Kickstarter campaign.

With Kickstarter savings and Peak Design’s reputation for quality, this is one campaign well worth watching.

Only hours left: Peak Design Pro Tripod Kickstarter Offer


from PictureCorrect https://ift.tt/1aQUw6M
via IFTTT
keskiviikko 13. elokuuta 2025

PictureCorrect.com: The Top 5 Most Exasperating Photography Myths

I know, as a photographer, that there are countless misconceptions that non-photographers (and in some cases, even photographers!) don’t quite seem to grasp. From the hundreds I could name, I have narrowed the list to five of the most exasperating misconceptions about photography.

Relevant note: only a little while left for the Long Exposure Photo Guide at 71% Off

1. Photography is easy

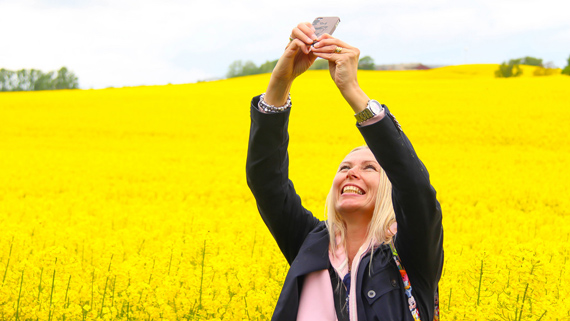
Nothing frustrates me more than when people claim photography is easy. Sure, it’s easy to take a picture; however, being a photographer is more than just taking a picture. It’s an art. It requires experience and skill to take a visually appealing picture. As a photographer, you must understand how lighting works, when to actually take the picture, and MANY more variables to take good photographs. It’s not as easy as what most people think (i.e., taking a ‘selfie’ and chucking a quick filter over it on Instagram).

selfie photography

“Taking a Selfie” captured by Susanne Nilsson

2. “Your camera takes great pictures!”

No, it does not. I take the great picture. My camera is merely a tool that allows me to execute my skills to my highest ability. This is another thing that irritates me. Sure, most of the time, the person delivering this statement means it in a positive way, but I can’t help but take it as more of an insult than anything. It’s essentially dismissing the years of experience, the amount of practice, and my overall skills in photography, and claiming that my camera is the mastermind behind my photographs. So please, if you’re one of those people who thinks the camera itself is the reason for professional photographs, bite your tongue.

Can I also just add that using a more expensive camera does not mean your photographs will be better? You can give an amateur a really expensive, high-standard camera, and it does not mean that their photographs will outperform a professional photographer with a low-budget camera. That said, if you know how to use a high-quality camera and all of its features exquisitely, then maybe this point is not applicable to you.

3. Nikon is better than Canon or Sony

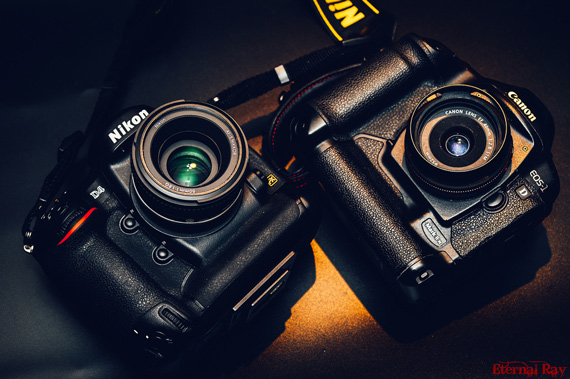
Saying Nikon is better than Canon is like saying apples are better than oranges. It’s a completely misleading way of thinking in terms of photography, and (similarly to the previous point) you should refrain from speaking. Basically, Nikon and Canon are both excellent camera brands. However, one might be more suitable for one person, and the other might be more suitable for the other person. The camera choice is all relative to the camera owner. It depends on what exactly you want to do with the camera, and what you want to achieve. Maybe the person making certain claims simply had a negative experience with one of the brands, which is not to say you will have the same experience at all.

nikon and canon cameras

“Untitled” captured by 伊特諾 雷

Instead of taking someone’s word in regards to which camera is better, you should instead do something cool, and that’s called research. The strange thing about research is that you can develop your own perspective of which camera is better and maybe come up with your own conclusions. Research includes looking up reviews of the camera you find appealing and comparing the camera with other cameras you might also have an interest in. You should also take the camera’s price into consideration and see if that price justifies its features.

4. Age is a barrier to success

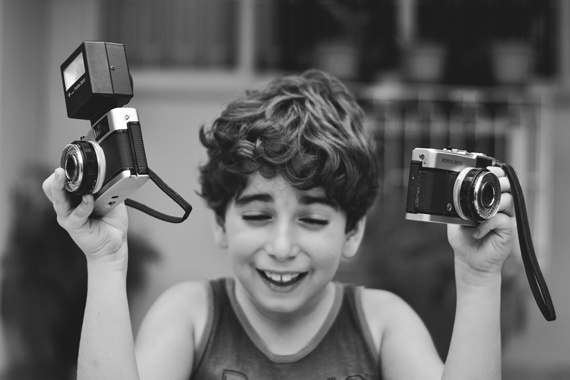
This is simply far from the truth. Just like music: there is no ‘expiry’ date to being a successful photographer. In fact, how old do you think I am? I could be 90 years old, or I could be 16 years old. I’ll tell you right now that I’m neither of those ages; however, I am somewhere in between.

photographers of all ages

“The Child and the Cameras” captured by Carine Felgueiras

Basically, this point is to disprove the misconception that age is a barrier to success. I know people of all ages, sexes, races, etc. who are extremely passionate about photography. All those things are simply unimportant to their success as photographers.

5. Black-and-white images are better and more professional

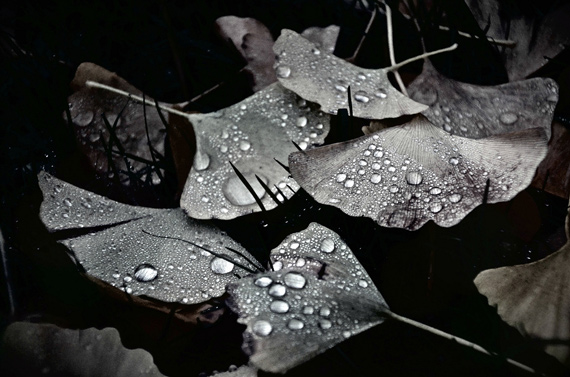
Finally, we have come to my favorite point of all: black-and-white photos. Now, don’t get me wrong; black-and-white photos can work really well, but the lack of color does not instantly make them professional. It depends on the photo itself and how the black and white has been executed. However, nothing irritates me more than when people throw on a black-and-white filter and call it photography. There is far more to photography than people understand. If you’re one of these people who think a black-and-white photograph is simply superior, and every other photograph is inferior, I want you to do something for me. Google “black and white photography,” click “Images,” and then compare the first result to your black-and-white image(s). This should probably prove my point that black and white does not necessarily make an image better.

black and white photography

“Rain Bubbles” captured by Chrissie

There you have it—some of the most “you-are-blatantly-misled” misconceptions that a photographer will hear throughout their career/hobby as a photographer. Let’s hope this article can make an impact toward obliterating these insulting misconceptions.

About the Author:
Cole is a writer/photographer who owns his own laboratory… I mean…website at considerphotography, which is chock-a-block full of information about photography.

For Further Training:

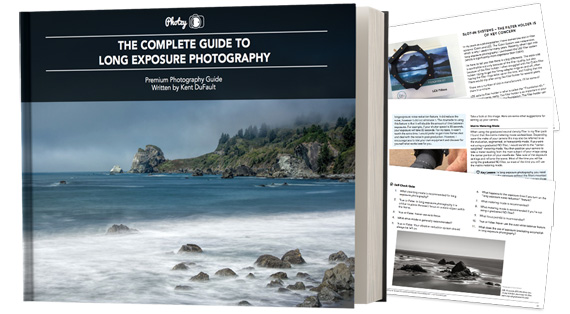
Photographer Dieter Appelt said, “A snapshot steals life that it cannot return. A long exposure creates a form that never existed.” If you’ve ever been mystified by other photographers’ tack sharp extended exposures and mind-blowing daytime long shutter speeds, then you may want to take a look at this popular in-depth eBook while it is marked down 71% off.

The Long Exposure Photography Guide (peek inside)

This guide was designed to walk you through every step of long exposure photography with a complete description and a visual reference. Each lesson is broken down into easy-to-follow steps, recommended resources, and self-check quizzes to make sure you understand each and every technique.

Deal ending soon: The Long Exposure Photography Guide at 71% Off


from PictureCorrect https://ift.tt/NJRokrm
via IFTTT

tiistai 12. elokuuta 2025

PictureCorrect.com: The Benefits of Using a Tripod for Photography

Camera technology has advanced so much that just about anyone can take good photos. (Not necessarily great photos–that has more to do with composition, subject matter, effective use of light and shadow, etc.) However, if there’s one item that helps in taking better shots, it’s the humble tripod. Many of us believe that a tripod is nothing but an extra item that helps us stop camera shake. With the high ISO capabilities and faster shutter speeds of new cameras, why do we need a tripod?

Relevant reminder: only a few days left for the Peak Design Pro Tripod Kickstarter Offer

tripods are useful in photography

Photo by Denys Nevozhai

The most obvious benefit of a tripod is that it affords stability to the camera and avoids camera shake by the operator in those situations where longer exposure times are necessary. Not many of us can hold a camera steady below a 1/60 of a second shutter speed, so we have no chance of avoiding camera shake when the exposure time could be seconds or minutes or sometimes hours in length. Examples of these times are:

  • night shots
  • star trails
  • fireworks displays
  • moon shots
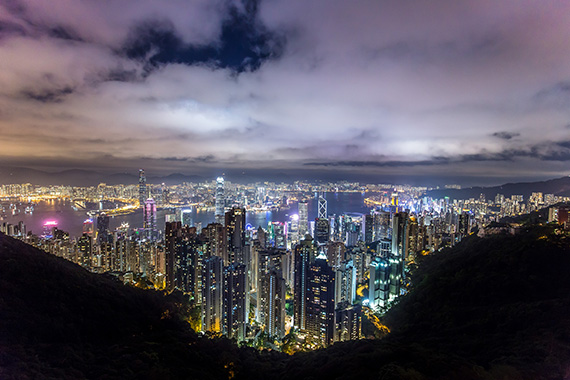
  • cityscapes
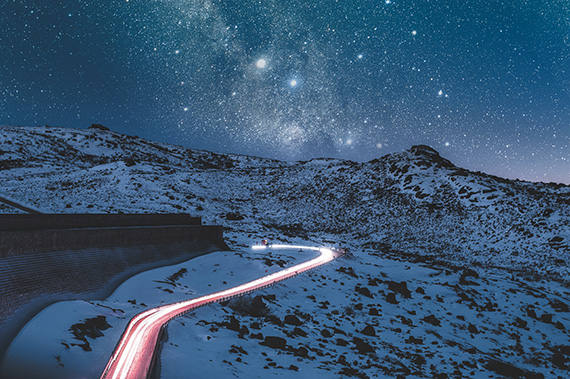
  • vehicle movement where blurring the lights is sought
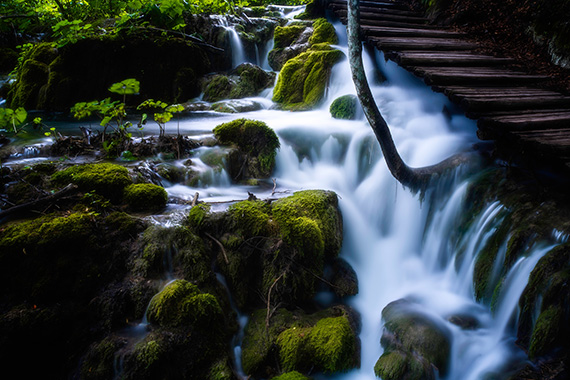
  • motion blur of waterfalls, sports action, or ocean waves
  • low light conditions without the use of flash

We all like to produce photos that are as sharp as we can get them. The tripod assists in obtaining clear focus, especially if we use timer delays or remote shutter releases. Even pressing the shutter button can cause the camera to shake.

Talking about timer delays, the tripod is a boon when making delayed action movies. Several hundred or thousand individual photos of an object are shot at predetermined intervals and run together to give those amazing movies of flowers opening, cloud movement or of decaying objects. The camera not only needs to be steady but to be in the same position for each shot.

If you are taking panorama shots or action shots where a steady panning motion is needed, the tripod is a must. A tip I picked up along the way is to use a large elastic band on the arm of the tripod head. Pulling on the elastic band, when panning, reduces any jerkiness of movement which produces a good overall result.

If you are into HDR shots, you will need a tripod for auto bracketing. This allows you to take several identical shots of the subject at different exposures. When you process the shots in your favourite image editing software, they can be combined to produce those wonderful shots where everything is dynamically exposed.

I am an ardent macro photographer and there is nothing more frustrating than trying to get a really small subject, such as an insect, into focus. All too often, the insect’s eyes are in focus but other areas on the insect, which are marginally further away, are too blurry. To overcome this I use small aperture settings to give a large depth of field, which in turn means slower shutter speeds. A tripod comes in handy in these situations. I also use sliding bracket attachments where the camera sits on the bracket and where I can finely adjust the camera movement in two planes. I can produce some really finely focused images this way.

One way that a tripod is useful, and not necessarily in an obvious way, is that it gives us time to compose our shots instead of taking instant hand held snap shots wherever we are. While this has its place in photography, we sometimes need to slow down, stand back and fine tune our composition to be able to produce dramatic landscapes, for example.

Another less obvious use of a tripod is camera placement. Capturing low level shots or shots above eye level can be achieved with a tripod without having to lie on the ground or climb a step ladder.

Tripods are also versatile in that they can double as light stands, microphone stands, or stands for reflectors or flash units. I have even heard of one photographer using a tripod as a weapon to defend himself from a vicious dog!

tripods necessary for night photos

Photo by Ricardo Rocha

A final note is that if you find the tripod a bit of an encumbrance to carry around, considered a monopod. These can double up as a walking stick and are nearly as good as tripods. There are other tripods on the market which fold down to the size of a ruler and snap open in the fixed leg position when needed.

Tripods are a wonderful accompaniment to our camera equipment, and we should all be encouraged to make more use of them.

About the Author:
Geordie Parkin keeps a website about wildlife photography, pet photography or general questions about digital photography (photopress brianparkin). Parkin is a photographer based in Forest Lake, Qld in Australia.

New Pro Tripod Deal Ending Soon:

With the launch of their new Pro Tripod (now live on Kickstarter), Peak Design has doubled down on the shape-shifting innovation that started it all—this time with a professional audience in mind.

pro tripod

If you’ve ever struggled with tripods that are either too clunky or too flimsy, this new shape-shifted Pro Tripod may be exactly what your kit has been missing.

Only a few days left: Peak Design Pro Tripod Kickstarter


from PictureCorrect https://ift.tt/BAqnWc9
via IFTTT

maanantai 11. elokuuta 2025

PictureCorrect.com: 2 Methods of Star Trail Photography

Relevant news: The Perseid meteor shower peaks the night of August 12–13, 2025, with up to 50–100 meteors per hour visible from dark, rural locations despite a bright moon. Best viewing is in low-light areas like national parks or designated dark-sky sites, with pre-dawn hours offering the clearest shots. Aim toward the constellation Perseus for the most dramatic trails.

This article is based on concepts from The Photo Adventure Cheat Sheets which are currently 80% off for a Summer Sale if you want to dig deeper.

Astrophotography, specifically star trail photography, offers an extraordinary way to explore and capture the awe-inspiring beauty of the night sky. Whether you are a novice photographer looking to dive into the world of astrophotography or an expert seeking to refine your techniques, this guide will provide you with practical tips and methods to capture perfect star trail photos.

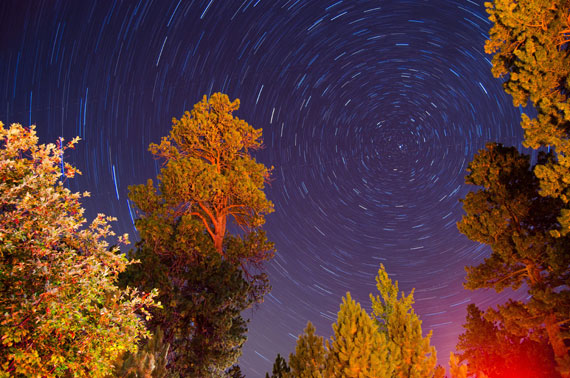
star trails exposure

30 minute single exposure captured by Lucas Ludwig

Before embarking on this fascinating journey, remember the first rule: Find a location far away from light pollution. The ideal setting for night sky photography should have minimal artificial lights to prevent light smog that can wash out stars. Choose a moonless, cloudless night to ensure maximum visibility of the stars.

Next, consider the composition. Look for an interesting foreground that can give depth to your images and make the star trails more compelling. This could include natural features like mountain ranges, bodies of water, or man-made structures like old buildings or bridges.

Equipment preparation is crucial. To capture the motion of stars clearly, you will need to keep your camera absolutely still for the duration of the shoot. A tripod or a weighted down setup can aid in this. Set your camera to manual focus, focusing on a bright star or the moon to ensure clarity. Turn off image stabilization and in-camera noise reduction. Don’t forget to check that your battery is fully charged before you start.

When it comes to camera settings, a manual white balance of around 4000 Kelvin is generally recommended for night photography. This setting provides a good balance between the cool blues of the night sky and the warmer tones of foreground objects lit by ambient light.

With your location, composition, and equipment ready, you can now dive into the actual process of capturing star trails. There are two primary methods: sequential images and single long exposure.

Method 1: Capturing Star Trails with Sequential Images

This method involves taking multiple sequential photographs over a period of time, which are then merged in post-processing to create the illusion of star trails.

  1. Set your camera to manual mode. A wide-open aperture, a 30-second shutter speed, and an ISO of around 800 is a good starting point.
  2. An intervalometer can be helpful in managing this process. This device can be programmed to shoot multiple sequential images with a constant interval between them.
  3. Once you have your set of images, import them into software such as Adobe Photoshop, StarStaX, or ImageStacker.
  4. These software programs allow you to stack your images together, blending them into a single image. Use options like gap filling to create a smooth, continuous star trail.
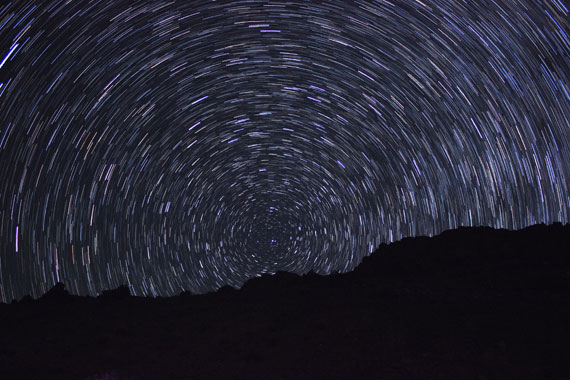
stacked star trail

Stacked star trail captured by Yash Raut

Method 2: Capturing Star Trails with a Single Long Exposure

This method involves taking one long exposure photograph. The long shutter speed captures the stars’ movement across the sky.

  1. Again, set your camera to manual mode. Use a high-quality, fast lens, the lowest possible ISO, and adjust the shutter speed based on test shots.
  2. Use an intervalometer to program a single long exposure. The length of the exposure will depend on the desired length of star trails, and can vary from 15 minutes to an hour.

Finally, here’s an extra tip to spice up your star trail photography: Point your camera at Polaris, the North Star. Due to the Earth’s rotation, the stars appear to move in circles around Polaris. Therefore, framing it in your image can result in captivating circular star trails.

By following these guidelines, you will be well-equipped to delve into the magical realm of star trail photography. Keep experimenting with different locations, compositions, and exposure times to find your unique style.

For Further Training:

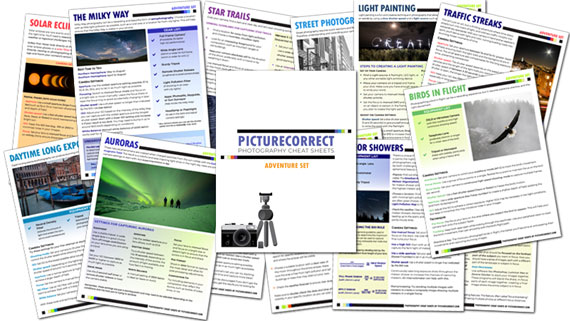
For help remembering the camera settings for difficult situations like this, a set of Photography Adventure Cheat Sheets are designed to help. They are currently 80% off for a Summer Sale which ends soon if you want to check them out.

adventure cheat sheets

New! Cheat Sheets for Your Photography Adventures (see how they work)

The perfect companion for any photographer. Print one out whenever you need it. Whether you’re going on vacation or seeking out a specific photography adventure, these cheat sheets can provide you with the knowledge and inspiration you need to create your best work yet.

Offer ending soon: The Photography Adventure Cheat Sheets Summer Sale


from PictureCorrect https://ift.tt/u6EUSkp
via IFTTT

sunnuntai 10. elokuuta 2025

PictureCorrect.com: Long Exposure Photography: How Long is Too Long?

In long-exposure photography, what is the one decision that can make or break your photograph?

The answer to that question surprised me when I started in long-exposure photography.

This article is based on concepts from the The Complete Guide to Long Exposure Photography which is currently 71% off if you want to dig deeper for further training.

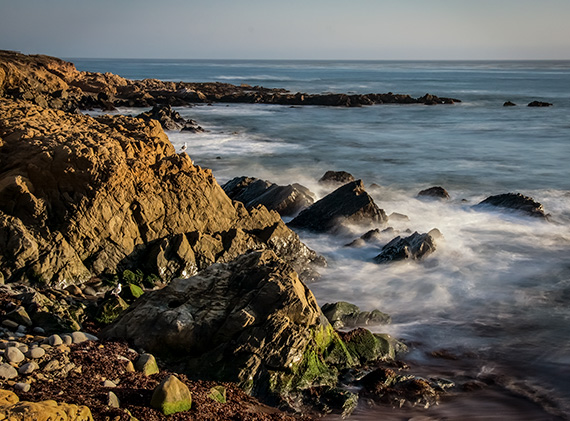
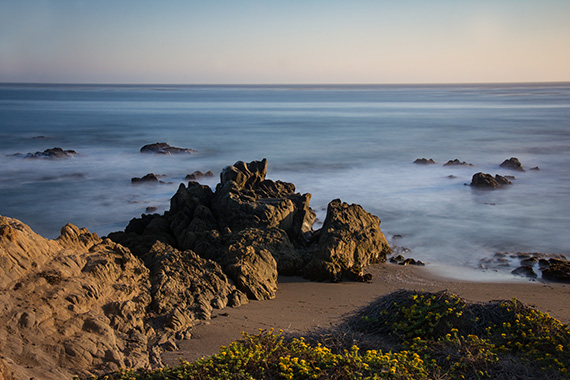
long exposure landscape photography

Photograph by Kent DuFault

Quick Tip

My initial thought with extended-exposure daylight imaging (a.k.a. long-exposure photography) was the longer, the better. Right? More exposure equals more effect.

I eventually learned that isn’t always the case.

When a long-exposure photograph is exceptionally long, it can wipe itself out of the picture. The effect might be minimal or almost non-existent.

long exposure landscape photography

Photograph by Kent DuFault

But what is too long? And how do you figure that out?

What is my favorite shutter speed for long-exposure photography?

I like to keep my shutter speed between half a second and 30 seconds. I almost always do a bracketed 1-stop exposure change on either side of my chosen shutter speed setting. If my shutter speed setting were 15 seconds, I would also shoot a frame at 30 seconds and another at 7.5 seconds.

In long-exposure photography, always bracket by changing the length of the exposure time and not the aperture or ISO setting.

Start out using the settings above until you develop your own system. I have seen some fantastic long-exposure photographs with shutter speeds of several minutes long, even as long as 10 or 15 minutes. I generally don’t have the patience for that; however, it would be worth giving it a try, just for the experience.

To get to shutter speeds of that length, you generally need to be shooting at dusk or dawn, or in a deeply shadowed area such as a forest. If you want to do daytime long exposures you will also need to invest in a significant filter pack that includes at least a couple of 10- to 16-stop ND filters.

long exposure landscape photography

Photograph by Kent DuFault

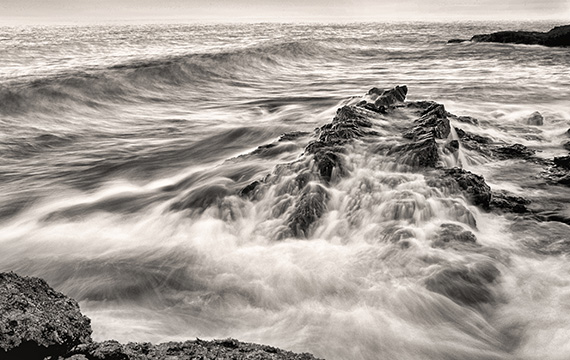
I recently had someone ask me what ND filters I used for the black and white shot above. The answer: I didn’t use any. The long-exposure effect was created by low light, a low ISO setting of 400, a high aperture of f/11 and a shutter speed of half a second.

long exposure landscape photography

Photograph by Kent DuFault

The sample image above brings us to another point of consideration when setting up your long-exposure picture.

What is all moving in the shot, and at what speed?

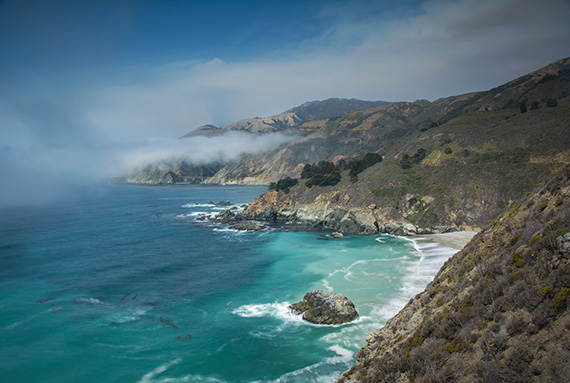
In the above long-exposure photo, the effect is visible at the beachhead but not the clouds. This outcome is because the water was moving much faster than the clouds.

Sometimes, you have to decide where you want the effect to appear. If I had left the shutter open long enough to see the clouds motion-blurred as well, it would have washed out the beachhead.

long exposure landscape photography

Photograph by Kent DuFault

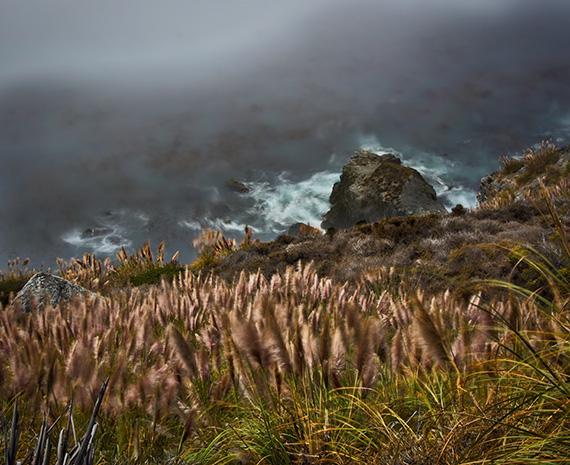
When selecting your length of exposure, consider objects that might be moving that can be a distraction.

I find the grasses in the foreground of the photo above to be a terrible distraction.

In Conclusion:

  • Exposure lengths between half a second to 30 seconds seem to work best for most scenes.
  • If the exposure time is too long for the movement captured, it can wipe the long-exposure effect from the picture.
  • Bracket one stop on either side of your chosen exposure.
  • Always bracket from the length of shutter speed and never the aperture or ISO setting.
  • You don’t always need an ND filter to capture a long-exposure effect.
  • Study your scene for objects that may be moving that will distract from the subject area of your picture and compose them out of the photo.
  • When objects are moving at varying speeds, determine where you want the effect to be visible and set your the length of shutter speed accordingly.

About the Author:
Kent DuFault is an author and photographer with over 35 years of experience. He’s currently the director of content at the online photography school, Photzy.com.

For Further Training:

Photographer Dieter Appelt said, “A snapshot steals life that it cannot return. A long exposure creates a form that never existed.” If you’ve ever been mystified by other photographers’ tack sharp extended exposures and mind-blowing daytime long shutter speeds, then you should take a look at the full in-depth eBook. It is currently 71% off if you want to check it out.

New: The Long Exposure Photography Guide

This guide was designed to walk you through every step of long exposure photography with a complete description and a visual reference. Each lesson is broken down into easy-to-follow steps, recommended resources, and self-check quizzes to make sure you understand each and every technique.

Deal ending soon: The Long Exposure Photography Guide at 71% Off


from PictureCorrect https://ift.tt/bIW87AU
via IFTTT

lauantai 9. elokuuta 2025

PictureCorrect.com: Summer Storm Photography Tips

Summer storms can be nature’s way of putting on a show, offering photographers an excellent opportunity to capture powerful, dramatic, and beautiful images. With clouds, lightning, rainbows, and dramatic lighting, there’s plenty to photograph. However, photographing storms also presents some unique challenges. Here’s a guide to help you capture the beauty of summer storms safely and effectively.

Relevant note: for a lightning photography cheat sheet and more difficult rare weather situations, you may want to check out this summer sale wrapping up soon on the popular Photography Adventure Cheat Sheets at 80% Off

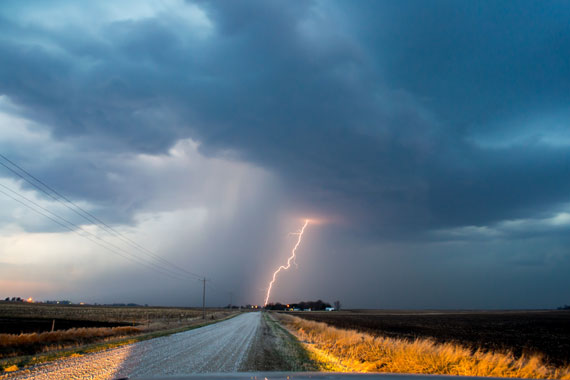
summer storm

Photo captured by NOAA; 18mm, f/8, 10 seconds, ISO 400

Safety First

  • Distance: Never prioritize a photo over your safety. Ensure you’re at a safe distance from the storm, especially lightning.
  • High Ground: Avoid being the tallest object in an open area, and don’t stand near tall trees or metal structures.
  • Weather Updates: Keep an eye on weather updates and storm movement. Apps like RadarScope or AccuWeather can be invaluable.

Optimal Settings

  • Shutter Speed: For lightning, longer exposures (several seconds) can be effective. However, if you want to capture the individual raindrops, a fast shutter speed (1/500 or faster) is required.
  • ISO: Start with a lower ISO (100 or 200) to reduce noise. You can increase it if the scene is too dark.
  • Aperture: Depending on your desired depth of field, an aperture of f/4.0 to f/11 is a good starting point.

Gear Protection

  • Rain Covers: Use rain covers to protect your camera and lens. Plastic bags with rubber bands can also work in a pinch.
  • Lens Cloth: Keep one handy to wipe off raindrops.
  • Backup Equipment: If possible, have backup gear in case something gets wet or damaged.
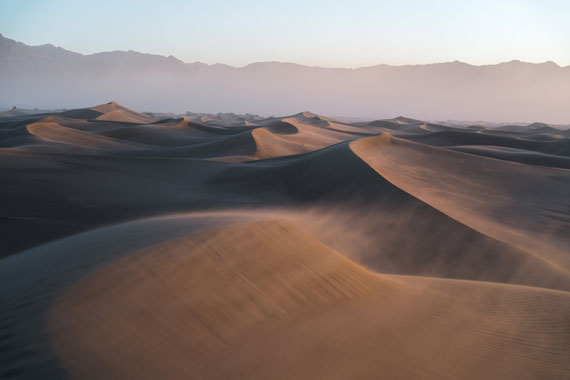
summer sand wind

Photo captured by Jeremy Bishop; f/4, 1/1000s, ISO 160

Composition Tips

  • Foreground Interest: Including objects in the foreground can give the viewer a sense of scale.
  • Leading Lines: Use roads, paths, or natural lines to lead the viewer’s eye into the storm.
  • Rule of Thirds: Position the horizon on the top or bottom third of the frame, depending on whether the sky or ground is more interesting.

Use a Tripod

Especially in lower light conditions or when capturing lightning with longer exposures, a tripod is essential to reduce camera shake and ensure sharp images.

Focus on Details

While vast stormy skies are captivating, don’t forget to focus on smaller details like raindrops on leaves, puddles reflecting the stormy sky, or the patterns of streaming water.

Chase the Light

The period just before or after a storm can have incredibly dramatic lighting. Golden hues, intense contrasts, and rainbows can emerge, offering unique photographic opportunities.

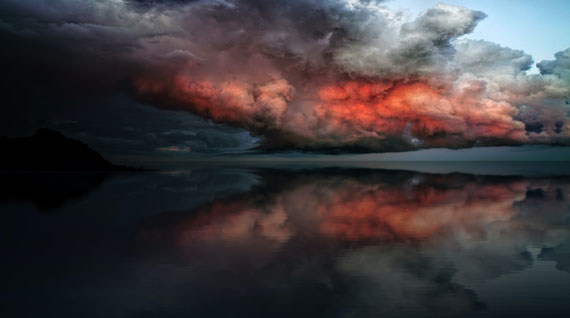
storm light

Photo captured by Johannes Plenio; 16mm, f/4.0, 1/30s, ISO 200

Post-Processing

Enhance the drama using editing tools. Increase contrast, sharpen details, and bring out the colors to give your storm photos an edge. However, avoid over-editing to the point of making the image unrealistic.

Practice and Patience

Nature is unpredictable. You may not get the perfect shot on your first outing. Keep practicing, understanding the nuances of your equipment and the weather patterns of your location.

Learn and Share

Join storm photography communities online or in person. Sharing experiences, tips, and photos can be beneficial and inspiring.

In conclusion, photographing summer storms is as much about understanding and respecting nature as it is about technical prowess. With safety at the forefront, embrace the challenge, and you’ll find yourself capturing some of nature’s most awe-inspiring moments.

For Further Training:

For help remembering the camera settings for difficult situations like this, a set of Photography Adventure Cheat Sheets are designed to help. They are currently 80% off for a Summer Sale which ends soon if you want to check them out.

adventure cheat sheets

New! Cheat Sheets for Your Photography Adventures (see how they work)

The perfect companion for any photographer. Print one out whenever you need it. Whether you’re going on vacation or seeking out a specific photography adventure, these cheat sheets can provide you with the knowledge and inspiration you need to create your best work yet.

Offer ending soon: The Photography Adventure Cheat Sheets Summer Sale


from PictureCorrect https://ift.tt/npLHiSh
via IFTTT

perjantai 8. elokuuta 2025

PictureCorrect.com: The Single Lens Challenge

Photography is as much about the equipment you use as it is about the vision you bring to your subjects. But sometimes, the best way to push your creative boundaries is to limit your technical options. That’s where the idea of shooting with a single focal length for one week comes in—a challenge that can transform your approach to photography.

Relevant note: only a little while left for the Photography Exercises ☀ Summer Sale

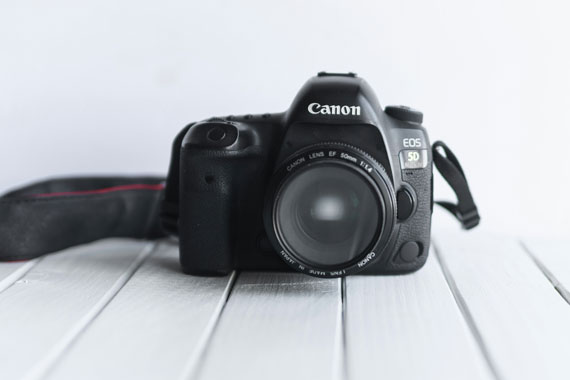
single lens

Photo captured by “Sixteen Miles Out”

Why a Single Focal Length?

Choosing to shoot with just one lens, particularly a prime lens with a fixed focal length, forces you to think differently. You can’t zoom with your lens; instead, you have to zoom with your feet, moving closer or stepping back to compose your shot. This limitation can spark creativity, improve your compositional skills, and help you see the world through a new perspective.

Choosing Your Focal Length

The focal length you choose will dictate the type of images you’ll capture. Here are a few popular options:

  • 35mm: Ideal for street photography, candid shots, and landscapes. It’s wide enough to capture the environment but not so wide that it distorts your subjects.
  • 50mm: Known as the “nifty fifty,” this lens closely mimics the human eye’s perspective, making it excellent for portraits and everyday photography.
  • 85mm: Perfect for portraits, this lens allows you to capture detailed facial expressions and beautifully blurred backgrounds while giving your subject personal space.

If you only have a zoom lens but want to participate in the single focal length challenge, you can easily adapt your lens to mimic a prime lens. One practical method is to use a piece of tape or a rubber band to lock the zoom mechanism at your desired focal length. Simply adjust your lens to the focal length you want to use for the week—such as 35mm, 50mm, or 85mm—and then secure it in place with the tape or rubber band.

The Challenge: One Week, One Focal Length

Day 1: Getting Acquainted

Start simple. Spend your first day taking photos of familiar subjects to understand how your chosen focal length handles different scenarios. Notice how it affects your composition and framing.

Day 2: Focus on Composition

With zooming off the table, concentrate on other elements like symmetry, leading lines, and the rule of thirds. See how moving around your subject changes the perspective significantly.

Day 3: Light and Shadow

Play with lighting. Use the early morning or late afternoon light to create dramatic images. Experiment with shadows, silhouettes, or even the harsh midday light to learn how your lens handles various lighting conditions.

Day 4: Texture and Detail

Get close to your subjects to explore textures and fine details. Whether it’s the rough bark of a tree, the weave of fabric, or the facial features of a portrait, let your lens capture the intricacies.

Day 5: Black and White

Switching to black and white can help you focus on contrast, lighting, and composition without the distraction of color. It can also lend a timeless quality to your images.

Day 6: People and Portraits

Focus on capturing expressions and interactions. If you’re using a longer focal length, you’ll appreciate how it can flatter your subjects by compressing space and offering a pleasing background blur.

Day 7: Review and Reflect

Look back at your week’s photos. Identify your strengths and areas for improvement. Were any worthy of adding to your portfolio? How has your approach changed? How has the limitation of a single focal length affected your creativity? Share a couple of the best ones to social media and see what your friends think.

Benefits of the Exercise

Completing this challenge can provide several benefits:

  • Improved Creativity: Limitations can indeed breed creativity. You’ll find new ways to approach and capture different subjects.
  • Enhanced Skill Set: You’ll develop a keener eye for composition and an improved ability to adapt to different photographic situations.
  • Greater Appreciation: Using one focal length for an extended period allows you to deeply understand its capabilities and limitations.

This exercise is a testament to the idea that creativity thrives under constraint. By the end of the week, you might find that this “limitation” has opened up a whole new world of photographic possibilities. Give it a try, and see how it transforms your photography!

For Further Training:

Are you ready to elevate your photography skills to the next level? Dive into our specially curated collection of 25 of the most popular and effective photography exercises designed to help you learn through practice and retain essential techniques.

Summer Sale Ending Soon: Photography Exercises Bundle at 85% Off


from PictureCorrect https://ift.tt/VHNf4vK
via IFTTT