keskiviikko 17. heinäkuuta 2024

PictureCorrect.com: Canon Launches the R1 and R5 Mark II Full-Frame Cameras

Quick reminder: next enrollment opening soon for PictureCorrect Insiders

MELVILLE, N.Y., July 17, 2024 — Canon U.S.A., Inc., a leader in digital imaging solutions, today launched two new professional full-frame mirrorless cameras, the EOS R1 and EOS R5 Mark II. The EOS R1 camera is designed for both professional still photographers and video creators in a wide range of fields including sports, news reporting and high-end video production. The EOS R5 Mark II camera features improved video focused features for the advanced creators and real-time multi recognition tracking system for those who focus on still photography.
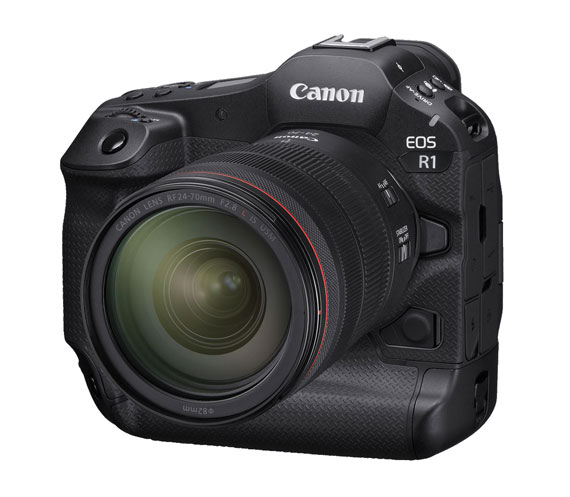
canon r1 camera

Canon EOS R1 Camera is “Ahead of the Game”

Canon’s EOS 1-series legacy continues with the unveiling of the flagship EOS R1 camera. This high-performance, reliable, and weather-resistance camera is designed for professionals in the photojournalism, sports and wildlife fields. Key features of the EOS R1 camera include:

  • Back-illuminated stacked 24.2 megapixel full-frame sensor and new processing system for extremely fast reading
  • Increased read-out speed, reducing “rolling shutter” distortions
  • Still-image shooting speeds up to 40fps
  • “Cross-type AF” imaging sensor for more positive focus on subjects with linear detail
  • Strong video capabilities, up to 4K (also 6K RAW video options)

Canon EOS R5 Mark II Camera helps users “Master the Moment”

For the professional who demands high-quality still and video output, the EOS R5 Mark II camera is ready to deliver. Designed with performance and image quality at its core, the EOS R5 Mark II camera offers the fundamental elements in one package for sports/wildlife photographers, journalists/producers, video producers and visual creators. Key features of the EOS R5 Mark II camera include:

  • Back-illuminated stacked 45 megapixel full-frame sensor and new processing system for extremely fast reading
  • When compared to previous EOS R camera models, more advanced and powerful AF system including Eye Control AF and new subject tracking technologies
  • Cinema EOS video features such as:

Custom Picture color profile including Canon Log 2
False Color Wave Form Monitor
4CH Audio with 24bit LPCM
Pre-recording up to 5 seconds

Accessories for the EOS R5 Mark II camera were designed thoughtfully with the end-user in mind. There is a new, more powerful battery. The LP-E6P battery, when compared to previous battery versions, features higher continuous power and two-times the amperage. Optional battery grips were also thoughtfully designed, and there are three options:

  • BG-R20– For vertical operability
  • BG-R20EP with Ethernet – Port enables high-speed wired communication
  • CF-R20EP with Cooling Fan and Ethernet – Cooling fan helps maximize movie performance

Both cameras feature the new DIGIC Accelerator, which is an addition to the DIGIC X processor. The DIGIC Accelerator assists with deep learning processing which helps to quickly analyze large volumes of data and supports the next-gen AF system, Dual Pixel Intelligent AF. Dual Pixel Intelligent AF is based on Accelerated Capture and deep learning, allowing end-users to experience tracking advancements, such as body, joint and head area estimation and focus on people other than the main subject.

Price and Availability

The Canon EOS R1 camera is expected to be available in the Fall of 2024, for an estimated retail price of $6,299.00*. The Canon EOS R5 Mark II camera is expected to be available in August 2024, for an estimated retail price of $4,299.00* for the camera body only. The EOS R5 Mark II camera kit, which will include the RF24-105mm F4 L IS USM lens, will have an estimated retail price of $5,399.00*. The estimated retail prices for the optional battery grips are:

  • BG-R20– $349.99*
  • BG-R20EP – $499.99*
  • CF-R20EP – $399.99*

* Specifications, availability and prices are subject to change without notice. Actual prices are set by individual dealers and may vary.

For Help with Camera Mastery:

Have you ever wanted to photograph an amazing moment but missed the shot because you didn’t know the right camera settings to use? That’s where these Camera Cheat Sheets come in. They are currently 75% off for a summer sale if you want to check them out.
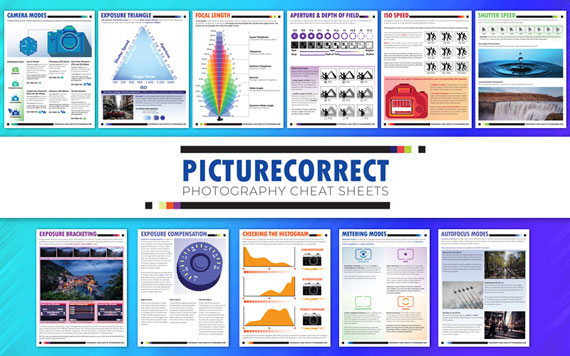
picturecorrect cheat sheets

Print a Cheat Sheet Whenever You Need It

Whether you’re a seasoned professional or just starting out, photography cheat sheets can be a valuable resource for improving your skills and taking your photography to the next level. The perfect companion for any photographer. Print one out whenever you need it.

Summer sale ending soon: The Camera Cheat Sheets at 75% Off

- - - - - - - - - - - - - - - - - - - - - - - - - - - - - - - - - - - - - - - - - - - - - - - - - - - - - - - - - - - - - - - - - - - - - - - - - -

Photography, like any art or skill, thrives on consistency. The journey to becoming an adept photographer is paved with regular practice. Learn how PictureCorrect Insiders can help.

- - - - - - - - - - - - - - - - - - - - - - - - - - - - - - - - - - - - - - - - - - - - - - - - - - - - - - - - - - - - - - - - - - - - - - - - - -

This post Canon Launches the R1 and R5 Mark II Full-Frame Cameras appeared on PictureCorrect.


from PictureCorrect https://ift.tt/oD2RGqS
via IFTTT

tiistai 16. heinäkuuta 2024

PictureCorrect.com: Protecting Your Digital Camera from the Summer Heat

As photographers, we often find ourselves in various environments, each posing its unique set of challenges. One critical factor that can significantly impact our gear and the quality of our shots is temperature. Specifically, high temperatures can be detrimental to our digital cameras. So, how hot is too hot for digital cameras, and what can we do to protect them?

camera heat

Understanding Temperature Limits

Most digital cameras, whether DSLRs, mirrorless, or compact, are designed to operate efficiently within a specific temperature range. Typically, this range falls between 32°F to 104°F (0°C to 40°C). Exceeding these limits, especially the upper end, can lead to several issues:

  • Overheating: Prolonged exposure to high temperatures can cause the camera to overheat. This can result in automatic shutdowns to prevent damage to internal components.
  • Sensor Damage: The image sensor is particularly sensitive to heat. Extended periods in hot conditions can lead to permanent damage, affecting image quality.
  • Battery Drain: Batteries tend to drain faster in extreme heat, reducing the time you can spend shooting.
  • Warping and Melting: In severe cases, high temperatures can cause the plastic components of the camera to warp or even melt.

Symptoms of Overheating

Recognizing the signs of overheating can help you take preventive measures before serious damage occurs. Look out for:

  • Warning Messages: Many modern cameras will display a warning message if they detect excessive heat.
  • Unexpected Shutdowns: If your camera shuts down unexpectedly, it could be due to overheating.
  • Lag or Slow Performance: Overheating can cause the camera to slow down or lag.
  • Hot to the Touch: If the camera body feels unusually hot, it’s a clear sign that it’s overheating.

Tips to Prevent Overheating

  • Avoid Direct Sunlight: Keep your camera out of direct sunlight as much as possible. Use a camera cover or find shade when shooting outdoors.
  • Limit Usage: Take breaks during long shooting sessions to allow your camera to cool down. This is particularly important when shooting videos, which generate more heat than still photography.
  • Use a Tripod: Holding the camera can transfer heat from your body to the camera. Using a tripod can minimize this.
  • Ventilation: If your camera has vents, make sure they are not blocked. Proper ventilation can help dissipate heat.
  • Carry Spare Batteries: Batteries can heat up during use. Swapping out batteries and letting them cool down can help manage heat.
  • Keep Your Gear Cool: Store your camera and lenses in a cool place when not in use. A cooler bag or insulated case can help maintain a lower temperature.

Hot Cars and Camera Safety

One specific situation that can pose a significant risk to your camera is leaving it in a hot car. Cars can reach extremely high temperatures, especially on sunny days. Interior temperatures can soar well above the operating range of most digital cameras. Here’s why it’s risky and how to mitigate the danger:

  • Extreme Temperatures: Cars can become ovens under the sun, with interior temperatures exceeding 140°F (60°C). Such extreme heat can cause sensor damage, battery leakage, and warping of plastic components.
  • Battery Issues: Heat accelerates battery drain and can cause batteries to swell or leak, potentially damaging the camera.
  • Warping and Melting: Prolonged exposure to high heat can cause plastic parts to warp or even melt, affecting camera functionality.

Precautions If You Must Leave Your Camera in the Car

If leaving your camera in a car is unavoidable, consider these precautions to minimize risk:

  1. Use an Insulated Bag: Store your camera in a well-insulated camera bag. Some bags are designed to protect against temperature extremes.
  2. Keep It Out of Direct Sunlight: Place the bag in the trunk or under a seat, away from direct sunlight.
  3. Crack the Windows: Leaving windows slightly open can help reduce the overall temperature inside the car.
  4. Use Sun Shades: Employ sun shades for your windshield and windows to lower the interior temperature.
  5. Limit the Duration: Try to minimize the time your camera is left in the car. The shorter the exposure to heat, the less risk there is of damage.
  6. Cool Down Gradually: When retrieving your camera, let it acclimate to the outside temperature gradually to prevent condensation.

Emergency Measures

If you find yourself in a situation where your camera is overheating, there are a few immediate actions you can take:

  1. Turn Off the Camera: Give it a break to cool down.
  2. Remove the Battery: This helps reduce the internal temperature faster.
  3. Seek Shade or a Cooler Environment: Move to a cooler area to help dissipate the heat.

Summary:

Understanding and respecting the temperature limits of your digital camera is crucial to maintaining its performance and longevity. By taking preventive measures and recognizing the signs of overheating, you can protect your gear from the detrimental effects of high temperatures. Remember, your camera is a precision instrument—treat it with care to ensure it continues to capture stunning images for years to come.

For Further Camera Training:

With clear, concise information on all the essential camera topics, you’ll never be unprepared again. That’s where these Camera Cheat Sheets come in. They are currently 75% off for a summer sale if you want to check them out.

camera cheat sheets

Some of the Many Cheat Sheets Included (see them all)

Whether you’re a seasoned professional or just starting out, photography cheat sheets can be a valuable resource for improving your skills and taking your photography to the next level. The perfect companion for any photographer. Print one out whenever you need it.

Summer sale ending soon: The Camera Cheat Sheets at 75% Off

- - - - - - - - - - - - - - - - - - - - - - - - - - - - - - - - - - - - - - - - - - - - - - - - - - - - - - - - - - - - - - - - - - - - - - - - - -

Photography, like any art or skill, thrives on consistency. The journey to becoming an adept photographer is paved with regular practice. Learn how PictureCorrect Insiders can help.

- - - - - - - - - - - - - - - - - - - - - - - - - - - - - - - - - - - - - - - - - - - - - - - - - - - - - - - - - - - - - - - - - - - - - - - - - -

This post Protecting Your Digital Camera from the Summer Heat appeared on PictureCorrect.


from PictureCorrect https://ift.tt/frtpB7I
via IFTTT

maanantai 15. heinäkuuta 2024

PictureCorrect.com: How to Get Photo Passes for Concerts

One of the most important things in live music photography is getting access to big shows. Big shows mean that artists have big budgets for lighting and stage production, which helps you create better photos as a beginner. In this article I will discuss various methods you can use secure a photo pass for these bigger gigs.

photography passes

Some of my recent photo passes. (From left to right: James Bay, Placebo and Steel Panther)

Finding a Media Outlet

Be direct and approach a media outlet to ask them if they would entertain the idea of you joining them as a photographer. Usually, you will photograph a show for free. In return, you get a photo pass for the show. After the fact, they should credit you for your photography, increasing your visibility. Local media outlets are more likely to accept your help, as national ones have a wider talent pool to pick from.

placebo concert photo

Placebo, March 2015

Applying Through an Agency

This method is slightly more difficult, as it first requires you getting signed to an agency. An agency is primarily looking for people who have access to big arena shows but can be used to get access to big arena shows in turn.

I advise trying to get big arena shows under your belt by other means (outlets/nepotism), then ask agencies if they’re interested in accepting your photos as a trial run for signing with them.

Agencies are great because they promote your work to national media outlets. If these outlets buy licenses for your photos, you get a portion of the money. Plenty of people make a living purely from shooting shows for agencies.

Application Process

Once you’ve chosen your method for obtaining a photo pass, you’ll need to find the press contact for the band.

Looking on Facebook pages for the bands you’re interested in photographing is great for finding an email address for a press contact. If you can’t find one, then my next recommendation is to find a tour poster. On the poster there should be the promoter, and from there you can go to the promoter’s website, find their marketing person, and send them an email asking who is handling the accreditation for that particular show. A final, desperate action is always searching “XYZ Band Press Contacts”.

tom jones concert photo

Tom Jones, June 2014

Writing E-Mail

The last step is to write out an email to the press person requesting a photo pass.

There are various ways that you can do this, but it is essential that you include the artist name, venue, date, and outlet or agency that you’re shooting for. I always include contact details of the editor of the outlet or when shooting for an agency. Some outlets will ask for you to copy them in, which you will discuss with them prior to applying for the pass.

With agency work, I also include a link to my Flickr account. Most of the people working in press will look at who you’re shooting for and will approve/deny you based purely upon this. Any proof of your work (Flickr/portfolio) will come in handy to prove your skill.

mcbusted concert photo

Mcbusted, my second ever show!

When you apply for side of stage access, portraits with the artist, or permission to shoot more then the first three songs of the show, it’s important to show your different skills.

It’s a tough, competitive business, but with the right attitude you’ll find yourself shooting in arenas in no time. My second shoot ever was a sold out 10,000 capacity Nottingham Arena show, which just shows that if you have a good outlet or agency to shoot for, then you will easily be shooting arena gigs in no time.

About the Author
Olly Stabler is a music photographer based in Leicester, UK. He photographs for three major agencies and his local newspaper, shooting everything from pop through to heavy metal.

- - - - - - - - - - - - - - - - - - - - - - - - - - - - - - - - - - - - - - - - - - - - - - - - - - - - - - - - - - - - - - - - - - - - - - - - - -

Photography, like any art or skill, thrives on consistency. The journey to becoming an adept photographer is paved with regular practice. Learn how PictureCorrect Insiders can help.

- - - - - - - - - - - - - - - - - - - - - - - - - - - - - - - - - - - - - - - - - - - - - - - - - - - - - - - - - - - - - - - - - - - - - - - - - -

This post How to Get Photo Passes for Concerts appeared on PictureCorrect.


from PictureCorrect https://ift.tt/tQV4DUa
via IFTTT

sunnuntai 14. heinäkuuta 2024

PictureCorrect.com: Understanding Metadata for Photographers

In the digital age of photography, understanding metadata is crucial for photographers who want to manage, organize, and utilize their photos effectively. Metadata is the hidden data embedded within your digital images, providing essential information about the photo. Let’s delve into what metadata is, why it’s important, and how you can leverage it to enhance your photography workflow.

Relevant reminder: only a little while left for the Camera Cheat Sheets Summer Sale

photo metadata

What is Metadata?

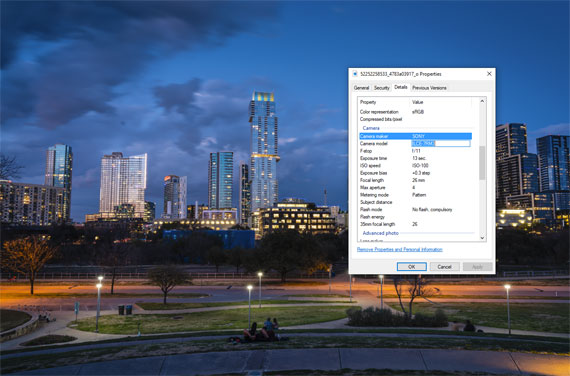
Metadata is essentially data about data. In the context of photography, it refers to the information embedded within your digital images that describe various aspects of the photo. This data includes details about the camera settings, the date and time the photo was taken, and even the GPS coordinates of the location where the photo was shot. Metadata is automatically generated by your camera when you take a photo and can be further edited and extended using various software tools.

Types of Metadata

EXIF (Exchangeable Image File Format):

  • Camera Settings: Includes details such as shutter speed, aperture, ISO, focal length, and white balance.
  • Date and Time: Records when the photo was taken.
  • Camera and Lens Information: Brand and model of the camera and lens used.

IPTC (International Press Telecommunications Council):

  • Descriptive Information: Captions, keywords, and titles that describe the content of the photo.
  • Author Information: Photographer’s name and contact details.
  • Copyright Information: Usage rights and licensing details.

XMP (Extensible Metadata Platform):

  • Custom Data: Allows for the creation of custom metadata fields to suit specific needs.
  • Compatibility: Ensures metadata compatibility across different software applications.

Why is Metadata Important?

  • Organization and Searchability: Metadata helps you organize your photos systematically, making it easier to search and retrieve specific images. By adding keywords, captions, and ratings, you can quickly find photos based on various criteria.
  • Workflow Efficiency: Effective use of metadata can streamline your workflow. Software like Adobe Lightroom and Capture One allows you to sort, filter, and edit images based on their metadata, saving you time and effort.
  • Copyright and Ownership: Embedding your copyright information within the metadata ensures that your ownership is recognized and helps protect your intellectual property rights.
  • Geotagging: For travel and landscape photographers, GPS metadata is invaluable. It allows you to map out your photo locations and revisit them in the future or share them with others.
  • Client Communication: For professional photographers, metadata can include client details, project information, and specific requirements, making it easier to manage client shoots and deliverables.

How to View and Edit Metadata

In-Camera:

Some cameras allow you to view basic metadata information on the camera’s LCD screen. However, for detailed metadata editing, you will need to use software tools.

Using Software:

  • Adobe Lightroom: Provides extensive metadata editing capabilities, allowing you to add, edit, and search metadata fields.
  • Adobe Photoshop: Offers metadata viewing and basic editing options.
  • Capture One: Another powerful tool for managing metadata.
  • Free Tools: Software like XnView and PhotoME provide free options for viewing and editing metadata.

Batch Editing:

Most professional software tools offer batch editing features, enabling you to apply metadata changes to multiple photos simultaneously. This is particularly useful for large photo shoots or when organizing your photo library.

Best Practices for Using Metadata

  • Be Consistent: Develop a consistent method for adding and editing metadata. Use a standard set of keywords, captions, and ratings to ensure uniformity across your photo library.
  • Automate When Possible: Use metadata presets and templates to automate the process of adding common metadata fields. This can save you a significant amount of time.
  • Backup Metadata: Always ensure that your metadata is backed up along with your photos. Some software allows you to export metadata separately, providing an additional layer of protection.
  • Update Regularly: As your photo library grows, periodically update your metadata to ensure it remains relevant and accurate.

Summary:

Understanding and utilizing metadata is a powerful way to enhance your photography workflow. By effectively managing your metadata, you can organize your photos better, protect your work, and streamline your editing process. Whether you’re a hobbyist or a professional, mastering metadata is an essential skill that will serve you well throughout your photography journey.

For Help with Camera Mastery:

Have you ever wanted to photograph an amazing moment but missed the shot because you didn’t know the right camera settings to use? That’s where these Camera Cheat Sheets come in. They are currently 75% off for a summer sale if you want to check them out.

fundamental photography sheets

New: Fundamental Photography Cheat Sheets

Whether you’re a seasoned professional or just starting out, photography cheat sheets can be a valuable resource for improving your skills and taking your photography to the next level. The perfect companion for any photographer. Print one out whenever you need it.

Summer sale ending soon: The Camera Cheat Sheets at 75% Off

- - - - - - - - - - - - - - - - - - - - - - - - - - - - - - - - - - - - - - - - - - - - - - - - - - - - - - - - - - - - - - - - - - - - - - - - - -

Photography, like any art or skill, thrives on consistency. The journey to becoming an adept photographer is paved with regular practice. Learn how PictureCorrect Insiders can help.

- - - - - - - - - - - - - - - - - - - - - - - - - - - - - - - - - - - - - - - - - - - - - - - - - - - - - - - - - - - - - - - - - - - - - - - - - -

This post Understanding Metadata for Photographers appeared on PictureCorrect.


from PictureCorrect https://ift.tt/m9k23SQ
via IFTTT

lauantai 13. heinäkuuta 2024

PictureCorrect.com: New: Photo Education Bundle

The newly launched Photo Education Bundle is a comprehensive collection of photography courses designed to help photographers at all levels enhance their skills. This bundle includes a variety of courses taught by renowned photographers and educators, covering different photography genres and techniques.

photo education bundle

Photo Education Bundle (see what’s inside)

What’s Included in the Photo Education Bundle?

The Photo Education Bundle offers a curated selection of courses:

Full Bundle:

Price: $249 (originally $1279)
Contents: All 15 courses, a lifetime license for Luminar Neo photo editor, and 50 presets for enhancing photos with a single click.

Travel Bundle:

Price: $149 (originally $594)
Contents:

  • Travel Street Photography by Sean Dalton
  • Travel Photography by Sean Dalton
  • iPhone Photography by Sean Dalton
  • Finding Creativity in Airborne Photography by Mark Houde
  • iPhone Photography by Max Rive

Landscape Bundle:

Price: $149 (originally $594)
Contents:

  • Ultimate Photography Composition Course by Ian Plant
  • Landscape by iPhotography
  • Introduction to the Art in Landscape Photography by Gina Yeo
  • The Art in Composition by Gina Yeo
  • Landscape Photography by Sean Dalton

Portrait Bundle:

Price: $149 (originally $594)
Contents:

  • An Honest Portrait by Ken Buslay
  • How the Light Behaves by Ken Buslay
  • Portrait Photography by Sean Dalton
  • Light of the Old Masters by Frank Doorhof
  • Speedlight Magic by Frank Doorhof

Each bundle includes a lifetime license for the Luminar Neo photo editor, equipped with AI tools to enhance photos effortlessly.

Meet the Educators

The courses are taught by a team of professional photographers who are experts in their respective fields:

  • Max Rive: Award-winning professional landscape photographer.
  • Ian Plant: Travel enthusiast, educator, and professional landscape photographer.
  • Ken Buslay: Film photographer and educator.
  • Sean Dalton: Travel photographer and YouTuber.
  • Frank Doorhof: Portrait photographer, author, ambassador, and educator.
  • Gina Yeo: Landscape photographer, mentor, and educator.
  • Mark Houde: Professional drone photographer and content creator.
  • Chris Sale: Landscape photographer working in partnership with iPhotography.

Key Features of the Photo Education Bundle

  • Courses Tailored to Specific Interests: Options for travel, landscape, and portrait photography, with bundles designed to meet specific needs.
  • Professional Instruction: Courses taught by highly regarded photographers, offering valuable insights and techniques.
  • Lifetime Access: Unlimited access to the courses, allowing for flexible learning at any pace.
  • 14-Day Money-Back Guarantee: Full refund available within 14 days if the courses do not meet expectations.
  • Photo Enhancement Tools: Lifetime license for Luminar Neo and 50 presets included for easy photo enhancement.

The Photo Education Bundle combines expert-led courses with cutting-edge editing tools to create a powerful learning experience for photographers. Whether your interest lies in travel, landscape, or portrait photography, you may want to take a look.

Offer ending soon: The Photo Education Bundle

- - - - - - - - - - - - - - - - - - - - - - - - - - - - - - - - - - - - - - - - - - - - - - - - - - - - - - - - - - - - - - - - - - - - - - - - - -

Photography, like any art or skill, thrives on consistency. The journey to becoming an adept photographer is paved with regular practice. Learn how PictureCorrect Insiders can help.

- - - - - - - - - - - - - - - - - - - - - - - - - - - - - - - - - - - - - - - - - - - - - - - - - - - - - - - - - - - - - - - - - - - - - - - - - -

This post New: Photo Education Bundle appeared on PictureCorrect.


from PictureCorrect https://ift.tt/8XL0eQr
via IFTTT

perjantai 12. heinäkuuta 2024

PictureCorrect.com: Why Photographers Love the 35mm Focal Length

When it comes to selecting a focal length, photographers have a multitude of options, each offering distinct perspectives and creative possibilities. Among these choices, the 35mm focal length stands out as one of the most preferred and widely used by photographers around the world. In this blog post, we’ll delve into why the 35mm lens is so popular and how you can utilize it to enhance your photography.

Quick reminder: only a little while left for the Camera Cheat Sheets Summer Sale

35mm photo

35mm Photo captured by Yves Cedric Schulze

The 35mm Focal Length: An Overview

The 35mm lens is often regarded as a wide-angle lens on full-frame cameras, offering a broad yet natural field of view. On crop sensor cameras, it approximates a 50mm standard lens. This versatility makes it a favorite for a variety of photography genres, from street photography to landscapes.

Why Do Photographers Prefer 35mm?

  1. Versatility: The 35mm lens offers a wide field of view that is still close to what the human eye perceives, making it ideal for a broad range of subjects, from landscapes to environmental portraits. Its slight wide-angle perspective provides a more immersive experience.
  2. Storytelling Ability: The 35mm lens is known for its ability to capture context and environment along with the subject. This makes it perfect for storytelling, allowing photographers to include background elements that add depth and narrative to the image.
  3. Minimal Distortion: Compared to wider lenses, the 35mm offers minimal distortion, making it suitable for portraits and architectural photography where straight lines are essential.
  4. Portability: Many 35mm lenses are compact and lightweight, making them easy to carry around for extended periods. This portability is especially beneficial for travel and street photographers.
  5. Low Light Performance: Like the 50mm, many 35mm lenses come with wide apertures (f/1.8, f/1.4, or even f/1.2), allowing for excellent performance in low light conditions and beautiful background blur (bokeh).
  6. Creative Flexibility: The 35mm focal length encourages photographers to think creatively. Its fixed focal length challenges photographers to move around and find the best angles and compositions, fostering a more engaged and dynamic approach to photography.

How to Make the Most of Your 35mm Lens

  • Street Photography: The 35mm lens excels in street photography due to its wide yet natural field of view. It allows you to capture candid moments and scenes with context, providing a sense of place and atmosphere.
  • Environmental Portraits: Use the 35mm lens to capture portraits that include the subject’s surroundings. This adds depth and context to your images, telling a more complete story about the person and their environment.
  • Landscapes and Architecture: While not as wide as some landscape lenses, the 35mm can still capture expansive scenes with great detail. Its minimal distortion makes it suitable for architectural photography, preserving the integrity of lines and structures.
  • Documentary Photography: The 35mm lens is a favorite among documentary photographers for its ability to capture real-life scenes with authenticity. Its versatility allows you to move seamlessly between different subjects and scenes.
  • Travel Photography: The compact size and wide field of view make the 35mm lens perfect for travel. It’s capable of capturing everything from grand vistas to intimate street scenes, all while being easy to carry.

Summary:

The 35mm focal length has earned its place as a go-to lens for photographers due to its versatility, storytelling ability, and minimal distortion. Whether you’re capturing the hustle and bustle of city streets, the beauty of natural landscapes, or the intimate moments of everyday life, a 35mm lens can help you tell your story with clarity and impact. If you haven’t yet experienced the benefits of this focal length, consider adding a 35mm lens to your kit. Its unique perspective might just become your new favorite way to see the world.

For Help with Camera Mastery:

Have you ever wanted to photograph an amazing moment but missed the shot because you didn’t know the right camera settings to use? That’s where these Camera Cheat Sheets come in. They are currently 75% off for a summer sale if you want to check them out.

fundamental photography sheets

New: Fundamental Photography Cheat Sheets

Whether you’re a seasoned professional or just starting out, photography cheat sheets can be a valuable resource for improving your skills and taking your photography to the next level. The perfect companion for any photographer. Print one out whenever you need it.

Summer sale ending soon: The Camera Cheat Sheets at 75% Off

- - - - - - - - - - - - - - - - - - - - - - - - - - - - - - - - - - - - - - - - - - - - - - - - - - - - - - - - - - - - - - - - - - - - - - - - - -

Photography, like any art or skill, thrives on consistency. The journey to becoming an adept photographer is paved with regular practice. Learn how PictureCorrect Insiders can help.

- - - - - - - - - - - - - - - - - - - - - - - - - - - - - - - - - - - - - - - - - - - - - - - - - - - - - - - - - - - - - - - - - - - - - - - - - -

This post Why Photographers Love the 35mm Focal Length appeared on PictureCorrect.


from PictureCorrect https://ift.tt/5iVISWh
via IFTTT

torstai 11. heinäkuuta 2024

PictureCorrect.com: Branching Out: A Fun Tree Photography Challenge

Trees are often overlooked as subjects in photography, yet they offer an array of textures, shapes, and colors that can produce stunning images. This exercise will help you explore the beauty of nearby trees, improve your composition skills, and experiment with different lighting conditions. Whether you’re in a forest, a park, or even your backyard, there’s always a tree waiting to be photographed. Let’s dive in!

tree photography exercise

Photo captured by Thom Holmes

Exercise Overview

Objective: To capture the essence and beauty of nearby trees through various photography techniques.

Duration: 1-2 hours

Required Gear:

  • Camera (DSLR, mirrorless, or even a smartphone)
  • Tripod (optional but recommended for stability)
  • Wide-angle or standard lens

1. Choose Your Tree(s)

Find a tree or group of trees that catch your eye. Look for interesting features such as unique bark textures, twisted branches, vibrant leaves, or even the way the light hits them.

2. Study the Lighting

Observe how the light interacts with the tree at different times of the day. Early morning and late afternoon light, known as the golden hour, can add a warm, soft glow to your photos. Midday light can create harsh shadows, but this can also be used creatively.

tree image

Photo captured by Liam Pozz

3. Composition Techniques

  • Rule of Thirds: Place the tree off-center to create a more balanced and dynamic composition.
  • Leading Lines: Use paths, branches, or shadows to lead the viewer’s eye toward the tree.
  • Framing: Use natural elements like other trees, branches, or leaves to frame your main subject.
  • Symmetry and Patterns: Capture the symmetry in tree branches or the repeating patterns in leaves and bark.

4. Experiment with Angles

  • Low Angle: Get down low and shoot upwards to emphasize the height and majesty of the tree.
  • High Angle: If possible, shoot from an elevated position to get a different perspective.
  • Close-ups: Use a macro lens or the macro mode on your camera to capture the intricate details of leaves, bark, and flowers.

5. Play with Depth of Field

  • Use a wide aperture (low f-number) to create a shallow depth of field, blurring the background and making the tree or part of it stand out.
  • Use a narrow aperture (high f-number) to keep the entire scene in focus, showing more detail in both the foreground and background.

6. Capture Different Seasons

If possible, revisit the same tree throughout different seasons. This will allow you to capture its transformation and show the passage of time through your images.

Bonus Challenges

  • Black and White: Convert your images to black and white to focus on the texture and form of the tree without the distraction of color.
  • Long Exposure: Use a tripod and a slow shutter speed to capture the movement of leaves in the wind, creating a dreamy, ethereal effect.
  • Silhouettes: Shoot against a bright sky or sunset to create striking tree silhouettes.

Trees are a rich subject for photographers, offering endless possibilities for creativity and exploration. By focusing on composition, lighting, and different perspectives, you can capture stunning images that highlight the beauty of these natural giants. So grab your camera, head outside, and start photographing the trees around you. Happy shooting!

For Further Training:

Looking for continuous improvement in your photography? PictureCorrect Insiders is designed to be a pathway to photographic excellence. Spots limited, don’t miss the next enrollment.

nature photographer

Unlock your photographic potential and take your skills to the next level with PictureCorrect Insiders. Our exclusive program is meticulously designed for photographers eager to enhance their abilities, creativity, and passion for photography.

Join the free waitlist: PictureCorrect Insiders Enrollment

- - - - - - - - - - - - - - - - - - - - - - - - - - - - - - - - - - - - - - - - - - - - - - - - - - - - - - - - - - - - - - - - - - - - - - - - - -

Photography, like any art or skill, thrives on consistency. The journey to becoming an adept photographer is paved with regular practice. Learn how PictureCorrect Insiders can help.

- - - - - - - - - - - - - - - - - - - - - - - - - - - - - - - - - - - - - - - - - - - - - - - - - - - - - - - - - - - - - - - - - - - - - - - - - -

This post Branching Out: A Fun Tree Photography Challenge appeared on PictureCorrect.


from PictureCorrect https://ift.tt/M4iHly7
via IFTTT