tiistai 22. marraskuuta 2022

PictureCorrect.com: Start-to-Finish Focus Stacking Process

Sharpness is a necessity when it comes to professional photography. However, it’s not a given, especially at a closer range to a subject or when using a wider aperture. A significant amount of blur and out-of-focus area can spoil an image — but focus stacking can help! Pro landscape photographer Mark Denney is here to help out with his easy-to-follow focus stacking guide.

When to Focus Stack

It’s not always necessary to focus stack — especially when shooting distant landscapes featuring smaller details imperceptible to the eye. The human eye also naturally sees out of focus, making a little blur totally acceptable for mid-to-far-range subjects.

When I first learnt to focus stack, I focus stacked everything… but, as I’ve kind of progressed in my own photography, I started to realize that not all scenes need to be focus stacked…

Mark says you’re more likely to encounter issues with sharpness if your subject is within 6 to 8 ft of your camera. To decide, focus a third into the scene and see if the bottom and top thirds are considerably out-of-focus. If so, you may need to focus stack. Detail images, such as of the actual shoreline, small geological formations, or singular flora and fauna, often benefit from stacking.

If you’re unsure, Mark advises you to take a few images with various AF points anyway. That way, you can play around with them and stack them later on if need be. Or choose from multiple singular images with different focus points instead of just one.

How to Focus Stack

Focus stacking starts on location. You need to take multiple images with different AF points to stack into a sharp composite image back in-studio. Some cameras can be set to do this for you, but you’ll likely need to do so manually.

Ideally, you should focus on the foreground, then the middle, and finally, the background of the image. However, you can take more than three images with differing AF points. Just remember that focal planes run from the bottom to the top of the camera, not left to right. So you can move your AF point up or down without focusing left or right to get good results.

Most importantly, make sure that you don’t disturb your tripod or camera to ensure all your images align. If you do bump it mid-process, start again to ensure all your images line up later on. Mark advises that you always review images on-location, as well, as it’ll be too late to fix once off-location.

Easy Focus Stacking Editing Process

Now the moment of truth, it’s time to stack your photographs into a composite image. Here’s Marks’ easy step-by-step process — no intermediate Photoshop or editing skills required! Ideally, you should be running one of the latest Photoshop and Lightroom CC programs, though.

To create a composite image:

  1. Import your images into Lightroom and select the best ones for stacking.
  2. Mark prefers to edit .RAW files, as they offer more scope for adjustments than other types.
  3. Edit one of the selected image’s lighting settings in Lightroom.
  4. Then sync the same settings across all the images you’ll use.
  5. Once done, highlight all the images in Lightroom.
  6. Then, right-click and select Edit in… > Open as layers in Photoshop…
  7. Wait until all the layers are open in Photoshop, which could take up to a few minutes.
  8. Hold the Shift key and click to highlight all the layers.
  9. In the top menu, click Edit, then Auto Align Layers…
  10. Stay on Auto, then click OK. Aligning is necessary as moving AF points results in minuscule distortions — yes, even if you didn’t move the camera or tripod.
  11. Hold the Shift key and click to highlight all the layers again.
  12. In the top menu, click Edit, then Auto Blend Layers…
  13. Select Stacked Images and ensure Seamless Tones and Colors and Content Aware Fill Transparent Areas are also ticked.
  14. Then, click OK. Photoshop will now automatically blend or stack the images according to where whichever is the sharpest.
  15. The program will also mask the existing layers separately while also producing a separate master file. So you can make adjustments if necessary.
  16. When you’re happy, select and move the master file back to Lightroom to do any final lighting edits.
  17. Click File… > Save…, and the composite image should populate in the Lightroom menu automatically. You should have Bridge installed and both programs set up on the same Adobe profile, though.

Wrapping Up

Focus stacking is an interesting technique that you can use to bring an entire image into focus. Mark often doesn’t use it because some blur and unfocused areas are natural and often aesthetically pleasing in an image. However, his method is easy and simple enough for anyone to test out for themselves.

- - - - - - - - - - - - - - - - - - - - - - - - - - - - - - - - - - - - - - - - - - - - - - - - - - - - - - - - - - - - - - - - - - - - - - - - - -

Did you appreciate this newsletter? Please help us keep it going by Joining Our Patreon Supporters

What are your thoughts on this article? Join the discussion on our Facebook Page

PictureCorrect subscribers can also learn more today with our #1 bestseller: The Photography Tutorial eBook

- - - - - - - - - - - - - - - - - - - - - - - - - - - - - - - - - - - - - - - - - - - - - - - - - - - - - - - - - - - - - - - - - - - - - - - - - -

The post Start-to-Finish Focus Stacking Process appeared first in the Photography Tips category on PictureCorrect.


from PictureCorrect https://ift.tt/3fX1LIW
via IFTTT
maanantai 21. marraskuuta 2022

PictureCorrect.com: Landscape Photography Masterclass & Tips

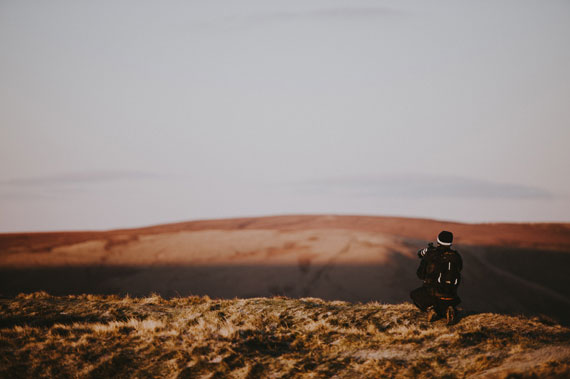
The world around us is diverse and teeming with once-in-a-lifetime views. Landscape photographers aim to capture those moments — be they a lofty, mist-shrouded mountain or photo-bombing bovines. Talented landscape photographer Charlie Waite captures the extraordinary in the ordinary.

His photographs are a masterclass in composition, depth, and emotion. One of his secrets is his astute eye for lighting — which can make or break an image. In this landscape photography tutorial, he shares his top tips on how to master the subject.

Invest in an Accurate Camera

Charlie is a firm Hasselblad loyalist. He believes that your camera and equipment are the most critical components of your photography, as accuracy is key. His companion is a Hasselblad 500C 6cm x 6cm — a camera first manufactured in 1957. Also, featuring one of the most accurate lenses as far as sharpness, pixelation, and color go.

His newest addition is the CFV II 50C digital back, built to fit even Hasselblad V System legacy cameras. Aside from this, he always uses a polarizing filter, which removes white light spots. Plus, he packs a graduated filter, which darkens overly-bright sky or ground, such as a sandy beach. An unexpected necessity is a ladder, which he’s climbed on more than one occasion to improve his vantage point and composition.

Train Your Eye to Notice Everything

As with his choice of camera, accuracy is important. If you do not see a scene as it is, you’re probably not going to capture it accurately. Charlie advises photographers to be aware of every element in the photo and the frame.

Look at the effect the polarizing filter is having. Train your eye to see in 3D — not just 2D — as depth is vital for landscape photography. Doing so will ensure you produce a photo the same or similar to what you saw or felt.

As Charlie says:

Many people will say, don’t photograph what it looks like; photograph what it feels like. I think that’s a lovely expression…

landscape masterclass tips

Photo captured by Annie Spratt

Leverage Symmetry and Asymmetry

If you study any of the images Charlie highlights as examples in this YouTube tutorial, you’ll notice one thing. His clever use of asymmetry and symmetry in each and every one. As if painted by brush, each element complements the other and adds to the overall composition cleanly and attractively. And what is more “as below, so above” than the sky?

Though it’s generally always present in landscape photography, it’s not always celebrated or considered. Charlie makes sure to time his shutter click just right with its movements — which results in stand-out landscapes. Be it clouds, clear skies, or an eavesdropping bird; he’s the master of capturing the artful interplay of air and earth.

The Right Lighting Is Worth Waiting For

The sky isn’t just a puzzle piece of the landscape, either — it’s also a source of light. Careful thought must be placed on its content and temperament. The angle of light acts much like a spotlight or flash, whereas clouds are a natural filter. Both augment the shadows, light, obscured, and spotlighted areas below.

To get the image just right, Charlie waits for the perfect time. He suggests photographers watch and premeditate the movement of clouds to achieve the best results. Distinct clouds make for an interesting photo. A missing cloud can be as impactful as a shapely one. The light it lets through brings out a hard shadow behind objects below.

Wrapping Up

Landscape photography can be a hobby, profession, and passion. Charlie’s top tips for heading out are to know your camera, be confident, and come prepared. There’s always a stunning scene waiting to be captured. You just have to find it and capture it.

- - - - - - - - - - - - - - - - - - - - - - - - - - - - - - - - - - - - - - - - - - - - - - - - - - - - - - - - - - - - - - - - - - - - - - - - - -

Did you appreciate this newsletter? Please help us keep it going by Joining Our Patreon Supporters

What are your thoughts on this article? Join the discussion on our Facebook Page

PictureCorrect subscribers can also learn more today with our #1 bestseller: The Photography Tutorial eBook

- - - - - - - - - - - - - - - - - - - - - - - - - - - - - - - - - - - - - - - - - - - - - - - - - - - - - - - - - - - - - - - - - - - - - - - - - -

The post Landscape Photography Masterclass & Tips appeared first in the Photography Tips category on PictureCorrect.


from PictureCorrect https://ift.tt/3agAfT0
via IFTTT

sunnuntai 20. marraskuuta 2022

PictureCorrect.com: Interesting Photo of the Day: Figure in the Arch

When taking landscape photos, it is a good idea to try and place something familiar to stand out against the landscape. This gives a sense of scale and lets us appreciate the grandness of mother nature. Without that scale, it’s hard to truly appreciate the natural beauty we’re looking at. The following image by photographer TJ Drysdale is a fabulous example of how you can execute this concept:

sunset at Double Arch in Utah

“Mystical Sunset at the Double Arch” by TJ Drysdale (Via Reddit. Click image to see full size.)

This is an image that Drysdale shot of his girlfriend during sunset at the Double Arch in Arches National park, Utah. It is fair to say that he has nailed some fundamental principles of photography in this brilliant image.

The composition is perfect, as he has placed his girlfriend in the middle of the gap. This has several advantages. First, she clearly stands out from a busy background and this straightaway attracts our attention. The fact that she’s perfectly framed by the negative space also emphasizes her presence. Most importantly, her presence gives us an instant realization of scale. With a full-grown human appearing so small amidst the rocks, we can immediately appreciate how massive the rock formation must be.

Besides composition, the lighting is also spot-on. The fiery glow, a result of the setting sun, gives the impression of treasure on the other side. And the fact that the subject is looking away from us, toward the sun, it makes the image even more intriguing.

What do you think she’s looking at?

- - - - - - - - - - - - - - - - - - - - - - - - - - - - - - - - - - - - - - - - - - - - - - - - - - - - - - - - - - - - - - - - - - - - - - - - - -

Did you appreciate this newsletter? Please help us keep it going by Joining Our Patreon Supporters

What are your thoughts on this article? Join the discussion on our Facebook Page

PictureCorrect subscribers can also learn more today with our #1 bestseller: The Photography Tutorial eBook

- - - - - - - - - - - - - - - - - - - - - - - - - - - - - - - - - - - - - - - - - - - - - - - - - - - - - - - - - - - - - - - - - - - - - - - - - -

The post Interesting Photo of the Day: Figure in the Arch appeared first in the Photography Tips category on PictureCorrect.


from PictureCorrect https://ift.tt/ZUjBSgt
via IFTTT

PictureCorrect.com: Getting Started with Moon Photography

Astrophotography is indeed a really interesting genre of photography. Whether you’re a professional or a beginner, good astrophotos will truly leave you mesmerized. And if you’re a beginner photographer, what better way to start photographing celestial bodies than with the moon. It’s relatively close, appears pretty big, and is quite bright. These characteristics make photographing the moon relatively easy to start out, compared with shooting other far off celestial objects in space. In today’s video, photographer Paul Farris explains how you can get started with moon photography:

As a beginner photographer, taking a photo of the moon can be tricky. This is especially so if you are using one of the auto modes. With no control over the camera settings in auto mode, the image of the moon can come out like a white bulb with no details. Where’s the fun in that? It thus becomes necessary to get out of auto mode and control your camera to take a proper moon photograph.

Besides exposure, another common problem that beginners face in moon photography is sharpness. It’s most likely because of camera shake or improper focus. Farris explains how you can improve sharpness by using various focusing techniques, a tripod, and a remote release/self-timer to overcome these challenges easily.

Other than camera settings, gear does matter a bit as well. For the lens, you will need something that has a long focal length. In this case, the longer the better. On a crop sensor body, you can do away with something like a 300mm lens. And don’t forget a tripod. When using a long lens, even a little bit of shake gets magnified leading to blurry images. Also, you don’t want to be carrying that heavy telephoto lens for hours, do you?

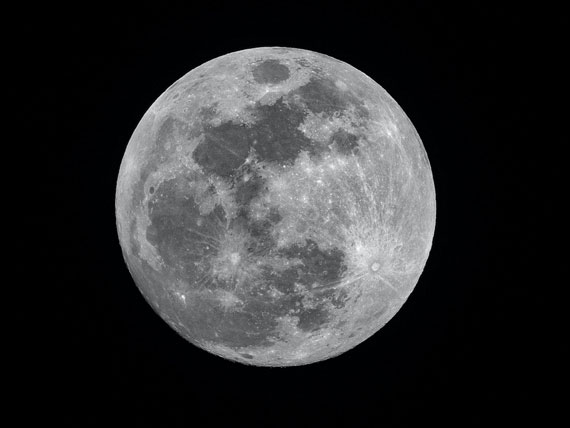
moon photo

Moon photo captured by Mike Petrucci

If you’ve been facing problems while photographing the moon, Farris’s tips will surely help you out a lot. Be sure to watch the video in full to hear all the moon photography tips. And let us know if you have any other tricks for photographing the moon.

- - - - - - - - - - - - - - - - - - - - - - - - - - - - - - - - - - - - - - - - - - - - - - - - - - - - - - - - - - - - - - - - - - - - - - - - - -

Did you appreciate this newsletter? Please help us keep it going by Joining Our Patreon Supporters

What are your thoughts on this article? Join the discussion on our Facebook Page

PictureCorrect subscribers can also learn more today with our #1 bestseller: The Photography Tutorial eBook

- - - - - - - - - - - - - - - - - - - - - - - - - - - - - - - - - - - - - - - - - - - - - - - - - - - - - - - - - - - - - - - - - - - - - - - - - -

The post Getting Started with Moon Photography appeared first in the Photography Tips category on PictureCorrect.


from PictureCorrect https://ift.tt/TFZQlV6
via IFTTT

lauantai 19. marraskuuta 2022

PictureCorrect.com: How to Capture Bokeh in Your Photos

The word bokeh, which has been taken from the Japanese dictionary, means blur or out of focus. But the word assumes a much larger definition when used in the context of photography. Suddenly blur is good and background blur is ‘bokehlicious’. But how do you capture bokeh? How do you make your background (and/or foreground) melt away? Doug McKinlay from the Adorama TV has a few suggestions:

While shooting portraits or small subjects we’ve all tried using a smaller f-number to get a bit of background blur going and thereby separate the subject from the background. But bokeh goes a bit further.

How to capture bokeh in your photos

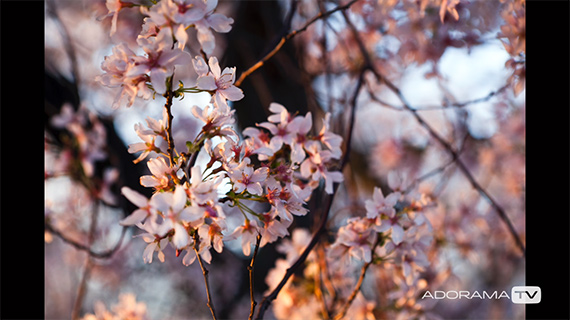
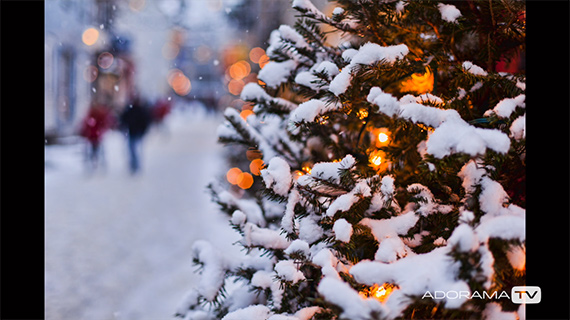
“With bokeh, we’re looking at shards of light in behind your subject. Nicely, softly focused, as well. And that’s the difference between the two. Simply, it’s those spears of light in a soft focused setting that gives us the bokeh.”

creative bokeh

Lens Choice for Better Bokeh

The million dollar question, however, is how do you achieve this bokeh?

A fast lens, ideally in the region of f/1.4 or f/1.8, is great for producing bokeh. You could also use an f/2.8 lens. Any lens in the range of 21 to 85mm focal length is ideally suitable. If you don’t have a lens that fits the above description, don’t worry; McKinlay has a solution.

bokeh technique

The solution is in standing farther away from your subject. Stand double the distance that you would normally for a fast prime lens. That way the subject is more compressed because of the natural compression of a long lens.

Bokeh Shape

The shape of the bokeh is dependent on the lens aperture diaphragm. More particularly on the number of aperture blades. If there are 9 blades creating essentially what is a round aperture, the shape of the bokeh would be round. If the shape of the aperture is rectangular or hexagonal the shape of the bokeh would be according to those shapes.

Bokeh Technique

It’s essential that you use a tripod for shooting with a wide aperture. This is because the margin of error at such wide apertures is very narrow. Even the slightest movement of the hands will throw focus away. Use a cable release, as well, if you can.

Try to shoot through a range of f-stops. Depending on the maximum aperture possible on your lens, you can shoot at f/2.8 to f/2, to f/1.8 and wider. This will give you a good idea of how the bokeh changes as the aperture changes.

what is bokeh

Of course the aperture that you end up using will depend a lot on the amount light there is in the scene. Sometimes, a bit of fill-flash goes a long way to lift an image.

Props and LED Lights

beautiful background bokeh

Don’t forget to experiment. Bring in props such as small LED lights. You can use these lights as the source of bokeh or even as the source of key light for the subject of your image. The subject can be anything from a toy to billiard balls or even a coffee cup.

Do you have any creative bokeh tips up your sleeve? Share some with us in the comments!

- - - - - - - - - - - - - - - - - - - - - - - - - - - - - - - - - - - - - - - - - - - - - - - - - - - - - - - - - - - - - - - - - - - - - - - - - -

Did you appreciate this newsletter? Please help us keep it going by Joining Our Patreon Supporters

What are your thoughts on this article? Join the discussion on our Facebook Page

PictureCorrect subscribers can also learn more today with our #1 bestseller: The Photography Tutorial eBook

- - - - - - - - - - - - - - - - - - - - - - - - - - - - - - - - - - - - - - - - - - - - - - - - - - - - - - - - - - - - - - - - - - - - - - - - - -

The post How to Capture Bokeh in Your Photos appeared first in the Photography Tips category on PictureCorrect.


from PictureCorrect https://ift.tt/jSVamGH
via IFTTT

perjantai 18. marraskuuta 2022

PictureCorrect.com: Improve Your Photography Skills: 5 Tips

Improving your photography is not something that can be achieved overnight. Like other genres of art, it requires persistence and hard work. Investing a lot in expensive gear and lighting alone will not make you take a leap in photography either. If you pay attention to the simple details, and learn some essential tricks of the trade, you can notice a major jump in your photography. In this video, Adam Lewis with Blue Pacific Media shares 5 best tips to help you take your photography to a whole new level:

1. Get Out of Automatic Mode

Automatic modes are not bad. But, if you refrain from learning to work in manual mode, you will never understand how photography works. Another major drawback of using auto mode is the inconsistency in results. If you want to replicate a shot, you will not be able to do so with automatic mode. But with manual mode, you can get consistent results every time. Surely you may struggle at first, but with time and practice when you fully understand manual mode, that alone will improve your photography so much.

2. Get Yourself a Nifty-Fifty

A 50mm lens has a perspective that closely matches the human eye. The results thus feel very organic, and this is specially true for street photography. Thankfully, all manufacturers have a nifty fifty that is quite affordable. And since it is a prime lens, the image quality is superb. The fixed focal length also forces you to move around to compose your shot.

street photo with a nifty fifty

“It’s gonna get you thinking fast and moving fast, and really thinking about where you are in relation to your subjects.”

Challenge yourself by going out with only the 50mm lens on your camera, and eventually you will notice that you’ll develop a keen eye for composition.

3. Think About Lighting

“Photography is simply painting with light. Understanding how lighting works is going to change the whole dynamic of your photography.”

Lighting is key in photography. Just having your subject lit is not enough. Understand how light is interacting with your subject. Whenever taking an image, see how you can create a seamless blend of the subject, light, and shadows together. Don’t just wait for the golden hour to shoot. Go out and learn to shoot in the mid-day sun. Learn to photograph subjects that are backlit. Only when you experiment with different lighting situations, will you be able to develop the necessary skills to be a better photographer.

portrait with light and shadows

4. Experiment With Angles

We are very much used to seeing things from our eye-level. Therefore, images shot from the eye-level do not appear much flattering. But, a mistake that most beginner photographers make is that they mostly shoot from the eye level. Doing so will only get you photos that have a “generic” look.

“Get low. Get twisted angles. Turn your camera sideways. Try taking shots from above. Experiment with angles within the scene.”

photograph from a different perspective

By photographing things from a different perspective, you can show people what they don’t witness on a daily basis. And this is exactly what will make your work exciting. Be sure to experiment with varying perspectives to get really interesting results of the daily environment.

5. Get a Shooting Buddy

“Go and find somebody who loves photography just as much as you do, and go out to shoot together.”

Having somebody to go out with to take photographs together has lots of advantages. This way you will have someone to talk to and you will enjoy taking photos more. You will also get to share ideas when working together, and that gives you both an opportunity to learn and improve on the go. This will make photography a less of a chore, and more of an experience.

“Surround yourself with great artists, and your art will rise.”

What is your favorite tip to improve one’s photography?

- - - - - - - - - - - - - - - - - - - - - - - - - - - - - - - - - - - - - - - - - - - - - - - - - - - - - - - - - - - - - - - - - - - - - - - - - -

Did you appreciate this newsletter? Please help us keep it going by Joining Our Patreon Supporters

What are your thoughts on this article? Join the discussion on our Facebook Page

PictureCorrect subscribers can also learn more today with our #1 bestseller: The Photography Tutorial eBook

- - - - - - - - - - - - - - - - - - - - - - - - - - - - - - - - - - - - - - - - - - - - - - - - - - - - - - - - - - - - - - - - - - - - - - - - - -

The post Improve Your Photography Skills: 5 Tips appeared first in the Photography Tips category on PictureCorrect.


from PictureCorrect https://ift.tt/yeluXBx
via IFTTT

torstai 17. marraskuuta 2022

PictureCorrect.com: How to Photograph Butterflies with Extension Tubes

Your long lens is a versatile tool. That is, if you know how to get the most out of it. When we talk about a long lens we usually talk about wildlife and birding and those sort of things. But did you know you can also shoot things that are much closer to you? Butterflies, for example? Bryan Peterson explains:

You’d think a macro lens would be more fitting for butterfly photography. So why are we deliberating on a long lens here? Because, as Peterson demonstrates, you can also shoot small subjects with a long lens. All you need is an extension tube.

When you use an extension tube it immediately does one thing to your lens: it gives your lens the ability to focus at extremely close distances. Forget focusing at infinity with a long lens once you attach an extension tube to it. The catch is you have to move a step or two back when using a telephoto lens with an extension tube.

Even with a telephoto lens you will get an incredibly shallow depth of field. The background and foreground go completely out of focus.

shooting macro with a long lens

Peterson with his Nikkor 200–500mm lens, Kenko extension tube, and monopod setup

long lens macro with extension tubes

When shooting butterflies it is recommended that you carry a monopod with you. You will need it when shooting with a heavy lens like the Nikkor 200-500mm that Peterson used. A tripod is less suitable here, because it’s bigger and less maneuverable. The monopod gives you that much more flexibility.

shooting butterflies with a long lens
long lens macro photography

Have you tried this technique? Share your images with us!

- - - - - - - - - - - - - - - - - - - - - - - - - - - - - - - - - - - - - - - - - - - - - - - - - - - - - - - - - - - - - - - - - - - - - - - - - -

Did you appreciate this newsletter? Please help us keep it going by Joining Our Patreon Supporters

What are your thoughts on this article? Join the discussion on our Facebook Page

PictureCorrect subscribers can also learn more today with our #1 bestseller: The Photography Tutorial eBook

- - - - - - - - - - - - - - - - - - - - - - - - - - - - - - - - - - - - - - - - - - - - - - - - - - - - - - - - - - - - - - - - - - - - - - - - - -

The post How to Photograph Butterflies with Extension Tubes appeared first in the Photography Tips category on PictureCorrect.


from PictureCorrect https://ift.tt/D0Hg4KA
via IFTTT