maanantai 25. lokakuuta 2021

PictureCorrect.com: Studio Portrait Light to Dark Techniques

Studio lighting often means our subject may feel that they must stay in exactly one spot. While this is helpful when setting up a lighting rig, immobility can make a subject feel rigid and uncomfortable when posing, which could make the images appear unnatural and stiff. Photographer Daniel Norton from Adorama shares an interesting technique for separating the subject from the background while still giving them space to move and be more natural.

While using a hair light is a common and effective way to create a separation between the subject and the background, it also requires precision. This is why the subject gets a very narrow window to move around in.

Norton’s idea is to light the background with a gradient going from dark to light. Make sure the lit part of the subject’s face is in front of the dark part of the background. Similarly, the side of the face that’s in the shadows is best placed in front of the bright part of the background.

“By combining this, we’ll get kind of a three-dimensional feel and we won’t have to worry about the subject’s position.”

Further into the video, Norton also shares how exactly you can set up the lights for the subject and background. He shares the gear he uses for this purpose and also gives practical examples of the process.

As you can see, this is a very useful way to create separation between subject and backgrounds. A bigger window to play around in means more freedom to produce natural results.

What do you think about this lighting style? Don’t you think it is more versatile than just using a rim light?

For further training: The Art of Portrait Photography


Go to full article: Studio Portrait Light to Dark Techniques

What are your thoughts on this article? Join the discussion on Facebook

PictureCorrect subscribers can also learn more today with our #1 bestseller: The Photography Tutorial eBook

The post Studio Portrait Light to Dark Techniques appeared first on PictureCorrect.


from PictureCorrect https://ift.tt/3EcNXqH
via IFTTT

sunnuntai 24. lokakuuta 2021

PictureCorrect.com: 5 Tips for Taking Travel Photos in Dangerous Countries

On a recent trip I stumbled upon a slum along the riverbank of Iquitos, an isolated Peruvian city in the Amazon jungle, and walked down rickety wooden boardwalk with my old Canon T2i in hand—snapping shots of the decrepit homes, crumbling wooden stilts, tattered clothes drying in the humid air—until a local security guard walked up to me and told me, in Spanish, that this area was dangerous and I should put my camera away.

It wasn’t the first time I’ve heard that. I’ve been told to hide my camera in Lima, Manila, Kolkata and beyond. If you want to bring your DSLR around the world, you’re basically screaming “Look at all this money I have!” to everyone around you.

The trick to nabbing good travel photos abroad in dangerous situations is a combination of luck and logic. In the five years I’ve spent living and travelling abroad, I’ve never been robbed, and still managed to capture shots of moments I’ve found honest and uncompromising. Here’s how.

elderly filipino lady

Walk Safely

This means a few things: for starters, keep your camera strap coiled tightly around your wrist. (I’ve seen drive-by motorcycle thieves snatch purses from women’s hands; the best way around that is to not let loose any strap slack.) Secondly—and this should go without saying—don’t walk down quiet streets alone at night. This goes for all white-skinned travellers, but especially those carrying a $1,000 camera around their necks.

bandar seri begawan photos

Linger Around for Good Moments

When you find a grungy neighbourhood, your first instinct might be to get out of there as quickly as possible. But I find the most awkward moments are the first few—after you linger a while, on a city block or in front of a food stall somewhere, people get used to you. That’s when they relax. Some of my favourite candid photos have only come after people relaxed a while and started talking amongst themselves.

bangkok street photos

Never Expose Longer Than 1/500

My style of travel photography leans toward subtle street photos, so I like to wait for the right moment and shoot from the hip. That means I may be walking while snapping the photo, or quickly drawing up the camera when I see something interesting. I tend to keep my shutter speed at 1/500 and my aperture at f/8, and adjust my ISO depending on the time of day and cloud coverage.

Indian child

Bring a Versatile Lens

My favourite travel lens is my Canon 18-200mm. I admit it’s bulky as hell, and it barrels around the edges near 18mm, but the range is terrific if you only want to bring one lens on a trip. (I consider the weight offset by the fact that I rarely bring any other glass.) At its widest, it takes solid landscape and cityscape shots, but the zoom is great for snapping quiet candid portraits from afar, and it’s especially useful whenever I get a hotel room with a balcony facing the street. As a bonus, with one versatile lens, you’ll never have to stand in the middle of a sketchy street changing lenses—something else to keep in mind when travelling to developing nations.

thailand malaysia border train

Ignore People Trying to Scare You

While in Barranco, a suburb of Lima, I had a Limeño man warn me that I shouldn’t flaunt my camera in the neighbourhood. It was 12:30 p.m. on a Sunday; the streets were bustling with people. I ignored him.

Taking photos anywhere is alienating—by sticking a lens in front of your face, you isolate yourself; cameras can be symbols of judgment or an invasion of privacy to strangers. This concept is amplified by a million when you’re in a strange country that is—speaking frankly—filled with people less privileged and poorer than you. It can be tempting to pack away your DSLR and stick to disposable cameras or cheaper, smaller compacts.

But that’s silly. If you care about photography, you should do it, no matter where you are—especially if you’re in a new country. Whether your goal is to take documentary shots, personal mementos or build up a travel portfolio, you can’t just put away your camera when people tell you to. Just play it safe and let your lens do the rest.

About the Author:
Michael Fraiman is a Canadian travel writer and photographer, and the author of A Long Way Back: Stories of Travelling Home.


Go to full article: 5 Tips for Taking Travel Photos in Dangerous Countries

What are your thoughts on this article? Join the discussion on Facebook

PictureCorrect subscribers can also learn more today with our #1 bestseller: The Photography Tutorial eBook

The post 5 Tips for Taking Travel Photos in Dangerous Countries appeared first on PictureCorrect.


from PictureCorrect https://ift.tt/2LpVjNM
via IFTTT

PictureCorrect.com: Interesting Photo of the Day: Sunset as Storm Clears Over Guitar Lake

While on a one month hike exploring the back country of the High Sierras, photographer Mark Lehrbass and his friend ended up in a blizzard at Guitar Lake in Sequoia National Park. They hunkered down, just listening and waiting for the storm to pass, and after about five hours, a silence fell—just as the golden hour hit, the storm ceased, opening up the cloud-covered sky in vibrant colors:

sunset during storm

Sunset Over Guitar Lake by Mark Lehrbass (Via Imgur. Click to see full size.)

Camera and Settings

  • Nikon D810
  • Nikkor 14-24mm
  • Single 1/2″ exposure
  • f/8, 1, 64 ISO

“It was the sudden presence of silence that made the evening so surreal. All we had been hearing the last 5 hours was wind howling and blowing snow through our tarp. At one point during the sunset I had to stop shooting, stand up, and just absorb the scene that was unfolding. The intense colors, perfect tranquility, and post storm aroma of snow and dirt truly made me appreciate the special link between nature and the observer.”


Go to full article: Interesting Photo of the Day: Sunset as Storm Clears Over Guitar Lake

What are your thoughts on this article? Join the discussion on Facebook

PictureCorrect subscribers can also learn more today with our #1 bestseller: The Photography Tutorial eBook

The post Interesting Photo of the Day: Sunset as Storm Clears Over Guitar Lake appeared first on PictureCorrect.


from PictureCorrect https://ift.tt/2nA0RcN
via IFTTT

PictureCorrect.com: How to Get the Most Out of Your Photography Hobby

Almost invariably, digital photography leads to one big truth—hundreds, even thousands of images end up stored on your hard drive.

how to enjoy photography as a hobby

I have run an “Enjoy Your Camera” course for many years—I’ve instructed almost 2,000 keen photographers face-to-face—and they all seem to have one key question. “What do I do with all my images, and what can I do to get the most enjoyment out of them?”

My answer has always been simple: “That’s up to you and how you approach this wonderful hobby.” However, I advise everyone to keep in mind a few points.

The image isn’t everything

Particularly when shooting landscapes, the whole process of creating an image should be part of the enjoyment and can be extremely calming and therapeutic.

It is really important to enjoy the moment.

If you are on site early in the morning and you are the only person there, practice the art of looking and absorbing as you plan your image. If you were not a photographer, you would be in bed and would miss this wonderful experience.

Being out and about should be an essential part of enjoying the hobby.

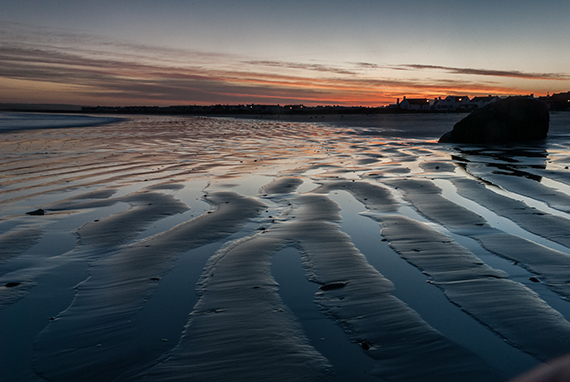
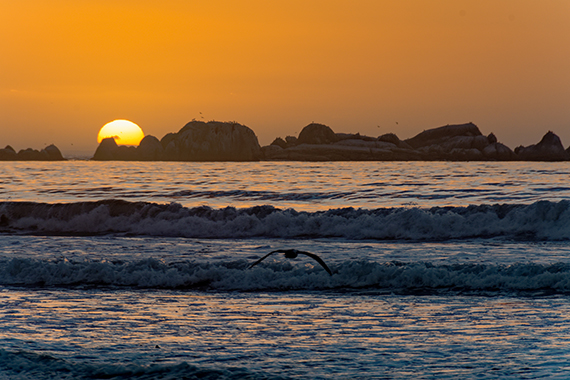
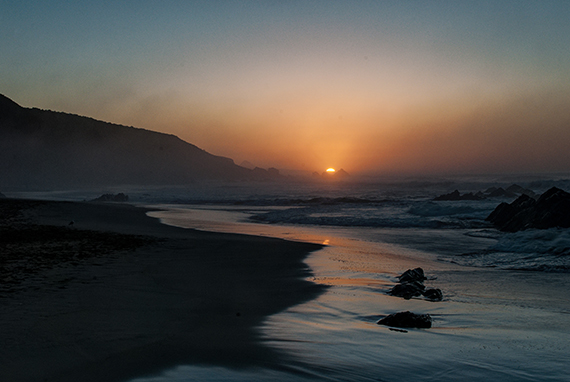
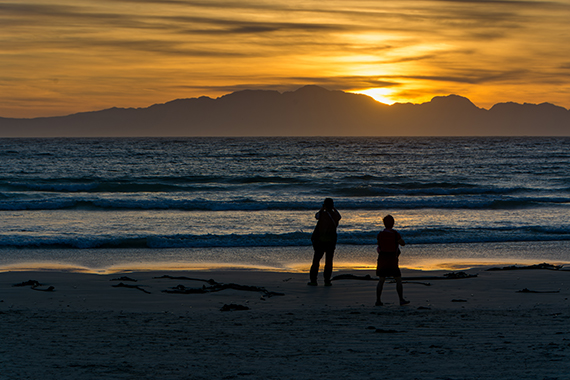
Likewise, enjoy the wonder of sunsets. Yes, you should get some good images, but that is only one part of what it takes to enjoy an environment that you can revisit time and again through your images.

The first person to impress with your image is you. If other people enjoy it, that’s a bonus

We should be making photographs for ourselves, for the enjoyment of experiencing nature and exploring the landscape—not to please someone else.

The less concerned we are about who will like our images, the better. It can put a real crimp in our creative juices. We should feel absolute freedom to create whatever grabs our attention. Of course, it’s still smart to pay attention to the tools of artistic composition that have been developed over hundreds of years—or ignore them, if that’s your preference. Digital photography has given us enormous freedom to create, but it is worth asking yourself why you are doing this. What are you trying to achieve? Ask these questions before you press the shutter.

There are all manner of systems and applications to help you sort your images, and it is not my intention to venture there. However, there is one tip I will offer:

Keep tabs on your special images

As soon as you download your images onto your computer, run through them on a big screen. If any of them triggers a response from you, move it to a special folder. You will never see your images with such a fresh view again. If you mentally mark the good ones and try and find them later, you stand a good chance of forgetting many of them. (I speak from experience.) Chances are, unless you are very well organized, you will never look at any of the other images again.

You will, however, look at the ones you have selected.

Enhancing your images

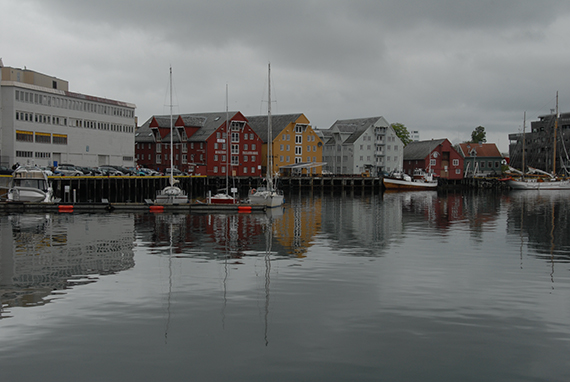
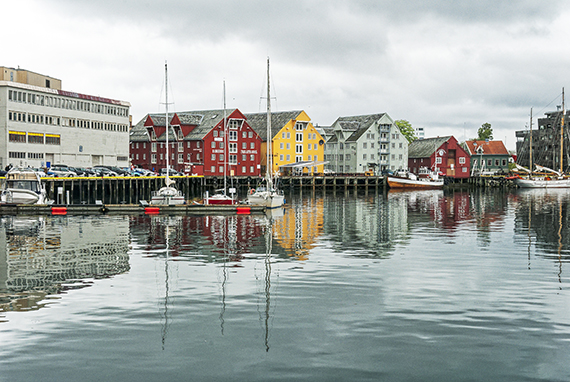
Yes, it is worth it. How much you do is a personal matter, but my view is that less is often more. Color is like sound: it can be too loud. However, fundamentally, post-production is a crucial step to enjoying your hobby and it can be very rewarding.

Before post-processing

After post-processing

It is all about having fun and enjoying what you are doing.

One could write a book on this, but I hope that what is here has given you some ideas.

I can offer one final, somewhat odd-sounding idea to encourage you to spend time running through your images:

Use Instagram

I recently posted my 1,000th image on Instagram, having done one every day for 1,000 days.

There have been one or two inadvertent duplicates but, hey, I had fun.

My Instagram account, should you be interested, is @rogeralanlee. The plan was to post once per day for a year—then it became two years, and now it is three years.

It has given me a whole new interest in my photographs, as I run though all my old files looking for images to post. It is purely for me, so I don’t mind how many followers I have and don’t actively look for them.

Try it for a while and see if it suits you. If it’s not fun, forget it.

The important thing is this: enjoy your photography!

About the Author:
Roger Alan Lee is a passionate photographer, course leader and cruise ship workshop leader. His aim is to enthuse others with his courses and eBooks, which are “for people who don’t want to drown in detail—just take good photographs.”


Go to full article: How to Get the Most Out of Your Photography Hobby

What are your thoughts on this article? Join the discussion on Facebook

PictureCorrect subscribers can also learn more today with our #1 bestseller: The Photography Tutorial eBook

The post How to Get the Most Out of Your Photography Hobby appeared first on PictureCorrect.


from PictureCorrect https://ift.tt/3b7vgbi
via IFTTT

lauantai 23. lokakuuta 2021

PictureCorrect.com: Photoshop Selections Tutorial Using 3 Tools

Do you want to make quick selections in Photoshop?

Are you looking for how to make precise selections in Photoshop?

Then you are in the right place.

In this article, I will share with you how to use three excellent Photoshop tools to quickly make precise selections. In fact, I always use these tools to make quick selections in my post-processing workflow.

These selection tools are easy to use, and the results you will get are excellent, regardless of what genre of photohgraphy you practice.

In this article, you will learn about the following selection tools:

  • Object Selection Tool
  • Quick Selection Tool
  • Magic Wand Tool

Object Selection Tool

If you want to select a specific object in your images, then Object Selection Tool is useful.

The Object Selection Tool automatically selects an object within a defined region.

The Object Selection Tool is one of the quickest tools to make initial selections.

Below is a beautiful flycatcher. We will select the bird and the perch.

Let’s start with steps to make selections using the Object Selection Tool

Create a background copy layer by selecting the background layer and dragging it to the Create New Layer icon ( the + symbol).

While the background copy layer is selected, click Object Selection Tool (keyboard shortcut: w).

Select “new selection”.

There are two mode options: rectangle and lasso.

If the object and background are pretty separated in the image, select the rectangle. If the main object is surrounded by other objects or distractions near the object, select the lasso.

Keep the Enhance Edge and Object Subtract options checked (enabled).

If using the rectangle, draw a rectangle around the object to be selected: in this case, the bird. The object will be selected. Yes, it is as simple as that.

If your object isn’t clear, then use the lasso. Likewise, if the shape of the object is a bit complicated, that’d another good reason to use the lasso.

With the lasso, click and drag your cursor around the object. Complete the selection by joining the end point with the starting point. (For selecting the perch below the bird, I have used the lasso.)
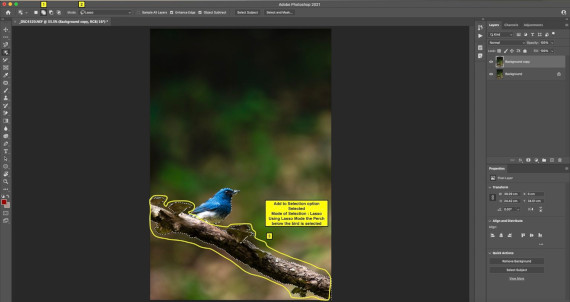
If you want to select an additional area, simply select “Add to Selection”. Use the methods described above to select an additional area.

If any area gets selected that you don’t want selected, then choose “Subtract from Selection”. Select the area which needs to be unselected. That area will be subtracted from the main selection.

While you have selected the object, you can make targeted adjustments using adjustment layers or add layer masks based on your requirements.

Quick Selection Tool

If the object in the image has distinct edges, then the quick selection tool is quite helpful.

You can make initial selections faster with the quick selection tool.

However, on the flip side, if the image does not have clear edges between the object and its surroundings, the quick selection tool may not be helpful.

For demonstration purposes, we have a spotted deer (a chital)that’s running. I would like to select the deer for some targeted adjustments.

Here are steps to use the Quick Selection Tool

Create a background copy layer by selecting the background layer and dragging it to the Create New Layer icon ( the + symbol).

While the background copy layer is selected, click “Quick Selection Tool”.

Click “New Selection”.

Adjust the size and hardness of the brush. For smaller objects, use the smaller brush size; for larger objects, use a large brush size. The hardness option controls the smoothness between selected and unselected areas.

Now, click on and drag the object to be selected. The object will start getting selected.

To add or subtract the selection, use the options Add to Selection and Subtract from the Selection.

Keep the Enhance Edge option enabled.

Once you have finalized the selection, apply the targeted adjustments using the new adjustment layer. Or you can add a layer mask to make specific targeted adjustments.

Magic Wand Tool

The Magic Wand Tool Helps you select areas with similar colors.

Suppose you want to select and edit different areas of the image with similar colors. In that case, the Magic Wand Tool is a great option.

Here are steps to use the Magic Wand Tool

We have this image of a beautiful dove in the rain. Surrounding the dove is lush greenery. I want to apply targeted adjustments to the grass, such as vibrance, saturation and noise reduction.

We have a uniform green color in the image, so we will use the Magic Wand Tool to select the bird’s surroundings.

Create a background copy layer by selecting the background layer and dragging it to the Create New Layer icon ( the + symbol).

While the background copy layer is selected, click the Magic Wand Tool.

To start with the Magic Wand Tool, choose the sample size and set the tolerance value to default. Or you can set sample size “11 by 11 average” and tolerance at 25. (These are just starting points; feel free to change it as you go.)

The sample size determines how much area is considered for color sampling. With the tolerance number increased, the areas additional to the desired color might get selected. So it’s good to choose a tolerance value on the lower end.

If you want to select an area that is not continuous, then uncheck the “Contiguous” option.

Click on the color you want to select.
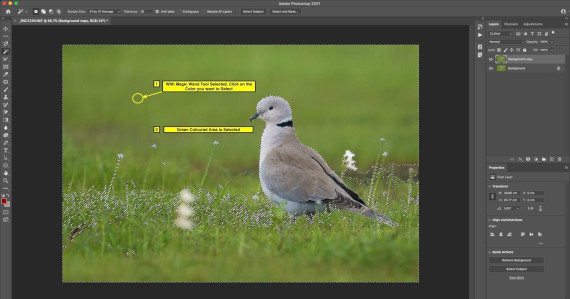
Once you have made the selection, you can apply a targeted adjusted using the adjustment layer.

These are the quick selection techniques you can use in Adobe Photoshop.

Based on the image and adjustments you are going to apply, the selection technique you need will differ. Sometimes I use three selection techniques for an image, and sometimes just one is good enough.

I hope you enjoyed these tips on selections in Adobe Photoshop.

Which of the techniques you are going to try first? Let me know by leaving a comment below.

About the Author:
Shreyas S. Yadav is an engineer and photographer of wildlife and nature. He is also a writer and lifelong adventure explorer. Through his writings, he teaches about digital post-processing and nature photography. Shreyas shares field techniques about nature photography, post-processing and wildlife photo stories on his website.


Go to full article: Photoshop Selections Tutorial Using 3 Tools

What are your thoughts on this article? Join the discussion on Facebook

PictureCorrect subscribers can also learn more today with our #1 bestseller: The Photography Tutorial eBook

The post Photoshop Selections Tutorial Using 3 Tools appeared first on PictureCorrect.


from PictureCorrect https://ift.tt/3EdoVaH
via IFTTT

PictureCorrect.com: Interesting Photo of the Day: Long Exposure of a Night Hike

Nature is beautiful, there’s no denying that. But with nature photography done the right way, you can take a breathless scenery and make it perfect. As we’ve said time and time again, photography can take a single moment and make it last forever, and it can take hours and make them pass in the blink of an eye. The following photo will show you what I mean by that:

long exposure of star trails and night hike

Stacked Exposures. Camera settings: f/2.8, 30s, ISO 1600. (Via Imgur. Click image to see full size.)

The photo was taken by Zach Becker with a Canon Rebel T3i and a Tokina 11-16mm lens. Using Magic Lantern, a custom Canon firmware, he set the camera to take a series of interval photographs as he hiked around for three miles, then he stacked all of the exposures together to create the stunning image you see above. In fact, no less than 94 pictures were stacked for this image alone!

Have you tried this sort of project? How did it go?


Go to full article: Interesting Photo of the Day: Long Exposure of a Night Hike

What are your thoughts on this article? Join the discussion on Facebook

PictureCorrect subscribers can also learn more today with our #1 bestseller: The Photography Tutorial eBook

The post Interesting Photo of the Day: Long Exposure of a Night Hike appeared first on PictureCorrect.


from PictureCorrect https://ift.tt/3EaXIWh
via IFTTT

PictureCorrect.com: How to Balance Perfectionism as a Photographer

Every single day, thousands of pieces of content come into the internet. Somehow, amazingly, so much of it appears very well done. Thanks to the incredible quality of modern cameras, even amateur photographers can take professional-quality images, often by only choosing to post their best images. This is generally a good thing. But being too much of a perfectionist can have certain drawbacks, as well. In the following video, photographer Kyle McDougall talks about how he struggles with perfectionism as a photographer. He highlights how being a perfectionist can negatively impact your work, and why it’s important that you embrace your mistakes:

When you’re looking to create professional content, proper structure and planning is necessary. But as McDougall rightly points out in the video, there has to be a certain limit to it. Go overboard and you will end up spending precious hours over a minor “issue” that others might not even notice. Eventually, there’s a high chance that perfectionism will lead you to feel burnt out.

“It’s so easy to get sucked into this vacuum of perfectionism, where it feels like everything you do needs to be your next best work.”

Another idea McDougall criticizes is the notion that every photograph we take needs to be a masterpiece. Talking from his own experience, only one in 10 photos he takes actually make him feel good. For beginners and amateurs, the success rate will even be lower. Therefore, don’t fall into the trap of being under the pressure that all of your photos need to be the best. There will be failures. Even the best photographers fail. It’s just that they only showcase the best of their work.

Are you a perfectionist, or do you embrace your failures? Let us know in the comments.


Go to full article: How to Balance Perfectionism as a Photographer

What are your thoughts on this article? Join the discussion on Facebook

PictureCorrect subscribers can also learn more today with our #1 bestseller: The Photography Tutorial eBook

The post How to Balance Perfectionism as a Photographer appeared first on PictureCorrect.


from PictureCorrect https://ift.tt/3b6Nl9m
via IFTTT