sunnuntai 29. marraskuuta 2020

PictureCorrect.com: Timelapse Photography: 5 Tips for Getting Started

Timelapse photography is a really interesting art form. By taking a series of photos at certain intervals and creating a video out of it, it feels like you’re traveling through time. And as complicated as the process may seem, it is actually quite simple. If you’ve ever wondered how to get started with timelapse photography, we have the right video for you. In today’s video, filmmaker and photographer Joseph DiGiovanna with B&H shares five tips for making an awesome timelapse video. You can learn how to make a timelapse using your smartphone or a camera and almost any editing software:

If you’re just getting started, your smartphone can be the perfect tool. You can take pretty amazing timelapse videos using just a smartphone—it’s as simple as pushing a button. But, as DiGiovanna explains in the video, you can take it to the next level by adding a bit of motion. You can easily do this by using a gimbal and panning while recording the timelapse.

You need to dedicate a good amount of time (as in, hours) when recording a timelapse. Keeping your devices powered up can therefore be a challenge. DiGiovanna shows you how you can tackle this issue by either using simple power banks or other, more sophisticated power backup solutions.

He also shares some tips on how you can gain more control over the timelapse videos. As he explains, the period between consecutive shots can vary depending on what’s you’re aiming for and for how long you’ll be shooting. And to control the interval, you can either use the camera’s interval timer function or an external intervalometer. For complex tasks, he suggests you get an external intervalometer.

Toward the end of the video, he shares how you can post-process the images (if required) and explains the different software options available to automatically generate a timelapse video. So if you are a beginner wanting to try out timelapse photography, be sure not to miss this video.


Go to full article: Timelapse Photography: 5 Tips for Getting Started

What are your thoughts on this article? Join the discussion on Facebook

PictureCorrect subscribers can also learn more today with our #1 bestseller: The Photography Tutorial eBook

The post Timelapse Photography: 5 Tips for Getting Started appeared first on PictureCorrect.


from PictureCorrect https://ift.tt/3fKOGEy
via IFTTT

lauantai 28. marraskuuta 2020

PictureCorrect.com: Advanced Bokeh Tips

Combining flash with ambient light isn’t always an easy thing to do, especially when you have to balance the exposure in a way so that you get a nice bokeh going in the picture. The flash, even when it is fired at its lowest power, can produce a blinding amount of light. Gavin Hoey shows us how to use a flash coupled with a string of holidays lights for some beautiful background blur:

Tools

The tools Hoey uses for the shoot include a camera, a flash (Flashpoint Li-Ion Flash) and a shiny surface. He also used an incandescent bulb as the subject and some holiday light chains in the background for the bokeh effect.

Adjust the Light’s Power and Direction

The problem with using flash, as already described above, is that even when at its lowest power the amount of light produced can be overwhelming. The Flashpoint can go down all the way to 1/128 of its full power. But even then this is the result that is produced:

capturing holiday lights bokeh with flash

Flash fired at 1/128 of its full power

So, how do you reduce the power of the flash even further?

A bit of feng shui ingenuity is what is needed:

holidays lights bokeh

With light adjusted for power and direction

It doesn’t take a genius to note that the background lights are inconspicuous. This happens because the shutter speed is 1/200 of a second. It’s not enough time for the fairy lights to be recorded on the sensor and to appear in all their glorious glitter. The solution is in reducing the shutter speed. Hoey changes the shutter speed to ¼ of a second and this is the result:

slow shutter speed

Shutter speed slowed down to record the background light

Use a Shiny Surface

Another problem routinely faced by photographers is the lack of background circles. In this particular case Hoey has a background setup with some holiday lights but they are not enough. The solution is a black shiny surface. This helps him to not only capture a reflation of the subject but also increase the number of circles in the image without any extra effort.

using a black shiny surface for product photography

Capturing reflection of the subject and the background lights on a shiny surface

Make sure that the shiny surface that you’re using has been thoroughly wiped clean. Otherwise you will have an image full of dirt and dust and a lot of work in post processing.

Change the Bokeh Shape

Changing the shape of the bokeh is a ingenious way to add a bit of spice to your photos. All you need is a black card with the bokeh shape you like cut out in the center of it. Take a picture and voila! You have a new bokeh shape!

Changing the shape of the background bokeh

Background bokeh shape changed!

Watch the rest of the video for some cool editing tips for your holiday lights photos.


Go to full article: Advanced Bokeh Tips

What are your thoughts on this article? Join the discussion on Facebook

PictureCorrect subscribers can also learn more today with our #1 bestseller: The Photography Tutorial eBook

The post Advanced Bokeh Tips appeared first on PictureCorrect.


from PictureCorrect https://ift.tt/2VfVHnn
via IFTTT

PictureCorrect.com: Lighthouse Photography Tips

This article is based on concepts from The Photography Action Cards which are currently 88% off for Black Friday weekend. Also try the discount code photoholiday20 at checkout for extra holiday savings.

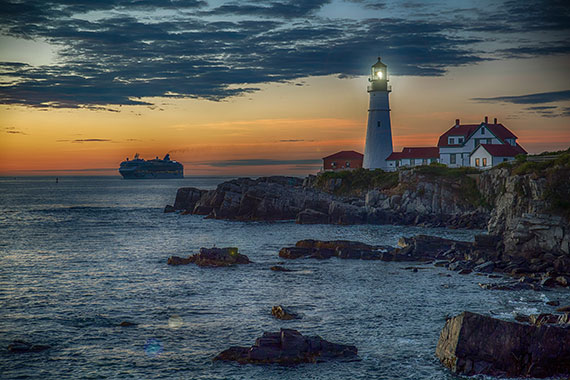
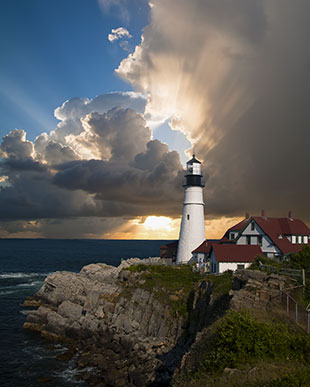
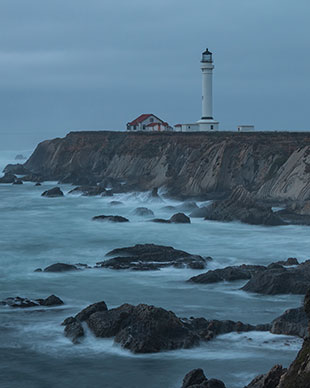
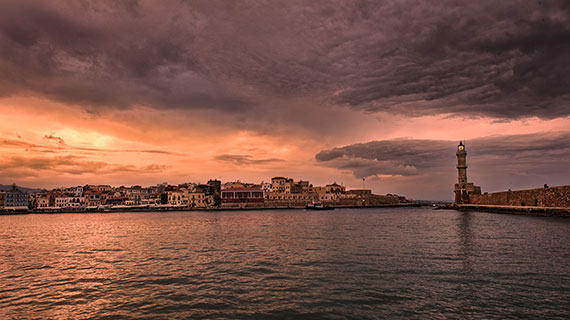
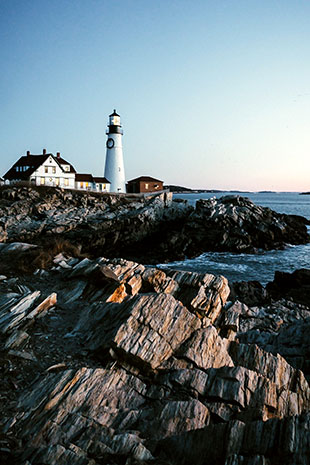
Lighthouses are a favorite subject for photographers, because they are romantic. However, some realities can make creating an excellent lighthouse photo challenging.

This article will provide you with some valuable insight into improving your lighthouse pictures, and we will discuss these skill points:

  • Composition with a limited point of view
  • Spotting problems: crooked horizon, trash cans
  • Balancing exposure between the sky and foreground
  • Creating sharp photos in a windy environment
  • Preparing for variable light conditions and weather

“Lighthouses are not just stone, brick, metal and glass. There’s a human story at every lighthouse; that’s the story I want to tell.” ― Elinor DeWire

Elinore DeWire is an American author that specializes in writing about lighthouses, and her quote is good advice for us photographers.

Photo by Pixabay

If you want to create romantic imagery of lighthouses, think about the human connection.

Showcase the sense of isolation and consider the impact a lighthouse would have upon a lonely sailor coming home.

Camera POV—Point of View

Some lighthouses are short and stout. However, the vast majority of lighthouses are tall and imposing structures.

Pro Tip: The height of the structure will play a critical role in helping you select your POV and lens. If the horizon line is visible, make sure that it is straight and not angled one way or the other.

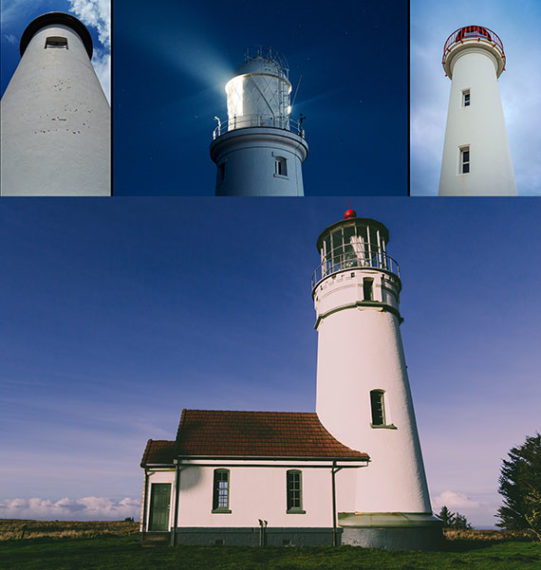
Tall lighthouses are large and imposing structures. If you get close to the tower, you will likely be limited to a POV that looks upward with a wide-angle lens or a moderate telephoto for close-ups.

examples of bottom-up lighthouse POV

Clockwise from top left: Photos by Daniel Reyes, Louis Reed, Louis Renaudineau and Eric Muhr

While there is nothing wrong with the upward view, it doesn’t lend itself to a romantic lighthouse picture. But by all means, take a few of these shots as well—if you have access.

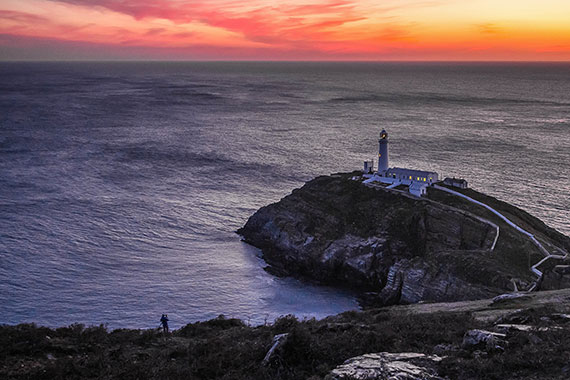
Critical Point: The romantic POV for a lighthouse will often come from some distance away, rather than close to the site itself. A lighthouse will usually be placed out upon a point of land, and there can be other points of land to either side of it. Look to these areas on either side for a camera position that can include the lighthouse’s surrounding environment, which will create a romantic visual story. A lighthouse is often best captured from an elevated point of view with the water stretching out behind it.

Access to lighthouses can range from complete access, where you can go inside and climb the stairs to the prism, to limited access where you might not even be allowed on the grounds.

Pro Tip: If you live near your subject lighthouse, you can visit it many times and explore different points of view and access moments. If you’re on vacation, and your opportunity is a one-shot deal, it will be worth your time to do some research online. You want to know the access limitations, weather conditions and sunrise and sunset times during your visit.
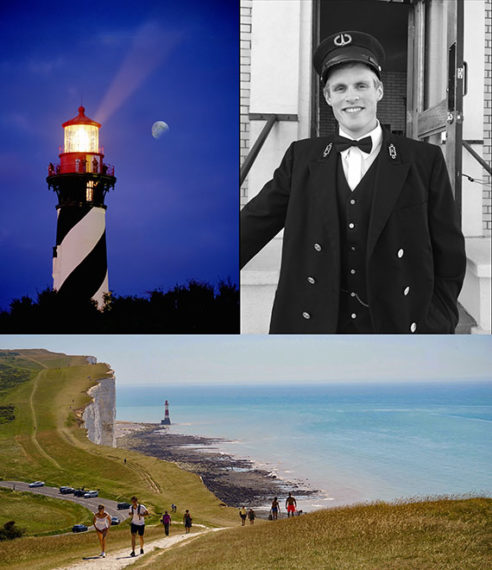
Top photos by Kent DuFault; bottom by Mike

Equipment:

  • Camera: Any camera, including a smartphone camera
  • Lens: Any lens, but typically, you want a moderate wide-angle to medium telephoto
  • Lens Hood: Highly suggested to prevent lens flare
  • Filters: Graduated ND and/or a polarizing filter can be convenient and helpful
  • Tripod: Best to get one with a sturdy head and a wired or wireless remote shutter release, if you want to give some long-exposure shots a try or plan to shoot in low light
  • Flashlight: A great tool if you arrive or leave in the dark, especially if you are walking along cliffs
  • App software: Photo Pills (this software, while optional, locates the sunrise and sunset on a map and can help you determine the best shooting location before you arrive)
  • Notepad: Take notes and be sure to record location metadata on your camera
how to take great lighthouse photos

Photo by Keith Luke

Think About This:

Romanticizing a lighthouse picture means adding drama. There are several ways to do this. Including a ship in the background is fabulous addition if you’re lucky enough to see one. You can also include working personnel like the lighthouse keeper, as I did in a previous example photo. Explore all the possibilities.
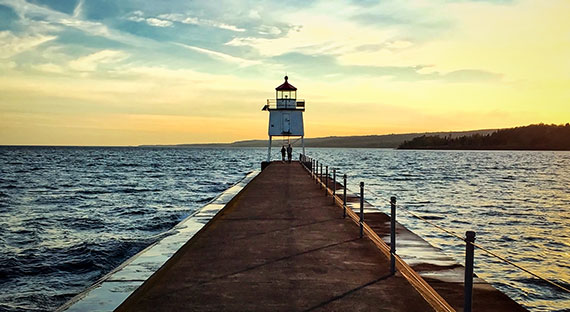
golden hour lighthouse

Photo by Kent DuFault

I visited this lighthouse at sunset. The lighting was perfect. However, I wasn’t lucky enough to catch a vessel going in or out of the harbor. Then a couple walked past me and out toward the structure. It was the perfect human element that I needed to create my romanticized lighthouse story.

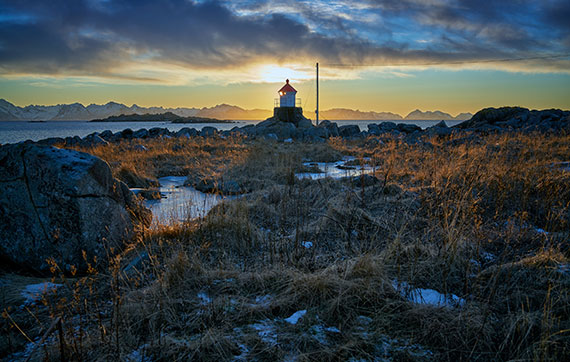
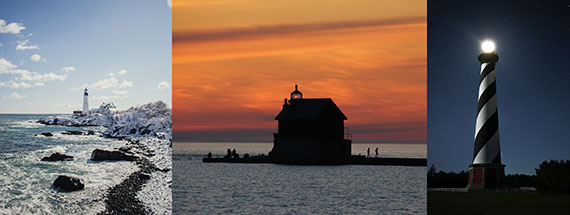
We’ve all heard the virtues of photographing during the golden hour. With romantic lighthouse photography, the time of day plays a critical role.

how time of day affects lighthouse photos

From left: photos by Adam Bixby, James Peacock and Cam Bradford

In the example photos above, the leftmost picture was taken under midday light. The scene is quite extraordinary. However, it lacks romantic drama due to the lighting.

The center photo represents what you might expect around sunrise or sunset, while the rightmost picture results from shooting the lighthouse after sunset in the twilight hour.

Pro Tips!

  • Avoid shooting during midday light. If that’s the only opportunity to photograph, consider using some glass filters on your lens. (More on that in a minute.)
  • Sunrise and sunset are great options for light. Arrive early. You want to set up and be ready when the magic happens. Bring a flashlight so you can see in the dark. A headlamp also works well.
  • Sunrise and sunset can be great for capturing your lighthouse in silhouette. Make sure you select a point of view that places the lighthouse structure against the bright sky.

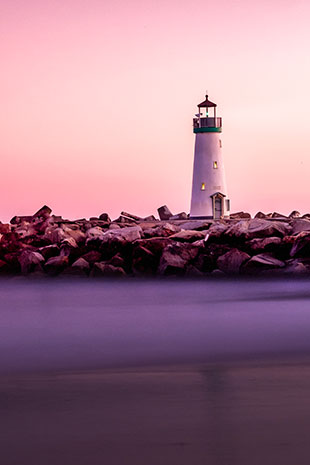
Post-sunset is a superb time for romantic lighthouse photography. The best shots will occur when there is still some light left in the sky—up to 45 minutes after the sun drops below the horizon.

romantic lighthouse lighting

Photo by Everaldo Coelho

Gear Hack!

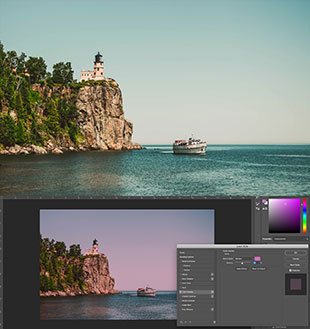
Let’s say you don’t have an option but to visit your lighthouse subject at midday. This scenario is one of those moments where a colored glass filter on the lens can save the day. You can also accomplish a color wash in post-production.

Pro Tip: If you’re going with a color filter on the lens, keep it light in hue and density. Colors that work well are pink, violet, blue and very light shades of red.

how to color wash lighthouse photos

Original photo by Atharva Tulsi; editing by Kent DuFault

The original photo was taken in midday light. It lacked any sense of romance in the lighting.

You can add a color wash to your lighthouse image in Photoshop using the layer style option in the layers palette. Make sure you duplicate the background layer and then highlight it before clicking on layer styles. You cannot use layer styles on the background layer.

You can also add a color wash to a bland lighthouse picture in Lightroom.
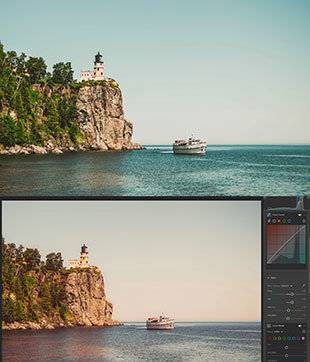
lightroom editing lighthouses

Pro Tip: When creating a color wash in post-production, using a minimalist approach is often more appealing than going with deep shades of color.

In Lightroom, the tools you will use to create a romantic hue of color are curves, color, and the color mixer or HSL (depending upon your version of Lightroom).

Beware of fakes!

Be careful with your post-production!

In this lighthouse picture, the sun was behind the photographer and to the right of the camera. You can tell by the shadows on the buildings.

how to spot a fake photo

Photo by Pixabay

There must have been a bland sky, and the photographer decided to drop in a sunset.

The problem is that the lighting doesn’t match up—backlighting and front lighting in the same picture?

It is obviously fake.

Become a student of light, and don’t create fake lighting!

Let’s cover a few final critical features to creating romantic lighthouse photos.

bad weather means good lighthouse photo

Photo by Cayetano Gil

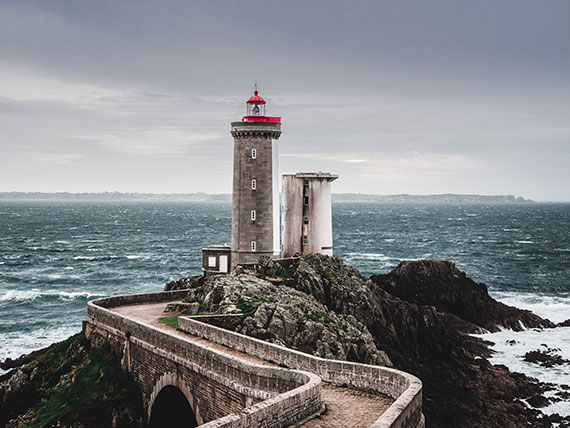
The weather is a definite dramatic factor in lighthouse photography.

In fact, the worse the weather is, the better.

After all, the very function of the lighthouse is to guide when inclement weather prevents visual contact.

Your chances of the lighthouse lamp being turned on are much higher!

Pro Tip: Inclement weather often brings the wind. You must stabilize your camera, especially if you will try and capture some long exposures (such as in the example photo above.) Having an excellent steady tripod with a decent sized head is crucial. Look for a vantage point that is protected from the wind. Bring some sandbags and bungee tie them to hang down from the tripod between the three legs. There are commercially available sandbags for photography purposes, or you can make your own.

how to take dramatic lighthouse photos

Photo by George Desipris

If a pleasing and storytelling environment surrounds your lighthouse, take some shots that include it.

These are the four lenses that I carry for my lighthouse photography.

  • Canon EF 16-35mm f/2.8L III USM
  • Canon EF 24-70mm f/2.8L II USM
  • Canon EF 70-200mm f/2.8L IS III USM
  • Canon EF 300mm f/4L IS USM

If your POV is distant, try to include some meaningful foreground objects to add depth perception.

add foreground elements to photos

Photo by Mitch McKee

Pro Tip: Keep your eyes sharpened and look for garbage cans, cars, power lines or any object that can interfere with your photo’s romanticized intent.

If you’re down near the water, look for tidepools to catch a reflection for added impact.

great lighthouse photo tips

Photo by Pixabay

In Conclusion

  • Lighthouses can be tall or short and stout; choose your POV accordingly
  • An elevated POV often best portrays the romantic aspect of a lighthouse
  • Keep your horizon line straight
  • Access can be limited, and you may find your best camera angle from some distance away from the tower
  • When possible, include a human element
  • You can create dramatic and romantic lighthouse images with any camera—more equipment just gives you more options
  • Be aware of the environment—bring a flashlight and watch your footing
  • It’s best to shoot a lighthouse at sunrise or sunset; dusk can also create dramatic effects, especially if the lighthouse lamp is on
  • You could add color with glass filters or post-production techniques if the lighting is lackluster
  • Don’t create a fake-looking picture!
  • Inclement weather is your friend
  • Include the surrounding landscape if it romanticizes the story of your image
  • Including foreground objects adds depth perception
  • Reflections can add a neat effect if you’re near the water
awesome lighthouse photo

Photo by Joshua Hibbert

Now You Should Give It a Try!

Pick your subject lighthouse.

Do pre-location research online. Try to determine the best time of day and angle. Depending upon the location, plan to shoot at sunrise or sunset.

Use the following camera settings:

  • Manual mode or aperture priority mode
  • Drive mode to single shot
  • Mount the camera to a tripod and use a remote shutter release
  • Start at ISO 200 (adjust as necessary)
  • Maintain a shutter speed of 1/15th or faster for wide-angle lenses, and 1/60th or faster for longer telephoto lenses
  • Use all the focusing points
  • Set the metering mode to matrix/evaluative/pattern
  • Use single shot focus mode
  • Set the white balance to auto
  • Shoot in camera raw (additional .jpeg optional)
  • Adjust aperture from f/2.8 to f/11 depending upon the depth of field
  • Use a foreground object if possible

How did you do?

  • Did you correctly place the focus for the intended depth of field window?
  • Is the lighthouse sharp and free of camera shake?
  • Did you compose the image using the sample pictures for ideas?
  • Is your image free of unwanted humanmade objects (garbage cans, etc.)?
  • Did you frame the shot tight enough or wide enough?
  • Does your photo convey the romance of the location?
  • Is the color pleasing? (It doesn’t need to be accurate)
  • Is your exposure balanced between the sky and foreground?
  • Did you experiment with motion blur in the water while keeping the lighthouse sharp?

About the Author:
Kent DuFault is an author and photographer with over 35 years of experience. He’s currently the director of content at the online photography school, Photzy.

For Further Training:

Expand your shooting skills with 65 beautifully designed & printable project sheets that will give you over 200 photography assignments, covering everything you can imagine! The Photography Action Cards are currently 88% off until Black Friday. Also try the discount code photoholiday20 at checkout for extra holiday savings.

photo action cards

New: The Photography Action Cards (Click to See How They Work)

These Action Cards discuss a photographic topic, provide you with suggested considerations, and give you specific photographic assignments. They’ll kick you out of the “nest” to go have a personal discovery experience all on your own.

Deal ending soon: The Photography Action Cards at 88% Off


Go to full article: Lighthouse Photography Tips

What are your thoughts on this article? Join the discussion on Facebook

PictureCorrect subscribers can also learn more today with our #1 bestseller: The Photography Tutorial eBook

The post Lighthouse Photography Tips appeared first on PictureCorrect.


from PictureCorrect https://ift.tt/37wH6d5
via IFTTT

PictureCorrect.com: Interesting Photo of the Day: Glowing Tent Under a Winter Sky

Have you ever been camping in the winter? I mean, really camping—tent, sleeping bag, in the wilderness, under the clear, crisp winter sky, sleeping on snow? Colorado photographer Lars Leber lives for this kind of stuff and frequently hikes the beautiful, natural areas of Colorado to photograph its picturesque landscapes. Here, he captures his typical camping setup in the Lost Creek Wilderness against a stunning winter night sky:

glowing tent in winter

Winter Camping by Lars Leber (Via Imgur. Click image to see full size.)

If you’re wondering why Leber didn’t just use one of the cabins in the background, it’s because they are old, abandoned cabins that were built for the Antero and Lost Park Reservoir Company between 1891 and 1913. Instead, he uses his modified Shangri-La shelter and a titanium wood stove. You can see the embers of the fire shooting out of the tent “chimney.”

Leber hiked about four miles from the Goose Creek Trailhead to find this beautiful backdrop. This shot was taken using a single 30-second exposure.


Go to full article: Interesting Photo of the Day: Glowing Tent Under a Winter Sky

What are your thoughts on this article? Join the discussion on Facebook

PictureCorrect subscribers can also learn more today with our #1 bestseller: The Photography Tutorial eBook

The post Interesting Photo of the Day: Glowing Tent Under a Winter Sky appeared first on PictureCorrect.


from PictureCorrect https://ift.tt/2q2bKIr
via IFTTT
perjantai 27. marraskuuta 2020

PictureCorrect.com: A.I. Photo Editor Bundle Black Friday Offer

This weekend, you can get all of the best-selling Topaz AI photo editors for one low price if you’re interested. And you only pay for what you don’t own. If you have Gigapixel and Sharpen, but not JPEG to RAW or DeNoise, you will only pay for two – and you’ll still get the discount! Discount automatically applied in your cart when you are logged in to your Topaz account. Found here: Topaz AI Photo Editor Black Friday Bundle Deal

ai photo editing

Artificial Intelligence Photo Editors

Photo editing programs included in the bundle:

“For the photos where exceptional quality matters.”

Sharpen AI

Sharpen AI is the first sharpening and shake reduction software that can tell difference between real detail and noise. Create tack-sharp images even when you’re shooting handheld or at night.

Gigapixel AI

Enlarging your image without losing detail has always been impossible… until now. Upscale your photos by up to 600% while perfectly preserving image quality with the power of AI.

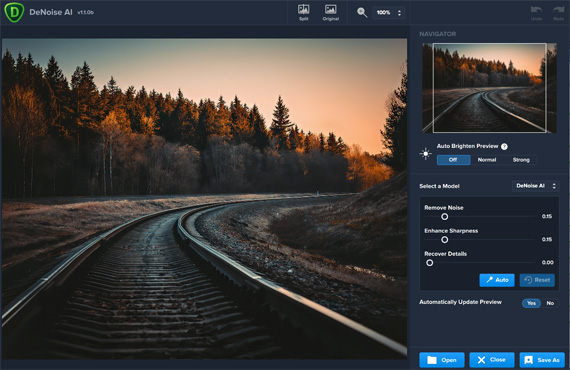
DeNoise AI

Topaz DeNoise AI removes distracting image noise while preserving image detail so you can shoot in any situation with confidence.

Mask AI

Topaz Mask AI is unlike any other masking tool. Combined with machine learning, and our trimap masking technology, you won’t find an easier masking solution.

Adjust AI

With one click, Adjust AI leverages the power of artificial intelligence to transform your photos into something incredible. Their AI-powered modes bring out colors, shadows, details, and more to make your photos as vivid as intended—all in one step.

topaz bundle

Topaz Photo Editors Black Friday Offer

JPEG to RAW AI

Use machine learning to convert JPEG to high-quality RAW for better editing. Prevent banding, remove compression artifacts, recover detail, and enhance dynamic range.

Topaz Studio 2

Edit your images beautifully with powerful filters and frictionless masking in a fine-tuned non-destructive layer workflow.

How to Get the Topaz AI Bundle for a Discount Today

Note: If you already own any of the products above and you’re logged in, you’ll get a special reduced price when you add the bundle to your cart. Plus you can remove the Video Enhance AI product from the bundle to lower the price. Also our readers can use the coupon code picturecorrect to save even more.

Deal found here: Topaz AI Photo Editor Bundle Black Friday Sale


Go to full article: A.I. Photo Editor Bundle Black Friday Offer

What are your thoughts on this article? Join the discussion on Facebook

PictureCorrect subscribers can also learn more today with our #1 bestseller: The Photography Tutorial eBook

The post A.I. Photo Editor Bundle Black Friday Offer appeared first on PictureCorrect.


from PictureCorrect https://ift.tt/3fJMX2e
via IFTTT

PictureCorrect.com: Interesting Photo of the Day: Moody Forest Near Mt. Rainier

Golden light is preferred by photographers for a good reason. To simplify, it just makes your images look magical. Some photographers are so obsessed with golden light that they can go overboard to pursue it. Photographer Jake Gosline left home at 2:00am to catch the early light at Mt. Rainier National Park:

rainier moody forest

“Early Morning Light Igniting the Low Lying Fog at Mt. Rainier National Park” by Jake Gosline (Via Reddit. Click image to see full size.)

Gosline shot this image with his Nikon D7500 and 18–400mm Tamron lens at f/9, ISO 640, 1/2000 second, at 400mm. The early morning soft light glowing up the low hanging fog has definitely given the image a dreamy look.

“I woke up around 2:00am to drive from Seattle and make it to Mt. Rainier by sunrise. When I arrived, the conditions were perfect and low lying fog filled the valleys around the mountain, creeping up among the trees and making for many spectacular ‘moody forest’ shots. I found this scene especially compelling, with the golden morning light reflecting and illuminating the wispy fog.”


Go to full article: Interesting Photo of the Day: Moody Forest Near Mt. Rainier

What are your thoughts on this article? Join the discussion on Facebook

PictureCorrect subscribers can also learn more today with our #1 bestseller: The Photography Tutorial eBook

The post Interesting Photo of the Day: Moody Forest Near Mt. Rainier appeared first on PictureCorrect.


from PictureCorrect https://ift.tt/2A41kes
via IFTTT

PictureCorrect.com: Forest Photography Tips & Techniques

Woodland photography can be tricky if you are new to it. The surroundings can feel quite congested, and it can be difficult to find a proper subject and an outstanding composition. If you’ve been wanting to try your hands with woodland or forest photography, though, and are wondering where to start, we have the perfect walkthrough for you. In this video, photographer Mads Peter Iversen shares seven steps that will help you master woodland photography from the get-go:

One of the biggest takeaways from the video: the focal length you use plays an important role in determining your composition. If there’s a considerable gap between trees, try using a longer focal length. The compression will bring the background elements closer and help fill the space. The tighter field of view will also help you get rid of the chaotic environment.

And when you’re out in the woods, be sure to keep an eye out for trees that look unique and have interesting shapes. They make for brilliant subjects. It also helps if you photograph such trees by facing a light source. This way you can capture their silhouette and also add some mystery to the image.

No matter what you choose to photograph, don’t be immediately satisfied with one composition. Always move sideways, back and forth, and see how the composition changes. Sometimes, what looks good on your LCD screen may not look as good on a bigger monitor. Always spend some extra time double-checking your composition.

For more tips and tricks, along with some brilliant examples of woodland photography, be sure to watch the complete video. You’ll be surprised by the quality of images Iversen capture using these very techniques.


Go to full article: Forest Photography Tips & Techniques

What are your thoughts on this article? Join the discussion on Facebook

PictureCorrect subscribers can also learn more today with our #1 bestseller: The Photography Tutorial eBook

The post Forest Photography Tips & Techniques appeared first on PictureCorrect.


from PictureCorrect https://ift.tt/3nZRUa0
via IFTTT