maanantai 24. helmikuuta 2020

PictureCorrect.com: 5 Tips for Better Wildlife Photos

Wildlife photography is a pursuit that can be challenging, frustrating, but ultimately rewarding to any photographer. The arrival of digital cameras has inspired a whole new generation of photographers to take an interest in wildlife photography.

elk sunset photo

photo by Larry Smith

Most photography courses, workshops and books concentrate on the technical aspects of camera craft: but really good photography relies more on composition, lighting, and sensitivity to your subject. This means you can improve your photography by thinking creatively, not technically.

Here are five of my top tips for taking better wildlife photographs:

1. Get to the subject’s eye level.

Wildlife photos are most effective if they create an intimate connection between the subject and the viewer. The best way to do this is to take your photo at the subject’s eye level. This way, your wildlife photo can create the illusion of sharing a moment inside the world of the subject, rather than from the outside looking in.

If, for example, your subject is low to the ground (like a lizard, frog, or even a pet), crouch or lie flat, getting as low as possible so you can take your photo at the subject’s eye level.

wildlife photography eye contact

photo by Gemma Stiles

2. It’s all in the eyes.

The personal connection mentioned in tip #1 is really about eye contact, so it is important to get the eyes right. If the eyes in your wildlife photo are sharp and clear, the photo will probably work. If they are out of focus, lost in shadow, or if the subject blinks or turns its eyes away, the connection will be lost, and the photo will almost certainly fail.

You don’t even need your whole subject to be in focus. Your animal could be mostly hidden by leaves, in shadow and out of focus. The picture could still work…as long as the eyes are open and captured sharply in the picture.

3. If the background doesn’t help, get rid of it.

Many wildlife photos are spoiled because the background is cluttered, distracting, ugly, or just plain inappropriate. For example, seagulls on a beach can be quite beautiful, but seagulls at the local rubbish tip is a different matter. Also, wildlife photos look far less natural if you can tell they were taken in a zoo. Apply this principle: “Anything that does not make my photo better makes it worse.”

background for wildlife photography

photo by Kristina Servant

This does not mean you can’t take a good wildlife photo at the zoo, at the tip, or anywhere else for that matter. You just need to manage it. If your background is spoiling your shot, zoom right in on the subject to eliminate as much of the background as possible. By zooming in, you will also reduce the depth of field to a minimum, so any background that does appear in your photo will be out of focus and less distracting.

4. If your background is working for you, use it well.

A wildlife photograph that captures the subject in a beautiful natural setting can be even more effective than a simple close-up. My photos of a kangaroo on the beach, for example, show the subject in an unexpected context, making a more interesting image than a close-up portrait style photo.

wildlife background

photo by James Brooks

If you take your wildlife subject as part of a wider landscape, you need to consider all the techniques of composition that apply to landscape photography. Remember the rule of thirds (which may or may not help) and be careful to position your animal so that the subject and the background work together to make a more effective composition. In particular, try to position your wildlife subject so that it looks toward the center of the picture, not towards the edge of the frame.

5. Capture your subject in the best possible light.

Even the most perfectly composed wildlife photo can fail because of bad lighting. Losing your subject in the shadows, glare reflecting off shiny feathers, and shadows across the face of the subject are all simple mistakes that can ruin a photo.

best lighting for wildlife photography

photo by CheepShot

There is no single rule for lighting in a wildlife photograph, but here are some suggestions. I often find the best results when the sky is lightly overcast with thin cloud. This produces light that is bright, but soft and even compared to full sunlight. Your subject will be well illuminated, but you avoid harsh contrast and heavy shadows that rob the image of important detail.

If the weather is sunny, try to take your photos early and late in the day when the sun is low. At these times the light is soft and warmly colored. It is also easier to catch the full face of your subject in sunlight, rather than half-obscured by shadow.

So there you have my five tips for wildlife photography. I could cheat and add tip #6: take lots of photos. Animals twitch, flap their wings, blink, and generally find a way to frustrate even the most patient photographer. Don’t forget, with digital photography it costs you nothing to keep snapping. So practice, persevere, and try out these tips…you could be taking better photos in no time.

About the Author:
Andrew Goodall writes for http://www.naturesimage.com.au and is a nature photographer based in Australia. He manages a gallery in Montville full of landscape photography from throughout Australia.


Go to full article: 5 Tips for Better Wildlife Photos

What are your thoughts on this article? Join the discussion on Facebook

PictureCorrect subscribers can also learn more today with our #1 bestseller: The Photography Tutorial eBook

The post 5 Tips for Better Wildlife Photos appeared first on PictureCorrect.


from PictureCorrect https://ift.tt/37QfnBX
via IFTTT

sunnuntai 23. helmikuuta 2020

PictureCorrect.com: How to Handle Catch Lights and Eyeglasses Glare in Portrait Photography

I’ve previously discussed the importance of catch lights. Without them, your subject’s eyes look dull and lifeless. They help add interest to portraits and are a very effective way to add depth to the eye.

portrait lighting catch lights

photo by Victor Semionov

Catch Lights

Ideally, catch lights should be round. This tends to be the most natural and visually pleasing shape (reflections of the sun are round, and we are used to seeing the round shape). The shape of your catch lights is generally only a problem if you are using a square reflector or diffuser. If you are going for a contest winner, you will want to retouch your catch lights to make them round.

Be careful about the number of catch lights visible in the eye. Your fill light or reflectors will add additional catch lights to the eyes. You usually only want one in each eye. Retouch or adjust your lighting to remove any extras.

Lastly, the catch light (ideally, provided by the main light) often looks best at the 11:00 or 1:00 o’clock position within the subject’s eye. Knowing this will help you determine how high to place the main light. It should be at about 45 degrees from the axis between the camera and the model and high enough to be slightly above their head.

Every face is different, so watch the shadows and catch lights to determine the right placement for the lighting pattern–shadows to determine the light pattern, catch lights to determine the height of the light source.

Glasses

Reflections in glasses can kill a portrait faster than just about anything else. Here are a few pointers:

The first thought that many of us have is to just take the photo with the subject not wearing glasses. This can work–or it can be a problem.

If the subject does not normally wear glasses (they may habitually go without them or they may usually wear contacts) go ahead and shoot without them. If the subject normally does wear glasses, and you shoot without them, no one is going to like the portrait. The person in the photo won’t look natural. Plus, their eyes might look slightly unfocused or even crossed.

"Untitled" captured by Ryantron on Flickr.

photo by Ryan Ritchie

Rule of thumb: if your subject shows up for the portrait session wearing their glasses, leave them on.

Since the lights are generally higher than the subject’s head, one way to avoid glare from the glasses is to raise the part of the stems going back to the ears. The hooked part will be raised half an inch or so above the ear. This tilts the lenses down and can eliminate glare.

If tilting the glasses doesn’t eliminate the glare, you may have to raise the lights. Be careful about tilting the glasses too far; it looks odd if you overdo it.

Lastly, you can actually take the lenses out of the frames and have your subject wear the empty frames. This is a method that’s been touted by photographers for decades! For most eyeglass frames, it is easy to remove and replace the lenses with an eyeglass screwdriver kit. It would be worth your while to get one and keep it in your camera bag.

Be cautious though. If you break or scratch your subject’s glasses, you could end up buying him or her some new ones. You will drop the screws, so have extras on hand.

Catch lights and glare prevention need not be complicated. Make sure your catch lights are the right shape and in the right location, watch for glare in your model’s eyeglasses, and you’ll be quick to improve your portrait photography.

About the Author:
Dan Eitreim writes for ontargetphototraining.com. He has been a professional photographer in Southern California for over 20 years. His philosophy is that learning photography is easy if you know a few tried and true strategies.


Go to full article: How to Handle Catch Lights and Eyeglasses Glare in Portrait Photography

What are your thoughts on this article? Join the discussion on Facebook

PictureCorrect subscribers can also learn more today with our #1 bestseller: The Photography Tutorial eBook

The post How to Handle Catch Lights and Eyeglasses Glare in Portrait Photography appeared first on PictureCorrect.


from PictureCorrect https://ift.tt/2ujcwRK
via IFTTT

perjantai 21. helmikuuta 2020

PictureCorrect.com: Are You Making These 10 Common Street Photography Mistakes?

When looking at the work of street photographers, it’s often a common thought that, “I could do that if only I were there.” However, when you finally go out into the world with your camera it can be shocking to find that it’s not quite that easy. There’s a reason that the best street photographers are so dedicated: it’s necessary.

mistakes in street photography

Smiley Face, SoHo, NYC

When you first start out, it’s so easy to make technical mistakes and it’s surprisingly difficult to figure out what makes for an interesting photo. These are things that are developed through time and experience, but to help you along, here is a list of the ten most common mistakes that beginning street photographers make.

1. Using a slow shutter speed and shallow depth of field

black and white cell phone street photo

Cellphones, NYC

Whenever I teach, about eight or nine out of ten photographers come to me shooting in Aperture Priority mode. This can be great to do, however, if you are not experienced enough technically, it can also cause you a huge problem.

For street photography, a fast shutter speed is necessary to freeze the motion in people. I primarily use 1/250 of a second. If it’s sunny out, then I will shoot a little faster and if it is darker, I will go to 1/160 or even 1/125 of a second. This big problem when you shoot on Aperture Priority mode is that it’s easy to forget to pay attention to the shutter speed the camera is choosing for you. If you set your camera to f/8 in then sun and then suddenly go into a darker area, you could all of a sudden be shooting at 1/20 or 1/10 of a second without noticing. The image may still look sharp on the back screen of the camera, but then when you bring it into your computer suddenly all your images will be a little blurry.

In addition, while it’s often necessary to shoot with a wide-open aperture because of the light, shooting with a smaller aperture (f/8 or above) can be very beneficial. Context and background is key in a lot of street images and having a larger depth of field can help everything stay in decent focus. If multiple subjects pop up at different depths, then it will be easier to keep them both in focus as well. Finally, if you happen to miss the focus on the subject slightly, which is very easy to do in the fast moving world of street photography, then there will still be a good chance that you will get them in focus.

To achieve all of this, you will have to raise your ISO. I rarely shoot lower than ISO 400 in sunlight and am usually between ISO 800 and 3200. At night, I usually use ISO 6400. Test out your camera, but don’t be afraid to take some grainy images.

2. Walking too fast

street photography black and white

SoHo, NYC

When you go out shooting, it is common to think that you have an endpoint that you need to get to. You don’t. Every step of the way you are somewhere. Even when the images are not obvious, they are there.

It’s a common mistake to walk very quickly. It almost seems like some people think that the faster they go, the more interesting moments they will come across. But this is not the case. The same number of moments will occur whether or not you are standing and waiting for them or walking fast to find them. The problem is that by walking fast it becomes much easier to miss the moments. The slower you go, the easier it is to look around and to be ready to capture the moment when it happens.

When you go for a walk, find interesting locations to linger and wait for the right moment to happen in front of you, ready with your camera.

3. Only photographing the flashiest people

common errors in street photography

Businessman, NYC

Flashy people can be wonderful to photograph. Interesting hats, hair, clothing, tattoos, and jewelry can make for one heck of a beautiful photograph. However, these people only make up a small part of the population.

The people that aren’t as flashy are not any less interesting. They show the same emotions and can make for even more interesting images than the flashy people. Most other people are out there searching only for the flashy. Try to photograph all different types of people when you are out.

4. Not shooting enough, not looking, and being impatient

street photo construction workers

Construction Workers, NYC

The world isn’t just going to hand you moments. It is all too common for me to go out with someone and for him or her to look around frustrated like nothing is happening. They expect it to be easier. You have to work to find the best moment and you need to figure out what makes an interesting image.

An elephant isn’t just going to fall from the sky every five minutes. You have to put in the time and effort for those moments to occur. In addition to that, sometimes you have to find and create those ‘elephants.’ Sometimes the most interesting moments are the subtle ones that fly right beneath your nose. Looking and noticing the potential for good photographs is a skill that is developed over time.

The common theme that exists between all great street photographers is that they spent the time out in the world with a camera to catch those moments. They didn’t just go out on Sundays for an hour. They photographed and photographed and kept a camera with them constantly. Try to shoot on a more frequent basis. Instead of being a weekend warrior, try to find 15 minutes on a more frequent basis, wherever you are. If you don’t want to bring your camera with you, consider getting a smaller camera to take around the rest of the time, or use a phone camera. Fifteen minutes every day will make a gigantic difference and it will give you a good excuse to take a fun break and go for a walk.

5. Being too sneaky

black and white street photo crowd nyc

SoHo, NYC

I can be pretty sneaky with a camera when I need to be. I can look like a tourist excited by the city or someone trying to figure out how to use their camera. I can pretend to photograph a building behind a subject like the best of them. I will shoot without looking through the viewfinder sometimes. However, if I can look through the viewfinder and take a proper shot without getting punched, that’s what I’m going to do.

Sometimes you have to just look through the viewfinder and take the damn image. Shooting haphazardly without looking through the viewfinder can work, but it can also become a crutch. Force yourself to look through that viewfinder and take a steady, composed shot of a good moment. Then if you missed it you at least gave your best effort. There’s always next time.

Also, there is usually no reason to take twenty photos of the same person. If a situation develops, then hang around and wait for the moment to develop. But it is one thing to take a photo of someone and then wait for the situation to develop and it is another to point your camera at them for a minute straight while shooting constantly and waiting for something else to happen. That just makes things uncomfortable for everyone involved.

6. Only shooting outdoors and in busy places

Busy places are my favorite areas for photography. I love to be surrounded by all different types of people and if you have a limit amount of time, more moments will happen in a shorter time period in a busier area.

But the rest of the world is just as interesting to photograph. Go to quiet areas without as many people. Take photos with less going on. Find ways to make the quieter areas look unique and interesting. Take images without people in them. If you stick to only shooting in the busiest areas then you’re cutting out a majority of the world. Street photography does not just mean shooting on a busy street corner.

7. Not shooting close to home

On a similar note, try to take some images close to home and even in your home. The most interesting candid images can be the most personal. In addition, you will know the area better. If your neighborhood is quiet, then take quiet images that show it. Try not to take your neighborhood for granted. If you took someone from a different part of the world or even a different time period and parked them where you live, they would probably find so many weird and interesting aspects of the surroundings and would capture a lot of scenes that you might take for granted and overlook. What is something that might look normal to you but is actually pretty special?

8. Trying to photograph classic images

do you make these photography mistakes

iMac, Yosemite, NYC

Street photographs are like wine; they get more interesting with age. However, it’s hard to figure out the aspects of them that will become the most interesting. Everyone gets frustrated that you cannot take a photograph these days without people staring at their phones, but that’s probably the most interesting sudden change that has happened, and who knows how long that will last for?

The images you take now that look like they are classic or old end up usually just being images that copy the look of previous photographers, back when those moments were modern. The more modern the photo you take, the more classic it will feel to someone in the future.

9. Not spending the time to organize your archive

rose behind a fence

Red Rose, NYC

One of the most vital and most overlooked aspects of being a good street photographer is how you edit. You need a good system for organizing your images. If you are like any good street photographer, you will shoot frequently and your archive will grow quickly. After 10 years of shooting, what do you think will happen?

I highly suggest using Lightroom, because one of its most important features is its incredible organizational system. After a session, import your photos into your archive through Lightroom immediately and do a very quick edit. You can and should come back to them another time after the hype from the day has subsided, but you also need to create a system where you don’t get overwhelmed by a messy archive of thousands of photos.

I will immediately go through a day’s shoot after I import the images and star every decent image as three stars and every image that I love as five stars. Once a year, I will do a spring cleaning of my archive and get rid of the terrible images, but I will also make sure to go back through all of the three stars images to see if there are any gems that I missed or to lower the five star images that I no longer love. By doing this after each time you shoot, you will easily be able to go through a months of your images, click to only show the five or three star images, and will have a much more manageable group of images to evaluate.

In addition, use Lightroom’s Collections to your advantage. Collections allow you to group your photos together without having to move their physical locations on the computer. Think about the different ways that you might want to show your images together. As you grow these collections, they will start to help you think more about you are photographing and will help you find more content when you are out shooting.

10. Not printing your work

tips for street photographers

A large photography cork board from the Container Store

This goes for all types of photography, but in my experience particularly street photography. Street photography images are not usually classic images that people think about putting on their walls, but that does not mean that you should not print them (or put them on your walls).

Street photographs can work well alone but often they work great in groups. Create a group of your street images that work together and put them next to each other on a wall. Another fun idea is to purchase a cork board and fill it up with your street images. You should also consider printing out a lot of 5×7 images, sequencing them, and storing them in a nice box or place for your friends and family to see. Or use Blurb to create a book of your images to display. These images deserve to be shown in places other than a website or blog. They deserve to be printed just as much as a beautiful landscape.

About the Author:
James Maher is the author of Essentials of Street Photography, which covers everything about the genre even down to specific post processing techniques that can bring the best out of street scenes.


Go to full article: Are You Making These 10 Common Street Photography Mistakes?

What are your thoughts on this article? Join the discussion on Facebook

PictureCorrect subscribers can also learn more today with our #1 bestseller: The Photography Tutorial eBook

The post Are You Making These 10 Common Street Photography Mistakes? appeared first on PictureCorrect.


from PictureCorrect https://ift.tt/2rLBHwS
via IFTTT

torstai 20. helmikuuta 2020

PictureCorrect.com: Why Black & White is a Good Place to Start in Photography

Black-and-white photography is the place to start if you’re serious about becoming a better photographer.

Go back to the dark ages before digital. Dinosaurs ruled the Earth, and the equivalent of Adobe Lightroom was a small piece of card on the end of a wire.

The first thing beginner photographers would learn is to shoot, develop, and print a roll of black-and-white film. We can go back to those roots today to solidify our skills.

These are the benefits to learning to shoot without color with your digital camera.

Start Simple

If you wanted to learn music as a child, you probably started with a recorder. You didn’t get handed a double-headed guitar and a book of Zeppelin riffs. Learning photography is very similar. Start with the simplest form of the medium, and as you master those elements, add things. A standard lens and black-and-white images are as simple as it gets.

black and white photography 101

Photo by B .Y; ISO 200, f/3.2, 1/100-second exposure.

You Learn to Pre-Visualize

By disregarding color, you have to work a lot harder to create great pictures. A beautiful, sandy beach in tropical sunshine? An easy shot in color becomes just expanses of grey. In monochrome, you have to find subjects that fit the medium and think about what you shoot before you click the shutter. This pre-visualization is perhaps the most valuable skill a photographer can develop.

black and white photography techniques

Photo by Natesh Ramasamy; ISO 100, f/5.6, 1/2500-second exposure.

Composition and Form Become Much More Important

Without color, composition and form are your essential tools for making a good photo. Learning to see shapes and form in abstract helps you compose better pictures later on. Learning is all about creating good habits, and black and white helps you do that. Photographers who started by shooting in this way tend to be very strong on composition, because that is your main tool for creating strong photos. You can’t use strong color to catch the eye.

photography in black and white

Photo by Michelle Robinson; ISO 32, f/2.2, 1/2026-second exposure.

Evaluating Exposure Is Much Easier

Blank shadows or blown-out highlights are much easier to spot in grey scale. In color, sometimes it’s hard to tell the difference between a color cast and bad exposure, and you can tie yourself in knots trying to work out what to correct and in what proportion. Making mono images with detail from the highlights to the shadows is a good way to sharpen your exposure skills, and that makes it easier to deal with color later on.

basics of black and white pictures

Photo by Giuseppe Milo; ISO 800, f/4.0, 1/320-second exposure.

Conclusion: Adding Skills to a Solid Base Is the Best Way to Make Steady Progress

Once you have started to master the simple things, you then have a solid base to build on. You can try to master different lenses, add color, or start using flash knowing that you have learned the basics.

Studying anything is like building a house. You have to start with solid foundations, and making great black-and-white images is the best foundation any photographer can have.

About the Author:
Tobias Key is a professional photographer from Chichester, West Sussex UK. For more great hints and tips on how to improve your photography, visit his blog at http://www.tobiaskey.com.


Go to full article: Why Black & White is a Good Place to Start in Photography

What are your thoughts on this article? Join the discussion on Facebook

PictureCorrect subscribers can also learn more today with our #1 bestseller: The Photography Tutorial eBook

The post Why Black & White is a Good Place to Start in Photography appeared first on PictureCorrect.


from PictureCorrect https://ift.tt/2jzKr2n
via IFTTT
keskiviikko 19. helmikuuta 2020

PictureCorrect.com: Astrophotography: Telescope Photography Tips

Most people love to gaze up at the night sky and enjoy the beautiful light show that nature provides; the stars, galaxies and constellations seem so close. It’s fun to imagine what earth was like millions of years ago when light from distant stars left on its journey through the universe, never stopping or slowing down, and finally reaching earth. Star gazing can be especially fun if you’re lying on a blanket next to your sweetheart and enjoying these beautiful celestial creations together! Observing the universe with the naked eye is fun, but what if you want to capture these objects on camera and in as much detail as possible? Well, for that you are going to need a telescope. Choosing the right telescope doesn’t have to be complicated if you follow some simple guidelines.

beautiful astrophotography

Photo by Yuriy Toropin.

  • Lens or Mirror Diameter. Assuming that this is your first telescope, a 4 inch lens should fit your needs. Lens or mirror size is important because the larger the lens or mirror the more available light it will be able to gather and the higher the resolution will be. However, the larger lens and mirror telescopes also cost more.
  • Mounts: Bigger is Better! Look for a telescope that has a sturdy and well constructed mount. This type of mount will provide stability on uneven or rough terrain. Poorly designed and flimsy mounts will wind up causing you nothing but frustration.
  • Eyepiece. This is a comfort issue. The better eyepieces will allow you to observe your target without having to literally press your eye against it, which can be very uncomfortable and almost impossible to view the object for more than a few seconds.

Now that you know some of the things to look for when shopping for a telescope, let’s take a look at getting the camera set up and taking some photographs!

  • Photographing Distant Objects. If you are using an SLR camera your best bet will be to use the Prime Focus Method. This requires you to remove the camera’s lens and the eyepiece from the telescope and use a T-Ring Adapter and T-Ring to reattach the camera to the telescope. What this does is turn your telescope into a camera lens! This technique works great when photographing distant objects that give off little light (as seen from earth) and require long exposures. The Prime Focus Method also works very well when photographing objects that create a large field such as galaxies and nebulae. Make sure you purchase the correct T-Ring and Adapter for the make and model of your camera.
  • Planets and the Moon. These can be photographed best if you use the Eyepiece Projection Method. Using an Eyepiece Projection Adapter attach the camera to the telescopes eyepiece and if possible use a remote trigger to take the picture. This will help to keep vibration to a minimum. Once again, make sure you purchase the right adapter for your camera’s make and model.
how to get the best astro photos

Photo by Carsten Frenzl.

The above suggestions should get you on your way into the area of astrophotography, but just to make sure, here are some tips and warnings:

  • When shopping for a telescope don’t get to caught up in its magnification. While magnification is important, it is not THE most important thing to consider. A telescope does its job by gathering light and the amount of light it collects is in direct relation to the size of its lens or mirror. To determine a telescope’s magnification capacity, you can do the following. Multiply the size of the lens, lets say it’s 4 inches, by 60. This gives you 240. This number will roughly represent the telescope’s upper magnification limit.
  • Pay Attention to Details. Always make sure the flash is turned off and that you use an ISO setting of at least 400. Use longer exposures for objects that are faint and shorter exposures for ones that are bright.
  • Beware of the Sun! Unless you are a trained professional photographer who has the proper equipment to photograph our nearest star, I would STRONGLY recommend that you not attempt it. Even though the sun is roughly 150 million miles from earth and its light takes over 8 minutes to reach us, don’t let these numbers fool you! The sun is a nuclear furnace that is constantly emitting ultraviolet rays as well as x-rays and extremely dangerous gamma rays. The intensity of these different rays vary according to their wavelength but they are all present. NEVER EVER use a telescope, binoculars, or any other piece of magnification equipment to view the sun. Using your naked eye is not a good idea either. The sun can very quickly and permanently damage your eyes (especially the retina), so PLEASE leave it to the pros.
  • Join an Astronomy Club. Star gazing can be much more fun if you enjoy it with others who share the same interest. They are also great places to have discussions and to learn from one another.
  • Get to Know the Sky. The Internet provides a wealth of information on our solar system and the universe as does your local library. Finding out where to point your telescope to locate your favorite celestial objects will make photographing them much easier. The links listed at the end of this article will assist you in navigating your way around the night sky.
shooting astrophotography

Photo by dyonis.

I hope the information that I have provided will help you in your quest to photograph our beautiful and amazing universe. Just be patient and stay persistent and before you know it you’ll be taking pictures that will amaze you!

About the Author:
Mike Mcnaulty is a writer at lecamera4u and writes mainly in the areas of science and the arts.


Go to full article: Astrophotography: Telescope Photography Tips

What are your thoughts on this article? Join the discussion on Facebook

PictureCorrect subscribers can also learn more today with our #1 bestseller: The Photography Tutorial eBook

The post Astrophotography: Telescope Photography Tips appeared first on PictureCorrect.


from PictureCorrect https://ift.tt/2GQ5VBV
via IFTTT
tiistai 18. helmikuuta 2020

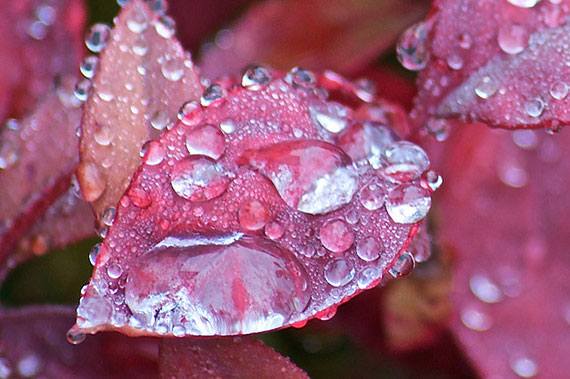
*** by popov_andrey (500px.com/popov_andrey)


via 500px https://ift.tt/2SZkWbM

PictureCorrect.com: Macro Photography Equipment Guide and Tips

There are a number of ways to get into macro photography ranging from inexpensive to outrageously expensive. Tough decisions to make, especially for someone who doesn’t make their living from photography.

tips macro photo equipment

Photo by Road Fun; ISO 400, f/5.6, 1/50-second exposure.

If you decide you want to explore macro photography you have a number of options. I have listed these options starting with what I would consider to be the best equipment for the job. This doesn’t mean that buying a dedicated macro lens will always be better than extension rings but in general you will get the best results by going this way.

Important Items to Consider:

  • dedicated macro lenses
  • extension tubes or bellows units
  • reversing rings
  • close up lenses and
  • macro zoom lenses

Dedicated Macro Lenses

Dedicated macro lenses are the ultimate way to go if you’re serious at all about doing this type of work. It doesn’t have to be expensive; I bought a wonderful 50mm Sigma Macro lens used for all of $120 (new about $270) and it’s tack sharp and produces amazing images. My main macro lens is a Sigma 150mm Macro, which cost a whopping $700—the best money I have ever spent. This gives you an idea about the price range available and the sky’s the limit with some highly specialized Nikon macro lenses in the $2,000 range. Why the difference in focal lengths? I’ll get to that soon in another article that I’m working on! If you’re serious about macro photography, buying a lens specifically designed for the purpose is the best way to go. The lens designs are optimized for close focusing and the lenses are also generally flat field (focus in a flat plane) producing sharper corners on flat objects such as pieces of wood or slabs of rock. Flat field may be a term that many have not heard of, and I’ll elaborate later on this as well.

Extension Tubes or Bellows Units

Extension tubes or bellows units are pieces of equipment that put space between the camera body and the lens thus allowing the lens to focus closer. They can work well with certain lenses. For instance, if you have a 50mm prime lens this might be a good option to get into macro work at an affordable cost. Extension tubes often come in sets of three of different lengths (high quality tubes tend to be sold individually) that can be used singly or combined to get the close focusing distance required.

macro tips photography equipment

Photo by Susanne Nilsson; ISO 100, f/5.0, 1/400-second exposure.

Bellows units work on the same principle but are expandable like a “bellows” allowing a great deal of flexibility. There real downside is the expense, and they’re bulky and heavy as well. I expect most people use bellows units for studio work only, as they aren’t terribly practical in the field. One area where extension tubes really shine is for making long focal length lenses like a 300mm focus closer—great for photographing skittish dragonflies and other critters.

Close up Lenses

Close up lenses are clear “filters” that screw onto the front of your lens allowing the lens to focus closer. Quality varies from mediocre to quite acceptable depending on the quality of the filters. This is likely the least expensive way to start shooting macro but does have its drawbacks. A big factor that has to be looked at is the quality of the camera lens you will be using. Inexpensive zoom lenses will likely produce less than stellar results while high quality prime lenses can produce excellent results but none of these will produce tack sharp results like the dedicated macro lenses. The biggest advantage? As these are just fancy filters they are very light, no extra tubes or additional lenses to carry.

Reversing Rings

You don’t hear much about reversing rings anymore and I expect that’s because most people are using zoom lenses that likely wouldn’t work very well. Reversing rings allow you to mount a lens “backwards” on the camera body. When used with high quality prime lenses, the results can be stunning and if you reverse a wide angle lens often you can achieve high magnifications on the order of 2X or more. For people interested in high magnification shooting, this is often the way to go, especially if you are on a budget.

equipment tips macro photography

Photo by ninfaj; ISO 200, f/10.0, 1/200-second exposure.

Macro Zoom Lenses

What about the macro zoom lens that you already own? Many of the new lenses that come as part of a kit are labeled as macro zooms and while they do focus a little closer than normal they are not true macro lenses. My experience has been that most of them are very suspect in terms of sharpness, as these lenses are not designed for this sort of application. In a pinch they will work, but to get in really close to your subject one of the above options would be best.

What are you presently using? Are you pleased with the results?

About the Author:
Kevin Oke is a professional nature and travel photographer with over 30 years experience. When not traveling he writes on his blogs, Nature Travel Photography and Kevin Oke Photography. Kevin is available to answer questions about photography on his photography forum.


Go to full article: Macro Photography Equipment Guide and Tips

What are your thoughts on this article? Join the discussion on Facebook

PictureCorrect subscribers can also learn more today with our #1 bestseller: The Photography Tutorial eBook

The post Macro Photography Equipment Guide and Tips appeared first on PictureCorrect.


from PictureCorrect https://ift.tt/2ul9bT8
via IFTTT