tiistai 7. lokakuuta 2025

PictureCorrect.com: How to Set Prices & Rates as a Professional Photographer

Pricing… you can’t work as a professional photographer for long without getting caught up in the subject of pricing your work (well, you could, perhaps, but you would never make any money). Then there’s the question of not only what prices to charge, but also how to educate your clients about your price list without them bailing out or thinking you’re trying to pressure them.

Related note: only a little while left for the Earn Money with Photography 🍂 Autumn Sale

photographer pricing

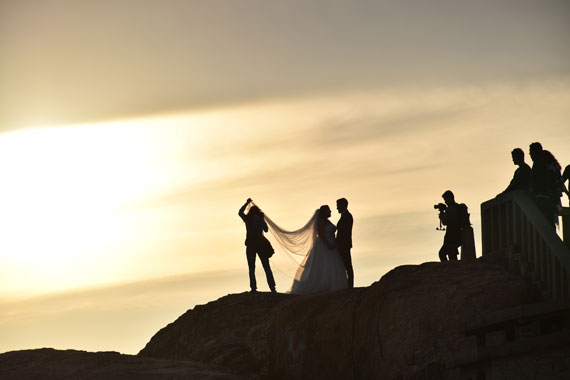
Photo by Pedro de Sousa; ISO 200, f/9.0, 1/1250s, 140mm.

In the time that I’ve been running my studio as a professional photographer, I’ve explored different methods of presenting my prices to clients and potential clients, with various degrees of success. These include the usual suspects:

  • Printed price menus
  • Combined price list and brochure
  • Website price page
  • Sending out price lists by email

But, the issue I had with these methods was that sales just didn’t seem to be where I wanted them to be. I would hand out price lists to prospects who requested them, count the accesses to my price list page, or email my list to anyone who asked for it; yet the clients disappeared as quickly as they came, like ghosts. This was a complete puzzle to me, and it didn’t take too much of that to imagine that my prices must be too high.

Looking at my price list, and considering the lack of returning customers, I really did start to think that my prices were too high, so I made the awful mistake of lowering them. Yes, you guessed it; I got just the same result. The moral is that we can get tangled up in a vicious cycle of always fiddling with the fees.

Is any of this familiar? Are you stuck in that wasteland of trying to second-guess your prospects to find out what you think they would easily pay, rather than what you believe they should pay?

You aren’t alone. Just about every professional photographer I know has encountered this painful process. But, there is a solution…

Show, Don’t Tell

The answer to this problem really requires three distinct things.

  1. Decide what your products and services are going to be (i.e. what it is that you’re actually selling).
  2. Decide on your fees, based on your production costs, level of competition and income requirements.
  3. Produce one price list that is yours, and yours alone.

That’s correct, just ONE. No one sees your complete price list unless you personally give it to them, complete with a full sales presentation and in-depth explanation of everything you offer.

I can hear you exclaiming, “that’s the dumbest thing I’ve heard!” but stick with me here for just a moment.

There is a perfectly good explanation for why the other methods don’t work effectively. When a customer looks at a website and finds a price list, they can see how much a portrait or a wedding package costs. But how are they going to compare that with what they’ve seen elsewhere, except by the price?
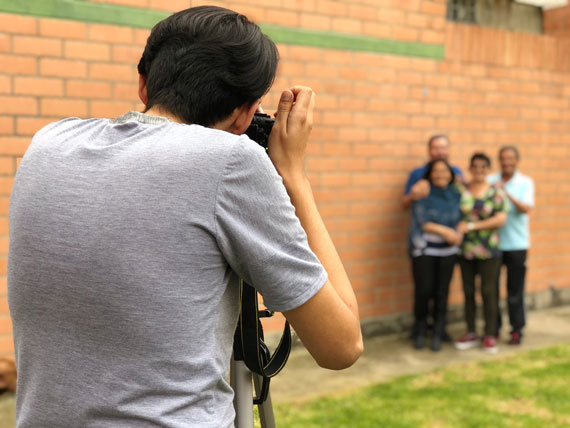
photographer at work

Photo by Gerson Crespo

All of a sudden, your prospect has been turned into a price comparison shopper! In the mind of most clients, all 8x10s are printed equal, but we know that couldn’t be more wrong. It’s what is printed on the paper that’s critical, not the print itself. But how can we clarify this to the prospect when they’re sitting at home reading a price list?

Wedding photography packages are an even better example. Displaying a price for a collection on a website or in a pamphlet they can take home is only going to make the prospect think, “I get such and such for this price, but that other photographer down the street will give me the same or more for a lower price.” You and I both know that the “other” photographer won’t put as much time into the wedding day as you will, doesn’t have the level of experience you do, won’t deliver as fast, or simply isn’t as professional. But the prospect is only looking at prices.

The same thing goes when the prospect calls you on the phone. The first question is, “how much?” If you answer that question straight away, they’re gone, and we never hear from them after that. Instead, we have to divert our chat away from the price (at least at the beginning of the call) and on to the less logical reasons for the photography they’re looking for. Once we’ve had a chance to educate them about what makes us unique, then we can gently mention pricing, after which we arrange to meet with them personally for a more detailed consultation if the price is within their expectations.

By the time the prospect meets with you for a consultation, they already understand that your prices are affordable.

The Personal Touch

As you might expect, I meet with every prospect before I allow them to book a portrait session or a wedding. This is an opportunity to give my complete sales presentation before showing them my price list. As a salesperson, it is my job to ensure I understand as much about their wants as possible before selling them anything—they won’t care what I know until they know I care about them. If making money is the only motivator for you as a professional photographer, then you’re in the wrong business.

There is one copy of my price list, and I keep it in a leather binder, printed on fine paper. To the prospect, it looks like an official copy, which it is, and nobody has ever asked to take it home.

When I’m meeting with a customer to discuss a wedding or portrait session, it can take 45 minutes to an hour before we ever get to the topic of price. The price list is there in front of them, I’m sure they know what it is, but I don’t open it until I’m ready. If they ask about the price list, and I don’t feel ready for them to see it, I simply say, “I’m so happy you brought that up, and I’ll be glad to go over it shortly. But first…” and then I ask them more questions about the wedding or portrait.

By the time we do get to the price list, we’ve talked about the wedding day, how the couple met, what they like to do together, what’s important to them and their family about the wedding, how many bridesmaids and groomsmen they have, the color scheme, etc. At that point, they understand that I really care about them, and now the topic of price is no longer the main driving force. Obviously, they will have a plan in mind, and there should be a collection that falls within that range, but they are no longer just comparing our prices to everyone else’s. They are making a comparison, but it’s a comparison of things like service, quality, attention to detail, personality, etc.

Selling: Start At The Top!

When I go through the price list, I start with the most expensive choice, even if they’ve already indicated their budget. Doing it like this, I only have to sell down and not up. Selling up is as hard as climbing a mountain—it’s usually much simpler going down than up.

Don’t make the awful mistake of confusing this method for pressure sales, because it isn’t. The reason for selling down is to help them become involved with a package that’s appropriate for them, even if it does happen to be the cheapest one you offer.

The client doesn’t understand as much about creative professional photography as we do, so they may not truly understand which considerations they ought to be most concerned about. Instead, they get stuck on the only thing they can relate to, which happens to be the price. At the end of the day, it’s our job to get them off the price and re-connect them with the real elements of what we do.
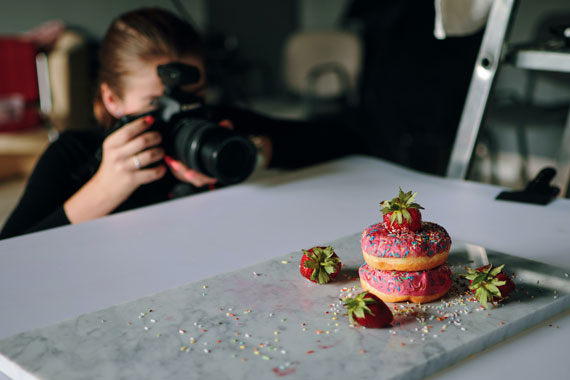
photographer rates

Photo by Szabo Viktor; ISO 100, f/1.8, 1/50s, 35mm.

Summary

I just want to make sure that I underline this point:

I have only one printed price list to show to prospective clients.

There are no prices listed on my website, no prices emailed out to those who ask for them, no detailed prices given over the telephone, and no brochure with a few photographs and my prices for them to take away.

I’m not hiding anything from my customers or trying to deceive them—that’s not the way to run a solid photography business. But, it does demonstrate to my prospects that I value them above the prices for my photography. It also helps to screen out the types of prospects I don’t want to work with—the ones to whom price is the main important factor and to whom family, relationships, memories, and emotions are not as valued.

So far, no one has complained about this procedure. My customers now treat my prices with respect, and they understand the context in which they’re given. This encourages better sales and, in my opinion, an overall better experience for the prospect.

About the Author:
Nigel Merrick is a professional photographer, blogger and business coach for other working photographers. Nigel’s blog helps professional photographers find peace in their business, love from their clients, and happiness in their personal lives by clarifying their focus on business and marketing.

For Further Training:

This in-depth eBook has helped thousands of photographers turn their passion into profit—and here it’s at its lowest price ever to start the Autumn season 🍂.

photography career

Packed with proven strategies in all types of photography and even printable contract templates you can use with clients right away, it’s your shortcut to making money with photography.

Deal ending soon: Earn Money with Photography Autumn Sale

The post How to Set Prices & Rates as a Professional Photographer first appeared on PictureCorrect.


from PictureCorrect https://ift.tt/mFj7KtE
via IFTTT
maanantai 6. lokakuuta 2025

PictureCorrect.com: The Photographer’s Palette: The Role of Color in Composition

Colors are the silent narrators of the stories that unfold through photography. They can evoke emotions, guide the viewer’s eye, and create a compelling composition. Photographers, both amateurs and professionals, should consider color as an essential tool in their creative arsenal to enhance the visual storytelling experience. In this blog post, we delve into the importance of color in photography composition and how you can use it effectively.

Also remember that an 🍂 Autumn Sale for the Cheat Sheets on all the Compositional Elements is ending soon!

photo colors

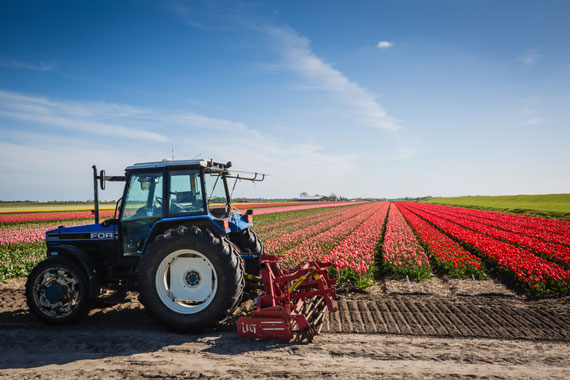
Photo captured by Richard Schneider; 35mm, f/13, 1/125s, ISO 125

The Role of Color in Photography Composition

Photography is a visual medium that relies heavily on composition, the arrangement of visual elements within a scene. A well-composed photo has a balance of elements that guide the viewer’s eye through the image, creating a visually pleasing and engaging experience.

One of these elements, often overlooked, is color. Colors can have different psychological effects on the viewer. They can stimulate emotions, highlight subjects, create depth, and even convey concepts and ideas. Understanding the role of color in photography can, therefore, elevate your compositions, taking your photos from merely “good” to “outstanding.”

Color Theory and The Color Wheel

Before diving into the practical aspects, understanding some basics of color theory can be beneficial. Central to color theory is the color wheel, which includes primary colors (red, blue, yellow), secondary colors (green, orange, purple), and tertiary colors – the result of mixing a primary and a secondary color.

Colors opposite each other on the color wheel are complementary colors, and when used together, they create a vibrant contrast. Analogous colors, those close together on the wheel, can establish a sense of harmony and cohesion.

color wheel

Photo captured by Irham Setyaki

Using Color in Photography Composition

  1. Complementary Colors: Complementary colors can make your subject pop, making the viewer’s eye immediately drawn to it. The stark contrast created by these color pairings can add a dramatic effect to your photographs.
  2. Analogous Colors: Using analogous colors can create a sense of harmony and consistency. These colors work well together and create a calming, peaceful effect. They are excellent for capturing serene landscapes, quiet street scenes, or intimate portraits.
  3. Monochrome: A monochrome color palette doesn’t mean just black and white. It involves using different shades, tints, and tones of a single color. This approach can produce a striking, impactful image by playing with light and shadows.
  4. Color and Mood: Colors can evoke a specific mood. Warm colors (red, orange, yellow) typically stir up feelings of warmth and comfort, while cool colors (blue, green, purple) elicit feelings of calm and relaxation. Use color to enhance the atmosphere or emotion you want to convey in your photograph.
  5. Color as a Leading Line: Color can be used as a leading line to guide the viewer’s eye towards your subject or a specific area in your image. Bright, saturated colors tend to draw attention, so use them strategically.
  6. Color for Depth and Dimension: You can use color to add depth and dimension to your photos. Warm colors appear closer to the viewer, while cool colors seem to recede into the background.
color composition

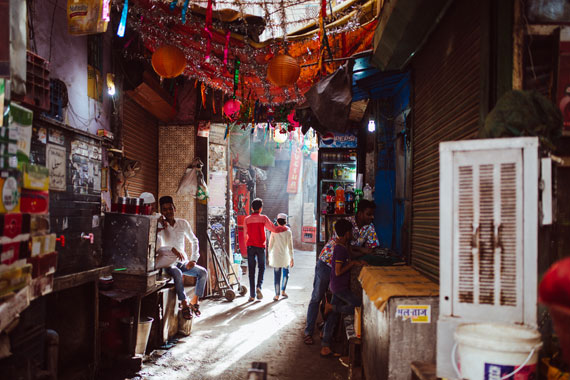
Photo captured by Amit Gaur; 35mm, f/1.8, 1/60s, ISO 100

Understanding Color Balance and Post-Processing

In digital photography, understanding color balance is crucial. Cameras interpret colors differently than the human eye, so adjusting the color balance, usually through White Balance settings, can significantly influence the overall mood of your photograph.

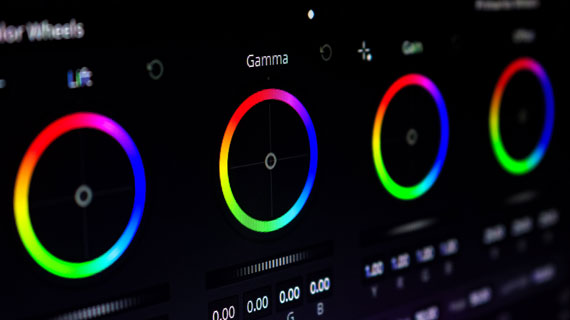
In post-processing, tools like Photoshop or Lightroom can help correct color balance, adjust saturation and vibrancy, or apply color grading to further emphasize the mood or narrative you want to express.

Final Thoughts

In the world of photography composition, color is a powerful tool waiting to be fully exploited. Mastering the use of color takes practice and experience, but once you grasp its potential, your photos will never be the same. So, the next time you’re framing a shot, consider not just the subjects and shapes, but the colors and the story they can tell. After all, every hue in your palette is another word in your photographic vocabulary.

For Further Training on Composition:

Do you ever have trouble remembering all the elements of composition? These popular Composition Cheat Sheets have you covered. With clear, concise information on all the essential elements of composition, you’ll never be unprepared again. They are currently 81% off today for an 🍂 Autumn Sale if you want to check them out.

composition cheat sheets

Composition Cheat Sheets (see all the elements covered)

The perfect companion for any photographer. Print one out whenever you need it. These cheat sheets consolidate crucial composition-related information, allowing you to concentrate on what truly matters – composing striking photographs.

Autumn sale ending soon: The Composition Cheat Sheets at 81% Off

The post The Photographer’s Palette: The Role of Color in Composition first appeared on PictureCorrect.


from PictureCorrect https://ift.tt/VEZnGg3
via IFTTT

sunnuntai 5. lokakuuta 2025

PictureCorrect.com: Aperture Adjustment in iPhone Portrait Mode Post-Capture

In photography, aperture is a crucial element that controls the amount of light entering the lens, affecting both brightness and depth of field. Although traditionally associated with DSLR and mirrorless cameras, modern smartphones like the iPhone now offer adjustable aperture settings, even after a photo has been taken. This feature is especially useful in portrait photography, where achieving the perfect balance between subject sharpness and background blur (bokeh) is key. In this post, we’ll delve into the steps and tips for adjusting the aperture in iPhone portraits post-capture.

Related reminder: only hours left for the iPhone Photography Academy 🍂 Fall Sale

aperture adjustment

Understanding Aperture in iPhone Photography:

The iPhone’s adjustable aperture feature relies on computational photography. Unlike traditional cameras, where aperture adjustment is achieved mechanically, the iPhone uses software to simulate various aperture values. This digital flexibility allows photographers to fine-tune the depth of field effect after the shot has been captured.

Steps to Adjust Aperture Post-Capture:

1. Open the Photos app:

Locate and open the Photos app on your iPhone to find the portrait photo you wish to adjust.

2. Select the desired photo:

Browse through your photos and tap on the portrait photo you want to edit.

3. Tap ‘Edit’:

In the upper right-hand corner, you will find the ‘Edit’ button. Tap on it to enter the editing mode.

4. Adjust the Depth Control:

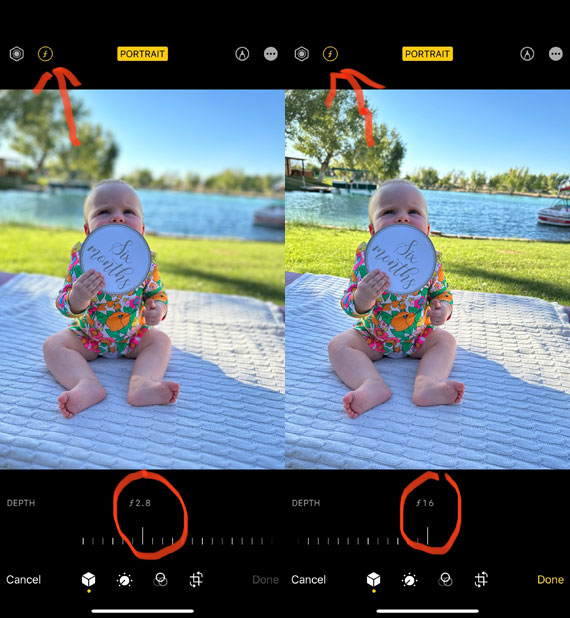
You will see a depth control slider (indicated by an ‘f’ symbol followed by a number) at the bottom of the screen.
Drag the slider left or right to adjust the aperture value. Moving it to the left (lower f-stop numbers) will create a shallower depth of field, blurring the background more. Conversely, sliding to the right (higher f-stop numbers) will increase the depth of field, making more of the scene in focus.

5. Compare Before and After:

Use the ‘Before and After’ feature by pressing and holding on the photo to see how your adjustments have changed the image.

6. Save Your Edits:

Once satisfied with the adjustment, tap ‘Done’ to save your edits.

Tips for Better Aperture Adjustment:

  • Understanding the Effect: Familiarize yourself with how aperture affects your photos. Experiment with different settings to see how they impact the depth of field and the overall look of your portraits.
    Consider the Lighting: Lighting conditions can significantly impact how the aperture adjustment will look. Ensure there’s adequate lighting to get the desired effect.
    Utilize Third-Party Apps: Explore third-party apps like Focos or Halide that provide more advanced depth and aperture control, allowing for even more creative flexibility in your portrait photography.

Here’s a breakdown of how it operates:

Depth Mapping:

When you take a photo in Portrait mode, the iPhone’s dual or multi-lens camera system captures the scene from slightly different angles. This data is used to create a depth map of the scene, understanding which objects are closer and which are farther away.

Computational Photography:

The depth information is then utilized by the software to apply a depth effect to the image. The term computational photography refers to the use of software algorithms to enhance or extend the capabilities of digital photography.

Simulated Aperture Adjustment:

  • When you adjust the aperture post-capture, what you’re essentially doing is instructing the software how much blur to apply to the different areas of the image based on the depth map.
  • A lower f-stop number (e.g., f/1.4) will result in more blur, simulating a shallower depth of field, while a higher f-stop number (e.g., f/16) will result in less blur, simulating a deeper depth of field.
  • This is a simulation of what adjusting the aperture on a traditional camera lens would do. However, unlike a traditional camera, the iPhone is using software algorithms to achieve this effect, not a physical change in the lens aperture.

Real-Time Preview and Adjustment:

The iPhone allows you to see these changes in real-time as you slide the depth control slider, making it easy to find the exact look you want.
Saving the Adjustment:

Once you’ve adjusted the aperture to your liking, you can save the image, and the software renders the final image with the chosen depth of field effect.

Adjusting the aperture post-capture on your iPhone is a powerful tool to enhance your portrait photographs. With a bit of practice and experimentation, you can master this feature and significantly up your photography game.

For Further Training:

The team over at iPhone Photography School is running a Fall Sale on their brand-new All-Access Pass — and for anyone who’s serious about improving their photography, this is worth a look.

ips all access

This is one of the most comprehensive photography education bundles available anywhere, and this Fall Sale is almost over.

Fall sale ending soon: IPS All-Access Pass at 95% Off

The post Aperture Adjustment in iPhone Portrait Mode Post-Capture first appeared on PictureCorrect.


from PictureCorrect https://ift.tt/Hn8peJu
via IFTTT

lauantai 4. lokakuuta 2025

PictureCorrect.com: Photography Tips for Water Reflections, Abstracts, Splashes, Puddles, and More

If you believe that waves, waterscapes, and waterfalls pretty well use up all the opportunities that water provides for picture-taking, think again. Here are seven more photography tips with water—remedies for the photo doldrums!

Related reminder: only hours left to Pre-Order the New Luminar Neo Ecosystem

photos of water splashing puddles refections

Photo by Tomasz Baranowski; ISO 80, f/3.2, 1/400-second exposure.

1. Reflections

For a mirror reflection on water, the surface must be still and can’t have sunlight shining directly on it. When the light hits just above the shoreline (early morning or evening) leaving the water in shadow, or where something casts its shadow across the water, you’ll find such reflections.

2. Abstracts

Intriguing opportunities for abstract reflections occur when the water is gently swelling or rippling. Watch the water’s surface carefully for a while and you’ll begin to see the possibilities. Remember to vary your pictures by making several exposures at different shutter speeds. The unpredictability of this type of picture-making will provide unexpected surprises and new directions for future shootings.

3. Spray

Activities carried out with water present opportunities for picture-making. (Just make sure your camera is well protected and doesn’t get wet!) Look for opportunities to capture spray while watering a garden, sprinkling a lawn, or washing a vehicle.

4. Splash

Splashes make for great photo opportunities. Try dropping things into water or pouring water on a surface. Or, photograph waves as they crash onto the beach.

5. Bubbles

What about dishwashing bubbles and bubbles from children’s bubble-blowing toys? These yield interfering light effects with their crazy colors and patterns.

6. Foam

The froth that swirls and creeps up the beach after a wave has broken is quite photogenic.

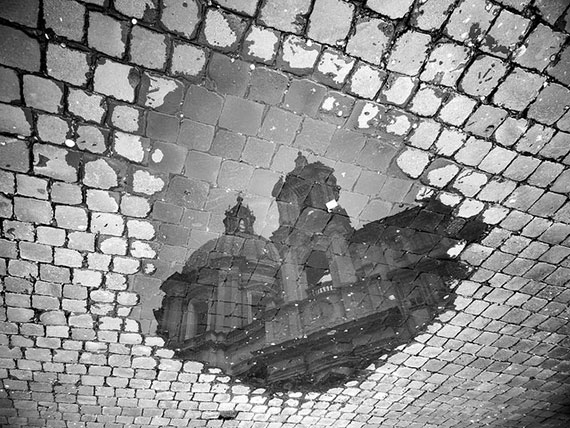
7. Puddles

Puddles are just about everywhere after a period of rain—in a wide variety of sizes and shapes. During rainfall they present ring-patterns. Afterward, they display upside down reflections during both daylight and after dark if there are lights nearby.

Self-Assignments for Above Photography Tips

Choose the projects that interest you most. Follow the photography tips conscientiously. Re-shoot when you aren’t satisfied. It’ll take all your patience and passion. Your skills and eye will improve with the practice. Shoot especially in early and late light. Use a tripod as much as possible. Edit your results relentlessly. Pin small samples on the wall for a few days to study before making final prints for wall art.

water photography tips

Photo by Arild Storaas; ISO 140, f/5.6, 1/500-second exposure.

Reflections: Go to a pond or lake in either early morning or early evening when the water is in shadow. Locate an interesting reflection and line up a shot with just a minimum of shoreline and a maximum of reflection. Then take a shot of equal parts shore and reflection using a graduated neutral density filter to balance the lighting.

Abstracts: Find a stream or creek with running, swirling water, etc., and study the colors and tones being reflected in the running water from onshore and overhead things. Try to include something just in or on the water that you can clearly focus on as a center of interest. When you spot such an interesting abstract, shoot it, first with a faster shutter speed, and then with a much slower speed.

Spray: The next time you get out the lawn sprinkler, look for an angle that puts sparkle in the water and provides a dark background to shoot toward. Use both high and low shutter speeds, and compare the results.

Splash: Make a close-up of water as it’s poured into a glass filled with ice cubes.

Bubbles: Take a shot of some dish soap bubbles against a sheet of black paper while shining a beam of light at the bubbles.

Foam: Look for a depression on the beach where the foam from spent waves swirls, and do a shot with the swirl pattern in the foreground, using a slow shutter speed.

Puddles: Take a picture during the rain trying for an interesting pattern of raindrop circles. Make a nighttime shot of a puddle having either lit-up signs or office buildings nearby which are reflected in the puddle.

tips for water photography

Photo by Enid Martindale; ISO 200, f/13.0, 1/200-second exposure.

In the next article of this set we’ll cover still more photography tips about water’s other warm season photo ops for overcoming the photo doldrums: condensation, hail, mist and fog.

About the Author:
John Maxymuik from AmbienceImages authored this article which is 1 of a set of 6 on Photography Tips for the Photo Doldrums providing tips to break the grip of the photo doldrums using the “ideal photo subject”.

For Help with Photo Editing:

This fall marks one of the most exciting leaps forward in photo editing. With the 2025 Fall Upgrade, Luminar Neo expands across every major platform — now available on iOS, Android, and ChromeOS — and lays the foundation for the Luminar Ecosystem (pre-order offer ending tonight).

Skylum is delivering on a vision many photographers have long dreamed of: freedom to create anywhere, share everywhere, and let inspiration flow without friction. Try the coupon code picturecorrect20 for an additional 20% off.

Final day: Luminar Ecosystem Pre-order Sale

The post Photography Tips for Water Reflections, Abstracts, Splashes, Puddles, and More first appeared on PictureCorrect.


from PictureCorrect https://ift.tt/a5TNc2M
via IFTTT

perjantai 3. lokakuuta 2025

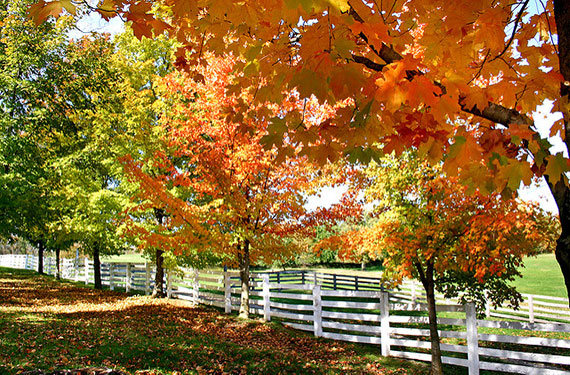
PictureCorrect.com: Fall Foliage: Tips For Taking Great Fall Photos

Here are some tips for creating great fall images:

Related note: 🍂 Autumn sale going on now for the Fundamental Camera Cheat Sheets

1. Use Indirect Light

Try to avoid bright sunny days, which tend to increase the contrast and brightness of the colors. Instead, go for partial or full shade. Shooting on overcast or rainy days can emphasize the earth tones and the depth of color of fall trees and leaves. Raindrops on fresh fallen leaves deepen the colors and create great patterns of light.

best fall photo tips

Photo by Yasunari(康就) Nakamura(中村); ISO 200, f/2.4, 1/40-second exposure.

2. See Close and Far

While you may be spellbound by a mountain covered in colored leaves, your camera may not capture the full detail. Try to get some detail of individual leaves or trees in the foreground.

3. Compose for Impact

Foliage is usually an emphasis on color, but you can also capture shapes, lines, and patterns through close-ups of leaves and other items.

To keep the image dynamic, consider the rule of thirds, where your object of interest is not in the center, but placed at an intersection of imaginary vertical and horizontal lines which split the viewfinder into thirds in both directions.

4. Control the Focus

A wide open f-stop (low number, e.g. f/2) will sharpen the item in focus but will blur much of the background. This is good for close-up shots of leaves and people. Point-and-shoot camera users can choose the “portrait” setting to achieve this effect. A small f-stop (large number, e.g. f/11) will put more of the background in focus, but will also lower the shutter speed and be more susceptible to blur from camera shake or object movement. Often the “landscape” setting on a point-and-shoot will set these preferences.

5. Balance the Brightness

If you have people in your image, you may need a touch of fill flash to lessen the “raccoon eyes” and give them a bit of brightness compared to the background. Try to balance the brightness of their faces and the background foliage so that you don’t have one underexposed and the other too bright. If you place your subjects just at the edge of a wooded area, their faces will be lit more than the trees behind them, creating a focal point of interest.

autumn photo tips

Photo by Chris Murphy; ISO 100, f/7.1, 1/125-second exposure.

6. Know the White Balance

If you can’t set a custom white balance, you may want to try the “shade” setting. Often cameras will get confused with all of that color, and you may end up with skin tones that are strange.

7. Stabilize the Camera

If your camera settings result in a shutter speed less than 1/100 second, you may want to stabilize your camera. This can be as simple as setting it on a rigid surface, such as a rock or fence post, or bring a monopod or tripod. Monopods make great hiking poles! And don’t hold your point-and-shoot out at arm’s length and expect to get a crisp shot.

8. Go for High Quality

Normally I recommend higher ISO (sensitivity) for shady or darker scenes, but in this case I recommend to keep the ISO low to capture all of the detail of the colors and leaves. Higher ISO often brings with it noise, and you want to limit that. Try for ISO 100–200 if you can.

9. Don’t Forget the Fruit

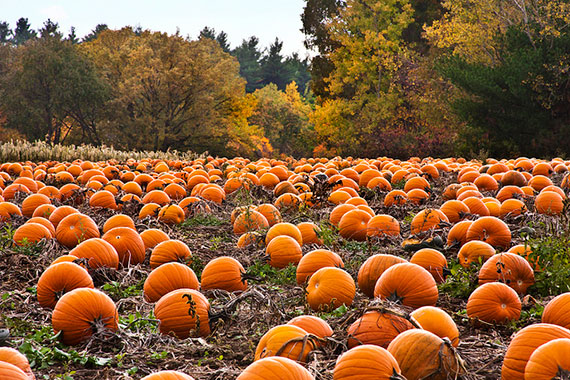
This is a great time to get some shots of fall fruit stands. Baskets of apples, squash, and grapes are great studies. So are pumpkins, haystacks, and corn. Take some time to appreciate the color and fall bounty. Mums and other fall flowers are in full bloom, as well. These images make great icons of the season.

fall or autumn photography

Photo by liz west; ISO 640, f/18.0, 1/80-second exposure.

10. Finish Creatively

Even though there’s lots of color, try finishing some photos in black and white and/or sepia to emphasize lines and shape. Play around with brightness, contrast, and saturation to provide more depth and interest. Consider printing and framing some images or making up some note cards to give as gifts.

To summarize, you’ll want high quality, stable shots, good lighting and composition, creative framing, and good exposure control. Use your eyes and creative talents, and capture some great fall images!

About the Author:
John Huegel is a photographer in the Erie, Pennsylvania area who specializes in Seniors, Dance Studio, Families and other groups. He is active in many charitable and volunteer activities in the Erie area.

For Help with Tricky Lighting & Camera Settings:

Have you ever wanted to photograph an amazing moment but missed the shot because you didn’t know the right camera settings to use? That’s where these fundamental Camera Cheat Sheets come in. They are currently 75% off for an Autumn sale if you want to check them out.

fundamental photography sheets

New: Fundamental Photography Cheat Sheets

Whether you’re a seasoned professional or just starting out, photography cheat sheets can be a valuable resource for improving your skills and taking your photography to the next level. The perfect companion for any photographer. Print one out whenever you need it.

Autumn sale ending soon: The Camera Cheat Sheets at 75% Off

The post Fall Foliage: Tips For Taking Great Fall Photos first appeared on PictureCorrect.


from PictureCorrect https://ift.tt/KTW8czn
via IFTTT

torstai 2. lokakuuta 2025

PictureCorrect.com: The Square Sensor Era: Apple’s 18MP Selfie Camera Explained

For years, the front-facing camera on smartphones has been more of a convenience tool than a serious creative instrument. It was something casual users relied on for quick selfies or video calls, but most photographers didn’t give it much thought. Apple’s latest update, though, is worth paying attention to. The new iPhone selfie camera packs in features that blur the line between “secondary” and “primary” cameras, making it a tool you might actually want to use intentionally.

A Bigger, Smarter Sensor

The first big change is the move to a square sensor. That may not sound revolutionary, but it’s a clever design choice. By capturing extra information around the edges, the camera can reframe shots automatically without forcing you to rotate the phone. For photographers, this means more flexibility in aspect ratio and composition — whether you prefer square, portrait, or landscape, you’ve got room to crop and adjust after the fact without sacrificing as much detail.

On top of that, resolution has jumped to 18 megapixels. That’s a meaningful leap from earlier iPhone front cameras, giving you sharper detail and more cropping flexibility. Combined with Apple’s latest computational imaging engine, it means selfies and front-camera video won’t feel like the weak link in your workflow.

Related reminder: only a few days left for the iPhone Photography Academy 🍂 Fall Sale

group selfie

Autofocus and Low-Light Gains

One of the under-the-radar but important upgrades is autofocus with Focus Pixels. Past selfie cams were stuck at a fixed focus distance, which worked fine if your arm was the tripod but fell apart when you tried anything more creative. Now you get real subject tracking and sharper results, whether you’re shooting a close-up self-portrait or including more of the environment.

The lens opens to ƒ/1.9, giving the camera better low-light capability. Combined with Apple’s “Photonic Engine” processing, you can expect cleaner shots in dim interiors or during golden hour when light levels drop. For photographers used to working with available light, this opens up a lot more possibilities.

Center Stage: Framing Without Effort

Perhaps the most striking addition is Center Stage technology. The camera can intelligently follow and reframe you (or a group) as you move within the frame. While originally designed for video calls, it has clear creative applications. Solo content creators, vloggers, and photographers experimenting with self-portraits now have a framing assistant that keeps them in view without constant adjustments.

Video and Dual Capture Potential

Stabilization has been significantly improved as well, making handheld front-camera video smoother than before. The option to record with both the front and rear cameras simultaneously — Apple calls this Dual Capture — is another intriguing addition. Imagine filming a live event where you can show both your own reaction and the scene in front of you, seamlessly in sync. It’s a storytelling tool that goes beyond the typical selfie.

Why It Matters to Photographers

No one is suggesting the iPhone’s selfie cam is going to replace your mirrorless kit. But the upgrade signals a shift in how Apple envisions photography: not just about capturing what’s in front of you, but also the photographer’s own presence in the story. For documentary shooters, travel photographers, or anyone building narratives around both subject and storyteller, this front camera is more than a gimmick — it’s another creative tool.

And perhaps most importantly, it’s consistent across all iPhone 17 models. You don’t need to buy the “Pro” tier just to unlock these features. Whether you’re casually shooting or experimenting with creative self-portraits, the new selfie camera is simply better, and that’s worth celebrating.

For Further Training:

The team over at iPhone Photography School is running a Fall Sale on their brand-new All-Access Pass — and for anyone who’s serious about improving their photography, this is worth a look.

ips all access

This is one of the most comprehensive photography education bundles available anywhere, and this Fall Sale is almost over.

Fall sale ending soon: IPS All-Access Pass at 95% Off

The post The Square Sensor Era: Apple’s 18MP Selfie Camera Explained first appeared on PictureCorrect.


from PictureCorrect https://ift.tt/Hk1OExR
via IFTTT

keskiviikko 1. lokakuuta 2025

PictureCorrect.com: Fall Sale: Unlock Every iPhone Photography School Course

Every once in a while, a deal comes along that’s simply too good not to share. Today is one of those days.

The team over at iPhone Photography School is running a Fall Sale on their brand-new All-Access Pass — and for anyone who’s serious about improving their photography, this is worth a look.

ips all access

What You Get with the All-Access Pass

This pass gives you lifetime access to all 13 of their world-class courses — that’s over 81 hours of lessons, dozens of bonuses, and step-by-step training designed to make you a better photographer, no matter your starting point.

Here’s just a sample of what’s included:

  • 📱 iPhone Photo Academy & iPhone Editing Academy
  • 🎬 iPhone Video Academy & Video Editing Academy
  • 🌄 iPhone Landscape Mastery
  • 🏙 Urban iPhone Photography
  • 🍴 iPhone Food Photography
  • 🚁 Drone Mastery
  • 📷 Digital Camera Mastery
  • …plus Lightroom Editing Mastery, Instagram Academy, and more

Along with:

  • 172 photo & video projects to practice with
  • Preset collections, cheat sheets, and editing resources
  • Private community access for feedback and support
  • A full 30-day money-back guarantee

👉 See everything that’s included here: Check out the All-Access Pass →

Why It’s Worth Acting Now

  • Massive savings — you’ll save up to 92% off the regular price
  • One-time payment — no subscriptions or hidden fees
  • Lifetime access — revisit lessons anytime you want
  • Today only — once the Fall Sale ends, the price goes back up

Even if you only take a few of the courses (say, editing, food photography, or landscapes), you’ll already be getting more than your money’s worth.

Final Takeaway

This is one of the most comprehensive photography education bundles available anywhere, and this Fall Sale makes it an absolute steal.

If you want to take your photography further — whether with your iPhone, DSLR, drone, or even video — this is the opportunity to do it.

Fall sale ending soon: IPS All-Access Pass at 95% Off

The post Fall Sale: Unlock Every iPhone Photography School Course first appeared on PictureCorrect.


from PictureCorrect https://ift.tt/e6DqHmI
via IFTTT