keskiviikko 16. heinäkuuta 2025

PictureCorrect.com: Sony RX1R III: A New Chapter in Full-Frame Compact Cameras

Quick reminder: only a little while left for the Camera Lighting Cheat Sheets Summer Sale

Sony has quietly re‑entered the premium compact arena with its third-generation RX1R, unveiled July 15, 2025. The RX1R III brings flagship-level hardware into a genuine pocket-sized body—no lens swapping, just a single fixed 35 mm lens, full-frame imaging, and high-end processing.
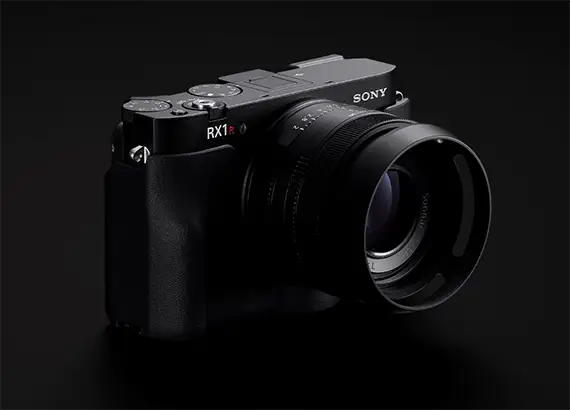
sony rx1r

What’s Under the Hood

61 MP Full-Frame Sensor

At its core lies the Exmor R BSI CMOS sensor—now rocking 61 megapixels (up from 42.4 MP in the RX1R II), delivering impressive resolution, low noise, and around 15 stops of dynamic range. There’s also an anti-reflection coating and no optical low-pass filter, enhancing sharpness and clarity.

Advanced Imaging & Autofocus

The camera employs Sony’s BIONZ XR engine and a dedicated AI-processing unit, similar to what’s used in the a7R V. This enables real-time recognition autofocus that tracks human bodies, heads, eyes, animals, cars, planes, and more. It supports up to 693 phase-detection points, covering about 78% of the frame.

The Lens & Versatility

True to the RX1 lineage, it features the high-quality Zeiss Sonnar T* 35 mm f/2 lens—untouched optically since the RX1 debuted in 2012. To add flexibility, Sony includes “Step Crop Shooting,” allowing in-camera cropping to simulate 50 mm (~29 MP) or 70 mm (~15 MP) perspectives. A macro ring bonus lets you focus down to about 20 cm, achieving 0.26× magnification.

Video & Creative Enhancements

  • 4K/30 fps and 1080p/120 fps video—no 8K due to heat limitations.
  • Support for S‑Cinetone and 12 customizable Creative Looks (e.g. nostalgic FL2, vibrant FL3), usable for both stills and video.

Design & Usability

  • Built tough yet compact: Magnesium alloy construction, weighs ~498 g including battery—slightly lighter than its predecessor.
  • Viewfinder & Screen: 2.36M‑dot OLED EVF, 0.7× magnification; rear touchscreen is fixed (no tilt)—a design choice that keeps things slim but may limit low-angle framing.
  • Battery & Storage: Now uses the larger NP‑FW50 battery (≈300 shots CIPA-rated) and supports SD UHS-II; USB‑C charging included.
  • Shutter & Flash Sync: Retains leaf shutter, allowing flash sync up to much higher speeds (1/2,000+ sec).

Strengths & Trade-Offs

Pros

  • Ultra-high-resolution full-frame stills in a pocket size
  • Zeiss f/2 optic ensuring excellent image quality
  • Advanced autofocus with rich subject-tracking AI
  • Step crop and macro add creative flexibility
  • 4K video and cinematic look options

Cons

  • Premium price tag (~US $5,099)—notably higher than the RX1R II’s $3,300.
  • Fixed screen limits compositional versatility
  • Single SD slot, fixed EVF, and modest burst speed (5 fps).
  • No 8K, shorter battery life compared to larger mirrorless bodies

It stands in the same league as the Fujifilm GFX100RF and Leica Q3 in terms of price and image quality, but its compact nature and prime lens put it in a unique niche — basically a high-end travel/street camera that won’t weigh you down.

Who Is This For?

The RX1R III is ideal for photographers who:

  • Crave uncompromising image quality in a true compact form
  • Love 35 mm but may also switch to 50/70 mm via cropping
  • Want sophisticated autofocus without bulky mirrorless kits
  • Don’t mind the price for serious build and imaging performance
  • Only occasionally need video features without 8K demands

If you’re after ultimate sharpness and creative control in a kamera that fits in your jacket pocket, the RX1R III could be the answer—just prepare to spend accordingly.

Final Thoughts

Sony’s RX1R III revives a beloved line with a modern twist—combining 61 MP resolution, AI‑powered AF, high-quality fixed lens, and video capabilities into a compact body. Compared to its 2015 predecessor, it’s a major spec upgrade, though some ergonomic compromises (fixed screen, EVF) are evident. Whether the RX1R III can justify its premium positioning will depend on how much value you place on pocket portability and pixel-packed performance.

Learn more about Photography Lighting Today:

Lighting is arguably the most important aspect of photography; but do you know how to use it? These new Photography Lighting Cheat Sheets are designed to help. With critical information on ALL the types of natural light and artificial light you can use. In the spirit of summer, they are currently 80% off today for a Summer Sunlight sale.
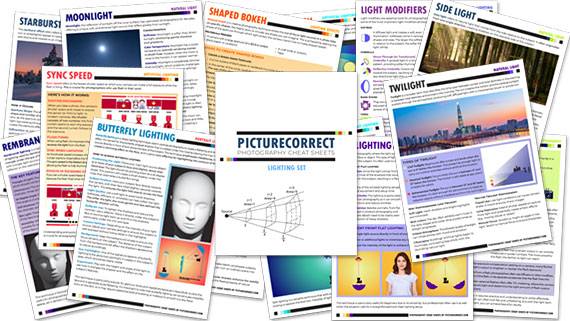
lighting cheat sheets

New! Cheat Sheets for Photography Lighting (see how they work)

Whether you’re a seasoned professional or just starting out, photography cheat sheets can be a valuable resource for improving your skills and taking your photography to the next level. By having all the key information you need in one place, you can focus on what’s important – capturing amazing photos.

Summer sale ending soon: The Photography Lighting Cheat Sheets at 80% Off


from PictureCorrect https://ift.tt/CsriehV
via IFTTT

tiistai 15. heinäkuuta 2025

PictureCorrect.com: Understanding the Most Important Aspect of Photography

Every photograph tells a story, and lighting is the pen with which it is written. Understanding lighting is pivotal in the realm of photography, as it can dramatically alter the mood, texture, and narrative of your images. For photographers keen on mastering this crucial element, you may want to check out the 🌞 Summer Sunshine Sale on these Lighting Cheat Sheets today.

lighting cheat sheets

New! Cheat Sheets for Photography Lighting (see how they work)

Why Focus on Lighting?

Lighting is the heartbeat of photography. It can whisper softness into a portrait, cast dramatic shadows for suspense, or paint a landscape with the golden hues of sunrise. The “Photography Lighting Cheat Sheets” are designed to help photographers navigate the vast and nuanced world of lighting, providing them with the tools to harness light creatively.

Some of the Many Topics Covered:

  • Natural vs. Artificial: Dive deep into the nuances of natural lighting, understand its behavior at different times of the day, and learn how to replicate or complement it with artificial sources.
  • Mastering Shadows and Highlights: Discover how to sculpt your subject using light and shadow, creating depth and dimension in your images.
  • Techniques for Every Scenario: Whether it’s the soft glow of the golden hour or the harsh brilliance of a midday sun, the cheat sheets equip you with strategies for every lighting situation.
  • Creative Lighting Effects: Unleash your creativity by learning how to produce and manipulate various lighting effects like bokeh, starbursts, and lens flares.
  • Portrait Lighting Patterns: From the drama of Rembrandt lighting to the simplicity of broad lighting, find out how to flatter subjects with strategic lighting setups.

A Tool for Every Photographer

Whether you’re just beginning your photographic journey or you’re a seasoned professional, the “Photography Lighting Cheat Sheets” are a must-have. They serve not just as a guide but as a source of inspiration, encouraging photographers to experiment and find their unique voice through lighting.

lighting sources

Empty photo studio with lighting equipment and camera

Light Up Your Portfolio

With these cheat sheets, your approach to photography lighting will never be the same. They empower you to elevate ordinary shots to extraordinary ones, using light not just as illumination but as an artistic medium. Embrace these cheat sheets, and watch your photography transform.

Step into the Light

The Photography Lighting Cheat Sheets are your gateway to mastering one of photography’s most powerful aspects. They’re more than just guides—they’re your companions on a luminous journey through the art and science of photography. Light awaits; let it guide your path to stunning imagery.

How to Get the Lighting Set for a Discount Today:

The cheat sheets normally retail for $3.50 per sheet which would be over $149 for all the sheets in this set. But during the 🌞 Summer Sunlight Sale, they are available for only $29.

They also come with a 90-day money back guarantee. If you are not completely satisfied with your purchase, simply contact us within 90 days of your purchase and we will refund your money in full. So there’s no risk in trying them.

Deal ending soon: Photography Lighting Cheat Sheets Summer Sale


from PictureCorrect https://ift.tt/LCz3nbv
via IFTTT
maanantai 14. heinäkuuta 2025

PictureCorrect.com: Previsualization: Transforming Your Thoughts into Photos

Oh, they’re just a snapshooter!

That’s kind of the biggest slap in the face that you can give a photographer.

This article is based on concepts from The Advanced Composition Guide which is currently 78% off if you want to dig deeper for further training.

None of us want to believe that we’re snapshooters.

Truthfully, almost none of us are, because we all make decisions as we’re taking a picture—whether we realize it or not.

guide to pre-visualization in photos

Photo by Kent DuFault

The picture above may appear to be a simple snapshot—a quick and meaningless moment captured.

However, it was quite the opposite. I conceived the photo and mentally prepared before the camera was even turned on.

There is a photographic term that encompasses this mental process of strategizing and executing an image: pre-visualization.

visualizing photos in your head

Photograph by Kent DuFault

For a moment, imagine the term “pre-visualization” basically means “translation.”

With pre-visualization, you translate a three-dimensional scene, which you can see in real-life, onto a two-dimensional medium—a photograph. As you can imagine, a significant component of pre-visualization is composition.

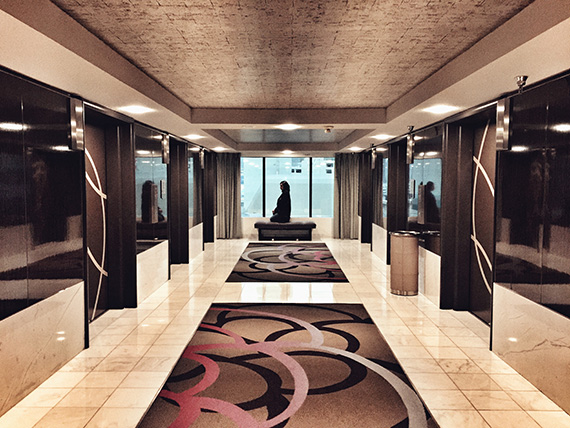
The photo above is a perfect example. It was taken in Las Vegas from a 12th-floor hotel room. It depicts a cityscape that is partially obscured by a window shade.

What you see here is what I saw in my mind before clicking the shutter. I didn’t see a window shade or a cityscape; what I saw in my mind was a semi-abstract painting depicted in a photograph.

Key Thought: When attempting pre-visualization, imagine your scene printed huge, framed and hanging on a large blank wall. What do you see?

visualize your photos

Photograph by Kent DuFault

Pre-visualization began in Hollywood with moviemaking and the art of storyboarding.

Photographer Ansel Adams is credited with bringing the idea to still photography.

Pre-visualization is the art of seeing the finished photograph in your mind before you ever pick up a camera.

It may sound easy, but it requires developed skills in art knowledge, equipment, composition, lighting, exposure and post-processing.

pre-visualization origins

Photograph by Kent DuFault

The first step toward pre-visualization is training your eye to see the world in terms of spatial relationships, rather than literal objects.

A spatial relationship, in art, is the ability to perceive the involvement of an object’s position within a given space.

In this example photo above, I saw the pre-visualized the shape of a man in a dark suit surrounded by the space of white buildings.

Idea: When I began taking photography seriously, a mentor of mine taught me this simple trick to help me develop my ability to see spatial relationships. Just cup your fingers and thumb to form a cylinder, then close one eye and hold the cylinder in front of the open eye.

pre-visualization techniques

Photo by Kent DuFault

Viewing a scene that you wish to photograph through this “lens” removes your peripheral vision and gives you something closer to a two-dimensional perspective. In fact, if you watch documentaries on filmmaking, you will often see the filmmaker using this same technique.

It forces you to see your scene in terms of spatial relationships!

pre-visualization guide for beginners

Photo by Kent DuFault

Critical Thought: Practicing spatial-relationship recognition is the first step in developing professional pre-visualization skills.

A spatial relationship is intrinsically tied to light, shadow, color, and shape.

Another fantastic training tool for developing pre-visualization, similar to the technique above, is to view your scene through squinted eyes and using your fingers to “crop” the scene in front of you.

pre visualization techniques

Photo by Kent DuFault

This activity eliminates details and divides the scene into spatial blocks of light, shadow, color and shape.

Idea: As you begin learning pre-visualization and using your eyes and hands as training tools, it’s best to stick with static subjects like landscapes. Once you’ve improved your pre-visualization to the point of no longer needing these techniques, you’re ready to take on moving scenes.

Key Thought: Moving scenes add an additional level of skill to pre-visualization. This extra skill is called anticipation.

This example photo is a perfect scene to begin pre-visualization practice:

pre-visualization photo guide for amateurs

Photo by Kent DuFault

Look at this picture using the techniques described above. You will see how it breaks down into a spatial relationship of shape, color, line and tone.

Critical Thought: Understanding your equipment is key to pre-visualization. If you don’t know how your equipment will affect the photograph, how can you pre-visualize it?

In my pre-visualization of the autumn tree photograph above, I saw an almost abstract image with blocks of color and a little to no perception of depth.

Knowing this, I selected a telephoto lens to compress the scene. That equipment further enhanced my preconceived idea for this photograph.

Critical Thought: Pre-visualization begins in the mind, advances to the camera and ends in post-production.

pre-visualization guide for beginner photographers

Photo by Kent DuFault

To take the photograph above, I physically saw an orange lawn chair that was sitting in a driveway in the late afternoon light. It was casting a shadow onto the concrete.

In my mind, I pre-visualized the scene as an abstract watercolor painting.

I physically created the picture by framing it as I saw in my mind’s eye, focusing on the shadow more than the chair.

I asked a friend to stand by the chair to cast a shadow in the upper left third of the frame. I felt this would further add a sense of mystery.

However—this is the crucial point in this illustration—this pre-visualized photograph came together in post-production.

Most of what you see in the final photo is nothing close to what was captured in the original digital file. Still, it perfectly completes what I preconceived as a painting on the wall!

pre-visualization photo manifestation

Photo by Kent DuFault

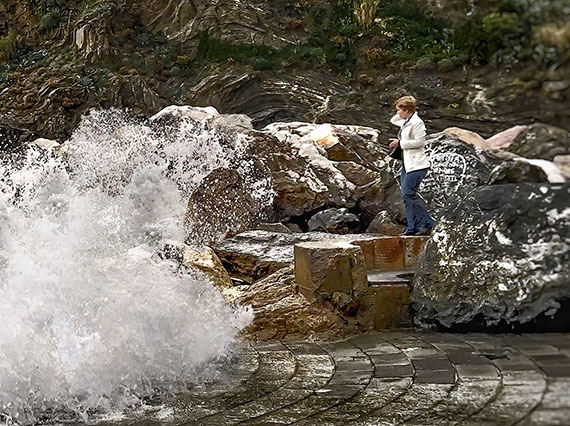
In the moments before this photograph was taken, I thought, “Oh my god! She better watch out for those waves!” This thought was the formulation of my pre-visualized picture. But more was needed!

Other core skills for pre-visualization are patience, anticipation and timing.

In the example photo, part of my pre-visualization was to capture the danger and drama of the heavy waves crashing onto the beach.

Without the woman, the pre-visualized shot fails.

This picture was born of a pre-visualized concept. However, it also required patience for the idea to materialize naturally. I needed someone or something to enter the frame and provide a sense of drama and potential danger.

It also required anticipation (having my equipment ready) once the shot began to materialize.

Many people were walking in this area. Several of them got close to where this woman was but then backed away.

When I noticed her, I could see she was going to make a point of venturing out further than anyone else.

I anticipated her action and had my equipment ready.

Finally, I timed the shot for the best spatial relationship. As you can imagine, there was a lot of movement here. The woman did not linger out there on those rocks. I had to anticipate and react when both she and the waves were at their peak spatial relationship.

Key Concept: Think of pre-visualization in this order:

  1. Idea
  2. Spatial relationships
  3. Compose the frame in your mind
  4. Imagine the image large and hanging on the wall
  5. Introduce a story element
  6. Have your equipment ready
  7. Be patient for the story to develop
  8. Anticipate the moment
  9. Capture the shot at peak action
  10. Use post-processing to bring your award-winning photograph to life!

Why Don’t You Give It a Try?

  1. Organize a photoshoot where you will spend the better part of a day out taking pictures.
  2. Do not take a picture before spending at least five minutes thinking about the picture and anticipating what it would look like hanging on your wall. Set a timer.
  3. Post-process to your pre-visualized thoughts.
  4. Print a selection of your best efforts. Tape them to a blank wall in your home. Leave them there for a week.
  5. Each day, position yourself five feet in front of each photo and look at it for at least a minute, if not longer.

What Do You Think?

  • Do your finished photographs reflect your initial pre-visualized intent?
  • Were you able to follow through on your pre-visualization from beginning to end?
  • Do you now have a basic understanding of how pre-visualization can advance your photography?

About the Author:
Kent DuFault is an author and photographer with over 35 years of experience. He’s currently the director of content at the online photography school, Photzy.

For Further Training, Deal Ending Soon:

This newly updated & expanded in-depth guide rolls years and years of practical knowledge, condensed into 239 pages packed with training, illustrations, and assignments. Advanced Composition goes far beyond knowing what composition is… (or, even knowing what the tools of composition are). Develop the SKILLS of anticipation, pre-visualization, and timing that are core to capturing great photography. It is currently 78% off which ends soon.

advanced composition

Updated: The Advanced Composition Guide at 78% Off (Learn More)

Broken into 84 key lessons, 38 assignments, & 117 self-check questions – it delves DEEP into the artistic and technical aspects of photographic composition. With this guide you will learn to SEE light, shadow, lines, curves, space, repetition, and focal points.

Deal found here: The Advanced Composition Guide at 78% Off


from PictureCorrect https://ift.tt/bkK1qrl
via IFTTT

sunnuntai 13. heinäkuuta 2025

PictureCorrect.com: Photography Situations Where a Tripod is Beneficial

Some people think that using a tripod for taking photos is time consuming and not fun at all. You add weight to your bag and you still need to set it up before you can start clicking away. But if you want to take clear photos all the time, and you’re serious about photography, this camera accessory is very helpful.

Relevant reminder: Kickstarter going on now for the new Peak Design Pro Tripod

photographer tripod

Photo captured by Sahand Hoseini

Shaky Hands

Regardless of what type of camera you’re using, a tripod can help you capture great images every time. Tripods are ideal for people who don’t have steady hands. Also, if you’re shooting a sport, car racing, or any outdoor event with lots of action, you don’t want to miss those moves because of your shaky hands.

Panning

But when you have a tripod, you can be sure to capture those movements smoothly and clearly, as you are able to follow the action with your camera without having to hold it all the time. You just have to put the camera securely on the tripod and pan to the left and right to keep pace with the action that’s going on.

Close Ups

When you need to take those close-up shots, using the tripod is also beneficial. Working close to your subject can sometimes cause blur. Your hands can be affected by the wind around you or there may be times you just can’t keep your hands steady due to fatigue or stress. If you don’t want to waste your time and spoil your shots, the best way to capture clear photos taken at close range is to put your camera on a tripod.

A great advantage of having a tripod is you can shoot images hands-free. You can use a remote release to trigger the shutter. If you don’t have a remote, you can alternatively use the camera’s self-timer. In this way, you need not touch the camera at all, avoiding any unintentional movement. Any movement you may have made when you pressed the shutter button with the timer on won’t be recorded in your shots.

Long Lenses

People using telephoto lenses will also find the tripod useful. Longer lenses put more weight on your camera, and a tripod will keep your device steady.

Wind

Windy days can also be challenging when shooting. But with a tripod, you won’t need to worry about getting blurry images. Just make sure your accessory is sturdy enough and not easily blown away. Otherwise, you can add weight on the tripod using your camera bag or by hanging some stones.

With the tripod, you can take photos in whatever position you want. Whether you’re shooting a subject at a higher or lower angle, you have every opportunity to take clear shots. You just need to adjust your tripod so you can move close to your subjects.

Consider getting a tripod; you won’t ever regret it. Keep in mind to take care of it and store it properly so it can be with you for a long time.

About the Author:
Kalyan Kumar writes for 42photo.com, New York’s legendary camera store in business for over 50 years.

New Pro Tripod Just Announced:

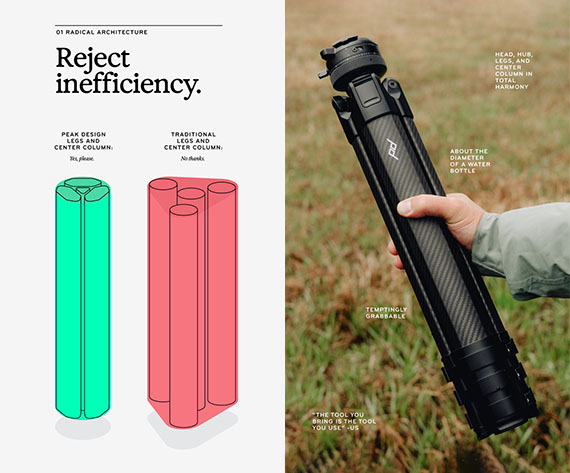
With the launch of their new Pro Tripod (now live on Kickstarter), Peak Design has doubled down on the shape-shifting innovation that started it all—this time with a professional audience in mind.

pro tripod

If you’ve ever struggled with tripods that are either too clunky or too flimsy, this new shape-shifted Pro Tripod may be exactly what your kit has been missing.

Kickstarter ending soon: Peak Design Pro Tripod


from PictureCorrect https://ift.tt/QdBSLnJ
via IFTTT

perjantai 11. heinäkuuta 2025

PictureCorrect.com: This Weekend: Complete Photo Editing Presets Bundle

If you’ve ever found yourself wanting to get a head start with your photo editing, these 1300+ presets will help you do just that. We were able to arrange a 50% off discount this weekend (effectively 92% off) for PictureCorrect readers if you want to check them out. Deal ending soon: The Complete Presets Bundle

photo editing presets

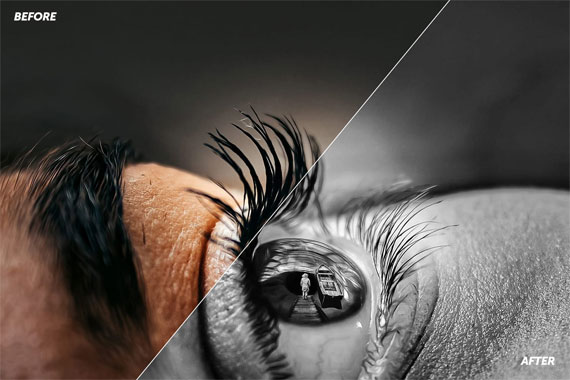
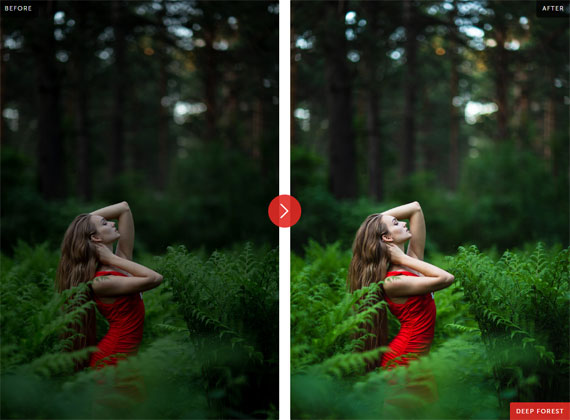
Presets to help with photo editing (see how they work)

Whether you’re just getting started with Lightroom or Adobe Camera Raw or you’re a veteran photographer, you know that using presets is a sure-fire way to speed up your editing and quickly find a style or look to add your own final touches to.

This bundle includes every single preset collections they carry in the store as well as all future updates. That means you get their Wedding Collection, Film Simulation, Essentials Collection, Seasons Collection, Desaturated Cinematic, Dramatic HDR, the West Coast Collection, and so much more. And you’ll also get access to the LRToolkit master kit.

Create gorgeous and breathtaking images with this professional post-production presets workflow. It will make your editing process easier and faster.

If you were to purchase every preset pack individually, it would set you back $549. By getting the bundle, you know you’re getting the best price possible. And you also get all future updates free, for life. This is the last presets bundle you’ll ever buy.

The presets are most commonly used in Adobe Lightroom. However every single presets is also compatible with the latest version of Adobe Camera Raw (10.3 or newer). All the included presets work great with RAW and JPG photos.

preset-before-after

Before and After Example (see more)

Note about Lightroom and Adobe Camera Raw: Adobe released an update to Lightroom, Lightroom Classic, and Adobe Camera Raw (10.3+) back in April 2018 that enables you to use the presets in ACR (v10.3+). This means you can use all these presets in Photoshop too now!

We were able to arrange a limited time discount for PictureCorrect readers if you want to check them out.

Only 1 day left: The Complete Photo Editing Presets Bundle


from PictureCorrect https://ift.tt/vCY4tZy
via IFTTT

torstai 10. heinäkuuta 2025

PictureCorrect.com: How to Use Lines in Photography Compositions

A very powerful method of improving the composition of photos is the use of lines. Properly used, lines can significantly increase the impact of images. Lines serve to affect photographic composition in two ways. First, they serve to create a mood. Second, they lead the eye through the photograph. By affecting mood, lines add emotional content to images. By leading the viewer’s eye, they keep the viewer’s attention focused on the image.

Related reminder: only a little while left to get Advanced Composition at 78% Off

line techniques in photography

Photo by Dun.can; ISO 100, f/8.0, 1/30-second exposure.

When dealing with lines, the subject can be broken into the following types:

  • Horizontal
  • Vertical
  • Diagonal
  • Jagged and irregular
Mood: Horizontal

Horizontal lines tend to indicate a sense of homeostasis (lack of change). This use in an image often projects a feeling that an image, or part of one, is somehow frozen at a point in time. Horizontal lines should be used when a photographer wants to impart a sentiment of timelessness or lack of change to an image. In addition, they can serve to provide a contrast with more dynamic parts of an image. Examples can be found in buildings, horizons, and fallen objects (e.g. trees).

Mood: Vertical

Vertical lines can project either a mood of stability or peace. When projecting a mood of stability, they often function similarly to horizontal lines. This can convey an implication of substance or permanence. Examples of vertical lines used to impart a mood of stability can be found in rock formations, power line poles, and vertical lines of buildings.

Proper use of vertical lines can also impart an impression of peace and tranquility. Examples of this use are trees in a fog shrouded forest, old fence posts on an isolated prairie, and a figure on a secluded beach in the early morning.

how to use lines in photos

Photo by Scott Meis; ISO 100, f/4.8, 1/60-second exposure.

Mood: Diagonal

Diagonal lines can convey a sense of action or make an image more dynamic. For this reason, diagonals are a very powerful tool. Their power resides in their ability to grab the attention of the viewer. The viewer’s eyes tend to travel back and forth along diagonals. Diagonal lines can be formed, not only of objects such as streets or sidewalks, but also of color. For instance, a diagonal section of color can add drama to a flower image. Examples of diagonals are plentiful: roads, streams, waves, and branches are but a few examples of objects that can be utilized in a diagonal manner.

Mood: Jagged and Irregular

Jagged and irregular lines take us one step further on the continuum of emotion and feeling. While diagonals move us into the area of the dynamic, jagged and irregular lines often impart a sense of unease, tension, or fear to the viewer of the image. Heavy use of jagged and irregular lines can cause a negative feeling in the viewer (which may be exactly what the photographer intended). Therefore, they are the tools of choice for the photographer who wants to create a feeling of disquiet or agitation in the viewer. Examples can be found in roots, a crocodile’s teeth, stark mountain peaks, and the twisted metal of an automobile wreck.

basics of lines in photography

Photo by fındık_fıstık; ISO 100, f/2.8, 1/25-second exposure.

Leading the Eye

As powerful as lines are in helping to create a mood in an image, they become even more powerful when they are also used to direct the viewer’s attention. When using lines to direct the viewer’s attention, two rules need to be followed. First, make sure that the lines always point toward the most important object in the image. This will direct the viewer’s attention directly to that object. Second, make sure that the lines never point outside of the image. Lines that point outside the image will make the viewer’s eye leave the image. This weakens the image and may result in the viewer losing interest in the image entirely.

About the Author:
Ron Bigelow (www.ronbigelow.com) has created an extensive resource of articles to help develop photography skills.

For Further Training, Deal Ending Soon:

This updated & expanded in-depth guide rolls years and years of practical knowledge, condensed into 239 pages packed with training, illustrations, and assignments. Advanced Composition goes far beyond knowing what composition is… (or, even knowing what the tools of composition are). Develop the SKILLS of anticipation, pre-visualization, and timing that are core to capturing great photography. It is currently 78% off which ends soon if you want to check it out.

advanced composition

Updated: The Advanced Composition Guide at 78% Off (Learn More)

Broken into 84 key lessons, 38 assignments, & 117 self-check questions – it delves DEEP into the artistic and technical aspects of photographic composition. With this guide you will learn to SEE light, shadow, lines, curves, space, repetition, and focal points.

Deal found here: The Advanced Composition Guide at 78% Off


from PictureCorrect https://ift.tt/kzGyTeR
via IFTTT

keskiviikko 9. heinäkuuta 2025

PictureCorrect.com: How to Create Powerful Photos Through Balance

In the physical world, it’s pretty easy to understand the concept of balance.

In the photography world, the concept of balance is a bit more muddled.

This article is based on concepts from The Advanced Composition Guide which is currently 78% off if you want to dig deeper for further training.

balance photo

Photo by Aziz Acharki

Balance within photography is an element of photographic composition. It relates to how you organize the various things you include within the frame of your picture and how they are positioned relative to each other.

There are balanced compositions and unbalanced compositions. Unbalanced arrangements can be visually exciting. However, they can also be very tricky, as you don’t want to unbalance a composition away from your subject.

Today’s Quick Tip

Here’s the first step toward understanding the composition of balance in photography:

Imagine that you place the subject of your photo on one side of a visual scale (metaphor illustrated above), and then you pile all the other elements of your photo onto the other side. A balanced image will be almost level but with a slight visual weight in favor of the subject. An unbalanced composition will tip heavily in one direction or the other.

symmetry in photography

Photo by Kent DuFault

Symmetry is one of the more natural ways to learn how to balance a picture. When an image is symmetrical, one side of the photo mirrors the other.

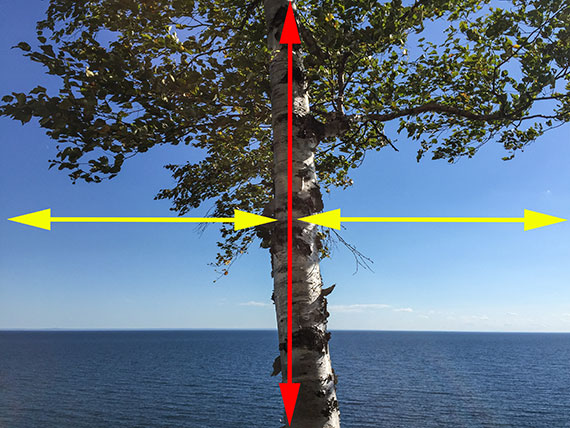
The tree photograph is an example of vertical symmetry. The left and right sides of the image mirror each other.

example of horizontal symmetry

Photo by Andre Mouton

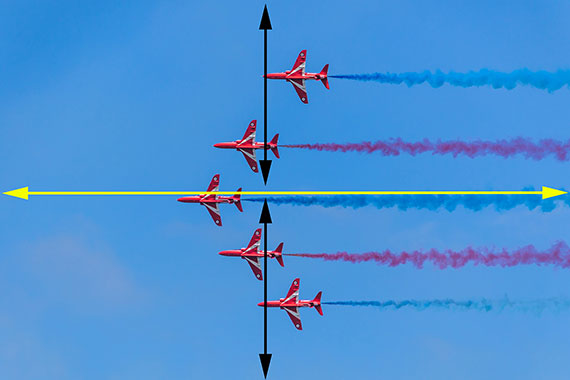
This airplane photograph is an example of horizontal symmetry. The upper half mirrors the lower half.

They balance each other out within the frame of the photo.

example of radial symmetry in photography

Photo by Kent DuFault

The second form of symmetrical balance is radial symmetry. With radial symmetry, the visually heaviest portion of the photographic composition begins at a central point and then radiates outward.

Quick Tip: Symmetry and radial symmetry are the easiest forms of balance within photography composition to master. Symmetrical balance is sometimes referred to as Formal Balance.

photo with asymmetrical balance

Photo by Kent DuFault

Asymmetrical balance is more challenging to master. There are different forms of asymmetrical balance. This type of composition occurs when opposing objects, with varying visual weight, create a pleasing path through the picture. However, the subject must always carry slightly more visual weight. The visual weight can be distributed throughout the frame by color, placement, tone, line, or juxtaposition.

photo showing informal balance

Photo by Kent DuFault

Quick Tip: With asymmetrical balance, careful placement of each object within the frame is crucial. The included objects place visual weight and interest in various portions of the picture, but never overtake the subject as the final resting spot for the eyes. Asymmetrical balance is sometimes referred to as Informal Balance.

photo using negative space in composition

Photo by Cindy Tang

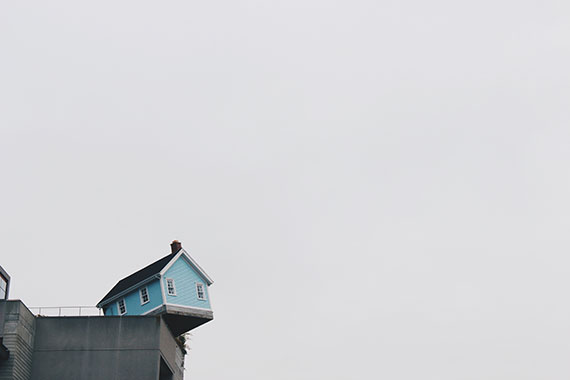
Quick Tip: Negative space can be an essential tool in establishing balance. This building’s precarious position only works because a large amount of the frame has been given to negative space. The negative space balances out the dramatic visual weight of the building.

cropping to make photo feel balanced

Photo by Kent DuFault

Quick Tip: One way to tell if your photograph might be unbalanced is if you find yourself trying all different kinds of crops to make it feel right.

example of many types of symmetry in one photo

Photo by Kent DuFault

As your skills in composition improve, balance can become second nature and involve many different elements within a frame.

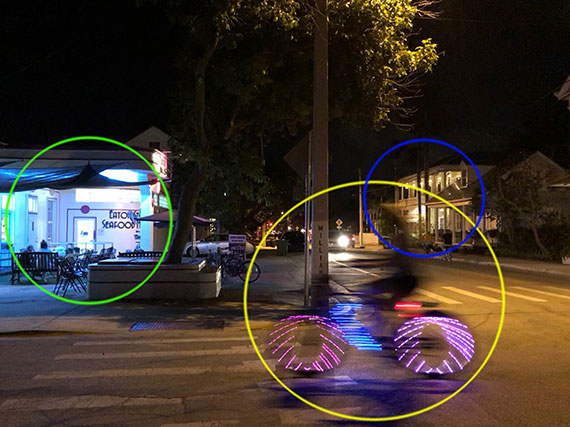
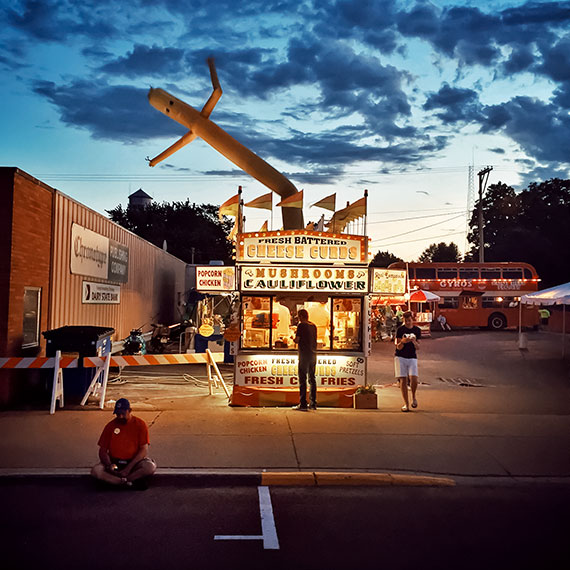
Quick Tip: You can combine different forms of balance within the same frame. The photograph of the food stand (above) combines radial symmetry with asymmetrical elements to create a complex composition.

About the Author:
Kent DuFault is an author and photographer with over 35 years of experience. He’s currently the director of content at the online photography school, Photzy.

For Further Training, Deal Ending Soon:

This newly updated & expanded in-depth guide rolls years and years of practical knowledge, condensed into 239 pages packed with training, illustrations, and assignments. Advanced Composition goes far beyond knowing what composition is… (or, even knowing what the tools of composition are). Develop the SKILLS of anticipation, pre-visualization, and timing that are core to capturing great photography. It is currently 78% off which ends soon.

advanced composition

Updated: The Advanced Composition Guide at 79% Off (Learn More)

Broken into 84 key lessons, 38 assignments, & 117 self-check questions – it delves DEEP into the artistic and technical aspects of photographic composition. With this guide you will learn to SEE light, shadow, lines, curves, space, repetition, and focal points.

Deal found here: The Advanced Composition Guide at 78% Off


from PictureCorrect https://ift.tt/kWLiMHx
via IFTTT