tiistai 11. maaliskuuta 2025

PictureCorrect.com: New! Peak Design Roller Pro Camera Luggage

When it comes to travel gear, Peak Design has long been at the forefront of innovative and functional designs. Their latest release, the Roller Pro Carry-On, is a game-changer for photographers, creatives, and frequent travelers alike. Designed to eliminate the common frustrations of standard roller bags, the Roller Pro is a sleek, durable, and highly efficient piece of luggage that challenges the status quo of carry-on travel.

They just launched it on Kickstarter, the response has been huge, and there are not many left if you want to reserve one.
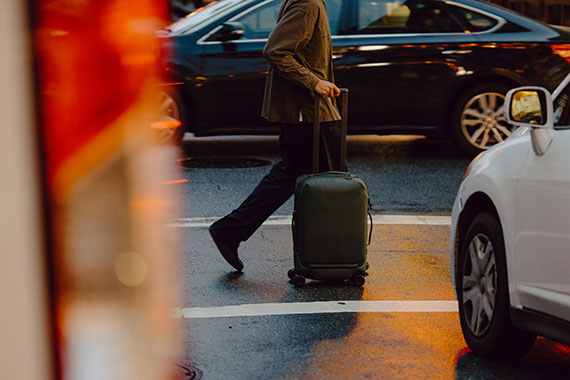
roller pro bag

Innovation Meets Functionality

At first glance, the Roller Pro Carry-On may seem like just another travel suitcase, but Peak Design has reimagined nearly every aspect of its construction. Unlike traditional rollers that rely on bulky aluminum telescoping tubes that take up valuable packing space, the SlimDrive™ handle system utilizes carbon fiber technology. This means a significantly stiffer, more compact handle, allowing for more storage capacity without compromising durability.

Additionally, the custom-engineered 60mm wheels, positioned within the bag’s corners, provide effortless gliding on various surfaces with minimal effort. Combined with an expandable capacity from 34L to 39L, the Roller Pro adapts to travelers who often return home with more than they packed.

Hybrid Construction for Maximum Durability

One of the standout features of the Roller Pro is its hybrid construction, blending a lightweight polycarbonate shell with Peak Design’s signature VersaShell™ fabric. This unique combination offers the best of both worlds—hard-sided protection with soft-sided flexibility—ensuring a rugged yet stylish aesthetic.

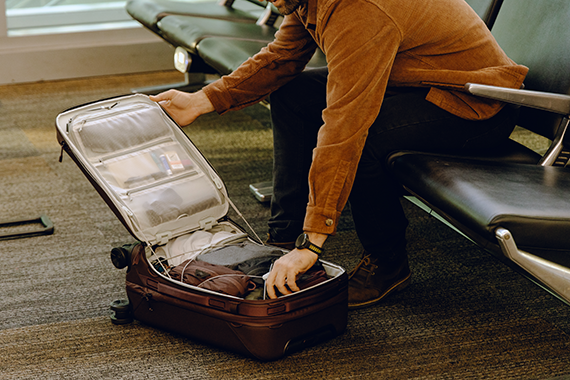
The Drawbridge opening system provides another major improvement over conventional clamshell-style bags, making it easier to access gear in tight spaces like airplane aisles, hotel rooms, or crowded events.
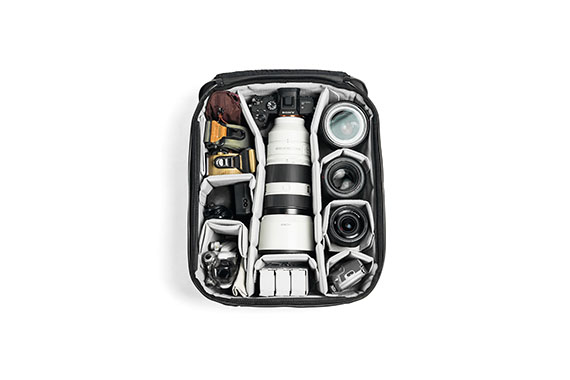
camera in bag

Designed for Photographers & Creatives

For photographers, the Roller Pro is more than just a carry-on—it’s a mobile creative workstation. The bag is compatible with Peak Design’s newly released XL Camera Cube, which fills the entire volume of the Roller Pro and can store large camera gear, including a 400mm prime lens. This modular design allows photographers to seamlessly switch between a full camera roller and a general travel bag, eliminating the need for multiple pieces of luggage.

Additional photographer-friendly features include:

  • Internal organization panels for small items or dirty clothes storage.
  • A hidden AirTag pocket to keep track of your bag.
  • Cord Hook™ Internal Retention System, securing contents without the hassle of straps.
  • 360-degree grab handles for easy retrieval from overhead bins or baggage claims.
  • External Cord Hook™ Gear Loops to attach tripods, jackets, or accessories.
travel photographer bag

Sustainability & Long-Term Investment

In line with Peak Design’s commitment to sustainability, the Roller Pro features a 100% recycled, Bluesign-approved fabric shell, is PFAS-free, and Climate Label Certified. It’s also backed by Peak Design’s lifetime warranty, ensuring a long-lasting investment for travelers.

Availability & Pricing

The Roller Pro Carry-On and XL Camera Cube are available for pre-order on Kickstarter from March 4 – April 17, 2025, with an exclusive discounted price ranging from $139.95 – $599.95, depending on the item. The official release on Peak Design’s website, Amazon, and global retailers is set for August 2025.

Limited kickstarter stock left here: Peak Design Roller Pro


from PictureCorrect https://ift.tt/MaSc5X9
via IFTTT
sunnuntai 9. maaliskuuta 2025

PictureCorrect.com: Location Scouting Tips for Landscape Photographers

Landscape photography is an art form that captures the vast beauty of nature in all its splendor. But behind every breathtaking shot, there’s often a lot of behind-the-scenes work. One of the crucial steps in this process is location scouting. Finding the perfect spot to set up your tripod can make the difference between a good photo and a masterpiece. This guide aims to provide budding landscape photographers with a comprehensive understanding of how to scout locations effectively.

Related reminder: only 1 day left for The Landscape Photography Bundle 2025

landscape scouting

Photo captured by Chris Czermak

1. Research, Research, Research!

Before you even step out of your door, the internet can be your most potent tool.

  • Google Earth & Google Maps: These tools offer a satellite view, street view, and user-uploaded images, giving you an almost first-hand experience of a place.
  • Photography Websites & Social Media: Websites like 500px or Instagram can be a goldmine for location ideas. Photographers often tag their locations, giving you a head start.
  • Local Tourism Websites: They often list popular scenic spots, and even if these are frequented by many, knowing them can help you discover less-known locations around them.

2. Time it Right

  • Golden Hours: Sunrise and sunset provide soft, diffused light. Apps like PhotoPills or The Photographer’s Ephemeris can predict the sun’s trajectory, helping you time your shots.
  • Seasonal Changes: Different seasons can bring different moods to a location. Autumn might bring fall colors, while winter might offer a snow-clad wonderland.

3. Reconnaissance Trip

Sometimes, you just have to be there. If possible, visit your chosen location ahead of your main shoot.

  • Check Accessibility: Is it easy to reach? Do you need any permissions?
  • Safety First: Ensure that the location is safe, both in terms of terrain and local conditions.

4. Talk to Locals

Locals often know secret spots that are off the beaten path. A conversation with them might lead you to a gem of a location that isn’t widely photographed.

5. Consider Different Perspectives

Don’t just scout with your eyes at standing level.

  • Elevated Points: Hills, towers, or even drones can offer a unique bird’s-eye view.
  • Ground Level: Sometimes, getting low can present a fresh perspective, especially if there are interesting foreground elements.

6. Take Test Shots

Always carry a camera during your scouting trips, even if it’s just your smartphone. Take test shots to review later. This will give you a better idea of the composition and what focal lengths or gear you might need.

7. Take Notes

Whether it’s a dedicated notebook, a smartphone app, or voice memos, take notes about:

  • Lighting Conditions
  • Best Times to Visit
  • Potential Challenges

8. Be Respectful & Environmentally Conscious

Remember, nature is a privilege to capture. Leave no trace, respect local guidelines, and always prioritize the environment and its inhabitants over getting a shot.

Conclusion

While there’s an element of unpredictability in nature, location scouting equips a landscape photographer with the best chances of capturing that magical moment. With thorough research, patience, and respect for the environment, you can find those hidden spots that resonate with your artistic vision. Happy shooting!

For Further Training:

Are you ready to take your landscape photography to new heights? Whether you’re an aspiring photographer or a seasoned pro, the Landscape Photography Bundle 2025 is your gateway to mastering the art of capturing breathtaking landscapes.

landscape contributors

For a limited time, you can gain access to world-class training, expert tutorials, and exclusive resources—all at a fraction of the retail price!

Only 1 day left: The Landscape Photography Bundle 2025


from PictureCorrect https://ift.tt/De90Tty
via IFTTT

perjantai 7. maaliskuuta 2025

PictureCorrect.com: Illuminated Peaks: How to Photograph Alpenglow

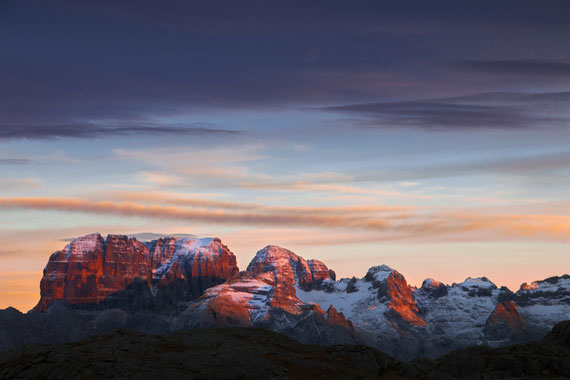
Alpenglow, the rosy light of the setting or rising sun seen on high mountains, is a dream spectacle for photographers. This magical moment, when the mountains seem to catch fire with hues of pink, orange, and purple, offers a fleeting opportunity to capture nature’s sublime beauty. Here’s how you can immortalize this enchanting phenomenon through your lens.

Today’s post is based on concepts from these Travel Photography Cheat Sheets which are currently 80% off for a Winter’s Last Light sale.

Understanding Alpenglow

Before setting out, it’s crucial to understand what alpenglow is and when it occurs. Unlike the direct light of golden hour, alpenglow is an indirect glow that lights up the mountain tops even before the sun crosses the horizon or after it has set. This phenomenon is most vivid when the sky is clear, and it typically lasts for just a few minutes during twilight.

alpenglow

Photo captured by Andrea Belussi

Planning Your Shoot

  1. Location Scouting: Research locations known for their alpenglow sightings. High vantage points that overlook mountain ranges facing east or west are ideal. Apps and websites that track sun position can help you plan the timing of your shoot.
  2. Timing is Everything: Since alpenglow is a transient phenomenon, knowing the sunrise or sunset times is vital. Arrive early to set up and be prepared to capture the fleeting moments of alpenglow.
  3. Weather Watch: Clear skies are crucial for alpenglow. Monitor the weather forecasts closely and be ready to seize the moment when conditions are right.

Gear and Settings

  • Camera: Any camera can capture alpenglow, but those with manual settings will give you more control over the outcome.
  • Lens: A wide-angle lens is ideal for capturing expansive landscapes, while a telephoto lens can help isolate distant peaks bathed in alpenglow.
  • Tripod: Use a tripod to stabilize your camera, especially in the low light conditions of twilight.
  • Settings: Start with a low ISO to reduce noise, a small aperture (around f/8 to f/16) for depth of field, and adjust the shutter speed accordingly. Bracketing exposures is a good strategy to ensure you capture the dynamic range of the scene.

Composition Tips

  • Foreground Interest: Include elements in the foreground to add depth and scale to your compositions.
  • Rule of Thirds: Position the mountains along the intersections of the grid to create a balanced composition.
  • Leading Lines: Use natural lines, such as rivers or paths, to guide the eye towards the glowing peaks.

Post-Processing

Subtlety is key when editing your alpenglow photos. Enhance the natural colors without oversaturating them, and adjust the shadows and highlights to reveal detail in both the dark and bright areas of the image.

Summary:

Photographing alpenglow is about capturing the fleeting moments of nature’s grandeur. With the right preparation, equipment, and technique, you can freeze this ethereal glow in time, creating images that resonate with the beauty of the natural world. Remember, the journey and experience of chasing alpenglow are as rewarding as the photographs you take.

For Further Training:

For help remembering the camera settings for difficult situations like this, a set of Travel Photography Cheat Sheets are designed to help. They are currently 80% off for a Winter’s Last Light Sale. which ends soon if you want to check them out.

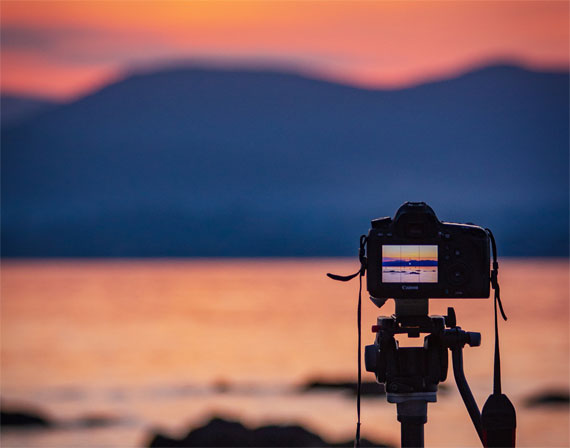
photography adventure

New! Cheat Sheets for Your Photography Adventures (see how they work)

The perfect companion for any photographer. Print one out whenever you need it. Whether you’re going on vacation or seeking out a specific photography adventure, these cheat sheets can provide you with the knowledge and inspiration you need to create your best work yet.

Offer ending soon: Winter’s Last Light Cheat Sheets Sale


from PictureCorrect https://ift.tt/VBI4eDw
via IFTTT

keskiviikko 5. maaliskuuta 2025

PictureCorrect.com: Dappled Light: Techniques for Photographing Speckled Sunlight

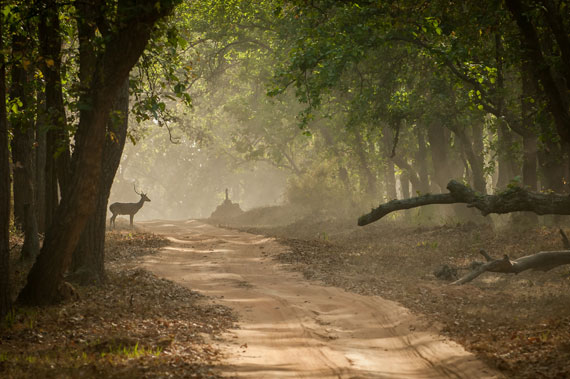
Photography is not just about capturing moments, it’s about painting with light, and one of the most enchanting ways to do this is by utilizing dappled light. Dappled light, often seen as patterns of light and shadow created when sunlight filters through the leaves of trees, offers a unique and visually striking scenario that can significantly enhance the quality of your photos.

Related reminder: only a little while left for the Winters Last Light Cheat Sheets Sale

dappled light

Photo captured by Mats

Creating Depth and Texture

The primary charm of dappled light lies in its ability to add depth and texture to images. The alternating patterns of brightness and shadow cast upon subjects lend a three-dimensional quality to photographs, making them pop. This interplay of light transforms flat, dull scenes into rich, textured visuals that are a pleasure to explore with the eyes.

Highlighting the Subject

Strategically using dappled light can emphasize parts of the subject, drawing the viewer’s attention to specific areas of the frame. This technique adds a layer of mystery and intrigue, as the light selectively illuminates segments of the scene, leaving the rest to the imagination.

Enhancing Mood and Atmosphere

The mood set by dappled light can vary immensely—from serene and peaceful to mysterious or dramatic—depending on the intensity and distribution of the light. Photographers can exploit this to convey different emotions and narratives within their work, making dappled light a versatile tool in their artistic arsenal.

Challenges in Exposure

However, the beauty of dappled light does not come without its challenges. The high contrast between the lit and shaded areas can complicate exposure settings. Finding the right balance to avoid overexposing the highlights while maintaining detail in the shadows is crucial. Techniques like spot metering are often employed to expose accurately for the desired area of the scene.

Timing and Positioning

The appearance of dappled light changes throughout the day and is influenced by the weather. Early mornings or late afternoons, when the sun is low, typically yield softer and more elongated patterns. Moreover, the position of the photographer can dramatically alter the composition; sometimes, just a few inches can make a significant difference.

leaf dappled light

Photo captured by Samuel Cesar

Creative Experimentation

Finally, don’t hesitate to experiment. Different angles, lenses, and aperture settings can produce a range of effects. A wide aperture might blur the background into a dreamy haze, while a smaller aperture sharpens the details in the light patterns, each adding a unique flair to your photos.

Here are some of the best places and situations where you can find this beautiful light:

  • Wooded Areas: Forests and wooded areas are classic spots for finding dappled light. The sunlight filtering through the leaves creates natural patterns on the ground or on any subject you’re photographing.
  • Orchards and Vineyards: The orderly rows of trees or vines in orchards and vineyards provide excellent opportunities for capturing dappled light, especially when the sun is low in the sky during the early morning or late afternoon.
  • City Parks with Large Trees: Large, leafy trees in city parks can create interesting patterns of light and shadow, especially on pathways or benches, which can be perfect for portrait and landscape photography.
  • Gardens with Pergolas or Trellises: Gardens that feature structures with lattice work, like pergolas or trellises covered with climbing plants, can also produce a dappled lighting effect that is great for both portrait and macro photography.
  • Near Buildings with Reflective Windows: Sometimes, the reflective windows of buildings can cast interesting light patterns on nearby pavements or walls, creating an urban form of dappled light.
  • Mountainous Regions with Scattered Clouds: If you are in a mountainous region on a day with scattered clouds, the sun peeking through the clouds intermittently can create a dappled effect on the landscape, adding depth and interest to mountain vistas.
  • On Water Near Overhanging Trees: Light reflecting off water where trees overhang can be especially magical. This scenario is perfect for capturing both the texture of the light on the water and the movement if there is a gentle breeze.

Understanding and effectively using dappled light can elevate your photographic work, adding layers of complexity and emotional depth. Whether you’re a novice or a seasoned photographer, mastering this aspect of natural lighting can help you create truly stunning, naturally lit photographs that resonate with viewers. Embrace the challenge and let the speckled sunlight transform your next photographic venture.

For Further Training:

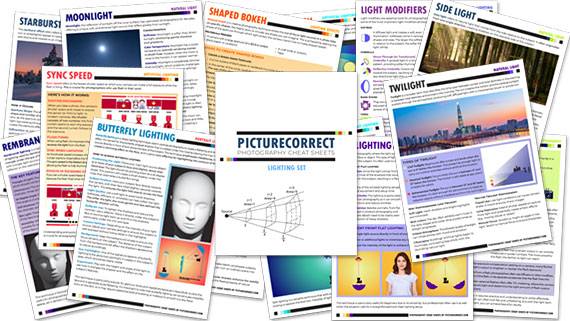
Lighting is arguably the most important aspect of photography; but do you know how to use it? These in-depth Photography Lighting Cheat Sheets are designed to help. With critical information on ALL the types of natural light and artificial light you can use, you’ll never be unprepared again. They are currently 80% off for a Winters Last Light Sale.

lighting cheat sheets

New! Cheat Sheets for Photography Lighting (see how they work)

Whether you’re a seasoned professional or just starting out, photography cheat sheets can be a valuable resource for improving your skills and taking your photography to the next level. By having all the key information you need in one place, you can focus on what’s important – capturing amazing photos.

Deal ending soon: Winters Last Light Cheat Sheets Sale


from PictureCorrect https://ift.tt/w3eIWby
via IFTTT

maanantai 3. maaliskuuta 2025

PictureCorrect.com: Using Manual Focus for Landscape Photography

In the fast-paced digital age, where cameras are equipped with advanced autofocus systems, the ancient art of manual focus might seem obsolete. However, for some landscape photographers, this traditional technique remains not only relevant but preferred. Let’s delve into the reasons why manual focus can be a valuable tool for landscape photography.

Related reminder: only a few days left for The Landscape Bundle 2025 Pre-order

manual focus landscape

Photo captured by Renan Brun

1. Precision Control:

While modern autofocus systems are impressive, they’re not always perfect. In landscape photography, the desired point of focus might be subtle — perhaps a delicate dewdrop on a leaf or a specific rock in a river. Manual focus allows photographers to select and refine their focus point with surgical precision, ensuring that the intended subject is razor-sharp.

2. Creative Freedom:

Landscape photography isn’t always about getting everything in focus. Sometimes, a little selective blur is what you need to draw attention to a specific subject or create a sense of depth. By using manual focus, photographers can make artistic decisions on what elements should be in focus and which should not, adding depth and interest to their compositions.

3. Unpredictable Subjects:

Although not unique to landscapes, scenes with elements like mist, rain, or moving foliage can confuse autofocus systems. By manually focusing, photographers can bypass these distractions and focus on what truly matters.

4. Low Light Mastery:

In the soft light of dawn or the deep shadows of dusk, even the best autofocus systems might hunt or fail to lock focus. During these magical moments of light, manual focus allows photographers to ensure they get the shot without struggling against the limitations of their gear.

5. Hyperlocal Distance:

One common practice in landscape photography is using the hyperfocal distance to ensure maximum sharpness from the foreground to the background. Calculating and setting the hyperfocal distance is more straightforward with manual focus, giving seasoned photographers an edge in capturing sprawling vistas.

6. Avoiding Autofocus “Hunting”:

In scenes with less contrast or in challenging light conditions, autofocus can “hunt” – constantly adjusting without settling on a focus point. This not only wastes battery but also might cause you to miss a fleeting moment. Manual focus eliminates this problem.

7. Connection to the Craft:

There’s a unique satisfaction derived from manually focusing a lens. It connects the photographer to the act of capturing the image on a deeper level. This deliberate, tactile process can slow photographers down, encouraging them to be more thoughtful about composition, framing, and the story they’re trying to tell.

8. Equipment Longevity:

Autofocus motors, especially in older lenses, might wear out or become less accurate over time. By mastering manual focus, a photographer can extend the life of their equipment, ensuring they can still capture stunning images even if the autofocus fails.

In Conclusion:

While there’s no denying the advancements and conveniences of modern autofocus systems, manual focus offers a combination of precision, control, and artistic freedom that can be invaluable in landscape photography. For those willing to practice and perfect the technique, manual focus is more than just a nod to tradition; it’s a tool that can elevate your photographic vision to new heights.

For Further Training:

Are you ready to take your landscape photography to new heights? Whether you’re an aspiring photographer or a seasoned pro, the Landscape Photography Bundle 2025 is your gateway to mastering the art of capturing breathtaking landscapes.

landscape bundle

For a limited time, you can gain access to world-class training, expert tutorials, and exclusive resources—all at a fraction of the retail price!

Pre-order offer ending soon: The Landscape Photography Bundle 2025


from PictureCorrect https://ift.tt/hR8OscI
via IFTTT

sunnuntai 2. maaliskuuta 2025

PictureCorrect.com: 5 Common iPhone Editing Mistakes and How to Fix Them

Photo editing on an iPhone has never been more accessible, with powerful apps offering professional-level tools right at your fingertips. However, despite all these advancements, many users still face significant challenges when trying to refine their photos. Whether it’s struggling with small screen limitations, getting colors just right, or knowing which adjustments to apply, mobile editing can be a frustrating process.

As part of their Spring Sale, the iPhone Editing Academy aims to help photographers overcome these hurdles. But before diving into solutions, let’s take a closer look at some of the biggest challenges of editing photos on an iPhone.

iphone editing academy

New: iPhone Photo Editing Academy (see preview videos)

1. Precision Editing on a Small Screen

While iPhones have high-resolution displays, editing detailed elements on a small touchscreen can be difficult. Unlike a desktop with a large monitor and a precise mouse or stylus, using fingers to make adjustments often leads to imprecise results. Cloning out an unwanted object or making selective adjustments can be especially tricky without the right techniques.

2. Understanding Color and Exposure Adjustments

Many iPhone users struggle with knowing how much to adjust brightness, contrast, shadows, and highlights. It’s easy to overdo it, leading to unnatural-looking photos. Similarly, achieving accurate color tones—especially skin tones—can be challenging without understanding white balance and color grading fundamentals.

3. Working with RAW vs. JPEG Files

Shooting in RAW gives you much more control over edits, but editing RAW files on an iPhone requires specialized apps like Lightroom Mobile or Darkroom. Many casual photographers stick to JPEG, which limits how much you can adjust an image before it starts to lose quality. Knowing when and how to use RAW properly is an important skill for iPhone editors.

4. Balancing Speed vs. Quality in Editing

One of the biggest advantages of mobile editing is speed—apps like Snapseed and Lightroom Mobile allow quick edits on the go. However, many users struggle to balance efficiency with producing high-quality results. Rushing through edits often leads to over-saturated images, excessive sharpening, or artificial HDR effects.

5. Choosing the Right Editing App

With so many editing apps available—Snapseed, Lightroom, VSCO, Darkroom, and even built-in Apple Photos—beginners often don’t know where to start. Each app has its strengths and weaknesses, and choosing the right one depends on your editing goals. Learning how to navigate these apps efficiently can make a huge difference in editing workflow.

Overcoming These Challenges

The iPhone Editing Academy was designed to help photographers navigate these common obstacles. The course covers essential editing techniques, offering step-by-step guidance on working with color, exposure, and precision adjustments—even on a small screen. By learning expert workflows, photographers can achieve professional-quality edits directly from their iPhone.

As part of their Spring Sale, the course is currently being offered at a discount for a limited time. If you’re struggling with mobile editing and want to master the tools at your disposal, this could be an opportunity to level up your skills.

Deal ending soon: iPhone Editing Academy at 86% Off


from PictureCorrect https://ift.tt/HX3Avpn
via IFTTT

lauantai 1. maaliskuuta 2025

PictureCorrect.com: The Landscape Photography Bundle 2025: Pre-order Offer

Are you ready to take your landscape photography to new heights? Whether you’re an aspiring photographer or a seasoned pro, the Landscape Photography Bundle 2025 is your gateway to mastering the art of capturing breathtaking landscapes.

Pre-order offer found here: The Landscape Photography Bundle 2025

For a limited time, you can gain access to world-class training, expert tutorials, and exclusive resources—all at a fraction of the retail price!

landscape bundle

What’s Inside the Landscape Photography Bundle?

The Main Bundle is packed with 18 premium products, offering over $1,000 worth of content for just $47 during the pre-order period. If you’re looking for an even greater value, the Pro Bundle unlocks 35+ expert-led courses with additional professional-level training, worth over $2,000, for just $84.

Learn From World-Renowned Photography Experts

This bundle features top educators and award-winning photographers, including:

  • Serge Ramelli – Landscape & Urban Photographer (15.4M+ social reach)
  • Scott Kelby – CEO of KelbyOne (9.6M+ social reach)
  • Mark Denney – Outdoor & Landscape Photographer (4.8M+ social reach)
  • Joshua Snow – Nature Photographer (4.1M+ social reach)
  • Christian Hoiberg – Founder of CaptureLandscapes (1.1M+ social reach)

These experts will guide you through advanced editing techniques, camera settings, composition tips, and post-processing workflows to ensure you capture stunning landscape shots.

landscape products

Exclusive Courses and Tools Included

  • Shooting Golden Hour Scenes – Learn how to capture and edit golden hour landscapes like a pro.
  • The Lightroom Landscape – Discover 20 essential Lightroom techniques every photographer should know.
  • Astrophotography for Beginners – Master the art of capturing the Milky Way and night skies.
  • Northern Lights Photography Made Easy – Step-by-step guidance for photographing the aurora borealis.
  • Bad Weather, Bad Light, No Problem! – Transform dull lighting conditions into stunning compositions.
  • Realistic Sky Replacement – Learn Photoshop techniques for natural and seamless sky replacements.

And much more! With over 44+ hours of in-depth training, you’ll gain the skills to produce gallery-worthy landscape photos.

Limited Time Offer Ends Soon!

This exclusive deal is available only until March 7th, 2025, at Noon Pacific Time. Don’t miss your chance to own this essential photography resource at an unbeatable price.

Pre-order offer ending soon: The Landscape Photography Bundle 2025


from PictureCorrect https://ift.tt/35hIx10
via IFTTT