lauantai 8. helmikuuta 2025

PictureCorrect.com: UPDATE: Gigapixel 8.2 Image Upscaler

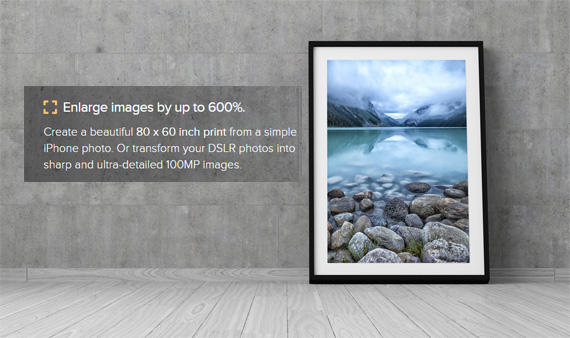
In photo editing news, Topaz Labs just announced the release of Gigapixel Version 8.2. Which now has batch Cloud Rendering, faster speeds on Mac, improvements to the Redefine model, and more. Keep reading to see what’s new.

gigapixel photo

Gigapixel Version 8.2 (see how it works)

What’s New in Gigapixel:

  • Upscale by Longest Side: A new option lets you upscale images based on their longest side. Simply select multiple images to unlock this highly requested feature—now available in Gigapixel!
  • Enhanced Cloud Rendering with Redefine: Experience significantly improved results when rendering without a prompt. The updated cloud rendering system ensures smoother image generation with fewer artifacts, delivering high creativity outputs.
  • Batch Cloud Rendering: No more sending images one by one to the cloud! This update introduces batch processing, allowing you to render multiple images simultaneously for a streamlined workflow.
  • Redefine Model Optimizations on Mac: The Redefine model now performs up to 2x faster on Mac, with improved consistency for text prompts. Note: Users on MacOS 13 or earlier will need to upgrade to MacOS 14 or 15 to access this improved model.

Print any image, bigger and better. Perfect for large-format prints where every pixel counts.

See how it works: Gigapixel 8.2 Image Upscaler

- - - - - - - - - - - - - - - - - - - - - - - - - - - - - - - - - - - - - - - - - - - - - - - - - - - - - - - - - - - - - - - - - - - - - - - - - -

Photography, like any art or skill, thrives on consistency. The journey to becoming an adept photographer is paved with regular practice. Learn how PictureCorrect Insiders can help.

- - - - - - - - - - - - - - - - - - - - - - - - - - - - - - - - - - - - - - - - - - - - - - - - - - - - - - - - - - - - - - - - - - - - - - - - - -

This post UPDATE: Gigapixel 8.2 Image Upscaler appeared on PictureCorrect.


from PictureCorrect https://ift.tt/egKHqkR
via IFTTT

perjantai 7. helmikuuta 2025

PictureCorrect.com: 5 Tips to Improve Your Travel Photography

Related reminder: only a little while left for the Travel Photography Guide at 90% Off

The world can be an overwhelming sensory experience, filled with sight, sound and aroma designed to delight all of your senses. How do you capture that experience in a photograph? Most people don’t. Instead, they show their photos with an apology: “You had to be there.” Your job as a travel photographer is to take them there through your photos. So how do you make sure you come home with a killer shot?

thailand pictures

Photo by Jonas Smith; ISO 200, f/10, 1/400 exposure.

Keep reading to discover five tips to unlock the secrets of how to take good pictures.

1: Know Your Gear

If you’re struggling to operate your camera, then you aren’t giving all of your attention to your composition. Make sure you know how to operate your camera. Forget about using those different modes that may have come with your camera. The problem with these idiot modes is that the camera is the idiot. It doesn’t know how to make a creative shot – it just averages everything out. You can’t rely upon these modes. Learn how to use the ISO, Aperture and Shutter Speed to make your own exposure decisions.

Different focal lengths can change the way your subject appears. Practice before you go on the trip. Use a foreground subject and take photos at different focal lengths to see how it changes as you change focal length. Pay attention to the background, too.

2: Make a Shot List

There are surely images you want to capture at your destination. Plan ahead. Write down the scenes you want to capture. Imagine you’re taking a dream trip to Paris. Most people will expect you to come home with a shot of the Eiffel Tower, but there’s much more to the city. Include shops on the street, a bakery, your meals, a bottle of champagne or cup of coffee. Every destination has its marquee landmarks, but the soul is often found in little details.

taj mahal photo

Photo by Kannan Muthuraman; ISO 125, f/14, 1/200 exposure.

Prioritize your list. You may not have time to get to everything on your list, Which ones are “must have” shots?

3: Work the Scene

If there’s one concept you need to accept, it’s this one: You’re going to take some lousy shots.

Don’t worry. Everyone does. There isn’t a photographer in the world who hasn’t made a bad composition. You have to work the scene until you find composition that works.

  • Walk around your subject
  • Try different angles
  • Get low on the ground
  • Get above
  • Shoot from far away
  • Shoot up close
  • Use a foreground element in your photo
  • Change your depth of field

4: Eliminate Distractions

Have you ever come across a wonderful scene, taken a photo, and felt that your shot didn’t capture the essence of being there? Trust your instincts.

It doesn’t mean that you’ve picked a bad location. Something made you stop to look. Your job is to work until you find a photo that captures the essence of that scene.

You may have too much in the photo causing distraction. It’s too busy, there’s something ugly in the scene, or people are walking around. Start looking for things to eliminate.

There are a number of ways to remove distracting elements and get to the core of your subject. Change your angle. Get tighter on your subject to fill the frame. Change your depth of field to blur distracting backgrounds.

Photographers don’t just snap one image and walk away with a golden masterpiece. Think about what made that scene interesting to you. Was it a shape, color contrast, the way the light falls on your subject? Concentrate on the core element that makes you appreciate your subject and then get rid of the stuff you don’t need.

5: Stop! Don’t Leave Yet

OK, you found an interesting scene or subject. You’ve walked around and think you captured an interesting photo. That’s great! It’s time to go on to the next one, right?

Not so fast. Take some time to look at your photos. Evaluate what you’ve captured and consider what you’ve missed. Chances are you may not be back anytime soon, so be sure you captured everything you wanted before you leave.

Is the exposure right? Think about the shots you didn’t take. If you shot in portrait mode, look for some opportunities in landscape mode. If you shot the whole scene, ask yourself if there are some detail shots that would complement it. Explore your subject from Grand to Granular. Little details can have as much impact as the big scene.

travel photography tips

Photo by Roberto Trombetta.

Remember to take plenty of pictures. It helps you discover new ways to interpret your scene and go home with the best shot you can make.

About the Author:
William Beem is a photographer and author living in Central Florida. He manages a blog offering photography tips and travel photos. Occasionally, he also provides training along with the folks at Harmon Photo’s School of Photography.

For Further Training, Deal Ending Soon:

Have you ever been on a once-in-a-lifetime trip with beautiful scenery, but the photos you captured were nothing but average? This new 280-page eBook by seasoned pro Dave Williams is designed to show you how to capture stunning photography on your next trip and more.

travel photo guide

Next Stop: Travel Photography (see inside)

Travel photography is fun. But it’s even more fun when you’re able to capture your dream images. It is currently 90% off for the first 500 customers if you want to check it out.

Launch sale ending soon: The Travel Photography Guide at 90% Off

- - - - - - - - - - - - - - - - - - - - - - - - - - - - - - - - - - - - - - - - - - - - - - - - - - - - - - - - - - - - - - - - - - - - - - - - - -

Photography, like any art or skill, thrives on consistency. The journey to becoming an adept photographer is paved with regular practice. Learn how PictureCorrect Insiders can help.

- - - - - - - - - - - - - - - - - - - - - - - - - - - - - - - - - - - - - - - - - - - - - - - - - - - - - - - - - - - - - - - - - - - - - - - - - -

This post 5 Tips to Improve Your Travel Photography appeared on PictureCorrect.


from PictureCorrect https://ift.tt/Bila6bS
via IFTTT

torstai 6. helmikuuta 2025

PictureCorrect.com: Perfect Balance: Exploring Symmetry in Photographic Composition

Photography, as an art, requires an eye for detail and an understanding of the numerous principles that guide this form of visual expression. Among these principles is the concept of symmetry, a powerful tool that can transform your images into captivating masterpieces. This blog post will delve into the world of symmetry in photography and the types of symmetry that can be applied in various compositions.

Relevant note: deal ending soon for the Photo Composition Cheat Sheets

Understanding Symmetry

Symmetry refers to a sense of harmonious and beautiful proportion and balance. In photography, this means creating an image that can be divided into two parts that are mirror images of each other, either horizontally, vertically, or diagonally. The symmetry can be perfect, with each side being a precise mirror image, or it can be approximate, where the two halves are similar but not identical.

symettry

Photo captured by jet dela cruz

Symmetry is not just about mirroring; it’s about creating balance, harmony, and a sense of order in an image. It can add depth, highlight specific parts of the composition, or create a compelling visual rhythm.

Types of Symmetry in Photography

There are several types of symmetry that photographers can use to enhance their images:

Vertical Symmetry: This is the most common type of symmetry in photography. Vertical symmetry involves splitting an image down the middle vertically, so that each side mirrors the other. Buildings, trees, and human beings are all examples of subjects that often exhibit vertical symmetry.

Horizontal Symmetry: Horizontal symmetry involves dividing an image into two equal halves along a horizontal axis. Reflections in bodies of water, landscapes with horizons, and sunsets are examples of scenes that can exhibit horizontal symmetry.

symmetry example

Radial Symmetry: This is where the elements of an image radiate from a central point, creating a circular symmetry. Examples of this can be found in nature, such as flowers or a spiral seashell, or man-made objects like a wheel or a clock.

Reflective Symmetry: Reflective symmetry is seen when one half of the image reflects the other half. This type of symmetry can be vertical or horizontal, and is often found in architectural photography or in nature with bodies of water reflecting the landscape.

Rotational Symmetry: In rotational symmetry, the image looks the same even after being rotated by a certain degree. This type of symmetry is often found in patterned subjects, such as kaleidoscope images or snowflakes.

Tips for Using Symmetry in Photography Composition

Seek Symmetry in Everyday Life: One of the keys to using symmetry in your photography is to start seeing it in your everyday life. Look for patterns, reflections, and structures that offer symmetrical elements.

Use Symmetry to Guide the Viewer’s Eye: Symmetry can be a powerful tool for guiding the viewer’s eye towards the center of an image or to a particular focal point.

Experiment with Balance: Not all images have to be perfectly symmetrical. Playing with asymmetry can lead to unique and engaging compositions.

Break the Symmetry: Perfect symmetry can sometimes lead to monotonous compositions. Breaking the symmetry by introducing an unexpected element can often result in a more dynamic and engaging photo.

Use Your Camera’s Grid: Most cameras have an inbuilt grid that can help you align the elements of your image and create a symmetrical composition. Use this tool to your advantage.

symmetry ceiling

Photo captured by Pete Alexopoulos

Symmetry in photography, when used effectively, can create compelling and visually pleasing compositions. It provides a sense of balance, stability, and harmony, which draws viewers into the photo. However, remember that the rules of composition, including symmetry, are not set in stone. They should serve as a guideline rather than a strict rule, allowing you to experiment and develop your unique photographic style.

In conclusion, understanding and mastering the art of symmetry can elevate your photography to new levels. So, keep your eyes open for symmetrical opportunities and let your creativity flow.

For Further Training on Composition:

Do you ever have trouble remembering all the elements of composition? These new Composition Cheat Sheets have you covered. With clear, concise information on all the essential elements of composition, you’ll never be unprepared again. They are currently 81% off today if you want to check them out.

composition cheat sheets

Composition Cheat Sheets (see all the elements covered)

The perfect companion for any photographer. Print one out whenever you need it. These cheat sheets consolidate crucial composition-related information, allowing you to concentrate on what truly matters – composing striking photographs.

Deal ending soon: The Composition Cheat Sheets at 81% Off

- - - - - - - - - - - - - - - - - - - - - - - - - - - - - - - - - - - - - - - - - - - - - - - - - - - - - - - - - - - - - - - - - - - - - - - - - -

Photography, like any art or skill, thrives on consistency. The journey to becoming an adept photographer is paved with regular practice. Learn how PictureCorrect Insiders can help.

- - - - - - - - - - - - - - - - - - - - - - - - - - - - - - - - - - - - - - - - - - - - - - - - - - - - - - - - - - - - - - - - - - - - - - - - - -

This post Perfect Balance: Exploring Symmetry in Photographic Composition appeared on PictureCorrect.


from PictureCorrect https://ift.tt/KvG2iSk
via IFTTT

keskiviikko 5. helmikuuta 2025

PictureCorrect.com: Travel Photography: Planning & Documenting

Relevant reminder: only a little while left for the Travel Photography Guide at 90% Off

Travel photography is quite different from other photographic endeavors, especially if you plan to make a living from it. Most successful travel photographers are writers as well. Actually in the print world, you can’t separate words from pictures. They complement each other.

norway

photo by Giuseppe Milo

What the picture can’t show, the words explain in greater detail. So it’s no surprise that some travel articles are sometimes from husband and wife teams. That’s the perfect job for couples. Think exotic locations, the love of your life with you and endless adventures together.

My biggest problem with travel photography is that a lot of the imagery you see has been so photographed that they’re the equivalent of visual clichés. What comes to mind when you think of China? Great Wall of China or the Forbidden City in Beijing? Egypt? The Great Pyramids. India… the Taj Mahal. Indonesia…Borobodur. Cambodia…Angkor Wat.

As in most printed media, the pictures tend to be more important than the words. A visually striking image will draw a casual browser of publication into reading an article even if the headline is not well-written. A great selection of pictures of one destination can save a article with mediocre writing. But the same can’t be said if the pictures are of poor quality.

No matter how good and compelling the writing, if the pictures are just mediocre, readers will not be drawn to the story. Poorly composed images, especially ones with lots of technical flaws like low resolution, artifacting and digital noise cannot be rescued. As powerful as Photoshop is, it simply can’t fix or add something that isn’t in a picture.

Even if it can, there is the ethical question of whether you are allowed to. Most magazines have strict guidelines against such manipulation of images, especially in their editorial content. But poorly written articles can be “massaged” and fine-tuned by editors into something quite readable.

Tips for a successful trip:

1. Careful planning and research of your destination

This seems obvious, yet a lot of people don’t consider this when making their plans. Festivities like Oktoberfest in Germany or the Tournament of Roses in Pasadena, California take place annually at the same time.

And by planning, I don’t just mean planning for the length of time you’re going to be at your destination. If you’re a digital photographer, you’ll need power to charge your batteries and a way to download and clear off your memory cards or you will be up the proverbial creek without a paddle.

india travel photo

photo by Patrick Savalle

If you’re headed abroad where electrical power is different from home, you’ll also a voltage converter. I recommend the Kensington 3317 International All-in-one Travel Plug Adapter.

2. Precise note-taking

Whether you use a laptop or pen and paper, having good habits like keeping receipts and other bills incurred during the trip is important.

Even if you’re not writing the article, precise notes on how to get from town A to town B, how much the fare was, and the duration of the drive are all details which add value to your pitch to magazines or collaborative effort with a writer.

Remember, your recall will not be so good once you’re home. Foreign names have a way of sounding the same when you get home, so good note-taking is critical.

thailand beach photography

photo by melenama

Your article will have more credibility if you provide details since a travel article is part “how-to” and part narrative. Another reason for those notes is documentation when you claim the trip as a business expense.

3. Digital Camera with wide and telephoto zoom lens

Think “light.” If you’re lugging around a lot of gear, you’ll be too beat to use your camera. Traveling light doesn’t mean you leave essentials like a healthy supply of extra memory cards, batteries and flash units at home.

If you’re bringing along a laptop, then a way to back up your images is important.

safari photography

photo by Feans

Even if you don’t have a chance to edit your images after you download them to your computer, you should burn those images as a backup and mail them to yourself.

That way if all your gear is stolen, you’ll still have images to show when you get home.

About the Author:
Prior to his arrival in the US, before attending college, Riverside portrait photographer Peter Phun traveled extensively, documenting his travels through photography. He specializes in location portraits, weddings, and editorial work. He writes about photography, Macs & the Internet. He also designs websites and is a stay-at-home dad. Previously, Peter worked as a staff photographer for 18 years at The Press-Enterprise, Southern California’s 4th largest daily newspaper. He is the webmaster for the Mac user group in the Inland Empire.

For Further Training:

Have you ever been on a once-in-a-lifetime trip with beautiful scenery, but the photos you captured were nothing but average? This popular 280-page eBook by seasoned pro Dave Williams is designed to show you how to capture stunning photography on your next trip and more.

travel photo guide

Next Stop: Travel Photography (see inside)

Travel photography is fun. But it’s even more fun when you’re able to capture your dream images. It is currently 90% off for the first 500 customers if you want to check it out.

Deal ending soon: The Travel Photography Guide at 90% Off

- - - - - - - - - - - - - - - - - - - - - - - - - - - - - - - - - - - - - - - - - - - - - - - - - - - - - - - - - - - - - - - - - - - - - - - - - -

Photography, like any art or skill, thrives on consistency. The journey to becoming an adept photographer is paved with regular practice. Learn how PictureCorrect Insiders can help.

- - - - - - - - - - - - - - - - - - - - - - - - - - - - - - - - - - - - - - - - - - - - - - - - - - - - - - - - - - - - - - - - - - - - - - - - - -

This post Travel Photography: Planning & Documenting appeared on PictureCorrect.


from PictureCorrect https://ift.tt/cVARqBi
via IFTTT

tiistai 4. helmikuuta 2025

PictureCorrect.com: Travel Photography Guide Here to Help

Here is something for those of you planning a trip this year. Have you ever been on a once-in-a-lifetime adventure with beautiful scenery, but the photos you captured were nothing but average? This 280-page eBook by seasoned pro Dave Williams is designed to show you how to capture stunning photography on your next trip and more. It is currently 67% off today for the first 500 customers if you want to check it out. Found here: The Travel Photography Guide at 80% Off

travel photo guide

Next Stop: Travel Photography (see inside)

Meet Dave Williams, Your Travel Photography Coach

Dave shoots snowy mountains… fiery skies… crispy blue seas…

His style relies on using eye-catching compositions to capture breathtaking photos of his travels.

All this without using expensive gear.

I tried it myself, and it is so much fun to know that you’re capturing interesting images of your adventures that most people can’t.

It’s no wonder that his photos have been featured by publishers like National Geographic, Forbes, and Lonely Planet.

He’s also a successful workshop instructor which makes him a perfect teacher for anyone who wants to learn the ins and outs of travel photography.

This includes destination and location scouting… camera settings and gear… creative styling tips and composition… making money as a travel photographer, and more…

While using the gear you already own.

The only limit is your imagination, and with Dave’s best ideas and expert techniques to choose from… you’ll never be short of inspiration.

travel photos

With “Next Stop: Travel Photography”, you’ll soon discover:

  • Practical and actionable tips about creating your best travel photography workflow – so you’re prepared for any situation
  • Creative ways of choosing both your destination and the exact location to shoot from
  • Go-to camera settings for the most common scenes you’ll shoot
  • Composition best practices that will help to entice your audience
  • Tips on how to photograph people (for both candid and environmental portraits)
  • Tried and tested post-processing instructions
  • Guidelines to what to do to make money with travel photography

Travel photography is fun. But it’s even more fun when you’re able to capture your dream images.

How to Get It for a Discount Today:

The Next Stop: Travel Photography eBook is currently 90% off for the next 500 customers (normally $199, currently $19). They have also thrown in 30 challenge card cheat sheets, a bonus chapter on starting a travel blog, and a bonus chapter on photo editing on-the-go. It all comes with an impressive 90 day happiness guarantee so there’s no risk in trying it.

Deal ending soon: The Travel Photography Guide at 90% Off

- - - - - - - - - - - - - - - - - - - - - - - - - - - - - - - - - - - - - - - - - - - - - - - - - - - - - - - - - - - - - - - - - - - - - - - - - -

Photography, like any art or skill, thrives on consistency. The journey to becoming an adept photographer is paved with regular practice. Learn how PictureCorrect Insiders can help.

- - - - - - - - - - - - - - - - - - - - - - - - - - - - - - - - - - - - - - - - - - - - - - - - - - - - - - - - - - - - - - - - - - - - - - - - - -

This post Travel Photography Guide Here to Help appeared on PictureCorrect.


from PictureCorrect https://ift.tt/ytMCsaf
via IFTTT

maanantai 3. helmikuuta 2025

PictureCorrect.com: Rent or Buy a Telephoto Lens for an Airshow

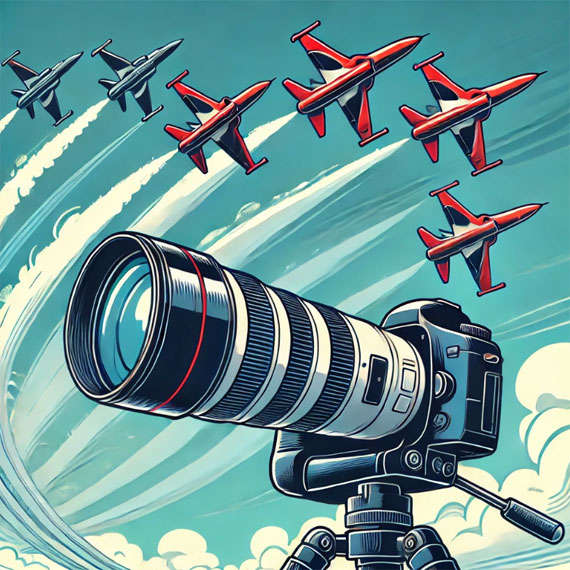
Capturing the thrilling action of an airshow requires a powerful telephoto lens, but should you buy one or rent it just for the event? Making the right decision involves considering cost, usage frequency, and long-term value. Let’s break it down mathematically.

Also thanks to our new friends at finance-tips.ai, who helped us do the math!

rent or buy lens

1. Cost Breakdown: Buying vs. Renting

Buying a Telephoto Lens:

  • Example: Canon RF 100-500mm f/4.5-7.1L IS USM
  • Purchase Price: $2,800
  • Estimated Resale Value After 3 Years: $1,700
  • Effective Cost: $2,800 – $1,700 = $1,100
  • Annual Cost (if used for 3 years): $1,100 / 3 = $366 per year

Renting a Telephoto Lens:

  • Rental Price for a Weekend: $140 – $200
  • Number of Rentals Over 3 Years: 1-2 per year
  • Total Cost Over 3 Years: $140 to $400

2. Frequency of Use

  • If you plan to use the lens frequently (several times a year), buying makes sense.
  • If you only shoot one or two airshows a year, renting is more cost-effective.

3. Depreciation and Resale Value

Lenses generally retain value well. If you buy and resell, your net cost is lower than the upfront purchase price. However, you must account for selling hassles and potential wear and tear.

4. Hidden Costs to Consider

  • Accessories & Insurance: Buying may require extra costs like filters, cases, or insurance ($100+).
  • Storage & Maintenance: Long-term storage and upkeep may add minor costs.
  • Rental Shipping Fees: Some rental services charge extra for shipping and insurance.

5. Breaking Even Analysis

If renting costs ~$140 per event and you attend three or more airshows per year, the break-even point favors buying after three years. Otherwise, renting remains the cheaper option.

Conclusion

  • Rent if: You only need the lens occasionally (1-2 times a year).
  • Buy if: You frequently shoot airshows, wildlife, or sports.
  • Consider resale value: If buying, plan for future resale to recover costs.

A little math goes a long way in making a smart financial decision. Whether you rent or buy, the goal remains the same: capturing stunning images of high-speed aerial maneuvers with the best gear available!

For Further Help:

Did you know that personal finance is the #1 topic students wish they had learned more about in school? Whether you’re just starting your financial journey or navigating retirement, these new Personal Finance Cheat Sheets are here to guide you every step of the way.

personal finance

They are designed for quick reference, so you can easily access the information you’re looking for in seconds. Plus, their printable format means you can have a physical copy at your fingertips anytime.

Found here: Personal Finance Cheat Sheets Launch Sale

- - - - - - - - - - - - - - - - - - - - - - - - - - - - - - - - - - - - - - - - - - - - - - - - - - - - - - - - - - - - - - - - - - - - - - - - - -

Photography, like any art or skill, thrives on consistency. The journey to becoming an adept photographer is paved with regular practice. Learn how PictureCorrect Insiders can help.

- - - - - - - - - - - - - - - - - - - - - - - - - - - - - - - - - - - - - - - - - - - - - - - - - - - - - - - - - - - - - - - - - - - - - - - - - -

This post Rent or Buy a Telephoto Lens for an Airshow appeared on PictureCorrect.


from PictureCorrect https://ift.tt/1rVJNxK
via IFTTT

lauantai 1. helmikuuta 2025

PictureCorrect.com: Decoding Darkness: How Smartphones Capture the Night

In photography, capturing the perfect image often revolves around understanding and manipulating light. But when natural light is limited, especially during night or in dimly lit areas, things become challenging. Modern smartphone cameras, despite their compactness, have made significant strides in addressing this challenge. Let’s delve deeper into the technological nuances behind this.

Relevant reminder: offer ending soon for the iPhone Photo Academy Winter Sale

smartphone night

Photo captured by Jules PT

1. Aperture Explained: The Role of Size

The aperture of a camera lens is essentially its “eye.” A larger aperture (denoted by smaller f-numbers like f/1.8) means the camera lens can open wider, allowing more light to enter. While a larger aperture aids in capturing brighter images in darker conditions, it’s only one piece of the puzzle.

2. Sensor Size and Its Significance

The sensor is where light is captured and converted into an image. Generally, larger sensors can gather more light, leading to better image quality and reduced noise. Although smartphone sensors are smaller compared to those in DSLRs or mirrorless cameras, advances in sensor technology have optimized them for better performance in limited light.

3. Optical Image Stabilization (OIS): A Mechanism for Clarity

In low light, the camera often needs to use slower shutter speeds to let in more light. However, this can introduce motion blur from slight hand movements. OIS combats this by making micro-adjustments to the lens or sensor, providing more stability during longer exposures.

4. Computational Photography: More Than Just a Click

This involves using algorithms to improve or extend the capabilities of digital photography. For example, some smartphones take multiple short-exposure shots and then merge them to produce a brighter and clearer image. This method reduces the noise typically seen in long-exposure shots.

5. AI in Photography: Not Just a Buzzword

While AI might sound like a trendy term, its application in photography is substantial. AI can assist in analyzing a scene, adjusting settings accordingly, or even identifying and enhancing specific subjects in a frame. This leads to better optimization of available light and improved overall image quality.

6. The Value of Manual Control

Auto-modes are great for convenience, but sometimes full control can yield better results. By manually adjusting parameters like ISO (sensitivity to light), shutter speed, and focus, users can tailor the camera’s behavior to better suit challenging lighting situations.

7. RAW Capture: The Post-Processing Powerhouse

A RAW image retains all the data from a sensor without compression or processing. This offers more flexibility when editing, especially useful in low light scenarios where you might want to adjust exposure, shadows, or reduce noise without compromising on quality.

8. Role of Multiple Lenses

While a single lens might be versatile, having multiple lenses (like wide or ultra-wide) allows for more flexibility. Some of these lenses have larger apertures or specific focal lengths, designed to perform better in different lighting conditions.

In Conclusion

Photographing in low light with a smartphone isn’t just about having advanced features or the latest tech. It’s about understanding how these technologies work together, how they can be adjusted, and how to use them effectively. While modern smartphones have made it easier to capture quality images in challenging conditions, knowing the underlying principles will always enhance the outcome.

For Further Training:

iPhone Photo Academy is an in-depth online course that will show you how to take incredible iPhone photos. With the right knowledge an iPhone can be used to take photos that are so good that most people would never even believe that they were taken with a phone. It is currently 84% off until the Winter Sale ends tomorrow!

iphone photo tutorials

iPhone Photography Tricks (Click to See More Examples)

The best camera is the one that is always with you. But having the iPhone with you is only half of the equation. The other half is knowing how to use it to take outstanding photos.

Deal ending soon: The iPhone Photography Academy Winter Sale

- - - - - - - - - - - - - - - - - - - - - - - - - - - - - - - - - - - - - - - - - - - - - - - - - - - - - - - - - - - - - - - - - - - - - - - - - -

Photography, like any art or skill, thrives on consistency. The journey to becoming an adept photographer is paved with regular practice. Learn how PictureCorrect Insiders can help.

- - - - - - - - - - - - - - - - - - - - - - - - - - - - - - - - - - - - - - - - - - - - - - - - - - - - - - - - - - - - - - - - - - - - - - - - - -

This post Decoding Darkness: How Smartphones Capture the Night appeared on PictureCorrect.


from PictureCorrect https://ift.tt/1mR679F
via IFTTT