torstai 15. elokuuta 2024

PictureCorrect.com: Improved Noise Reduction Models in NoNoise AI 2024.5

In photo editing news, ON1 has released ON1 NoNoise AI 2024.5, the latest version of its photo editing software focused on image noise reduction. This update introduces new AI models aimed at improving noise reduction results, along with performance enhancements designed for professional photographers and enthusiasts.

on1 nonoise update

Key Updates in ON1 NoNoise AI 2024.5

1. Improved Noise Reduction Models

The 2024 High-Detail models in this version aim to enhance detail retention in areas like trees, feathers, and skin, while keeping out-of-focus regions clean. This update is intended to help photographers achieve better results when dealing with noise in their images.

2. Enhanced Quick Mask AI Tool

The Quick Mask AI tool has been updated to improve its ability to select and adjust specific regions, such as skies, clothing, and individual objects. This enhancement is intended to simplify the process of applying noise reduction selectively.

3. Performance Enhancements

ON1 NoNoise AI 2024.5 includes performance improvements that aim to provide smoother zooming, panning, and brushing, even in complex photos with multiple layers. These updates are designed to optimize GPU use and memory efficiency, potentially making the software more responsive during editing.
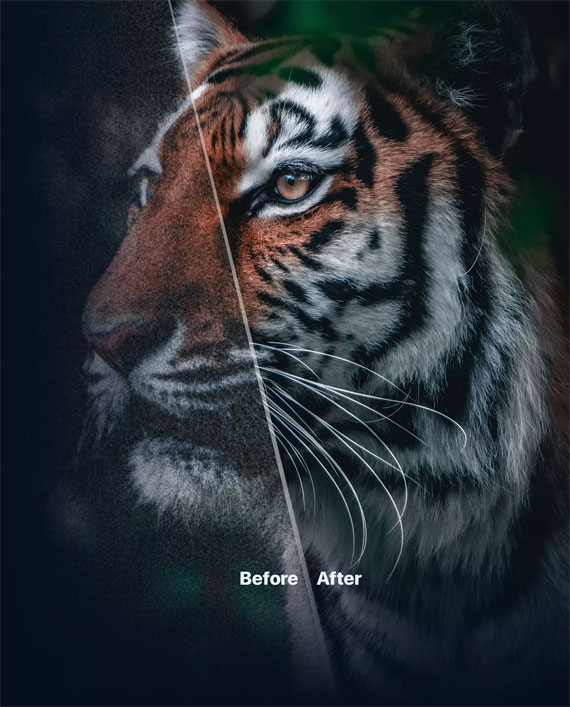
nonoise example image

4. Smaller Installer and More Frequent Updates

The update also includes a smaller installer for faster downloads and installations. Additionally, the app will now check for updates more frequently, with the goal of providing more regular updates for camera support, AI models, and additional content.

5. Expanded Camera and Lens Support

This version adds support for new cameras and lenses, including the Panasonic LUMIX G100D, Fujifilm X-T50, and Nikon Z6 III, among others. This expanded support may benefit photographers using the latest equipment.

Availability and Pricing

ON1 NoNoise AI 2024.5 is available as a free update for existing NoNoise AI 2024 owners and subscribers. New customers or those upgrading from previous versions can purchase ON1 NoNoise AI 2024.5 either as a standalone license or through ON1’s subscription plans. The new features and models have also been included in ON1 Photo RAW version 2024.5.1.

See how it works: ON1 NoNoise AI 2024.5

- - - - - - - - - - - - - - - - - - - - - - - - - - - - - - - - - - - - - - - - - - - - - - - - - - - - - - - - - - - - - - - - - - - - - - - - - -

Photography, like any art or skill, thrives on consistency. The journey to becoming an adept photographer is paved with regular practice. Learn how PictureCorrect Insiders can help.

- - - - - - - - - - - - - - - - - - - - - - - - - - - - - - - - - - - - - - - - - - - - - - - - - - - - - - - - - - - - - - - - - - - - - - - - - -

This post Improved Noise Reduction Models in NoNoise AI 2024.5 appeared on PictureCorrect.


from PictureCorrect https://ift.tt/yHKO6j8
via IFTTT
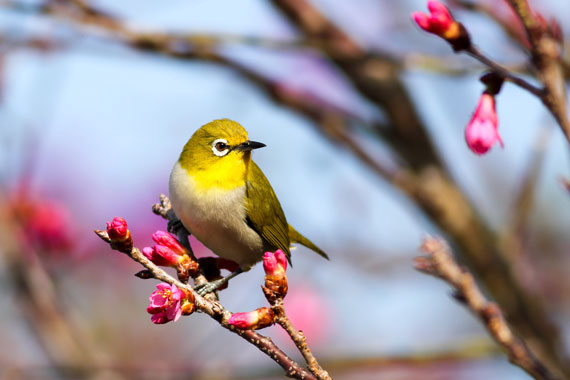
keskiviikko 14. elokuuta 2024

PictureCorrect.com: How to Find Birds to Photograph

Finding birds to photograph can be an enjoyable and rewarding hobby. No matter where you are, there are likely birds nearby, and you can follow these tips to find them.

Related note: only a little while left for the Bird Photo Snap Cards at 82% Off

finding birds

Photo captured by Boris Smokrovic

Research local species: Begin by learning about the bird species native to your area. Online resources, field guides, and birding apps can be helpful tools. Identifying the most common species will help you know what to look for and where to find them.

Visit birding hotspots: Look for birding hotspots or popular birdwatching locations in your area. These can include parks, nature reserves, wetlands, forests, and even urban green spaces. Websites like eBird or local birding groups on social media can help you identify these spots.

Timing: Birds are most active during the early morning and late afternoon, so these are the best times to find and photograph them. Migratory species are more easily found during migration seasons (spring and fall).

Listen for bird calls: Learning to recognize bird calls can help you locate birds that may be hidden in trees or bushes. Apps like BirdNET and other bird song recognition tools can be helpful for identifying species by their calls.

Attract birds to your yard: If you want to photograph birds closer to home, consider setting up bird feeders, bird baths, or even planting native plants that attract birds. This will encourage birds to visit your yard and make it easier to photograph them.

Use proper equipment: A good camera with a telephoto lens is essential for capturing high-quality bird photos. A pair of binoculars can help you locate and observe birds from a distance.

Join birding groups or clubs: Connecting with other bird enthusiasts can help you learn more about local bird species, discover new locations for bird photography, and improve your photography skills. Look for local birding clubs, online forums, or social media groups focused on birdwatching and photography.

Practice patience: Bird photography requires patience, as you may need to wait for the right moment to capture the perfect shot. Spend time quietly observing the birds and their behaviors, and be prepared to wait for the perfect opportunity.

Want to Identify a Bird You Have Photographed?

Consult field guides: Field guides are excellent resources for bird identification. They contain illustrations or photographs of various species, along with information on their habitats, behaviors, and range. Choose a field guide specific to your region for the most accurate results.

Use mobile apps: There are many bird identification apps available for smartphones, such as Merlin Bird ID, eBird, and Audubon Bird Guide. These apps can help you identify birds by their physical characteristics, songs, and other features.

By following these tips and staying committed, you’ll be able to find and photograph a variety of bird species no matter where you are.

For Further Help with Bird Photography:

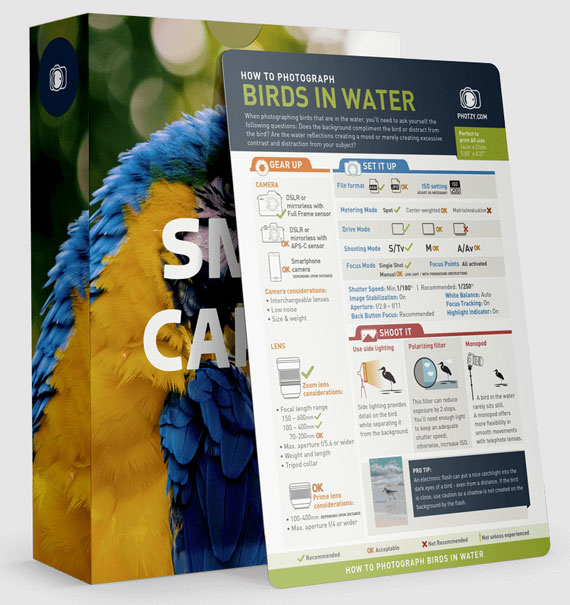
Bird photography is active and hands-on, so your reference materials should be able to come with you anywhere. Enter these new bird photography snap cards. A simple and beautiful way to learn bird photography on-the-go. Download your snap cards – print them out – and pop them in your camera bag— You’ll never miss a shot again! They are currently 82% off today if you want to check them out.

bird snap cards

New: Bird Photography Cheat Sheets (see what’s included)

Not only will these Snap Cards give you a simple and beautiful way to learn bird photography on-the-go… They’ll also give you the confidence to experiment. Because now, if you get stuck with a problem, you’ll have the answer right there with you in your camera bag.

Deal ending soon: The Bird Photography Snap Cards at 82% Off

- - - - - - - - - - - - - - - - - - - - - - - - - - - - - - - - - - - - - - - - - - - - - - - - - - - - - - - - - - - - - - - - - - - - - - - - - -

Photography, like any art or skill, thrives on consistency. The journey to becoming an adept photographer is paved with regular practice. Learn how PictureCorrect Insiders can help.

- - - - - - - - - - - - - - - - - - - - - - - - - - - - - - - - - - - - - - - - - - - - - - - - - - - - - - - - - - - - - - - - - - - - - - - - - -

This post How to Find Birds to Photograph appeared on PictureCorrect.


from PictureCorrect https://ift.tt/e8G0JtV
via IFTTT

tiistai 13. elokuuta 2024

PictureCorrect.com: Printable Bird Photography Snap Cards at 82% Off

Bird photography is active and hands-on, so your reference materials should be able to come with you anywhere. Enter these recently released bird photography snap cards. A simple and beautiful way to learn bird photography on-the-go. Download your snap cards – print them out – and pop them in your camera bag— You’ll never miss a shot again! They are currently 82% off today. Offer found here: The Bird Photography Snap Cards at 82% Off

bird snap cards

New: Bird Photography Cheat Sheets (see what’s included)

Not only will these Snap Cards give you a simple and beautiful way to learn bird photography on-the-go… They’ll also give you the confidence to experiment. Because now, if you get stuck with a problem, you’ll have the answer right there with you in your camera bag.

  • Easy to print-at-home: no shipping fees, subscriptions, or hidden costs. We’ll send you the files to get started today.
  • Easy to understand graphics: The Concepts are explained with Bright, Colorful, and Clear Examples.
  • It’s just like having a bird photography mentor at your side while you’re out shooting!

What’s Covered On Each Snap Card?

  1. Summary and Mini-Lesson: Includes a rundown of what this card is about and the key takeaways.
  2. Equipment & Gear Breakdown: Gives you a list of the exact equipment needed for this shooting situation.
  3. Tips & Settings: Recommended camera settings, how to set it all up & useful tips to give you a perfect starting point.
  4. Shooting Steps: To give you the step-by-step breakdown of what to do.
  5. Pro Tips & Recommendations: Special tips, ideas and key information will be highlighted, to help you quickly reference the key points.

bird photo cards

“Think of these Snap Cards as your own personal photographic mentor- Your boot camp instructor, that comes with you everywhere. Pushing your creativity to new limits!” – Kent Dufault

How to Get the Bird Snap Cards for a Discount Today:

Currently 82% off which ends soon (normally $50, currently just $9). The sale also includes 3 Bird Photography eBooks + 5 Extended Bird Photography Case-Studies. It also comes with an impressive 365-day happiness guarantee so there’s no risk in trying it.

Deal ending soon: The Bird Photography Snap Cards at 82% Off

- - - - - - - - - - - - - - - - - - - - - - - - - - - - - - - - - - - - - - - - - - - - - - - - - - - - - - - - - - - - - - - - - - - - - - - - - -

Photography, like any art or skill, thrives on consistency. The journey to becoming an adept photographer is paved with regular practice. Learn how PictureCorrect Insiders can help.

- - - - - - - - - - - - - - - - - - - - - - - - - - - - - - - - - - - - - - - - - - - - - - - - - - - - - - - - - - - - - - - - - - - - - - - - - -

This post Printable Bird Photography Snap Cards at 82% Off appeared on PictureCorrect.


from PictureCorrect https://ift.tt/QdoZzhA
via IFTTT

maanantai 12. elokuuta 2024

PictureCorrect.com: How to Photograph Hummingbirds

Hummingbirds are amazing little birds. They’re the only birds that can fly backwards. They can also fly upside down and sideways. They have beautiful iridescent colors and are almost irresistible to photographers. However, they can be a challenge to photograph. This is article is meant as a guide for beginners when taking pictures of these speedy little birds.

hummingbird photo

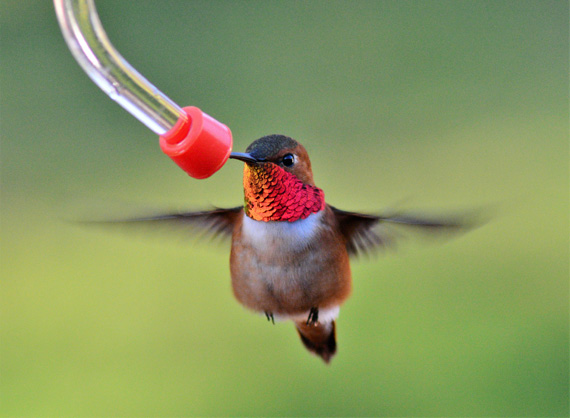
Photo by Bryan Hanson; ISO 2000, f/8, 1/500s

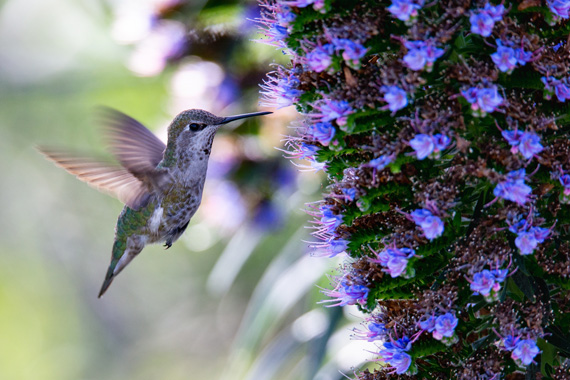
  • First of all, you need to know where to find the hummingbirds. If you don’t already have a hummingbird feeder, I would recommend that you buy one. Hummingbirds are very highly attracted to tubular type flowers but may do a “fly by” on different varieties. However, because there is not as much “food” in each flower, they will be darting quickly from flower to flower. If you have a feeder, they will stay in one location much longer. They will get used to that feeder having food all the time and will come and go all day.
  • Now you need to position yourself in the right location for the best pictures. Hummingbirds, like any other bird, frighten off easily, but I have found that if you’re very still and wait for a few minutes, they will return to the feeder. I prefer to take pictures of hummingbirds in bright sun. Their feathers have an iridescent color, which just glows in bright sun. Position yourself where you can take pictures while the sun is shining directly on the bird. How close you can get to the birds depends on the type of lens you use. Standing very still, I have had them come within inches of me while I was refilling the feeder.
  • There are several pieces of equipment that you’ll need. I would recommend using a zoom or telephoto lens so you can get a good close-up shot without disturbing the birds too much. The farther away you are, the more comfortable they’ll be. I would also recommend using a tripod or monopod. If you don’t have a tripod and your lens has an image stabilizer on it, be sure it’s turned on. You want your picture to be as sharp as possible in case you want to crop it. Using your built-in flash will help to freeze the motion of the wings, however, a hot shoe flash will usually do a better job as they tend to be faster. I personally like to see a little blur of the wings to show motion; to me it’s just a little more interesting.
  • Use the auto-focus, AF, setting on your camera. This allows the camera to refocus on the hummingbird as it darts around. This is harder than it sounds, as they’re so fast. Keep an eye on where the bird tends to hover while waiting for another drink. It’s also helpful to use the center AF point for focusing. Try to keep that center point on your subject as much as possible.
hummingbird flowers

Photo by Anchor Lee; ISO 800, f/5.6, 1/500s

  • You will also need to use a fast shutter speed, and if in shady light conditions, a higher ISO setting. I recommend a shutter speed of about 1/500 of a second and an ISO that gets you there. If you go too high on either setting in a low light situation, you’re going to get too much “noise” and your picture will look grainy.
  • One of the most important things you are going to do to be successful while photographing hummingbirds is to take a lot of pictures! These little speed demons are so fast; you’re going to have to take a lot of pictures to get a few good ones. I have taken as many as 100 pictures, to get 2 or 3 really good shots. Set your camera up so it will take pictures in “bursts.”You can hold down the shutter button and it will take 4-5 pictures, one right after the other.

Hummingbirds are beautiful and amazing creatures. Hummingbird photography is definitely going to be a bit of a challenge, but well worth the effort when you get those one or two great shots.

About the Author:
Sheila Brown (shopbeautifulnaturepictures) is an experienced photographer who enjoys writing articles to share her experiences and her passion for nature photography.

For further training on photographing hummingbirds, here is a helpful video tutorial:

You may not be successful on your first attempt, but don’t give up; with a little time and patience you will succeed!

For Further Help with Bird Photography:

Bird photography is active and hands-on, so your reference materials should be able to come with you anywhere. Enter these new bird photography snap cards. A simple and beautiful way to learn bird photography on-the-go. Download your snap cards – print them out – and pop them in your camera bag— You’ll never miss a shot again! They are currently 82% off today if you want to check them out.

bird snap cards

New: Bird Photography Cheat Sheets (see what’s included)

Not only will these Snap Cards give you a simple and beautiful way to learn bird photography on-the-go… They’ll also give you the confidence to experiment. Because now, if you get stuck with a problem, you’ll have the answer right there with you in your camera bag.

Offer ending soon: The Bird Photography Snap Cards at 82% Off

- - - - - - - - - - - - - - - - - - - - - - - - - - - - - - - - - - - - - - - - - - - - - - - - - - - - - - - - - - - - - - - - - - - - - - - - - -

Photography, like any art or skill, thrives on consistency. The journey to becoming an adept photographer is paved with regular practice. Learn how PictureCorrect Insiders can help.

- - - - - - - - - - - - - - - - - - - - - - - - - - - - - - - - - - - - - - - - - - - - - - - - - - - - - - - - - - - - - - - - - - - - - - - - - -

This post How to Photograph Hummingbirds appeared on PictureCorrect.


from PictureCorrect https://ift.tt/nfo6AXm
via IFTTT

sunnuntai 11. elokuuta 2024

PictureCorrect.com: In-Camera Photography Tricks & Techniques

Quick reminder: only a little while left for the Photo Adventure Cheat Sheets at 80% Off

The great thing about digital photography is that you have wide room for creativity once you’re in Photoshop. You can create any kind of effect by playing around with your shots in any way you choose. But what are some in-camera techniques for cutting edge, creative shots? Let’s look at some of the techniques you can play with to get the best professional and artistic shots. It’s fun, and your only limit is how far your imagination can go.

creative camera technique

“Dagens foto – 190: Fable of the brown ape” captured by Peter Tandlund

Zoom as You Shoot

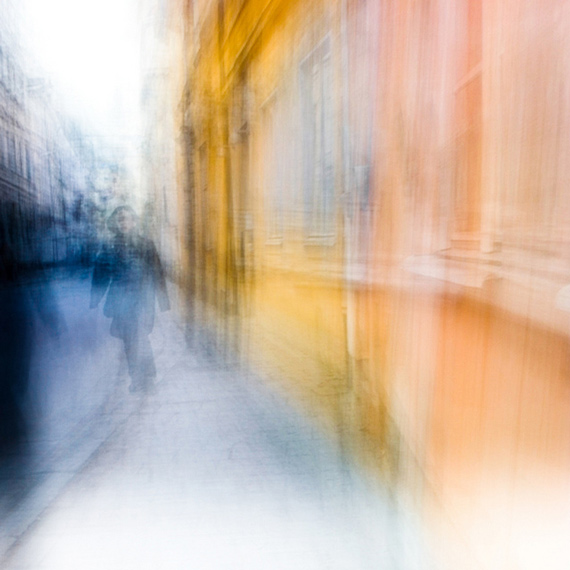
One way to put a sense of movement in your image is to zoom your lens in or out while taking a shot, keeping your camera still as you do so. While panning puts a vertical motion into the picture, zooming gives a dynamic 3D effect. When you combine zooming with slow sync flash, you get pretty dramatic results. Try it and see for yourself.

camera zooming movement

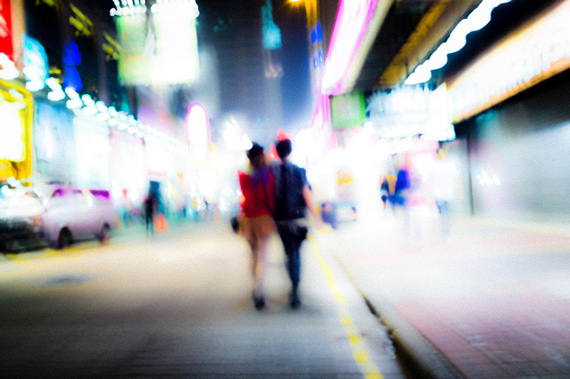
“Drifters in Yau Ma Tei” captured by Paolo Barzman

Move Your Camera

You may have been taught that to get very sharp images, you need to keep your camera still while shooting. I’m not about to dispute that. But sometimes you want a different result than sharp. You can add motion to your shot by moving the camera while shooting. To achieve this effect, you can pan, rotate, or even toss your camera.

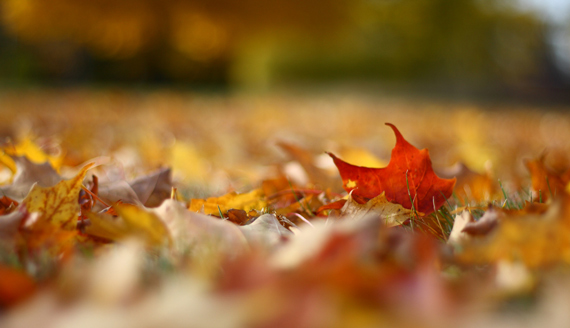
Put Your Camera on the Ground

Catching your subject from this low angle gives a totally new dimension to your shots. You get to see your images from a new perspective. You equally capture an interesting foreground and maybe even one or two surprising objects along the way.

ground perspective

“Fall Foliage on the Ground” captured by Billy Wilson

Experiment With Different Exposure Levels

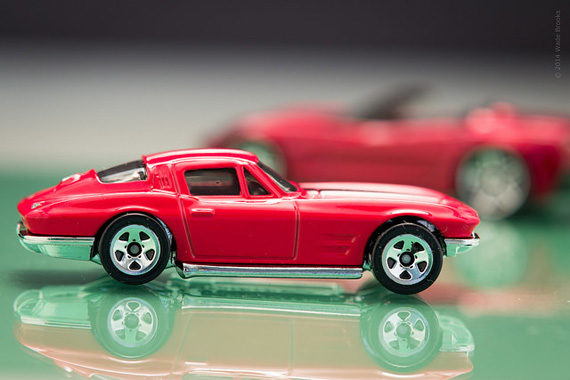
Adjusting your shutter speed to overexpose, you can earn you bright, burnt-out images. Use this technique if you are shooting colorful objects, because it can give you the images on bright, burnt out background.

photography tricks to try

Photo by Wade Brooks; ISO 100, f/6.3, 0.5-second exposure.

Use Low Sync Flash

This technique is your best bet if you are shooting in low light conditions with ambient light and a subject you want to light up with a flash.

Shoot From a High Pedestal

Here you attach your camera to a tripod or an extended monopod and a long shutter release cable. You are able to catch objects high up (billboards, for example) and equally shoot down on scenes you could otherwise not be able to see before. Fish eye and wide angle lenses make it even more fun.

Try Out Multiple Exposures

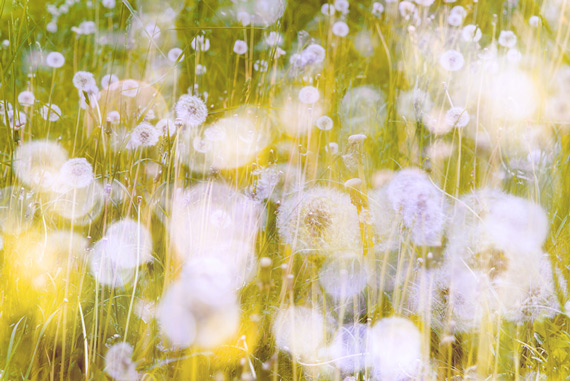
Not all digital cameras have the ability to do multiple exposures, but if yours does, you can achieve some extraordinary results. Take photographs of the same scene from slightly different angles and focal lengths. This is particularly effective with recurring patterns. You can achieve the same effect in Photoshop if your camera does not have a multiple exposure feature.

multiple exposures

“Multiple Nature 266” captured by Pekka Nikrus

Change White Balance

You can put a variety of color casts into your images by playing with different white balance settings. White balance settings are designed to compensate for different types of light situations. You can warm up or cool down the image by experimenting with these images.

Understand Bulb Setting

By holding down the shutter release button, you can keep your shutter open for as long as you want. This allows you a lot of room to play around, especially in low light conditions. The bulb is quite useful when you want to capture light trails or fireworks.

About the Author:
This articles was written by Steve Chijindu Igbokwe from FiveStarPhotoTips.

For Further Training:

For help remembering the camera settings for difficult situations like this, a set of Photography Adventure Cheat Sheets are designed to help. They are currently 80% off for a Summer Sale which ends soon if you want to check them out.

photography adventure

New! Cheat Sheets for Your Photography Adventures (see how they work)

The perfect companion for any photographer. Print one out whenever you need it. Whether you’re going on vacation or seeking out a specific photography adventure, these cheat sheets can provide you with the knowledge and inspiration you need to create your best work yet.

Deal ending soon: The Photography Adventure Cheat Sheets Summer Sale

- - - - - - - - - - - - - - - - - - - - - - - - - - - - - - - - - - - - - - - - - - - - - - - - - - - - - - - - - - - - - - - - - - - - - - - - - -

Photography, like any art or skill, thrives on consistency. The journey to becoming an adept photographer is paved with regular practice. Learn how PictureCorrect Insiders can help.

- - - - - - - - - - - - - - - - - - - - - - - - - - - - - - - - - - - - - - - - - - - - - - - - - - - - - - - - - - - - - - - - - - - - - - - - - -

This post In-Camera Photography Tricks & Techniques appeared on PictureCorrect.


from PictureCorrect https://ift.tt/kaHp4iI
via IFTTT

lauantai 10. elokuuta 2024

PictureCorrect.com: Photography Adventure Aid Summer Sale

Have you ever wanted to photograph an amazing once-in-a-lifetime moment but missed the shot? This set of photography cheat sheets is here to help. With camera settings and critical information on the most challenging photography situations, you’ll never be unprepared again. They are currently 80% off for a Summer Sale 🌞 which ends soon if you want to check it out. Found here: The Photo Adventure Cheat Sheets Summer Sale

photography adventure

New! Cheat Sheets for Your Photography Adventures (see how they work)

The perfect companion for any photographer. Print one out whenever you need it.

Whether you’re going on vacation or seeking out a specific photography adventure, these cheat sheets can provide you with the knowledge and inspiration you need to create your best work yet.

Some of the Many Difficult Situations Covered:

  • Auroras (The Northern Lights)
  • Lightning
  • The Milky Way
  • Star trails
  • Meteor showers
  • Comets
  • Sunrise phases
  • Sunset phases
  • Lunar eclipses
  • Solar eclipses
  • Birds in flight
  • Manhattanhenge
  • Firefall Yosemite
  • Snowy scenes
  • Infrared
  • Fireworks
  • Travel portraits
  • Cityscapes
  • High dynamic range
  • Traffic streaks
  • Focus stacking
  • Wildlife
  • Air shows
  • Light painting
  • Daytime long exposures
  • Timelapse
  • Seascapes
  • Panoramas
  • Cameraphone tricks
  • Packing checklist
  • And more!

Our team of photographers, writers, a graphic designer, and layout designer have been working tirelessly to bring you the ultimate Cheat Sheets. They have spent countless hours researching, writing, designing, and perfecting each sheet to ensure they provide the most valuable and comprehensive information on the most difficult photography situations.

How to Get the Adventure Set for a Discount Today:

They are currently 75% off for a Summer Sale today! They also come with a 90-day money back guarantee. If you are not completely satisfied with your purchase, simply contact us within 90 days of your purchase and we will refund your money in full. So there’s no risk in trying them.

Summer sale ending soon: The Photography Adventure Cheat Sheets at 80% Off

- - - - - - - - - - - - - - - - - - - - - - - - - - - - - - - - - - - - - - - - - - - - - - - - - - - - - - - - - - - - - - - - - - - - - - - - - -

Photography, like any art or skill, thrives on consistency. The journey to becoming an adept photographer is paved with regular practice. Learn how PictureCorrect Insiders can help.

- - - - - - - - - - - - - - - - - - - - - - - - - - - - - - - - - - - - - - - - - - - - - - - - - - - - - - - - - - - - - - - - - - - - - - - - - -

This post Photography Adventure Aid Summer Sale appeared on PictureCorrect.


from PictureCorrect https://ift.tt/JwMp3SH
via IFTTT

perjantai 9. elokuuta 2024

PictureCorrect.com: Daytime Long Exposure Photography Tips

There are two main categories of long exposure photography: images captured during the day and those that are taken at night. Although the techniques used to take these photos are largely the same, a number of differences also exist. This article talks about the techniques of taking daytime long exposures.

Use a neutral density (ND) filter

Neutral density filters are normally available in different stops. The type you choose really depends on how long the exposure needs to be and also on the brightness of the day.

how to do long exposure photos

Photo by Nicolas Raymond; ISO 100, f/9.0, 10-second exposure.

Focus first

It will become nearly impossible to autofocus, especially if you are using a ND filter that is very dense. Sometimes, it may even be impossible to focus. The reason for this is that the ND filter will only allow a certain amount of light to pass through it, but your autofocus definitely requires more light for it to function. The same is also true for your eyes. This means that you will first have to remove the ND filter, compose, manually focus the shot, and then finally replace the filter and shoot. It is not advisable to use autofocus for this step, because your camera will attempt to refocus the shots after replacing the filter.

Make use of NDCalc

With this simple app (available for both Android and iPhone), it is possible to get the right exposure even with the ND filter attached. In order to use this tool, you need to use your camera’s meter to take a reading without ND filter. After that, inform the app of the exposure time that your camera got, as well as the type of ND filter that you are using. It will tell you the duration that exposure ought to be.

Take the best photos during the magic hour

The magic hours are times just before sunset and just after sunrise. Even with daytime exposure, it is still a lot better to take shots during the magic hours. This will give you better contrast against the clouds–something that will make the movements there appear more dramatic.

long exposure photography explained

Photo by Michael Levine-Clark; ISO 100, f/9.0, 210-second exposure.

Have your goals in mind

The weather will not matter at all if you aim to capture the misty look of the water. However, if you intend to capture cloud movement, you need to be more careful in your choice of weather. You require a day that is partly cloudy with decent winds. If a day is fully overcast, forget about getting that beautiful streak appearance, as it will be too cloudy. On the other hand, a windless day is likely to offer you only scant sky movement.

how to take amazing long exposure shots

Photo by Andi Campbell-Jones; ISO 100, f/6.3, 45-second exposure.

With these four tips, you can trust that you will get the best daytime long exposure photography and get the best shots you have ever wanted.

About the Author:
Swee Shiong Chong writes for SG East Photography, a photography blog on techniques and equipment that is used in creating all types of photography from around the world.

Neutral density filters have are dark sheets of glass or plastic which will decrease the level of light getting into the camera. Exactly like sunglasses, the amount of light is reduced and it enables you to use longer exposures for nice motion blur effects. ND filters are coming in various grades from lighter to darker and depending on that, they can reduce the camera settings from one stop to several.

The whole idea is to be able to have long time exposures during daylight hours which opens up many new opportunities.

For Further Training:

For help remembering the camera settings for difficult situations like this, a set of Photography Adventure Cheat Sheets are designed to help. They are currently 80% off for a Summer Sale which ends soon if you want to check them out.

photography adventure

New! Cheat Sheets for Your Photography Adventures (see how they work)

The perfect companion for any photographer. Print one out whenever you need it. Whether you’re going on vacation or seeking out a specific photography adventure, these cheat sheets can provide you with the knowledge and inspiration you need to create your best work yet.

Deal ending soon: The Photography Adventure Cheat Sheets Summer Sale

- - - - - - - - - - - - - - - - - - - - - - - - - - - - - - - - - - - - - - - - - - - - - - - - - - - - - - - - - - - - - - - - - - - - - - - - - -

Photography, like any art or skill, thrives on consistency. The journey to becoming an adept photographer is paved with regular practice. Learn how PictureCorrect Insiders can help.

- - - - - - - - - - - - - - - - - - - - - - - - - - - - - - - - - - - - - - - - - - - - - - - - - - - - - - - - - - - - - - - - - - - - - - - - - -

This post Daytime Long Exposure Photography Tips appeared on PictureCorrect.


from PictureCorrect https://ift.tt/zx9eP2G
via IFTTT