torstai 8. elokuuta 2024

PictureCorrect.com: Top 5 Tips You Need to Know Before Photographing Your First Wedding

Are you nervous about photographing your first wedding!? This article will give you the top 5 most important wedding photography tips that you need to know and implement before shooting your first wedding!

This is the holy grail, beginners guide to getting you prepared and ready for your first wedding shoot.

I wish someone had told me these tips when I shot my first wedding, but unfortunately I had to learn the hard way! So let’s celebrate…woohoo! Because if you follow and actually practice these 5 steps you’ll be ready.

bride and groom in forest

So, let’s set the scene: you’ve booked your first wedding about a year ago and at the time you were super excited! It may be a paid job or you might just be doing it for free for a friend to get some experience. Either way, it’s one of the most important days of the couple’s life so you need to make sure you nail it! The wedding is about two months away and your excitement has turned to fear, you find beads of sweat appearing on your forehead just thinking about the wedding, and as you see the big day quickly approaching it’s time to get organized.

Hopefully this list of wedding photography tips can help calm your nerves and get you as prepared as possible for the big day. And remember to have fun, because it’s going to be the first day of doing the best job in the world!

Before we get started, you need to know that being an awesome wedding photographer is NOT all about photography!

Having good photography skills is only about 30 percent of what it takes to being an awesome wedding photographer.

The other 70 percent includes:

  • Being happy, friendly and building rapport with anyone and become everyone’s best friend
  • Being an awesome problem solver when things go wrong (e.g., car breaks down, camera breaks, mother-in-law faints, etc., and yes, these have all happened to me!)
  • Being able to think quickly on your feet, make big decisions, and convince everyone it’s the right thing to do
  • Being bold, getting people to listen to you but never be rude—crowd control :)
  • Being an entertainer. Having fun with the bridal party, cracking jokes, playing games
  • Giving the bride and groom the best possible experience so they enjoy having their photos taken.
  • and lots more…

I wrote an article summarizing a day in the life of a wedding photographer; I suggest you read it to give you a really good idea, step by step, total overview of what it’s like to actually be the photographer on the day.

Lastly, I want to talk about the number one, holy grail, mother of all beginner wedding photography rules:

PREPARE, PREPARE and PREPARE!

Although this may seem obvious to most people, it’s amazing how little preparation some photographers put into their first wedding! Please don’t expect to rock up and just wing it. It’s irresponsible and totally unfair for the couple who are expecting you to know what you’re doing. So what does prepare, prepare and prepare mean? I personally find that preparation is the key for success in any industry so I have focused the following 5 top wedding photography tips on helping you to be as prepared as possible so you can rock up with confidence and nail it!! :)

1. Know your gear inside out

Let’s begin with one of the most important tips, know your gear! This should be a no brainer. Pick up your camera and make sure you know all the settings, understand the modes, get to know the settings that are available on your lenses (image stabilizer for example), work out all the options available on your speedlite, etc etc.

If you want to know what wedding photography gear I use, click here.

gear list for new wedding photographers

**Real life horror story** During one of my first weddings, I thought I knew my gear and then suddenly, BANG! My cameras shutter speed stopped increasing once it hit 1/250 of a second, the couple is looking at me waiting impatiently for direction and I’m red in the face and frantically trying to get my settings right. FYI, when your speedlight is attached and turned on, your camera does not allow you to shoot faster than 1/250 of a second. Simply turning on the ‘high speed’ mode on your speedlight fixes this! I wish I had known that before the day!!

Once you think you know your stuff, grab a friend or partner and practice getting perfectly exposed images quickly and in a lot of different locations.

I used to torture my poor girlfriend at the time (now wife!) by taking photos of her all around the house. It doesn’t need to be flattering,—just practice so you get used to getting your settings right, so on the big day you can be prepared.

My wife is going to kill me for showing these images—but it is what I did to learn so I wanted to share it with you. I even grabbed some branches from the neighbors’ yard to use as the bouquet! Here are some before shots (me learning at home) and after shots (real wedding examples).

mock bride portraits

photographing bride practice

**Try This** Go into the lounge room, position your subject where you would position your bridal party (ideally photographer’s back to a window), and take a photo of him/her as quickly as possible with perfect exposure. Then walk outside to the backyard and do the same: find the best spot, either in the shade or with the sun behind the subject, and shoot. Next, head to the front yard, then the kitchen, study, whatever! Use your flash, practice in a darker room with little window light, as this would be similar to the conditions you will be up against in the reception. Bounce the flash off the roof or the wall, or turn it off and crank your ISO to see what happens. Practice all these options and see what works best, so that on the wedding day, you’ll be prepared.

**Funny story** I used to watch the TV through my camera and try and move my focal points around as quickly as possible to follow the person’s face on the screen! Sounds silly, but now I can do it without thinking, and it saves me getting a lot of camera blur issues when shooting.

2. Scout the locations

Scouting locations is another MUST DO before the wedding so you can be prepared. You most likely won’t get a chance to see the groom’s house or bride’s house before the day, but you can assume it is like any average home. As long as there is light in the lounge room and master bedroom, then you’ll be OK.

**Extreme Example** I shot groom coverage in a one bedroom apartment with five boys in the bridal party plus 50 family members standing around waiting for me to finish so the bride could arrive and they could start the tea ceremony! Talk about pressure as well as working in tight spaces!

So, apart from the groom and bride coverage you should definitely scope out the scenes at the church/ceremony location, as well as the locations you intend to go to, and even pop into the reception to see what you’re up against.

**Tip** It would be awesome if you could go to these locations at roughly the same time of day as you will be there on the actual wedding so the lighting will be similar.

I would suggest googling the locations before you go on your shoot and see what other photographers have done there in the past. Then head over, use their shots as inspiration and work out your own ideas. Walk around everywhere, find the best spots, and use your camera. Take photos pretending the couple is standing there so you can work out your compositions. Below I simply google “Parliament House Wedding” and heaps of examples pop up, which makes for a really good reference!

google your wedding location for shot ideas

I know this sounds like a lot of work, but like I keep mentioning, preparation is key. If you’ve already been to the locations, worked out your ideas, and photographed your imaginary couple in the best spots, you’re going to kill it on the actual wedding day!

3. Write a shot list and memorize it

This is another really important tip that I used to do for at least my first 20 weddings! Write a shot list of exactly what you’re going to do at every location. Feel free to be as specific as possible and then try and memories it. Also, I feel that writing it with pen and paper actually helped me to remember everything a lot more than just typing it out.

I literally used to write the following info down the day before every wedding:

Groom Coverage Shot List

Details

  • Flower
  • Tie
  • Cufflinks
  • Rings
  • Cologne
  • Watch?
  • Ask the groom if there is anything else he wants

Boys Getting Ready

  • Boys helping groom with cufflinks
  • Boys helping groom with tie
  • All boys putting vests on
  • All boys helping adjust the back of each others vests
  • Slap each in the ass shot!
  • All boys grab jackets and do the Roger David shot
  • All boys put on jackets
  • Hero shot of all the boys fully dressed looking awesome
  • Serious and gangster!
  • Big smiles
  • Hugging and ruffing up the groom!
  • the wedding rings at Tatra Receptions
  • groomsmen helping groom prepare for his wedding at Montsalvat
  • Groom and his boys hanging out in the alleyway
  • bright colorful portrait of the groom before going to Montsalvat
  • Groom and groomsmen having a beer before the ceremony at Montsalvat
  • Portrait of the groom using orange video lighting

Etc, etc, etc… You get the point :)

wedding rings

I know this is super detailed, and all weddings are different, and things happen and you can’t always do all these shots, but at least I have all my shots memorized so whatever happens, I’ll be prepared and always have ideas up my sleeve!

Do this for the bride coverage and definitely the locations too. Bring a pen and paper with you when you’re doing your recce and as your finding spots, write stuff down. For example:

  • Bride on her own in archway (full length)
  • back of dress shot
  • bride looking down at flowers
  • bride looking away into the distance
  • bride looking at camera
  • groom on his own in archway (full length)
  • hands in pockets looking cool at camera
  • looking into the distance
  • looking at his bride
  • serious and smiling at camera
  • Bride and Groom together (full length)
  • looking at eachother
  • nosey nosey
  • kissing
  • looking at camera
  • Bride hugging groom from behind (close up)
  • Both looking at camera
  • Looking into the distance together
  • Bride kissing groom on the cheek
  • Bride sticking her tongue in the grooms ear!! Get the reaction!!

**Tip** For every scene try and shoot a series of wider shots, and then mix things up and shoot another series of close up shots in the same location. Doing this will make it a million times easier when it comes to designing the wedding album! All the pages will just fall into place.

wedding day portrait

4. Assist as much as you can

This is another super important thing that you should definitely do before you go out and shoot your first wedding! Ideally start trying to find someone to assist as soon as you book your first wedding or even before that. The sooner you start assisting the more prepared you will be.

**Tip** Finding a job as an assistant or even volunteering is not an easy task. Especially because every other beginner photographer is looking for the same job. Find the best 20 wedding photographers that you LOVE and shoot in a style that you really like and start emailing them one by one. Make sure they have your details on file and know your available at the drop of a hat. Even email them once a month (but don’t be annoying). I generally find that if your timing is right, you’ll get the job. Imagine, their current assistant is sick, they need someone urgently, and suddenly your email pops up—you’re in!

If you have no luck, then just make yourself a cup of coffee, put some music on, and start emailing all the wedding photographers in your city. One will eventually get back to you, and you can start heading out and getting some experience.

This will give you first hand experience from a pro (hopefully) of exactly what goes on behind the scenes of a wedding. Try to put yourself in their shoes and guess what shots they’re going to do next. Imagine what settings you would use on your camera as you go from location to location.

Best of all, you get a decent amount of one-on-one time with the photographer while driving around, so you can ask plenty of questions (without being annoying!). Pick their brains; most of the time they’ll be more than happy to help you and divulge their knowledge, as they know that once upon a time they started out just like you.

wedding photography assistant

Ask local photographers if they need an assistant.

5. Shoot a fake wedding

One of the best ways to prepare for the real wedding is to shoot a fake wedding! Get some friends together or a couple that you know and try and mimic some of the shots that you are actually going to do on the wedding day.

Shoot the groom coverage in a lounge room, try and memories the shots you need and practice getting the images perfect in camera. Same as the bride coverage, don’t worry about the dress, just try and get the shots.

Go on location to the actual spots you are going to use for your first wedding and shoot all the images you would for the real day. Practice getting it right in camera. There is no pressure doing it this way, so take your time and get it right, until it becomes almost second nature!

I just found some old photos in my archives of me doing this. I dragged some friends of mine to the city and acted out the scenes that I actually was going to do on the wedding day. Check out my super embarrassing before shots compared to my half decent real wedding after photos below:

mock wedding photography
practice wedding photography
Thanks so much for reading!

Hope you enjoyed this article detailing in my opinion the 5 top tips to get a beginner photographer ready for their first wedding. If this is you, let me know what you thought! Did it help you? Have you got some better ideas? Did I miss something super important??

I really appreciate your feedback so feel free to leave a comment. Or, if you know someone else who might benefit from reading this article, feel free to share it!

About the Author:
Chris Garbacz has 10 years of experience as a Melbourne wedding photographer with Epic Photography PTY LTD. He’s photographed just shy of 400 weddings, says he has seen it all and experienced almost every scenario imaginable. The best part is that he still loves photographing weddings and jumps out of bed feeling excited to see each couple’s wedding day unfold.

- - - - - - - - - - - - - - - - - - - - - - - - - - - - - - - - - - - - - - - - - - - - - - - - - - - - - - - - - - - - - - - - - - - - - - - - - -

Photography, like any art or skill, thrives on consistency. The journey to becoming an adept photographer is paved with regular practice. Learn how PictureCorrect Insiders can help.

- - - - - - - - - - - - - - - - - - - - - - - - - - - - - - - - - - - - - - - - - - - - - - - - - - - - - - - - - - - - - - - - - - - - - - - - - -

This post Top 5 Tips You Need to Know Before Photographing Your First Wedding appeared on PictureCorrect.


from PictureCorrect https://ift.tt/F7TtV5c
via IFTTT
keskiviikko 7. elokuuta 2024

PictureCorrect.com: Getting Off Auto Mode With Your Camera

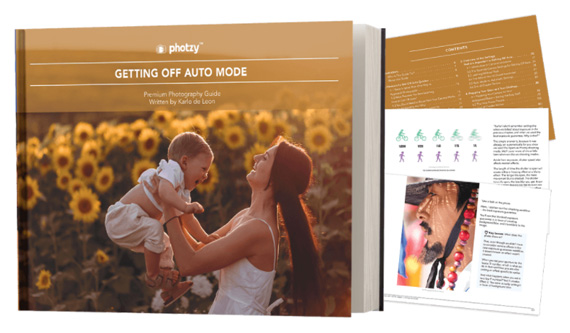
Do you ever feel like your camera’s Auto Mode is holding you prisoner? There is a common fear behind leaving Auto Mode and taking full control of your camera. Much of that fear is needlessly entrenched in our minds. This popular step-by-step guide is designed to help conquer that fear and give you full creative control of your camera. It is currently 71% off today if you want to check it out. Found here: Getting Off Auto Mode at 71% Off

off auto mode ebook

Master Digital Cameras (see inside)

We all have a photography comfort zone, and it can be quite scary to push out of it. In fact, much of the time, the Auto Mode can do an O-K job — so why should we even bother?

The more control you have over your camera, the better you’re able to translate your vision into a great photo.

Some of the Many Topics Covered (over 250 pages):

  • Confidently capture the moments in front of you without having to fumble with numbers, or worry about calculating the correct settings on your camera.
  • Take full creative control over your images – finally producing photographs with fancy effects just like the pros.
  • Nail your exposures every time instead of just snapping and hoping the camera will capture it the way you want.
  • Get those wonderful blurry backgrounds that you see the professionals create.
  • Be creative with motion subjects. You can create light trails, freeze a falling subject, and even make objects look like they’re floating. The possibilities are endless!
  • Easily deal with difficult shooting scenarios like photographing darker skin tones, shooting snow, creating silhouettes, and shooting against the light, among others.

Walk-through exercises are sprinkled throughout the guide. So keep your camera handy and follow along as you read. Treat the assignments as experiments. Allow yourself to observe the effects of your camera whenever you change settings. The more you familiarize yourself with your camera. The better you get.

How to Get a Discounted Copy Today (With Bonuses):

Currently 71% off which ends soon (normally $100, currently just $29). It also comes with an impressive 365-day happiness guarantee so there’s no risk in trying it.

Deal ending soon: Getting Off Auto Mode eBook at 71% Off

- - - - - - - - - - - - - - - - - - - - - - - - - - - - - - - - - - - - - - - - - - - - - - - - - - - - - - - - - - - - - - - - - - - - - - - - - -

Photography, like any art or skill, thrives on consistency. The journey to becoming an adept photographer is paved with regular practice. Learn how PictureCorrect Insiders can help.

- - - - - - - - - - - - - - - - - - - - - - - - - - - - - - - - - - - - - - - - - - - - - - - - - - - - - - - - - - - - - - - - - - - - - - - - - -

This post Getting Off Auto Mode With Your Camera appeared on PictureCorrect.


from PictureCorrect https://ift.tt/9u04SPU
via IFTTT

maanantai 5. elokuuta 2024

PictureCorrect.com: Gigapixel Image Upscaler Update v7.3.0

In photo editing news, Topaz Labs just announced a new update to Gigapixel AI. Designed to do the impossible with machine-learning-powered image enlargement. Upscale your photos by up to 600% while perfectly preserving image quality. Keep reading to see what’s new.

gigapixel update

What’s New in Gigapixel AI v7.3.0:

  • Seed Regeneration for the new Recovery AI model to generate better detail in your results
  • Updated Resize Mode user interface. Scale, width, and height all in one space instead of three tabs.
  • New Custom ICC profiles in Export. You can now add your own and review them in the Profiles Directory.
  • New Command Line Interface for Gigapixel. Available for Pro users.
  • Better Crop tool rotation to snap at 15 degree increments. You can also now decrease processing time using Recovery after image has been cropped.
  • New Light Mode available in Preferences

Print any image, bigger and better. Perfect for large-format prints where every pixel counts.

See how it works: Gigapixel A.I. Version 7.3.0

- - - - - - - - - - - - - - - - - - - - - - - - - - - - - - - - - - - - - - - - - - - - - - - - - - - - - - - - - - - - - - - - - - - - - - - - - -

Photography, like any art or skill, thrives on consistency. The journey to becoming an adept photographer is paved with regular practice. Learn how PictureCorrect Insiders can help.

- - - - - - - - - - - - - - - - - - - - - - - - - - - - - - - - - - - - - - - - - - - - - - - - - - - - - - - - - - - - - - - - - - - - - - - - - -

This post Gigapixel Image Upscaler Update v7.3.0 appeared on PictureCorrect.


from PictureCorrect https://ift.tt/OPZX0xq
via IFTTT

sunnuntai 4. elokuuta 2024

PictureCorrect.com: 10 Advanced Smartphone Camera Options for Avid Photographers

While most smartphone users are familiar with the basic features of their camera, there are lesser-known features and capabilities that can greatly enhance the photography experience. Some of these features may be device-specific or available through third-party apps, but photographers should be aware of the following:

Final day reminder: only hours left for the iPhone Photo Academy Super Sunshine Sale

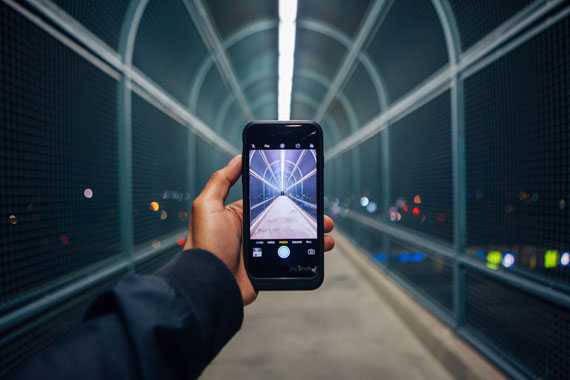
advanced smartphone photography

Photo captured by Omar Prestwich

1. RAW image capture: Many smartphones allow users to capture images in RAW format, which provides more control over post-processing.

2. Manual mode: Some smartphones have a manual mode that allows users to adjust settings like shutter speed, ISO, and focus, providing greater creative control.

3. Focus peaking: This feature highlights in-focus areas of the image, making it easier to determine the depth of field and ensure a sharp focus.

4. Long exposure: Some smartphones support long exposure photography, allowing users to capture light trails, star trails, or smooth water effects.

5. Bracketing: With bracketing, the camera takes multiple images at different exposure levels, allowing photographers to merge them for HDR photos or choose the best exposure later.

6. ProRAW: Exclusive to some iPhone models, ProRAW combines the benefits of RAW format and computational photography for greater flexibility in post-processing.

7. Night mode: This feature enables better low-light photography by taking multiple images and combining them to reduce noise and enhance detail.

8. Burst mode: By holding down the shutter button, users can take a rapid succession of images, making it easier to capture action or fast-moving subjects.

9. Time-lapse: Many smartphones have a built-in time-lapse feature, allowing users to create stunning videos by capturing images at specific intervals.

10. External lenses: To expand their smartphone’s capabilities, photographers can use external lenses, such as wide-angle, telephoto, or macro lenses, which can be attached to the phone’s camera.

Remember that not all smartphones may have these features, and updates or new models may introduce even more capabilities. To get the most out of your smartphone camera, it’s essential to explore and experiment with the available settings and features.

For Further Training:

iPhone Photo Academy is an in-depth online course that will show you how to take incredible iPhone photos. With the right knowledge an iPhone can be used to take photos that are so good that most people would never even believe that they were taken with a phone. It is currently 84% off for the Super Sunshine Sale which ends soon!

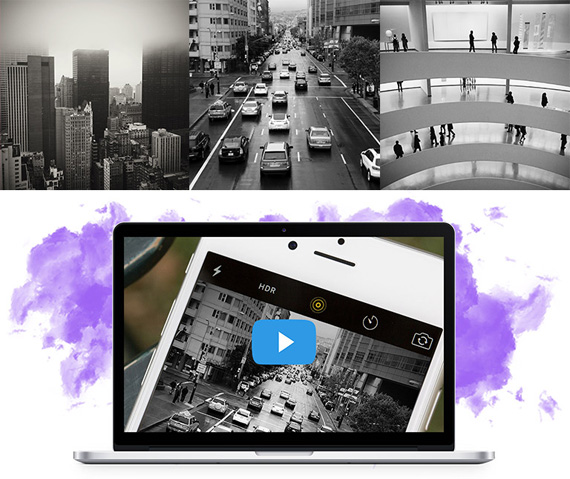
iphone photo tutorials

iPhone Photography Tricks (Click to See More Examples)

The best camera is the one that is always with you. But having the iPhone with you is only half of the equation. The other half is knowing how to use it to take outstanding photos.

Deal ending soon: The iPhone Photography Academy at 84% Off

- - - - - - - - - - - - - - - - - - - - - - - - - - - - - - - - - - - - - - - - - - - - - - - - - - - - - - - - - - - - - - - - - - - - - - - - - -

Photography, like any art or skill, thrives on consistency. The journey to becoming an adept photographer is paved with regular practice. Learn how PictureCorrect Insiders can help.

- - - - - - - - - - - - - - - - - - - - - - - - - - - - - - - - - - - - - - - - - - - - - - - - - - - - - - - - - - - - - - - - - - - - - - - - - -

This post 10 Advanced Smartphone Camera Options for Avid Photographers appeared on PictureCorrect.


from PictureCorrect https://ift.tt/dwY4UOZ
via IFTTT

lauantai 3. elokuuta 2024

PictureCorrect.com: Aperture Adjustment in iPhone Portrait Mode Post-Capture

In photography, aperture is a crucial element that controls the amount of light entering the lens, affecting both brightness and depth of field. Although traditionally associated with DSLR and mirrorless cameras, modern smartphones like the iPhone now offer adjustable aperture settings, even after a photo has been taken. This feature is especially useful in portrait photography, where achieving the perfect balance between subject sharpness and background blur (bokeh) is key. In this post, we’ll delve into the steps and tips for adjusting the aperture in iPhone portraits post-capture.

Related reminder: only 1 day left for the iPhone Photo Academy Super Sunshine Sale

aperture adjustment

Understanding Aperture in iPhone Photography:

The iPhone’s adjustable aperture feature relies on computational photography. Unlike traditional cameras, where aperture adjustment is achieved mechanically, the iPhone uses software to simulate various aperture values. This digital flexibility allows photographers to fine-tune the depth of field effect after the shot has been captured.

Steps to Adjust Aperture Post-Capture:

1. Open the Photos app:

Locate and open the Photos app on your iPhone to find the portrait photo you wish to adjust.

2. Select the desired photo:

Browse through your photos and tap on the portrait photo you want to edit.

3. Tap ‘Edit’:

In the upper right-hand corner, you will find the ‘Edit’ button. Tap on it to enter the editing mode.

4. Adjust the Depth Control:

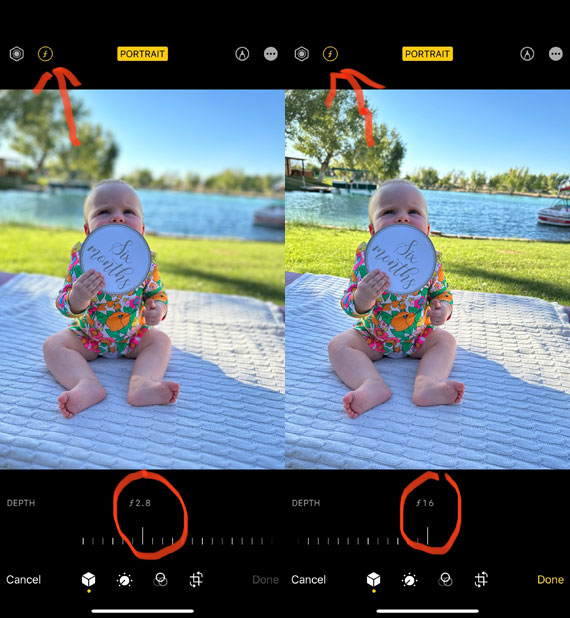
You will see a depth control slider (indicated by an ‘f’ symbol followed by a number) at the bottom of the screen.
Drag the slider left or right to adjust the aperture value. Moving it to the left (lower f-stop numbers) will create a shallower depth of field, blurring the background more. Conversely, sliding to the right (higher f-stop numbers) will increase the depth of field, making more of the scene in focus.

5. Compare Before and After:

Use the ‘Before and After’ feature by pressing and holding on the photo to see how your adjustments have changed the image.

6. Save Your Edits:

Once satisfied with the adjustment, tap ‘Done’ to save your edits.

Tips for Better Aperture Adjustment:

  • Understanding the Effect: Familiarize yourself with how aperture affects your photos. Experiment with different settings to see how they impact the depth of field and the overall look of your portraits.
    Consider the Lighting: Lighting conditions can significantly impact how the aperture adjustment will look. Ensure there’s adequate lighting to get the desired effect.
    Utilize Third-Party Apps: Explore third-party apps like Focos or Halide that provide more advanced depth and aperture control, allowing for even more creative flexibility in your portrait photography.

Here’s a breakdown of how it operates:

Depth Mapping:

When you take a photo in Portrait mode, the iPhone’s dual or multi-lens camera system captures the scene from slightly different angles. This data is used to create a depth map of the scene, understanding which objects are closer and which are farther away.

Computational Photography:

The depth information is then utilized by the software to apply a depth effect to the image. The term computational photography refers to the use of software algorithms to enhance or extend the capabilities of digital photography.

Simulated Aperture Adjustment:

  • When you adjust the aperture post-capture, what you’re essentially doing is instructing the software how much blur to apply to the different areas of the image based on the depth map.
  • A lower f-stop number (e.g., f/1.4) will result in more blur, simulating a shallower depth of field, while a higher f-stop number (e.g., f/16) will result in less blur, simulating a deeper depth of field.
  • This is a simulation of what adjusting the aperture on a traditional camera lens would do. However, unlike a traditional camera, the iPhone is using software algorithms to achieve this effect, not a physical change in the lens aperture.

Real-Time Preview and Adjustment:

The iPhone allows you to see these changes in real-time as you slide the depth control slider, making it easy to find the exact look you want.
Saving the Adjustment:

Once you’ve adjusted the aperture to your liking, you can save the image, and the software renders the final image with the chosen depth of field effect.

Adjusting the aperture post-capture on your iPhone is a powerful tool to enhance your portrait photographs. With a bit of practice and experimentation, you can master this feature and significantly up your photography game.

For Further Training:

iPhone Photo Academy is an in-depth online course that will show you how to take incredible iPhone photos. With the right knowledge an iPhone can be used to take photos that are so good that most people would never even believe that they were taken with a phone. It is currently 84% off for the Super Sunshine Sale which ends soon!

iphone photo tutorials

iPhone Photography Tricks (Click to See More Examples)

The best camera is the one that is always with you. But having the iPhone with you is only half of the equation. The other half is knowing how to use it to take outstanding photos.

Deal ending soon: The iPhone Photography Academy at 84% Off

- - - - - - - - - - - - - - - - - - - - - - - - - - - - - - - - - - - - - - - - - - - - - - - - - - - - - - - - - - - - - - - - - - - - - - - - - -

Photography, like any art or skill, thrives on consistency. The journey to becoming an adept photographer is paved with regular practice. Learn how PictureCorrect Insiders can help.

- - - - - - - - - - - - - - - - - - - - - - - - - - - - - - - - - - - - - - - - - - - - - - - - - - - - - - - - - - - - - - - - - - - - - - - - - -

This post Aperture Adjustment in iPhone Portrait Mode Post-Capture appeared on PictureCorrect.


from PictureCorrect https://ift.tt/XiH8ZaK
via IFTTT

perjantai 2. elokuuta 2024

PictureCorrect.com: Travel Photography Tips to Remember

Each place that you visit has its own peculiar ambiance. If you want your travel photographs to look exceptionally good, you should try to capture the unique character and features of that place. The snapshots should not only trigger your memories but should also easily communicate to others the captivating vim and vigor of the location.

how to take quality travel photos

Photo by – Adam Reeder –; ISO 400, f/6.3, 1/4000-second exposure.

With respect to travel photography, here are eight important tips that will help you capture outstanding photos.

1. Travel photography gear, be prepared

A DSLR or Mirrorless camera with a 50mm to 200mm lens (the Canon EF 24-105mm f/4 L IS is a great one) will set you up for travel success. Your camera bag should have memory cards, batteries, a battery charger, filters, external flash units, a lens hood, cleaning gear, power adapter and a tripod or monopod.

You don’t need any kind of special training in travel photography to take good shots. You just have to know the basics, like how to set the shutter speed or how to alter the aperture size. You should also learn about different camera modes, ISO, silhouettes, filter usage, and so forth.

2. Gather as much information about the destination as possible

If photography is the sole purpose of your trip, then before getting to the destination, gather as much information as possible. You should know about the best time to travel, chief modes of transportation, main attractions, events that shouldn’t be missed, and things that should be avoided. Once you have completed your research, prepare a list of photographic opportunities available.

3. Look beyond the main tourist attractions

Often, travel photographers become so obsessed with the main tourist attractions that they fail to notice other photo-worthy subjects. While traveling, keep your eyes wide open. At times, objects near the main attraction are more interesting and photogenic.

4. Natural light vs. artificial light

Artificial light sources usually make the photographs look unreal. For better shots, rely upon natural light. Make the most of sunlight, and don’t hesitate to use filters, reflectors, lens hoods, and fill flash whenever the sun becomes too overbearing. If the subject is not well-lit, then freely use flash. By utilizing flash diffusers, night mode, and fine-tuning the exposure settings of the camera, you can easily prevent instances of flash blow-outs.

5. Frame composition is crucial

Each frame that you capture should be top-class. Before you press the shutter button, meticulously examine and evaluate the scene. Apart from the subject, take a look at the background. Make sure that secondary focal points do not overshadow the subject. Everything you wish to include in the frame should be distinctly visible.

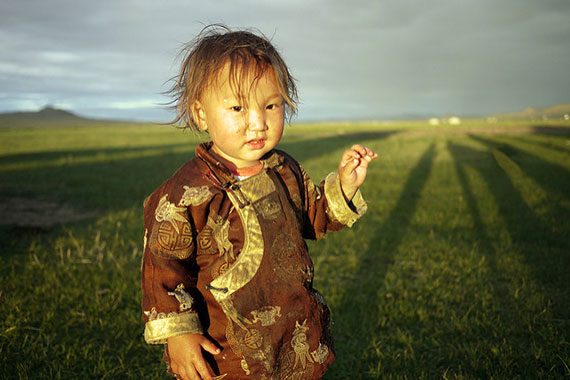
travel photography tips for beginners

Photo by Jonathan E. Shaw; ISO 100, f/1.8, 1/200-second exposure.

6. Try to interact and connect with the people

For capturing candid portraits, you should openly interact with the people. Close interaction will help to generate trust, and it will become relatively easy for you to convince them to gaze through your lens.

7. Don’t count the pictures

Experienced travel photographers shoot the subject from all possible perspectives before moving to the next photographic opportunity. Hence, for shooting great travel photos, explore the scene from all angles, and take snapshots liberally.

travel photography techniques

Photo by azedkae; ISO 400, f/4.5, 1/50-second exposure.

8. Avoid traveling with a group

If you travel with a group, your creative freedom is be drastically curtailed. You won’t get a chance to pause, look around, and assess the different perspectives of the subject. Moreover, your pictures won’t be exclusive, as all the members of the group will be shooting the same buildings and people.

About the Author:
This article was written by Patrick Laundy. He managed an online photo album called OurPhotos. The idea was to keep things as simple and uncluttered as possible while providing a fully-functional photo sharing service.

- - - - - - - - - - - - - - - - - - - - - - - - - - - - - - - - - - - - - - - - - - - - - - - - - - - - - - - - - - - - - - - - - - - - - - - - - -

Photography, like any art or skill, thrives on consistency. The journey to becoming an adept photographer is paved with regular practice. Learn how PictureCorrect Insiders can help.

- - - - - - - - - - - - - - - - - - - - - - - - - - - - - - - - - - - - - - - - - - - - - - - - - - - - - - - - - - - - - - - - - - - - - - - - - -

This post Travel Photography Tips to Remember appeared on PictureCorrect.


from PictureCorrect https://ift.tt/4qZTOey
via IFTTT

torstai 1. elokuuta 2024

PictureCorrect.com: Understanding Computational Photography in Smartphones

Smartphone photography has come a long way since the early days of grainy, low-resolution images. Today’s smartphones are equipped with advanced cameras that rival even some professional equipment. The secret behind this remarkable transformation lies not just in hardware improvements but also in the rise of computational photography.

computational photography

Photo captured by Hendrik Morkel

What is Computational Photography?

Computational photography refers to the use of software algorithms to enhance or create images. Unlike traditional photography, which relies primarily on optical and mechanical processes, computational photography leverages the power of digital computation to process images in ways that were previously impossible. This approach allows for features like HDR (High Dynamic Range), portrait mode, and night mode, which enhance image quality and expand creative possibilities.

Key Features of Computational Photography in Smartphones

HDR Imaging:

High Dynamic Range (HDR) imaging is one of the most common applications of computational photography. By capturing multiple exposures of the same scene and merging them into a single image, HDR enhances the details in both bright and dark areas. This results in a more balanced and visually pleasing photograph.

Portrait Mode and Bokeh Effects:

Smartphones use computational photography to simulate the bokeh effect, which traditionally requires a DSLR with a fast lens. By using depth data from multiple cameras or sensors, smartphones can create a background blur effect, making the subject stand out. This feature, often marketed as “Portrait Mode,” is a favorite for portrait photographers.

Night Mode:

Low-light photography has always been challenging, but computational techniques have made it more accessible. Night mode captures a series of images at different exposures and then merges them to reduce noise and improve detail. This results in brighter and clearer images, even in dimly lit environments.

Super-Resolution and Image Sharpening:

Computational photography can also enhance the resolution and sharpness of images. Techniques like super-resolution combine data from multiple images to create a higher-resolution photo. Image sharpening algorithms, meanwhile, can enhance edge details, making the images appear crisper.

AI and Machine Learning:

Artificial intelligence (AI) and machine learning are integral to modern computational photography. Smartphones can now recognize scenes, objects, and faces, adjusting settings in real-time to optimize the shot. For instance, AI can enhance skin tones in portraits or boost colors in landscape photos.

The Impact on Photography

Computational photography has democratized high-quality imaging, making it accessible to everyone with a smartphone. It has also expanded the creative potential for photographers, offering tools and effects that were once exclusive to advanced photo editing software.

However, it also raises questions about the authenticity of images. As software increasingly takes over the image-making process, the line between a captured moment and a digitally enhanced creation becomes blurred. This evolution challenges photographers and viewers to reconsider what constitutes a “photograph” in the digital age.

The Future of Computational Photography

The future of computational photography looks promising, with advancements in AI and machine learning leading the charge. Future smartphones may offer even more sophisticated image processing capabilities, such as real-time 3D scene reconstruction or augmented reality (AR) enhancements. As technology continues to evolve, the possibilities for creative expression in photography are bound to expand even further.

Conclusion

Computational photography has revolutionized the way we capture and perceive images, making high-quality photography accessible to everyone. As smartphones continue to evolve, the boundary between hardware and software in photography will blur even further, pushing the limits of what’s possible. Whether you’re a professional photographer or a casual snapshooter, understanding these technologies can help you make the most of your smartphone camera and take your photography to the next level.

By embracing computational photography, we open up new creative avenues and redefine the art of capturing moments. As we look to the future, it’s clear that this technology will continue to shape the landscape of photography, offering exciting possibilities for both photographers and enthusiasts alike.

For Further Training:

iPhone Photo Academy is an in-depth online course that will show you how to take incredible iPhone photos. With the right knowledge an iPhone can be used to take photos that are so good that most people would never even believe that they were taken with a phone. It is currently 84% off for their Summer Sale which ends soon!

iphone photo tutorials

iPhone Photography Tricks (Click to See More Examples)

The best camera is the one that is always with you. But having the iPhone with you is only half of the equation. The other half is knowing how to use it to take outstanding photos.

Deal ending soon: The iPhone Photography Academy at 84% Off

- - - - - - - - - - - - - - - - - - - - - - - - - - - - - - - - - - - - - - - - - - - - - - - - - - - - - - - - - - - - - - - - - - - - - - - - - -

Photography, like any art or skill, thrives on consistency. The journey to becoming an adept photographer is paved with regular practice. Learn how PictureCorrect Insiders can help.

- - - - - - - - - - - - - - - - - - - - - - - - - - - - - - - - - - - - - - - - - - - - - - - - - - - - - - - - - - - - - - - - - - - - - - - - - -

This post Understanding Computational Photography in Smartphones appeared on PictureCorrect.


from PictureCorrect https://ift.tt/rt20bmK
via IFTTT