perjantai 8. maaliskuuta 2024

PictureCorrect.com: Step-by-Step Flower Photography Guide for Spring

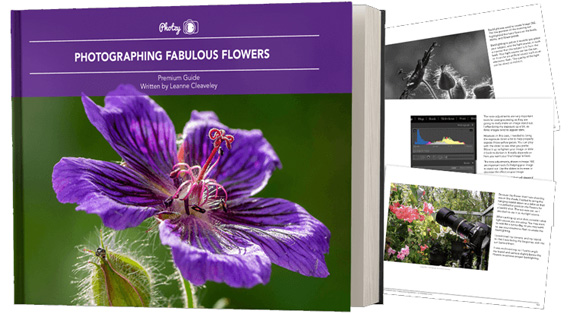
Have you ever wondered how amazing flower photographs are created? I wondered as well… And then, I found this amazing, and gifted, flower photographer- who not only knows HOW to create dynamic flower photography- she also knows how to TEACH those tricks and techniques to other photographers in an in-depth eBook! It is currently 68% off today with all the flowers starting to bloom if you want to check it out. Deal found here: Photographing Fabulous Flowers at 68% Off
flower photo guide

New: In-Depth Flower Photography Guide (Take a Peek Inside)

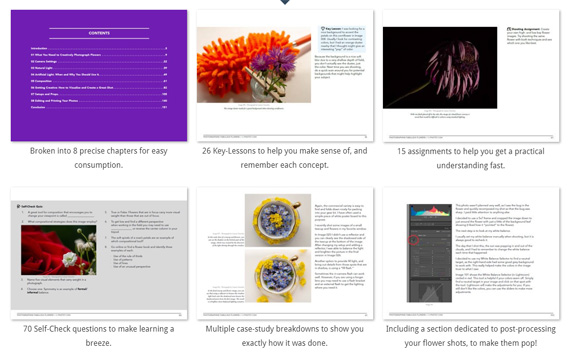
This 156 page practical guide is packed with Assignments, Key Lessons, and Self-Check Quizzes! (15 assignments, 26 key lessons, & 70 self-check questions!)

How does it work? this guide follows a unique step-by-step learning approach:

  1. Start with the precise gear you need, what camera settings to use and how to know when to deviate from these settings due to environmental conditions.
  2. Then move on to how to work with natural light including: altering the light, sculpting a flower with light, bending the light, and a lot more lighting technique. Plus Working with artificial light. Yes, this is a necessity at times.
  3. The next step is Flower composition- your key to winning awards & recognition. How to visualize, and then execute, a professional level flower image. Plus using props and other Pro Tricks that will ensure that your flower photography rises above all of the competition.
  4. And finally, how to edit (post-process) your shots to give them maximum impact, plus how to correctly print them!
flower photography

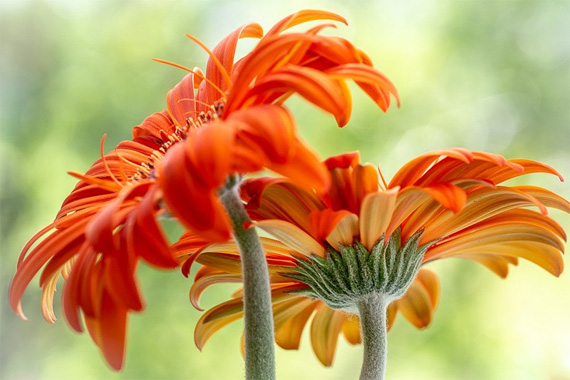
Advanced Flower Photography Techniques

Some More of the Many Topics Covered:

  • Learn where to find the best flowers to photograph, and also how to select the best examples.
  • Discover how to think of your shot as art, and not simply a “flower picture”.
  • Find out Pro techniques on how to keep a flower steady (even in a breeze) so that your image is SHARP.
  • Acquire the knowledge on how to ‘balance’ foreground and background lighting, so that you don’t have blown out highlights or icky dense black shadows.
  • Editing Steps- that will take your precious flower photograph to that ‘special place’ that viewers love.
  • Find out what lenses work best and more importantly- why.
  • How to properly support the camera when you’re low to the ground or shooting at awkward angles.
  • Is camera sensor size important for flower photography? Learn the facts!
  • Tripod tips- the tripod is important to flower photography. Not using it correctly can kill your best efforts-
  • Working with Flash and Reflectors. (Yes, you need to tackle this, and learn to master it. Leanne shows you how.)
  • How to create an interesting background out of just about any object lying around your house. (You’ll be amazed at what Leanne teaches you on this subject. I was!)
  • The importance of bokeh and how to control it. Bokeh can be wonderful. It can also ruin your picture.
  • Why you want clothesline clips in your camera bag.
  • The distinct advantages of a right-angle viewfinder, or an articulating screen, and where to get one.
  • What camera shooting mode, and metering mode, will work best for your flower photography-
  • Deep depth of field or shallow depth of field: when and why? Get the facts!
  • Working with aperture and focal length… (Flower photography is a world of ever evolving environmental conditions. You need to know how to be flexible.)
  • Plane of Focus – why it’s important. (You want sharp pictures. Right? You need to know this!)
  • Is shutter speed a factor in flower photography? It’s not moving. Or, is it?
  • Why auto-focus may not always be the best option.
  • How to find the most pleasing natural light.
pages flower guide

Pages from the Photographing Fabulous Flowers Guide (See More Within)

  • Flowers & Histograms- SUPER IMPORTANT
  • Working with the time of day and making solid informed decisions on a location for your flower shoot.
  • How to use alternative light sources.
  • Creating drama through your composition! (Think… Award Winning Shot!)
  • When to use an electronic flash, and how to work with that momentary type of lighting.
  • Post-processing and Printing: getting your images out there into the world
  • And much more!

With this guide, you’re getting a complete system for producing beautiful flower photographs. And, it’s at a fraction of the cost of an in-person workshop. Plus you can re-read the material anytime you want, whenever you need a quick refresh.

How to Get a Discounted Copy Today (With a Bonus):

This is one of the best months for flower photography, and this in-depth guide is 68% off today if you want to check it out (just $19, total value $60). Right now it also includes a printable flower photography checklist and flower water drop tutorial. All of it also carries an amazing 365 day happiness guarantee so there is no risk in trying it.

Deal ending soon: Photographing Fabulous Flowers at 68% Off

- - - - - - - - - - - - - - - - - - - - - - - - - - - - - - - - - - - - - - - - - - - - - - - - - - - - - - - - - - - - - - - - - - - - - - - - - -

This post Step-by-Step Flower Photography Guide for Spring appeared on PictureCorrect.


from PictureCorrect https://ift.tt/Zqk9rjo
via IFTTT
torstai 7. maaliskuuta 2024

PictureCorrect.com: New Workflow and Design for Photo AI Editor

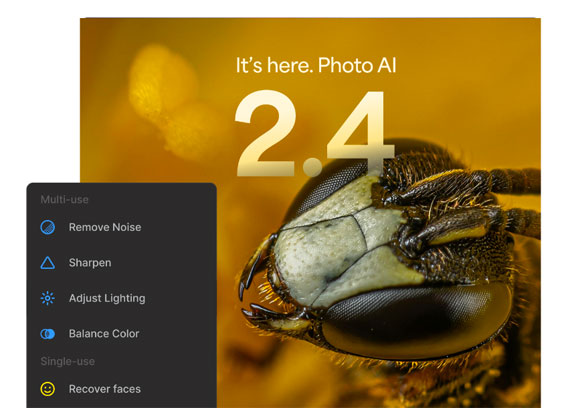
In the ever-evolving landscape of image editing software, Photo AI 2.4 introduces a suite of enhancements and new features aimed at improving the user experience in image editing. This update marks a significant evolution from its predecessors, focusing on flexibility, user control, and efficiency. Let’s delve into the specifics of what Photo AI 2.4 brings to the table.

photo ai workflow

Photo AI 2.4 (see how it works)

A Redesigned Workflow

The core update in Photo AI 2.4 is its revamped workflow, which allows for a more flexible approach to image editing. Users now have the autonomy to apply, modify, or remove enhancements in any order, a departure from the more linear workflows of the past. This change aims to give users a clearer insight into how each adjustment affects the overall image, potentially enhancing the creative process.

Choosing Your Starting Point

With Photo AI 2.4, users can initiate their editing process in two ways: using the ‘Autopilot’ feature for automated enhancement suggestions or starting manually by selecting specific enhancements. This choice is designed to cater to different user preferences and editing styles, whether one desires guidance or full control from the outset.

Enhanced Area Selection for Detailed Editing

The new version introduces an enhanced selection feature, allowing users to apply adjustments to specific areas of an image. This functionality is intended for detailed editing tasks, such as selective color balance adjustments or targeted denoising, offering more precise control over the final outcome.

Introducing Stacked Enhancements

Photo AI 2.4 eliminates the toggle approach to enhancements, replacing it with a stacking mechanism. This allows users to apply multiple enhancements to an image, each with its own set of parameters and selected areas. The intention here is to provide a platform for more nuanced editing, enabling a broader range of effects and adjustments within a single project.

Interface Enhancements and Processing Improvements

The update also includes steps toward a customizable interface, starting with the ability to reposition enhancement panels according to user preference. This feature is a move towards more personalized and efficient workspaces. On the technical side, improvements in how filters are processed aim to speed up the editing process, offering quicker preview updates and more responsive switching between edits.

Refined Crop and Remove Tools

Photo AI 2.4’s crop tool has been overhauled for better responsiveness and additional features like straightening, addressing previous limitations and expanding its utility. The Remove tool has also been integrated more seamlessly into the workflow, allowing it to be used at any stage without hindering subsequent editing steps.

Summary

Photo AI 2.4 is an update focused on enhancing user control, flexibility, and efficiency in image editing. By redesigning the workflow and introducing new features like stacked enhancements and a more versatile crop tool, it aims to provide a more intuitive and adaptable editing environment. While these changes represent a significant shift from previous versions, they also set a foundation for future developments in image editing technology.

See how it works: Topaz Photo AI Version 2.4

- - - - - - - - - - - - - - - - - - - - - - - - - - - - - - - - - - - - - - - - - - - - - - - - - - - - - - - - - - - - - - - - - - - - - - - - - -

This post New Workflow and Design for Photo AI Editor appeared on PictureCorrect.


from PictureCorrect https://ift.tt/CltfnEx
via IFTTT

keskiviikko 6. maaliskuuta 2024

PictureCorrect.com: Speedlights vs. Strobes for Portrait Photography Lighting

When it comes to portrait photography, lighting is a critical element that can make or break your images. Two popular lighting options are speedlights and strobes. Both have their unique features, benefits, and optimal use cases. Understanding the differences between them can help you choose the right lighting for your portrait photography needs.

Related reminder: only a little while left for Flash Photography for Portraits at 67% Off

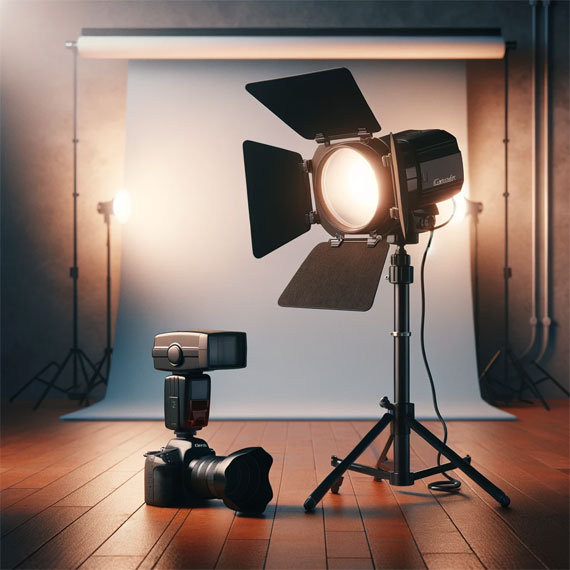
speedlights vs strobes

What are Speedlights?

Speedlights, also known as flashguns or hot shoe flashes, are portable, battery-powered flash units that can be mounted directly onto a camera’s hot shoe or used off-camera. They are versatile and easy to use, making them a favorite among photographers who need mobility and simplicity.

Advantages of Speedlights:

  1. Portability: Speedlights are lightweight and compact, ideal for on-location shoots or situations where mobility is key.
  2. Ease of Use: They are relatively straightforward to operate, with many models offering TTL (Through The Lens) metering for automatic flash power adjustment.
  3. Flexibility: Speedlights can be used on or off the camera, allowing for creative lighting setups and the ability to quickly adapt to changing conditions.
  4. Affordability: Generally, speedlights are less expensive than strobes, making them a great entry-level option for emerging photographers.

Ideal Use Cases:

  • On-location shoots where portability is essential.
  • Event photography, like weddings or parties, where quick mobility is needed.
  • Photographers looking for an affordable and easy-to-use lighting solution.

What are Strobes?

Strobes, or studio flashes, are powerful lighting units designed primarily for studio or controlled environment use. They require an external power source (though some battery-powered options exist) and offer higher power output compared to speedlights.

Advantages of Strobes:

  1. Power: Strobes produce much more powerful light, allowing for greater control over ambient light and the ability to illuminate larger scenes or subjects.
  2. Quality of Light: With the ability to use larger modifiers, strobes can create a softer, more even light, ideal for flattering portraits.
  3. Faster Recycle Times: Strobes can recharge and be ready for the next flash more quickly at higher power levels, reducing waiting time between shots.
  4. Consistency: They provide consistent color temperature and intensity, which is crucial for maintaining uniformity in your photos.

Ideal Use Cases:

  • Studio portrait sessions where control over lighting is paramount.
  • Commercial photography where high power and consistency are necessary.
  • High-volume shoots where fast recycle times can improve efficiency.

Making the Choice

When deciding between speedlights and strobes for portrait photography, consider the shooting environment, desired light quality, budget, and the need for portability and speed. Speedlights offer flexibility and mobility for on-the-go photographers, while strobes provide the power and quality desired in controlled environments or more demanding shoots.

In conclusion, both speedlights and strobes have their place in portrait photography. By understanding their strengths and limitations, you can make an informed decision that best suits your artistic vision and practical requirements. Whether you choose the nimbleness of a speedlight or the commanding power of a strobe, mastering your chosen light source will illuminate your path to capturing stunning portrait photographs.

For Further Training:

Are you ready to elevate your portrait photography game and master the art of flash? Whether you’re a complete beginner, a seasoned professional, or a passionate hobbyist, the comprehensive online course Flash Photography for Portraits is here to transform your approach to flash photography.

portrait flash photography

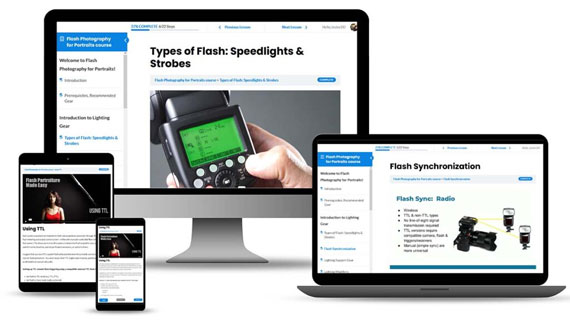
Flash Photography for Portraits (learn more)

Flash photography can seem daunting at first, but it’s a powerful tool that can dramatically improve the quality of your portraits. For a limited time, the Flash Photography for Portraits course is available for a discount.

Deal ending soon: Flash Photography for Portraits at 67% Off

- - - - - - - - - - - - - - - - - - - - - - - - - - - - - - - - - - - - - - - - - - - - - - - - - - - - - - - - - - - - - - - - - - - - - - - - - -

This post Speedlights vs. Strobes for Portrait Photography Lighting appeared on PictureCorrect.


from PictureCorrect https://ift.tt/gJ1ilIC
via IFTTT

maanantai 4. maaliskuuta 2024

PictureCorrect.com: Flash Photography for Portraits

Are you ready to elevate your portrait photography game and master the art of flash? Whether you’re a complete beginner, a seasoned professional, or a passionate hobbyist, the comprehensive online course Flash Photography for Portraits is here to transform your approach to flash photography.

portrait flash photography

Flash Photography for Portraits (learn more)

Why Flash Photography for Portraits?

Flash photography can seem daunting at first, but it’s a powerful tool that can dramatically improve the quality of your portraits. Proper use of flash can bring out the best in your subjects, regardless of the lighting conditions you’re working with. This course is designed to demystify flash photography, making it fast and easy to learn. You’ll discover how to harness beautiful light and create amazing portraits that both you and your subjects will love.

Who Can Benefit?

  • Beginners: If you’re new to both portraiture and flash photography, this course covers all the essentials to get you started.
  • Professionals: Looking to enhance your lighting skills to boost your bookings?
  • Hobbyists: Keen on learning flash photography to improve your portraits?

What You’ll Learn

  • Gear Selection: Say goodbye to confusion about which gear to use. This course guides you through the essential gear you need, saving you both time and money.
  • Flash Setup and Sync: Learn to set up your lights quickly and efficiently, avoiding common pitfalls and focusing on capturing beautiful portraits.
  • Exposure and Lighting Control: Master exposure settings and lighting angles to eliminate bad shadows and achieve the perfect look every time.

flash photography

Course Structure

The course is divided into easily digestible modules, ranging from 3-10 minute videos that combine slides and clips in a lecture format. Topics covered include:

  • Introduction to flash photography
  • Lighting gear essentials
  • Setting up your flash
  • One-light and multi-light portraits
  • Practical tips for creating professional-level portraits in any location

Why This Course?

  • Expert Instruction: Led by Ed Verosky, a seasoned photographer with over 30 years of experience, this course offers insights and tips that are grounded in real-world scenarios.
  • Flexible Learning: Complete the course at your own pace, on any device, with easy-to-navigate lessons.
  • Amazing Bonuses: Gain lifetime access to a treasure trove of resources, including a flash photography guide, mini-courses, printables, and a business course for portrait photographers.

How to Get the Course for a Discount Today:

For a limited time, the Flash Photography for Portraits course, including all bonuses, is available at a discounted price of $97 (regularly priced at $297). This includes a 30-day money-back guarantee.

Deal ending soon: Flash Photography for Portraits at 67% Off

- - - - - - - - - - - - - - - - - - - - - - - - - - - - - - - - - - - - - - - - - - - - - - - - - - - - - - - - - - - - - - - - - - - - - - - - - -

This post Flash Photography for Portraits appeared on PictureCorrect.


from PictureCorrect https://ift.tt/v2fhowb
via IFTTT

sunnuntai 3. maaliskuuta 2024

PictureCorrect.com: Lightroom Export Settings: A Deep Dive

Exporting images from Adobe Lightroom provides photographers and designers with a variety of options to optimize their images for different uses. Whether you’re preparing images for print, web, or archival purposes, Lightroom’s export settings allow you to customize the output to meet your specific needs. Here’s an overview of the key image export options available in Lightroom.

Related reminder: limited spots available for the Post-Processing Secrets Webinar

lightroom export settings

1. File Settings

  • Image Format: You can choose from several formats, including JPEG, TIFF, PSD, and DNG. JPEG is widely used for its compatibility and balance between quality and file size. TIFF and PSD are preferred for high-quality prints and archival storage due to their lossless compression. DNG is Adobe’s universal raw file format.
  • Color Space: Selecting the correct color space is crucial. sRGB is the standard for web images, ensuring consistent display across various devices. Adobe RGB and ProPhoto RGB offer a wider color gamut, suitable for high-quality prints.
  • Quality: Adjusting the quality slider affects file size and image quality. A higher value (closer to 100) is preferred for print, while a lower value may suffice for web use to reduce loading times.
  • Compression: Choose between lossy and lossless compression, depending on your format choice and the need for image fidelity.

2. Image Sizing

  • Resize to Fit: This option lets you resize the image to specific dimensions, useful for creating thumbnails or optimizing for web use.
  • Resolution: Determines the image’s pixels per inch (PPI), important for print quality. A higher PPI (like 300) is used for print, while a lower PPI (such as 72) is standard for web images.

3. Output Sharpening

Apply sharpening tailored for the image’s destination: screen, matte paper, or glossy paper. The amount can usually be adjusted to suit your preference.

4. Metadata

You can choose how much metadata to include with your exported image. Options range from removing all metadata to preserving copyright and contact information.

5. Watermarking

Lightroom allows you to add a watermark to your images, which can be text or a graphic logo. This feature is particularly useful for branding and protecting your images online.

6. Post-Processing

After export, you can specify an action, such as opening the image in another program or showing it in the Finder or Explorer.

7. File Naming and Destination

Customize the file naming and choose the destination folder for your exported images. Lightroom also offers the option to create subfolders and organize your exported files efficiently.

8. Presets

Once you have your preferred settings, you can save them as a preset for future use, streamlining your workflow for similar export tasks.

By understanding and utilizing these export options, you can ensure your images are optimized for their intended purpose, maintaining the quality and integrity of your work. Whether you’re sharing your images online, creating prints, or archiving your portfolio, Lightroom’s export features offer the flexibility and control needed for professional results.

For Further Training:

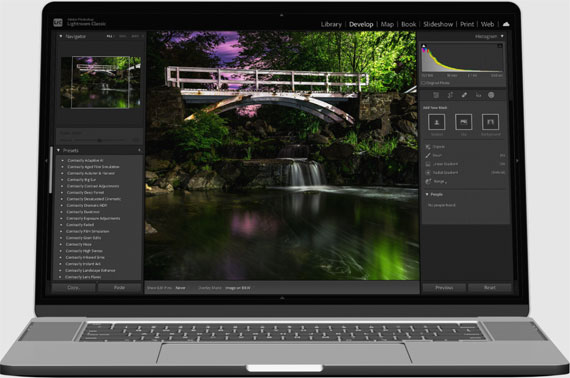
The current educational webinar titled Six Post-Processing Secrets You Cannot Live Without offers a unique opportunity for photographers of all levels to deepen their knowledge and enhance their skills in using Lightroom and Photoshop.

post processing secrets

Post-Processing Secrets Webinar (see what’s covered)

By providing a blend of technical knowledge, artistic insight, and practical advice, this event aims to equip photographers with the tools and understanding necessary to bring their creative vision to life.

Limited spots available: Six Post-Processing Secrets for Photographers

- - - - - - - - - - - - - - - - - - - - - - - - - - - - - - - - - - - - - - - - - - - - - - - - - - - - - - - - - - - - - - - - - - - - - - - - - -

This post Lightroom Export Settings: A Deep Dive appeared on PictureCorrect.


from PictureCorrect https://ift.tt/04dODM2
via IFTTT

lauantai 2. maaliskuuta 2024

PictureCorrect.com: NASA Partners with Nikon for Astronaut Moon Camera

In an exciting development for space exploration and photography, NASA has partnered with Nikon Inc. to create a groundbreaking camera designed specifically for the lunar environment. This collaboration, formalized through a Space Act Agreement, signifies a giant leap in the technological advancements used in space, particularly for the upcoming Artemis missions aimed at exploring the Moon’s South Pole.

moon camera

Image from European Space Agency. NASA astronaut Jessica Wittner uses an early design of the Artemis lunar camera to take photos during planetary geological field training in Lanzarote, Spain.

The Artemis missions represent NASA’s ambitious plan to return humans to the Moon and establish a sustainable presence there, laying the groundwork for future Mars exploration. The introduction of the Handheld Universal Lunar Camera (HULC) marks a significant milestone in this journey, ensuring that astronauts can capture high-quality visual data from the lunar surface.

This camera, a highly modified version of Nikon’s Z 9 model, is being developed to withstand the Moon’s extreme conditions, including drastic temperature variations and challenging lighting environments. The collaboration leverages Nikon’s expertise in camera engineering and NASA’s experience in space technology, combining their strengths to produce a device that can operate effectively in space.

The HULC is not just an ordinary camera; it embodies a series of modifications to suit the lunar environment. It will feature a thermal blanket for protection against lunar dust and temperature extremes, a custom grip with enlarged buttons for ease of use by astronauts in bulky gloves, and enhanced electrical components to combat radiation issues. Moreover, this will be the first mirrorless camera to be used on the lunar surface, equipped with advanced imaging technology to excel in low-light conditions.

Before its lunar debut, the HULC will undergo rigorous testing at the International Space Station, demonstrating its capabilities in a space setting. This step ensures that the camera is well-prepared for its critical role in the Artemis missions, where it will capture images and videos, aiding scientific research and providing invaluable insights into the Moon’s geology and environment.

The development of the HULC also represents a continuation of NASA’s legacy of using specialized cameras in space. From the large-format cameras of the Apollo era to the modern imaging devices on the International Space Station, NASA has consistently relied on photographic technology to document and study space. The HULC is set to be the latest addition to this illustrious lineage, equipped with a viewfinder and video capabilities that surpass its predecessors.

As NASA prepares for the upcoming Artemis missions, the HULC will be an essential tool in the astronauts’ toolkit, enabling them to capture the Moon’s mystique and its scientific treasures. This collaboration between NASA and Nikon underscores the importance of technological innovation in advancing our understanding of space and strengthening our capabilities for future exploration.

- - - - - - - - - - - - - - - - - - - - - - - - - - - - - - - - - - - - - - - - - - - - - - - - - - - - - - - - - - - - - - - - - - - - - - - - - -

This post NASA Partners with Nikon for Astronaut Moon Camera appeared on PictureCorrect.


from PictureCorrect https://ift.tt/PgEIKwY
via IFTTT

perjantai 1. maaliskuuta 2024

PictureCorrect.com: Advanced Lightroom Shortcuts and Hidden Gems

Lightroom is a powerful tool for photographers, offering an extensive range of features for photo organization and editing. Knowing a few shortcuts and hidden features can significantly speed up the workflow and enhance your editing process. Here are some helpful Lightroom shortcuts and secrets that can benefit photographers.

Quick reminder: limited spots available for the Post-Processing Secrets Webinar

lightroom shortcuts

Quickly Compare Before/After: Pressing “\” (backslash) in the Develop module lets you quickly switch between the before and after views of your image. This is a straightforward way to compare your edits with the original photo.

Solo Mode: To avoid scrolling through numerous panels in the Develop module, right-click on one of the panel titles (like Tone Curve, Basic, Detail, etc.) and select “Solo Mode.” This ensures that only one panel is expanded at a time, keeping your workspace uncluttered.

Batch Editing: Lightroom allows you to apply edits from one photo to others, which is a great time-saver. After editing one photo, you can press “Shift + Ctrl/Cmd + C” to copy the settings, then select other photos and press “Shift + Ctrl/Cmd + V” to paste these settings across multiple images.

Visualize Spots: The “Visualize Spots” feature is incredibly helpful for spotting dust or sensor spots on your images. While using the Spot Removal tool in the Develop module, press “A” to toggle the visualize spots feature, which helps to highlight imperfections that are otherwise hard to see.

Quickly Adjust Brush Size: When using adjustment brushes, you can quickly change the brush size and feathering by dragging the mouse while holding down the corresponding keyboard shortcuts. Pressing “[” or “]” adjusts the size, while “Shift + [” or “Shift + ]” adjusts the feathering.

Rate and Cull Quickly: Use the number keys (1-5) to rate your photos and the “P” key to flag them as picks. This makes the initial culling process much faster and more efficient.

Use Auto Mask: When using the adjustment brush, turning on Auto Mask helps to apply your adjustments more accurately by detecting and respecting edges within your image. This is particularly useful for selective adjustments like brightening a subject without affecting the background.

Create Virtual Copies: Press “Ctrl/Cmd + ‘” to create a virtual copy of an image. This is useful for experimenting with different edits without altering the original file.

Color Label Shortcuts: Assign color labels to your photos for better organization using “6” for red, “7” for yellow, “8” for green, “9” for blue, and “Ctrl/Cmd + 9” for purple.

Quick Develop in Library Module: The Library module’s Quick Develop panel lets you apply basic adjustments to a selected photo or group of photos without switching to the Develop module. This can be a great time saver for minor tweaks.

Sync Settings Across Multiple Images: In the Develop module, you can synchronize edits across several selected images. This is particularly useful for photos shot in the same conditions. After adjusting one photo, just click the “Sync” button, choose the settings you want to synchronize, and apply them to the selected images.

Targeted Adjustment Tool (TAT): In the Tone Curve, HSL/Color, and B&W panels, you can use the Targeted Adjustment Tool to directly click and drag on the image to adjust parameters like hue, saturation, and luminance for that specific color or tone.

By integrating these shortcuts and hidden features into your workflow, you can make your Lightroom experience more efficient and enjoyable. Whether you’re a seasoned professional or an enthusiastic amateur, these tips can help streamline your editing process and give you more time to focus on the creative aspects of photography.

For Further Training:

The current educational webinar titled Six Post-Processing Secrets You Cannot Live Without offers a unique opportunity for photographers of all levels to deepen their knowledge and enhance their skills in using Lightroom and Photoshop.

post processing secrets

Post-Processing Secrets Webinar (see what’s covered)

By providing a blend of technical knowledge, artistic insight, and practical advice, this event aims to equip photographers with the tools and understanding necessary to bring their creative vision to life.

Limited spots available: Six Post-Processing Secrets for Photographers

- - - - - - - - - - - - - - - - - - - - - - - - - - - - - - - - - - - - - - - - - - - - - - - - - - - - - - - - - - - - - - - - - - - - - - - - - -

This post Advanced Lightroom Shortcuts and Hidden Gems appeared on PictureCorrect.


from PictureCorrect https://ift.tt/lcbqKSx
via IFTTT