keskiviikko 7. helmikuuta 2024

PictureCorrect.com: From Auto to Manual: A Step-by-Step Journey Through Camera Modes

Learning how to use a camera and its various modes can significantly improve your photography skills, allowing you to creatively control your camera and adapt to different shooting conditions. Here’s a recommended order for learning camera modes, starting from the basics to more advanced settings:

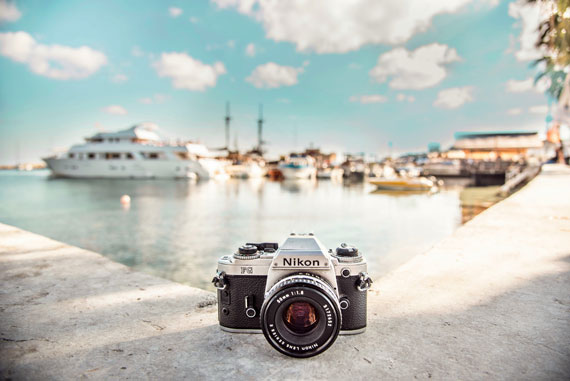
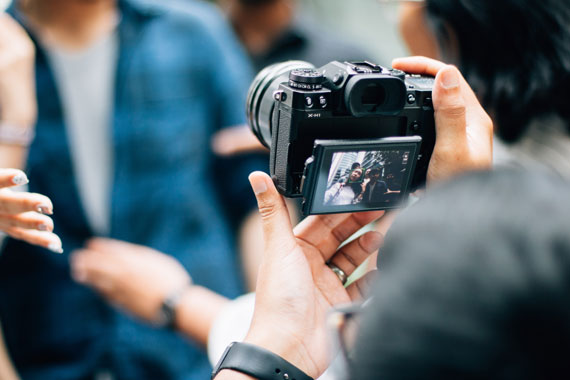
camera mode order

Photo captured by Giannis Agathokleous

Auto Mode (A or Auto): Most cameras have an automatic mode that makes all the decisions for you. It’s a good starting point to begin taking photos without worrying about the settings. Auto mode adjusts the aperture, shutter speed, ISO, and sometimes flash to suit the subject matter.

Program Mode (P): Once you’re comfortable with Auto mode, move to Program mode. It still selects the aperture and shutter speed for you but gives you more control over other settings like ISO, white balance, and flash. It’s a step towards understanding how different settings affect your images.

Aperture Priority Mode (A or Av): In Aperture Priority mode, you select the aperture (the size of the lens opening), and the camera automatically selects the shutter speed. This mode is essential for learning about depth of field (how much of your image is in focus) and for controlling how much light enters the camera.

Shutter Priority Mode (S or Tv): Here, you choose the shutter speed, and the camera selects the appropriate aperture. This mode is crucial for understanding how to capture motion in your images, allowing you to freeze action with fast shutter speeds or create motion blur with slow shutter speeds.

Manual Mode (M): Manual mode gives you full control over the camera settings, including shutter speed, aperture, and ISO. It requires a good understanding of how these settings interact. Start experimenting with manual mode in different lighting conditions to see the effects of your adjustments.

ISO Sensitivity: Alongside learning about modes, it’s essential to understand ISO sensitivity, which controls the camera’s sensitivity to light. Higher ISO values are used in darker conditions but can increase the graininess or “noise” in photos.

Bulb Mode (B): This is a specialized mode that allows for long exposures, useful for night photography, star trails, and other low-light conditions. In Bulb mode, the shutter stays open as long as you hold down the shutter button, allowing for exposure times longer than the camera’s preset limits.

Start with Auto and Program modes to get a feel for taking pictures and gradually work your way through to Manual mode, experimenting and learning how each setting affects your images. It’s also beneficial to read the camera manual, join photography courses, or watch tutorials to deepen your understanding of these modes. Practice is key; the more you shoot, the better you’ll understand how to control your camera to achieve the desired results.

For Further Training:

These online courses, ebooks, and cheat sheets cover every possible topic for beginner photographers. Currently 71% off for a limited time. The content is vast and complete while still being easy to navigate and understand.

confident photographer

The Confident Photographer

It’s the most complete education available for a beginner photographer, brought to you by the most trusted names in photography.

Deal ending soon: The Confident Photographer at 71% Off

- - - - - - - - - - - - - - - - - - - - - - - - - - - - - - - - - - - - - - - - - - - - - - - - - - - - - - - - - - - - - - - - - - - - - - - - - -

This post From Auto to Manual: A Step-by-Step Journey Through Camera Modes appeared on PictureCorrect.


from PictureCorrect https://ift.tt/b9wJg4D
via IFTTT

tiistai 6. helmikuuta 2024

PictureCorrect.com: How to Take Sharper Street Photography, Even at Night

Capturing sharp photographs is by far the toughest technical skill in street photography. People move quickly, you are often moving quickly, the light isn’t usually ideal, and you sometimes have to frame instantly and suddenly. When I take a look at other people’s street work, one of the most common problems I notice is that the photos are not sharp and not in focus.

sharp street photos at night

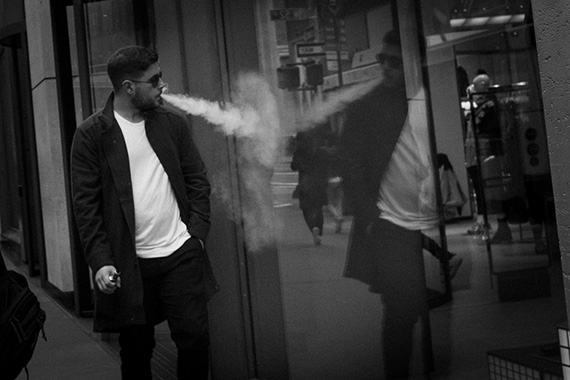
“Jerry Delakas”

This being said, there are many tips to allow you to get sharper street photographs. And some are very simple. So let’s get to them.

1. Shoot with a Wide Angle Lens

There are many reasons to shoot with a wide-angle lens, but one of the main reasons is that wide angle perspectives have a larger depth of field. This means that if you miss your focus somewhat, there will still be a large range of the scene that will be sharp, which will give you some leeway to mess up and still get the shot sharp. The trade off is that you have to get closer to your subject than with a telephoto lens, but this usually leads to a better visual look anyway.

The other reason is that wide-angle lenses are generally lighter and easier to maneuver. Steadier hands = sharper photos.

28mm and 35mm are probably the most common focal lengths for street photography (50mm is used a lot as well, but it’s too much of a telephoto view for my tastes). I prefer 28mm.

low light night picture

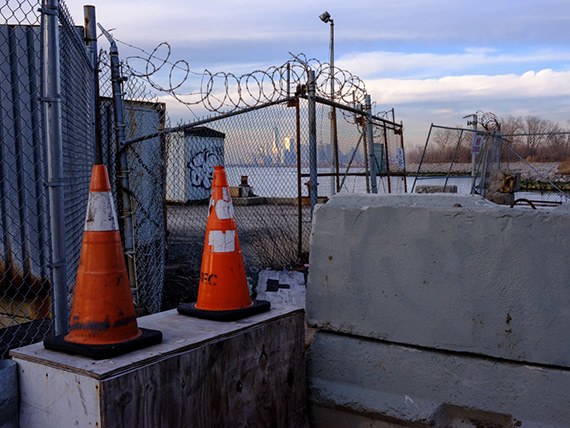
“Labels”

2. Ideal Camera Settings for Sharpness

While you can go slower and still achieve perfectly sharp shots, a shutter speed of at least 1/320 of a second, and optimally 1/500, is recommended to fully freeze people in motion. If I am in a very dark location then I will sometimes stop down to 1/250 or even 1/160, but I prefer not to.

Similarly, we generally want to use the smallest aperture possible (small aperture = larger number), for the same reason behind using a wide-angle lens, because there will be more depth of field. With more of a scene that will be sharp, the more leeway we have to get the focus correct. When possible, it’s best to shoot from f/8 to f/16.

So if we want to shoot at 1/320 or 1/500 of a second and f/8, and the light isn’t great, something has to give. That means we will need to push our ISO. Despite what you might have been told, shooting at high ISOs for street photography is often the number one key to creating street photos that have a higher technical quality because of the flexibility it allows for your shutter speed and aperture. You should test out your cameras upper limits for ISO to see the amount of grain that you are comfortable with. With the 5D Mark II, I often shoot in ISO 800, 1600, and 3200.

Also, grain is beautiful.

subway station picture

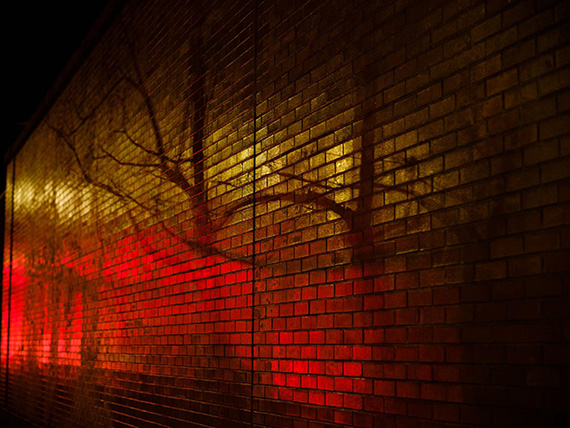
“Gold can’t buy you everything”

3. Zone Focus (Pre-Focus)

Zone focusing is the technique of manually focusing your camera to a specific distance, say 8 feet away, and then photographing people as they enter that range of distance from your camera. For instance, with my 5D Mark II and a 28mm lens, if I pre-focus the camera to 8 feet away at f/8, then everything from 5.5 feet to 15 feet will be within an acceptable range of sharpness.

This is one of the keys to being successful at street photography because auto-focusing can be a huge hinderance in many situations. If you have the time to autofocus or manual focus through the viewfinder then you should do it, but focusing these ways takes time, which isn’t often ideal for many of those fast moving situations. I probably zone focus for 75 percent of my street photos.

A good exercise for this is to take a tape measure and measure two feet from your lens all the way up to 12 feet and try to memorize those distances away from you. This is a skill that needs to be practiced continually.

It can also be good to learn how to slide the manual focus without looking. What this means is that if someone is walking towards you then you can capture them at 10 feet away sharp and then as they get closer you can move the manual dial to 6 feet without looking to be able to capture them sharp at 6 feet away as well.

Also, I would only recommend zone focusing with focal lengths of 35mm or less. With more telephoto views with shallower depth of fields, it is much more difficult to guess distances and still get shots perfectly sharp.

4. Stopping Your Motion and the Stutter Step

By far my biggest pet peeve of photographers is when they don’t stop their own motion before taking a photo. I see it all of the time. People frame, focus, and capture an image and don’t even stop moving. It’s sloppy. Don’t do it. How can you get a sharp photo while you are still moving unless you are shooting at 1/1000 of a second?

The stutter step is basically just a way of stopping your motion instantly while in mid stride to take a shot and then continuing that motion right after the shot. Just stop in mid stride for a half a second, take the photo, and continue your stride. It’s a great way to stop quickly and take a shot without drawing too much attention to yourself. Just be careful about people being behind you. I have stopped short a couple of times and had people bump into me. In those cases, I just pretend to be a dumb tourist (instead of what I really am, which is a dumb photographer).

snow overcast conditions street image

“The Chase”

5. Pick a Spot / Background and Wait There

You really want a technically great street photograph? Then plan it. Find the location, wait for the right light, and choose the perfect settings ahead of time. Then, wait patiently for the right person to enter your scene. It is about a million times easier to get a technically good street photograph this way than by only taking spontaneous shots as you come across them.

At Night:

Street photography at night is one of the most incredible experiences. Cities glow, people and scenes become more magical, and it’s just exciting. However, you need to be careful. Choose safe areas or travel with a friend. Don’t bring too much attention on yourself or your equipment.

sharp pictures

“Noodletown, Chinatown”

6. Step Back

During the day I much prefer to get closer to my subjects, but often when out at night I will step back somewhat and get further from my subjects. When subjects are a small part of a dark scene it generally looks more interesting than when they’re a small part of a scene during the day, and the backgrounds are often much more interesting. Of course this is a gross generalization and every situation is different.

When you step back, you don’t need to use as fast of a shutter speed to capture moving subjects sharp. The shot above was taken at 1/60 of a second and the subjects are all super sharp.

7. Find Glowing Window Signs

When you’re shooting at night, seek out lampposts or artificial light sources and wait there to photograph people as they pass by. These are often very strong light sources if you are close enough to them. You can see this in the previous photograph, but getting even closer to the light source and shooting away from it is often a good idea as well.

8. Tripod and Blur

Who says you need sharp people as long as you have a sharp background? Put your camera on a tripod and wait for lots of people to walk through. Some people will be blurry and some sharp. It is a very interesting effect, especially of crowds.

sharp night photography

“Partying, Lower East Side”

9. Photograph with a Flash, Even During the Day

Some street photographers prefer to use flash to bring out their subjects and to make them sharp, even during the day. Bruce Gilden is probably the most famous flash street photographers, and Bruce Davidson is another photographer you should take a look at. He would photograph with a flash in the NY subway system back when it wasn’t very safe. It takes some nerve to do that.

This strategy is a little too intrusive for my tastes out there, but I love the look when other photographers do it.

My final word of advice is to not become too obsessed with sharpness. You don’t need to pixel-peep each image from a few centimeters away. When you are aiming for a sharp photo, of course you want it to be as sharp as possible, however view the finished photograph from a traditional distance that normal viewers will look at it from to truly gauge how the photograph looks.

Aim to get sharp photos, but don’t become too obsessed with sharpness.

About the Author:
James Maher is the author of Essentials of Street Photography, which covers everything about the genre even down to specific post processing techniques that can bring the best out of street scenes.

- - - - - - - - - - - - - - - - - - - - - - - - - - - - - - - - - - - - - - - - - - - - - - - - - - - - - - - - - - - - - - - - - - - - - - - - - -

This post How to Take Sharper Street Photography, Even at Night appeared on PictureCorrect.


from PictureCorrect https://ift.tt/oA31Mpt
via IFTTT

maanantai 5. helmikuuta 2024

PictureCorrect.com: Choosing the Perfect Print Resolution for Your Photos

Creating high-quality prints of photographs involves numerous considerations, with one of the most critical being the print resolution. The print resolution, measured in dots per inch (DPI), determines the level of detail and clarity of the printed image. The optimal DPI setting depends on various factors, including the purpose of the print, the viewing distance, and the capabilities of the printer. In this blog post, we’ll explore how to choose the right print resolution for your photographs to ensure the best quality.

print resolution

Photo captured by Antenna

Understanding Print Resolution

Print resolution refers to the number of dots of ink a printer can produce within an inch. A higher DPI means more dots per inch, resulting in a sharper and more detailed image. However, the effectiveness of high DPI values depends on the printer’s capabilities and the quality of the original photograph.

Standard Print Resolutions

  • Low-Resolution Prints (72 to 100 DPI): Suitable for large banners or prints that will be viewed from a distance. At close range, the image will appear pixelated.
  • Medium Resolution Prints (150 to 300 DPI): Ideal for standard photo prints, such as 4×6 inches or 5×7 inches. This range provides a good balance between quality and file size.
  • High-Resolution Prints (300 to 600 DPI): Recommended for high-quality prints, especially for professional photographs or detailed artwork. This range is often used for prints that will be viewed up close, such as portrait photographs or fine art prints.

Factors to Consider

  1. Purpose of the Print: Determine what the print will be used for. Decorative art pieces or professional portraits require higher resolutions than a standard photo album print.
  2. Viewing Distance: Consider how close viewers will be to the print. The closer the viewing distance, the higher the resolution should be to maintain image clarity.
  3. Printer Capabilities: Ensure your printer can handle the desired DPI. Some consumer-grade printers may not print effectively at very high resolutions, leading to wasted ink without a noticeable increase in quality.
  4. Original Photo Quality: The resolution of the original photograph limits the print resolution. Enlarging a low-resolution photo for a high-DPI print can result in a blurry image.

Recommended Resolutions by Print Size

  • Small Prints (up to 5×7 inches): 300 DPI is typically sufficient for clear and detailed prints.
  • Medium Prints (8×10 to 11×14 inches): 300 DPI is still recommended, though you can sometimes get away with a slightly lower resolution if the original photo quality is high.
  • Large Prints (larger than 11×14 inches): 200-300 DPI can be adequate, especially for prints viewed from a moderate distance. For very large prints or banners viewed from further away, 150 DPI might be sufficient.

Recap:

Choosing the right print resolution is vital for producing high-quality photographs. While 300 DPI is a good standard for most prints, consider the purpose, viewing distance, printer capabilities, and original photo quality when determining the best resolution for your needs. Experimenting with different resolutions and print sizes can also help you find the perfect balance for your specific project. Remember, a higher DPI isn’t always better; it’s about finding the right setting for the desired outcome.

For Help Increasing Photo Resolution:

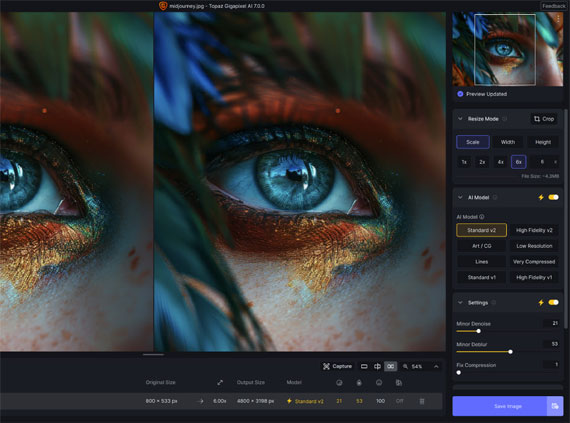
In photo editing news, Topaz Labs just announced a new update to Gigapixel AI (version 7). Designed to upscale your photos by up to 600%, rebuilt from the ground up to be better and faster.

gigapixel

Generate more resolution in your images – allowing you to digitally crop and upscale without loss of pixels. Perfect for large-format prints where every pixel counts.

See how it works: Gigapixel A.I. Version 7

- - - - - - - - - - - - - - - - - - - - - - - - - - - - - - - - - - - - - - - - - - - - - - - - - - - - - - - - - - - - - - - - - - - - - - - - - -

This post Choosing the Perfect Print Resolution for Your Photos appeared on PictureCorrect.


from PictureCorrect https://ift.tt/YI6py7V
via IFTTT

sunnuntai 4. helmikuuta 2024

PictureCorrect.com: How Aperture Blades Affect Image Quality

In the world of photography, the aperture of a lens plays a crucial role in not only controlling the amount of light that reaches the camera sensor but also in determining the quality and character of the image, especially its bokeh, or the aesthetic quality of the blur produced in the out-of-focus parts of an image. One factor that significantly influences this aspect of image quality is the number of aperture blades within the lens. But why do some lenses have more aperture blades than others? Let’s dive into the reasons behind this design choice and its implications for photographers.

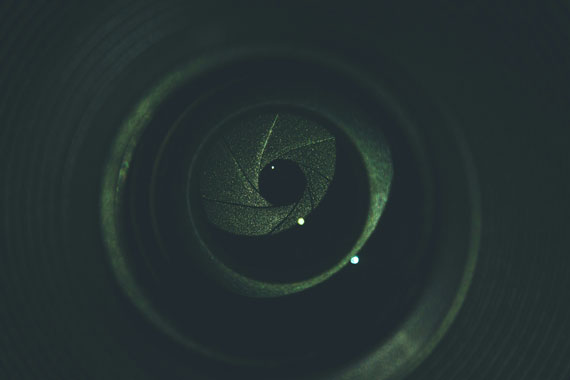
aperture blades

Photo captured by Lenstravelier

Understanding Aperture Blades

Aperture blades are the mechanical elements within a lens that can open and close to adjust the size of the aperture opening through which light passes. The configuration of these blades—how many there are and their shape—affects the shape of the aperture, which in turn influences the bokeh and the overall sharpness of the image.

More Blades for a More Circular Aperture

The primary reason for having more aperture blades is to create a more circular aperture opening. Lenses with fewer blades tend to produce an aperture that resembles a polygon (e.g., hexagonal or heptagonal) when stopped down, which can result in bokeh that mirrors this shape. More blades usually mean the aperture can form a shape closer to a true circle, leading to smoother, more pleasing bokeh. This circular bokeh is particularly sought after in portrait and macro photography, where the subject stands out against a softly blurred background.

Optical Quality and Design Considerations

Lenses designed for high-end or professional use often feature more aperture blades because manufacturers aim to optimize optical performance, including the quality of the out-of-focus areas. These lenses are typically larger, heavier, and more expensive due to the increased complexity and precision required in manufacturing a mechanism with more blades. Additionally, the shape of the blades—whether they are straight or curved—also plays a role in the quality of the bokeh.

Cost and Complexity

The number of aperture blades also reflects a balance between cost and desired optical characteristics. More blades increase the complexity of the lens design and the manufacturing process, leading to higher costs. Budget-friendly lenses often have fewer blades to keep prices low, appealing to amateur photographers or those with less demand for perfect bokeh.

Specific Photographic Needs

Different types of photography benefit from different aperture blade configurations. For instance, landscape photographers might prioritize lens sharpness and depth of field over bokeh quality and thus may opt for lenses with fewer blades, which can also be lighter and more cost-effective. Conversely, portrait photographers who value a soft background might prefer lenses with more aperture blades.

Summary:

The variation in the number of aperture blades among lenses is a result of manufacturers tailoring their products to meet specific photographic needs, balancing between cost, optical quality, and the intended use of the lens. Whether a lens has fewer or more aperture blades, each design choice impacts the character and quality of the images it produces. Understanding these differences can help photographers select the right lens for their work, ensuring that they achieve the desired artistic effect in their photographs.

For Further Training:

These online courses, ebooks, and cheat sheets cover every possible topic for beginner photographers. Currently 71% off for a limited time. The content is vast and complete while still being easy to navigate and understand.

confident photographer

The Confident Photographer

It’s the most complete education available for a beginner photographer, brought to you by the most trusted names in photography.

Deal ending soon: The Confident Photographer at 71% Off

- - - - - - - - - - - - - - - - - - - - - - - - - - - - - - - - - - - - - - - - - - - - - - - - - - - - - - - - - - - - - - - - - - - - - - - - - -

This post How Aperture Blades Affect Image Quality appeared on PictureCorrect.


from PictureCorrect https://ift.tt/USrg5Qp
via IFTTT

lauantai 3. helmikuuta 2024

PictureCorrect.com: How To Frame Your Shots to Avoid Excessive Cropping

We’re all familiar with the cropping tool in our image editing programs. Unfortunately, it is one of the most widely used editing tools, mainly because it’s easy to forget to frame pictures before snapping the shutter. Yes, it is easy to crop images to get rid of ugly background extras, like empty water bottles, and focus only on the part we want. Or sometimes we do some heavy-duty cropping to zero-in on a subject’s face. But if you are planning on printing your images or enlarging them, you’ll get a sharper end result if you do a little planning before you take your shot.

avoid cropping

Photo captured by Luke Lung

Whenever you crop your photo, you limit the size you can print your image without it looking fuzzy or jagged. If you shoot in high resolution or you only plan to show your photos online, it is not as big of an issue. However, by properly framing your shots in the first place, you will have greater flexibility in what you can do with your photos, and you won’t have to spend so much time cropping.

Here are some tips for properly framing your pictures:

  • Take a minute to compose your shot and see what’s in the background before you have people get into position. Then you won’t have to rush to get your shot when your subjects get restless.
photography techniques to stop cropping too much

Photo by cheriejoyful

  • After you’ve added people to the shot, check out what’s in the background on the left and right sides of your subject. Is there a trash can or telephone pole in the way? Better to adjust your shot now than to have to crop it out later.
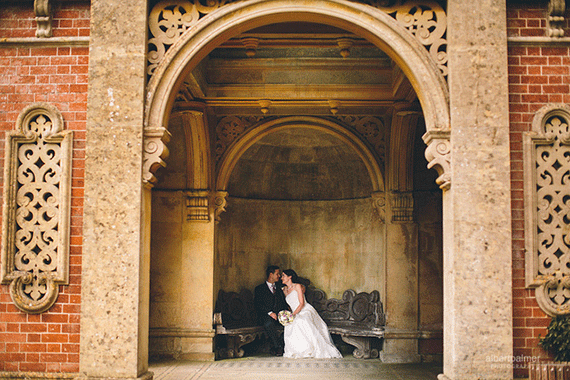
  • Are there objects in the background that could provide an attractive backdrop to your image? Is there something in the background that can provide a natural frame for your picture, such as an attractive doorway or staircase?
how to stop cropping your photos

Photo by Albert Palmer; ISO 500, f/2.0, 1/1250-second exposure.

  • When photographing people with scenery or buildings/monuments in the background, the foreground should be minimized. Try to focus fairly close up on your subjects so they don’t look like tiny ants in front of a giant building — unless, of course, you are attempting to show how big something is in comparison to the people.
  • Landscape photos benefit from showing more of the foreground in order to provide a better perspective.
  • Keep the horizon above the center line of the photo to enhance the composition.
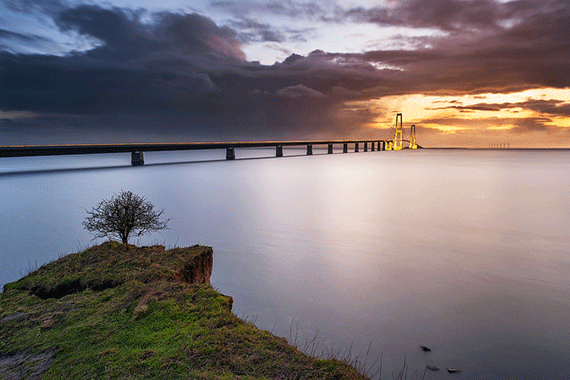
  • When photographing a landscape, placing an object in the foreground can greatly enhance the image. It can be interesting to focus on an object in the foreground and let the background blur, or try the reverse: focus on the background and let a foreground object blur.
how to frame photos so you don't have to crop

Photo by Thomas D Mørkeberg; ISO 100, f/16.0, 30-second exposure.

By keeping these tips in mind, you’ll find you’ll use your cropping tool much less, you’ll keep your printed image sharp, and you’ll increase your creative options—from making enlarged prints and posters to calendars, and even blankets and pillows with your favorite pictures.

About the Author:
Valerie Goettsch is from Digital Photos 101. She is a researcher, reviewer, copywriter, web designer, and graphic artist for the site.

- - - - - - - - - - - - - - - - - - - - - - - - - - - - - - - - - - - - - - - - - - - - - - - - - - - - - - - - - - - - - - - - - - - - - - - - - -

This post How To Frame Your Shots to Avoid Excessive Cropping appeared on PictureCorrect.


from PictureCorrect https://ift.tt/gBehmw8
via IFTTT

perjantai 2. helmikuuta 2024

PictureCorrect.com: Becoming a Confident Photographer

Photography, an art form that captures moments, emotions, and the beauty of the world around us, requires not just a keen eye but also a mastery of the tools at our disposal. In the digital age, the camera has become an extension of the photographer’s vision, offering limitless possibilities to those willing to explore its capabilities. However, the journey from taking casual snapshots to creating stunning visual narratives is fraught with challenges, misconceptions, and often, the underutilization of the camera’s full potential.

Josh Dunlop’s story resonates with many budding photographers. The transition from a point-and-shoot camera to a more sophisticated DSLR or mirrorless system can be daunting. The initial excitement is quickly replaced by the realization that better gear does not automatically translate to better photos. The complexity of focus modes, metering modes, aperture, shutter speed, and ISO settings can overwhelm even the most enthusiastic novices, diverting attention from the crux of great photography: composition.

Recognizing this common pitfall, Josh embarked on a mission to demystify photography for everyone. His journey led him to create The Confident Photographer offering a blend of expertly produced videos, eBooks, and beautifully designed cheat sheets that cater to both visual and practical learners.

confident photographer

New: The Confident Photographer (Learn More)

What Makes “The Confident Photographer” Different?

  • Comprehensive Coverage: This course is meticulously crafted to cover every conceivable aspect of beginner photography, ensuring a well-rounded education. From mastering the technicalities of your camera to unlocking the secrets of captivating composition, it leaves no stone unturned.
  • Practical Learning Tools: The integration of videos, eBooks, and cheat sheets provides a holistic learning experience. The cheat sheets, in particular, are a game-changer, offering quick, at-a-glance tips that you can refer to in the field, ensuring that the learning doesn’t stop once you step away from your computer.
  • Real-World Applications: The inclusion of fun photography projects is a stroke of genius, encouraging learners to apply their skills in real-world scenarios. This hands-on approach accelerates the learning process, fostering a deeper understanding and appreciation of the art of photography.
  • Expert Guidance: The course benefits from the insights and experiences of seasoned photographers, including Josh Dunlop, Stuart Price, and Dave Williams. Their collective wisdom, shared through engaging lessons and actionable tips, serves as a beacon for aspiring photographers navigating the complexities of this art form.

Moving Beyond Auto

The promise of “The Confident Photographer” is not just in the improvement of technical skills but in the transformation of the learner’s approach to photography. It’s about moving beyond the limitations of auto-mode, exploring the creative possibilities of manual settings, and developing an intuitive understanding of composition. This course is designed to empower you to capture amazing photos with the camera you already own, proving that the key to breathtaking photography lies not in the gear but in the knowledge and creativity of the photographer.

photo cheat sheets

Included Quick Capture Sheets

A Journey from Novice to Master

For those on the fence about diving into photography or those who have struggled to make sense of other educational materials, “The Confident Photographer” offers a fresh start. By demystifying the technical aspects and emphasizing the importance of composition, Josh Dunlop and his team have created a pathway for anyone to become a confident, skilled photographer.

Whether you’re looking to capture the essence of your travels, the beauty of everyday life, or simply to preserve memories in the most visually stunning way, this course promises to equip you with the skills, knowledge, and confidence to achieve your photographic goals.

How to Get the Course for a Discount Today:

The Confident Photographer is currently 52% off for a limited time. The course also includes bonuses like cheat sheets, and tutorials to enhance the learning experience. It all comes with an impressive 90 day happiness guarantee so there’s no risk in trying it.

Deal ending soon: The Confident Photographer at 52% Off

- - - - - - - - - - - - - - - - - - - - - - - - - - - - - - - - - - - - - - - - - - - - - - - - - - - - - - - - - - - - - - - - - - - - - - - - - -

This post Becoming a Confident Photographer appeared on PictureCorrect.


from PictureCorrect https://ift.tt/Z90kdsp
via IFTTT

torstai 1. helmikuuta 2024

PictureCorrect.com: 5 Unique Tips for Editing Street Photography

There can be a very fine line in street photography between overdoing your editing and getting it just right.

Creating a mood, building feeling and capturing an environment while staying true to the realness and specialness of found moments is at the heart of the genre. And this can make editing tough.

street photography editing tips

Because of this, I generally prefer to stay on the “less is more” side, but here are some editing tips that I love to use that may fly under the radar for many people.

Camera Color Profiles

Color or black and white is always the first choice I make. When shooting in RAW, if I want my photo to be in color, the first thing I do is check the camera color profile settings to choose a color profile.

street photography editing tips

I sometimes leave the default color profile, but more often than not I will choose one of the camera’s built-in profiles and it will help the photo out significantly.

I’m personally a Fuji shooter, and one of the best things about the camera is the look of the built-in color profiles. They can mimic different film looks in such an incredible way and create a quality to the photograph that is very difficult to achieve through just the RAW settings.

And each profile choice depends on the photo itself. Some will be much too saturated for one photograph while perfect for others.

Remove noise and add grain

I’m not afraid of digital noise in my photographs, particularly with newer cameras, as it looks so much better than it used to.

But sometimes, at the very high levels that you need when shooting at night or indoors, it’s just too high.

street photography editing tips

To fix this, under the Detail section in the Develop panel of Adobe Lightroom, I will use the Noise Reduction’s Luminance slider to reduce the noise (but not too much). This will take some sharpness out of the image, which is fine.

The key here is that I will then go to the Effects slider and add Grain. This will offset the noise reduction, but the grain that Lightroom adds has a much more pleasing look than digital noise. So it helps the look significantly.

I only do this with very problematic images, however.

Vignette

Vignettes can save an image when used sparingly and carefully. Our eyes naturally want to move off of an image, so if there’s not enough in the corners of an image, or if they are brighter than the center, it can throw the look of the photograph off.

street photography editing tips

And because of the quick and happenstance nature of street photography, we can capture an incredible moment—but still the edges of the photo can not look quite right.

Adding a subtle vignette can completely fix this, focusing the eyes where they need to be on the subject of the photo and saving the look of the photo.

Reverse skew / crop

This one is sneaky! Sometimes a street photograph can feel too perfect. Everything is in place and the moment is amazing, but it just feels a little too planned.

street photography editing tips

To fix this, I will go to the crop setting and skew the photograph a little so it’s a bit off-kilter. This can make the photo feel more imperfect, more real—and more special.

Just don’t tell anyone you did it!

Don’t touch the photo! Embrace the imperfections

Sometimes a photo looks perfect out of the camera, so just go with it. But other times you can look at a photograph and things look screwed up at first.

street photography editing tips

The imperfections are there, the sharpness is off, the exposure may be weird. Of course, in many cases, you’ll want to fix this. But sometimes these mistakes just work and add to the feeling that this was a found moment.

Embrace the imperfections when they work and don’t worry too much about them. If the moment is special enough, it will bring everything together on its own and make your editing job that much easier.

About the Author:
James Maher is the author of Essentials of Street Photography, which covers everything about the genre even down to specific post processing techniques that can bring the best out of street scenes.

- - - - - - - - - - - - - - - - - - - - - - - - - - - - - - - - - - - - - - - - - - - - - - - - - - - - - - - - - - - - - - - - - - - - - - - - - -

This post 5 Unique Tips for Editing Street Photography appeared on PictureCorrect.


from PictureCorrect https://ift.tt/5OXjA4b
via IFTTT