keskiviikko 6. joulukuuta 2023

PictureCorrect.com: How to Tell a Story with Your Photos

You know the phrase, “A picture says a 1,000 words.” However, if we assemble 1,000 random words, will they make an interesting story? Probably not as often as we would like.
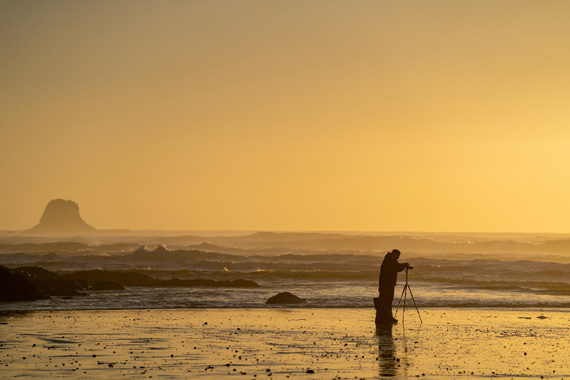
story photography

Photo by Lei Jiang; ISO 100, f/4.5, 1/2500s, 200mm

You see, a photo—like a good story—must be focused. And a photo is only as good as the story it tells.

If we show up without much thought and capture whatever we see, all we end up with are 1,000 jumbled words that no one wants to read.

If we are not sure of the story ourselves, how can we expect our viewers to understand what it is we are trying to say?

It’s about being aware and purposeful. Your story might be as simple as wanting to show your viewers how beautiful some river pebbles are as the first drops of rain come to rest. Or maybe how peaceful and calm reflections on a lake are. Or how beautiful the sunset is over the lake.

Once you begin pondering the story, then you can ask yourself:

  • Is there a subject to help tell my story?
  • What composition would best suit that subject and the story that I am trying to tell?
  • Which shutter speed might best portray that feeling?
  • Are there any distractions I should omit from the frame?

You see, every decision we make with regards to how the photo is to be captured can help or hinder the story we are trying to tell. The more cohesion within these subtle details, the clearer your story will be.

When we edit our photos, the same applies: we try and edit to create the feeling or mood that suits our stories. Sometimes that can be as simple as trying to communicate what it felt like to witness an incredible sunrise, as the sun rose over the ocean and the first rays of light reflected off the wet rocks.

Now we are getting romantic!

Practice being mindful of the story and then, as your skills in visual communication increase, you can begin to express deeper and more personal emotions within your photography.

A great example is shutter speed. On a stormy day by the ocean, if we are trying to tell the story of the wind and the crashing waves, then what shutter speed would help convey that feeling? If we choose 30 seconds, we will capture a very calm photo with no hint of waves or motion of the wind. However, if we decide on a one-second shutter speed, we will capture just enough motion to show the wind whipping off the waves and the explosion of the waves crashing over the rocks.

Which shutter speed we choose can have a huge effect on the story we tell.
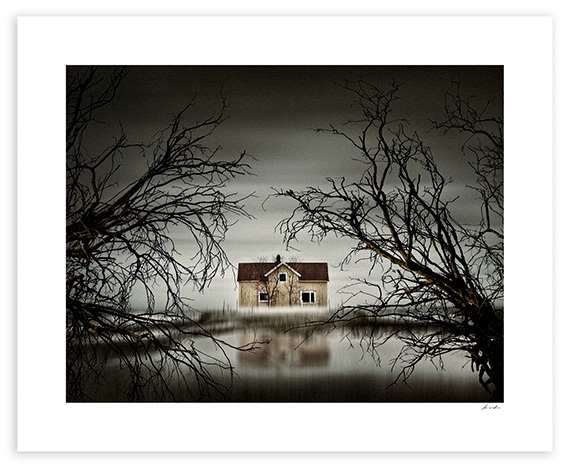
how to tell a story in photos

Above is one of my emotionally deeper photos. I wonder if you can feel a little hint of what I was trying to say?

- - - - - - - - - - - - - - - - - - - - - - - - - - - - - - - - - - - - - - - - - - - - - - - - - - - - - - - - - - - - - - - - - - - - - - - - - -

The post How to Tell a Story with Your Photos appeared first on PictureCorrect.


from PictureCorrect https://ift.tt/QJWNAf0
via IFTTT
tiistai 5. joulukuuta 2023

PictureCorrect.com: Memory Card Handling Tips for Photographers

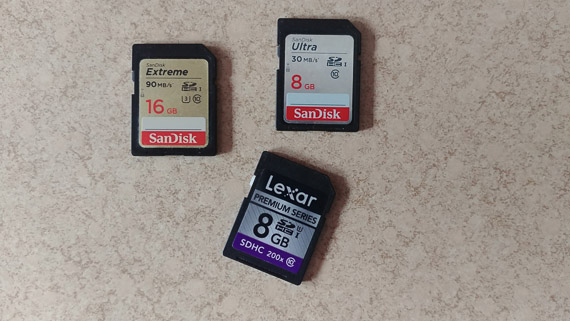
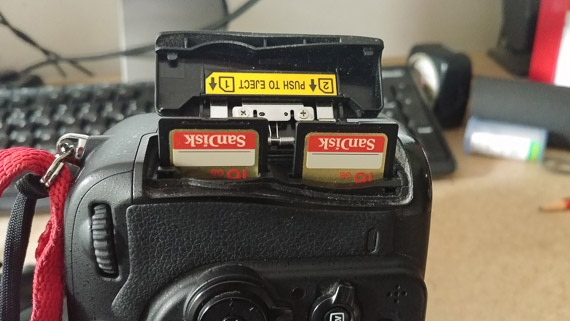
Our memory cards are absolutely essential to our photography, and should anything happen to one, we run the risk of losing valuable memories. Yet the average photographer tends to treat memory cards in a pretty cavalier manner, taking for granted that they will simply keep on working and safely storing images. Fortunately in most cases they do simply keep working. However, file corruption is always a possibility. I have memories of setting out on a four-day hike away from civilization, and on day one a friend’s only memory card failed.

photo memory card care

Of course, there are a number steps we can take to look after our memory cards better. Some photographers might debate about the necessity of these steps, but I just take a practical view – they’re my memory cards and I’ll do all I can to look after them. And it’s really easy!

1) Format your new card.

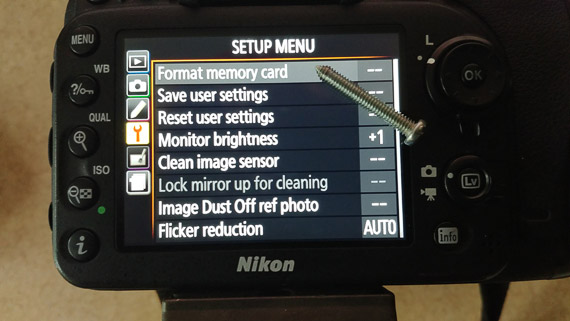
Before using your new card it’s necessary to format it in your camera first. This step is essentially a technological handshake between your card and your camera. It helps make sure that each one understands the other perfectly when setting up the file systems on the card.

why format your new memory card

2) Format instead of erasing.

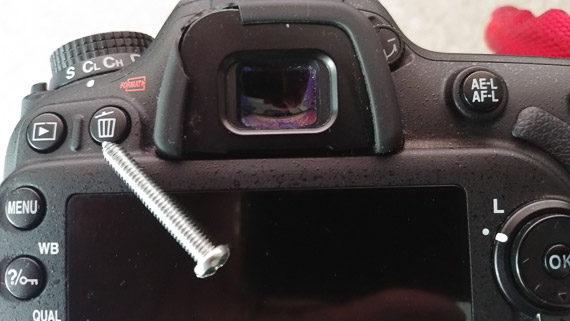
Erasing individual images on the fly in your camera is not a good idea. It’s possible to mix up the file system on your card and make it less efficient. It’s also much better to delete photos on your computer after you have downloaded them. That way you can really see what you’re about to erase. You might accidentally delete a gem if your only view of the file is on the small camera display. Once you have downloaded the files, format instead of erasing. Erasing could actually leave remnants of electronic debris on your card.

don't erase individual images

3) Different camera? Format your card.

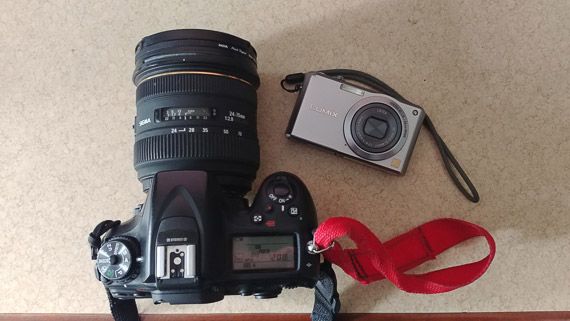
Once again formatting is important to do – in this case, before using it in other cameras. Using a partly filled card in a different camera may mix up the file systems.

format your card for different camera

4) Don’t fill your card 100%.

You especially don’t want to ‘overshoot’ as your card will struggle to find space and writing efficiency may drop.

5) Give your camera time.

Your camera writes files to a buffer before transferring them to your card. If you’ve just shot a lot of images on ‘continuous’ this may take a slightly longer time than normal. Don’t whip out your card too soon if you’re in a hurry.

safely remove hardware

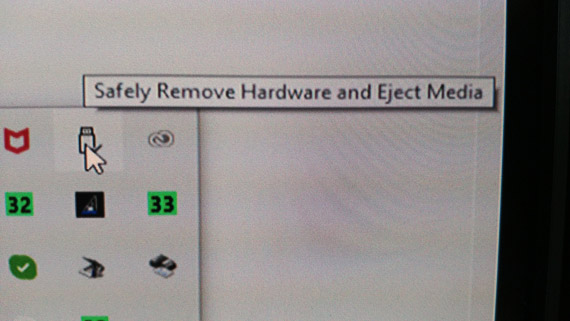
6) Use the ‘safely remove’ method.

Just as with removing your card from your camera, make sure that files you’re downloading have finished transferring before removing your card or turning off your computer. Using the ‘safely remove’ method is really a good practice!

use a card reader

7) Use a card reader.

It’s best not to download files directly from your camera to your computer, but rather to use a good card reader. It’s much faster and you know that your camera will not run out of power mid-transfer!

keep eye out for battery charge level

Do remember to keep an eye on your battery charge level. The vagaries of life can mean that the shot of a lifetime is transferring just as your battery dies.

check that files have downloaded

8) Check for success.

Before you format your card make certain that the file transfer has actually taken place successfully by checking the files. It’s not uncommon for some glitch to cause a problem and interfere with the transfer.

use a few different memory cards

9) Use more than one card.

Unless you are shooting video it’s actually a good idea to use a few smaller capacity cards rather than one large capacity one. This means that you will not have all your eggs in one basket in the case of malfunction or theft.

memory card protector

10) Use a card case.

It’s good to keep the card contact clean by keeping it in a protective case. Without this it may pick up scraps of lint from your shirt pocket.

11) Make a back up copy.

As a final thought, your downloaded files should be in two different locations before you format your memory card. Having just one copy with no back up copy is really playing with fire. Remember there are only two types of people – those who have had hard drive failure and those who are going to have hard drive failure!

About the Author:
Roger Lee is a Johannesburg based photographer who runs a one day course based on “we don’t want to drown in detail, we just want to know how to use our cameras and enjoy ourselves!” He also does an ebook version of his course.

- - - - - - - - - - - - - - - - - - - - - - - - - - - - - - - - - - - - - - - - - - - - - - - - - - - - - - - - - - - - - - - - - - - - - - - - - -

The post Memory Card Handling Tips for Photographers appeared first on PictureCorrect.


from PictureCorrect https://ift.tt/argiZx5
via IFTTT
PictureCorrect.com: How to Use Lines in Photography Compositions

A very powerful method of improving the composition of photos is the use of lines. Properly used, lines can significantly increase the impact of images. Lines serve to affect photographic composition in two ways. First, they serve to create a mood. Second, they lead the eye through the photograph. By affecting mood, lines add emotional content to images. By leading the viewer’s eye, they keep the viewer’s attention focused on the image.

line techniques in photography

Photo by Dun.can; ISO 100, f/8.0, 1/30-second exposure.

When dealing with lines, the subject can be broken into the following types:

  • Horizontal
  • Vertical
  • Diagonal
  • Jagged and irregular
Mood: Horizontal

Horizontal lines tend to indicate a sense of homeostasis (lack of change). This use in an image often projects a feeling that an image, or part of one, is somehow frozen at a point in time. Horizontal lines should be used when a photographer wants to impart a sentiment of timelessness or lack of change to an image. In addition, they can serve to provide a contrast with more dynamic parts of an image. Examples can be found in buildings, horizons, and fallen objects (e.g. trees).

Mood: Vertical

Vertical lines can project either a mood of stability or peace. When projecting a mood of stability, they often function similarly to horizontal lines. This can convey an implication of substance or permanence. Examples of vertical lines used to impart a mood of stability can be found in rock formations, power line poles, and vertical lines of buildings.

Proper use of vertical lines can also impart an impression of peace and tranquility. Examples of this use are trees in a fog shrouded forest, old fence posts on an isolated prairie, and a figure on a secluded beach in the early morning.

how to use lines in photos

Photo by Scott Meis; ISO 100, f/4.8, 1/60-second exposure.

Mood: Diagonal

Diagonal lines can convey a sense of action or make an image more dynamic. For this reason, diagonals are a very powerful tool. Their power resides in their ability to grab the attention of the viewer. The viewer’s eyes tend to travel back and forth along diagonals. Diagonal lines can be formed, not only of objects such as streets or sidewalks, but also of color. For instance, a diagonal section of color can add drama to a flower image. Examples of diagonals are plentiful: roads, streams, waves, and branches are but a few examples of objects that can be utilized in a diagonal manner.

Mood: Jagged and Irregular

Jagged and irregular lines take us one step further on the continuum of emotion and feeling. While diagonals move us into the area of the dynamic, jagged and irregular lines often impart a sense of unease, tension, or fear to the viewer of the image. Heavy use of jagged and irregular lines can cause a negative feeling in the viewer (which may be exactly what the photographer intended). Therefore, they are the tools of choice for the photographer who wants to create a feeling of disquiet or agitation in the viewer. Examples can be found in roots, a crocodile’s teeth, stark mountain peaks, and the twisted metal of an automobile wreck.

basics of lines in photography

Photo by fındık_fıstık; ISO 100, f/2.8, 1/25-second exposure.

Leading the Eye

As powerful as lines are in helping to create a mood in an image, they become even more powerful when they are also used to direct the viewer’s attention. When using lines to direct the viewer’s attention, two rules need to be followed. First, make sure that the lines always point toward the most important object in the image. This will direct the viewer’s attention directly to that object. Second, make sure that the lines never point outside of the image. Lines that point outside the image will make the viewer’s eye leave the image. This weakens the image and may result in the viewer losing interest in the image entirely.

About the Author:
Ron Bigelow (www.ronbigelow.com) has created an extensive resource of articles to help develop photography skills.

- - - - - - - - - - - - - - - - - - - - - - - - - - - - - - - - - - - - - - - - - - - - - - - - - - - - - - - - - - - - - - - - - - - - - - - - - -

The post How to Use Lines in Photography Compositions appeared first on PictureCorrect.


from PictureCorrect https://ift.tt/ja4SIdW
via IFTTT
maanantai 4. joulukuuta 2023

PictureCorrect.com: Pet Portraits: How to Get Animals to Look At You

Today’s photo tip is about pet portraits and how to get the animal’s attention. Pet portraits can be some of the most fun photography you do. As an added bonus, it’s a great photography training ground.

dog portrait attention

Photo by Katie Bernotsky; 50mm, ISO 800, f/4.5, 1/1000s.

“Never Work With Kids or Animals!”

Or so says the old show business expression… Why? Because they steal the show every time! While that may be a bad thing for an actor, for us it’s great. We want our pictures to be seen, liked, commented on, and so forth. So, the rule of thumb here is to always include the family pets when you’re shooting portraits. It takes more work, but after you’ve done it a few times you will quickly realize it’s worth the effort. Even better, do shots of each of the kids with their pets. Whether it’s your own kids or you’re doing some photos for a friend, parents love ’em!

But, like everything else, pet portraits have their challenges. You won’t be doing pet portraits very long before you run across a dog or cat that simply won’t cooperate.

Dogs

Dogs are basically pack animals and there is a distinct hierarchy in the pack. Alpha dogs and so on. There is a competition between you as a photographer and the dog to determine who the alpha dog is. Generally, it’s no problem and the shoot goes smoothly, but sometimes you run across a dog that is shy. It is not only content in second spot, but wants to let you be the boss.

dog eye contact

Photo by Daniel Lincoln; 23mm, ISO 100, f/1.8, 1/320s.

This becomes a problem because among dogs, eye contact (staring) is the first stage of a fight. The winner of the fight is the alpha. The loser isn’t. A fight can be avoided by one of the two dogs breaking off eye contact and “surrendering.” In addition to breaking off eye contact, they will often lay on their back, exposing the stomach. This is a vital, easily damaged area, and to expose it signals complete surrender.

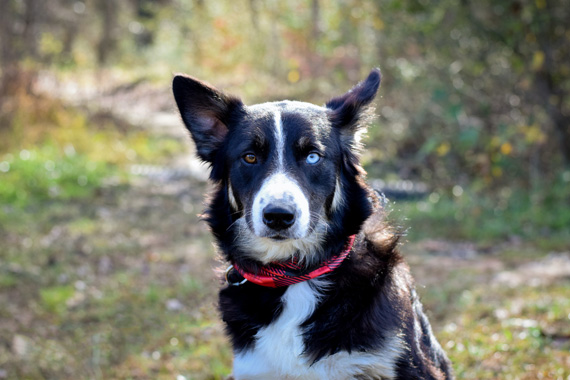
In your pet portraits, you don’t want a dog that looks like it was just beaten! You want one that looks alert and vitalized. But, the dog sees the lens as an eye staring at them and if it’s a shy dog, to avoid a fight, it won’t look back. There is your “why” a dog won’t look at the camera.

By the way, if the dog has been abused in the past (which is often the case for rescue dogs) you really have your work cut out for you. Allow a lot of extra time to get to know the animal and get them comfortable with you.

Cats

Cats won’t look at a camera for the simple reason that you want them to. They’re obstinate. Cats will be your nemesis. But if you succeed, it’s worth it.

cat eye contact

photo by Be Celicious.

Eye Contact

To get pets to look at you, for dogs, sound is the key.

For cats use visual stimuli. As a visual stimulus for cats a peacock feather flicking around the lens will get their attention for a while.

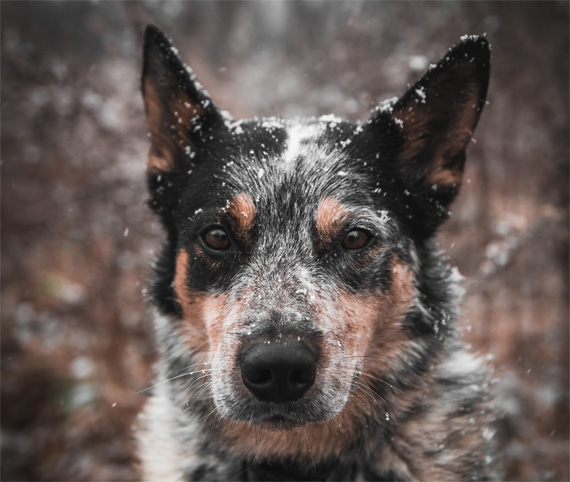
For dogs, get a dog toy with a squeaker in it. Keep it hidden from the dog, and when you are ready to shoot, gently squeak it. This unusual, hard to hear, hidden source of sound will immediately get the dog’s attention! It will look at you, put up its ears, and look attentive. Don’t let the dog see the toy. The longer it takes for it to figure out what is making the sound, the more shots you’ll get. When it starts to lose interest in the squeaking, flick the toy into the air.

Needless to say with both the squeaker and the feather, you have to be ready to shoot the instant the animal looks at the camera. You will only get a split second to capture the ultimate moment.

dog photos

photo by philhearing

Photographing animals is the best photo training I know to learn how to shoot fast. Give it a try. Animals will drive you nuts, but good pet portraits are definite contest winners!

About the Author:
Dan Eitreim writes for OnTargetPhotoTraining. He has been a professional photographer in Southern California for over 20 years. His philosophy is that learning photography is easy if you know a few tried and true strategies.

- - - - - - - - - - - - - - - - - - - - - - - - - - - - - - - - - - - - - - - - - - - - - - - - - - - - - - - - - - - - - - - - - - - - - - - - - -

The post Pet Portraits: How to Get Animals to Look At You appeared first on PictureCorrect.


from PictureCorrect https://ift.tt/4ovPmnO
via IFTTT

sunnuntai 3. joulukuuta 2023

PictureCorrect.com: Travel Photography Slideshow Tips

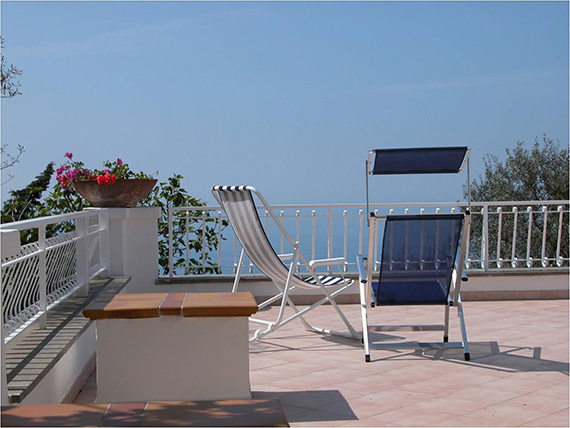
This article focuses on capturing photos that are your images and building them into a travel slideshow.

balcony

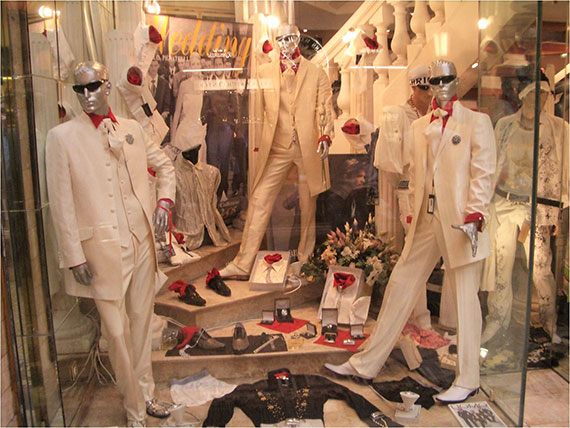
Have a list of subjects that you can capture to use as ingredients for your travel show—not your standard travel images. A list helps you to see so much more on your travels, such as markets, artists, buskers, and even shop windows.

shop window travel photography

dog in shop window

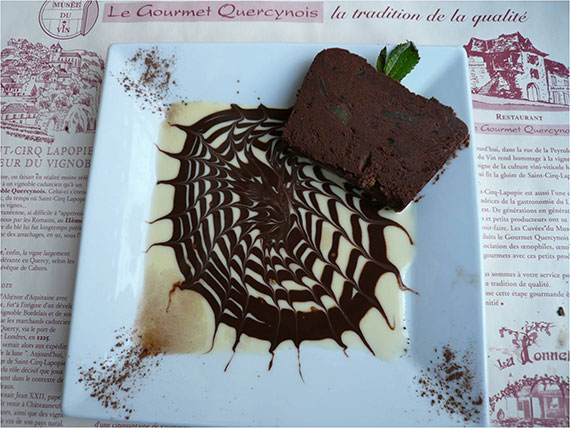
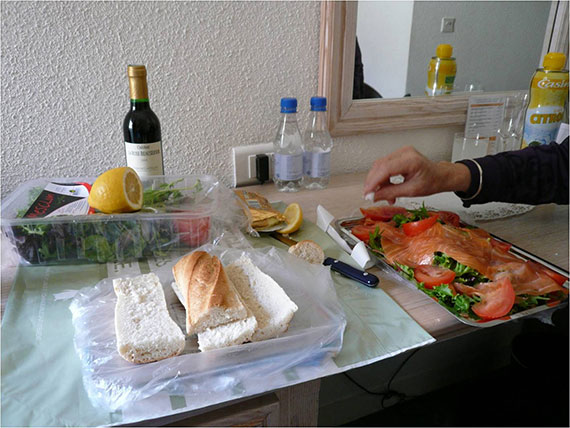
Shop windows are great for illustrating different countries. And images of food bring back good memories and can add “taste” to your travel show.

food photography

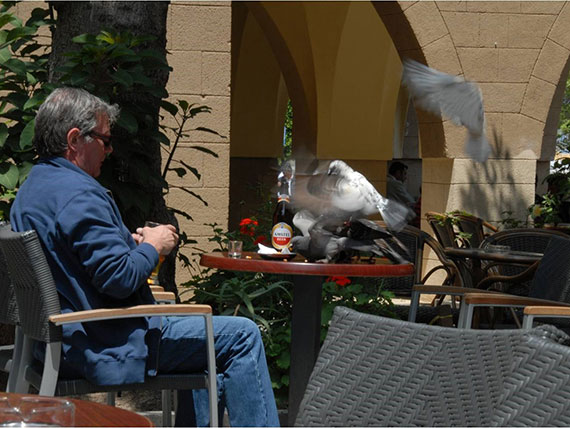
And don’t forget amusing incidents like the attack of the doves…

pigeons stealing food

Or even your self-catering.

self catering

Remember, travel photography is the way in which we go about recording our travels so that we can revisit and share our experiences time and time again and really enjoy each revisit.

And to do this you need variation, surprise, and unexpected items, all providing an element of visual interest.

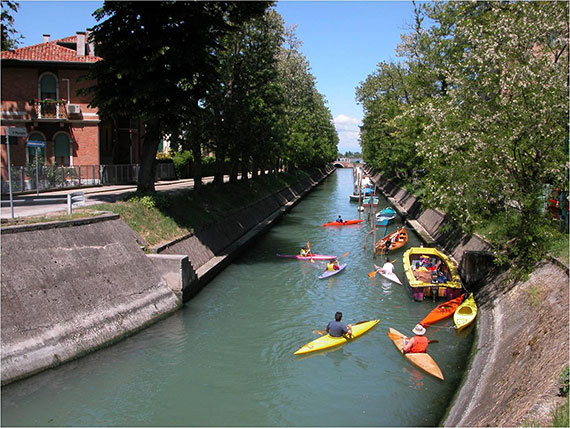
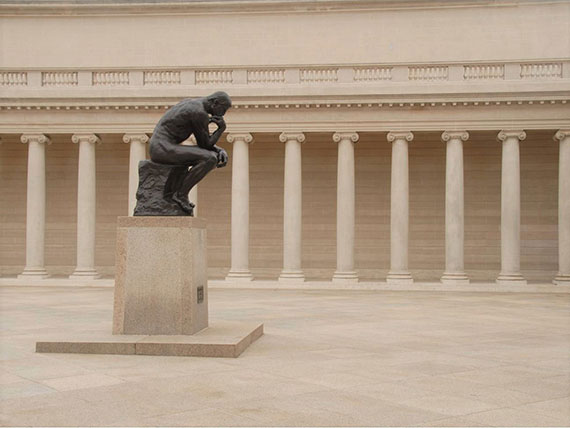
classic travel photo

kayakers

statue

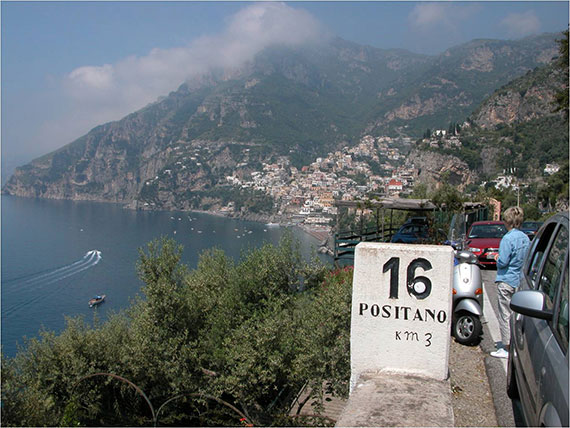
When doing your travel show you obviously have to let people know where in the world you are—what country or city you’re visiting. This is essential to give context, and the aim is to do this without it being a big interruption to the show. Photographing signage is the easiest and most effective way of establishing location.

road sign

Just as one should do with all of our visual images, it’s important to include some indication of scale, otherwise, your viewer has no real idea of what is being shown.

People are your best indicators of size.

human for scale

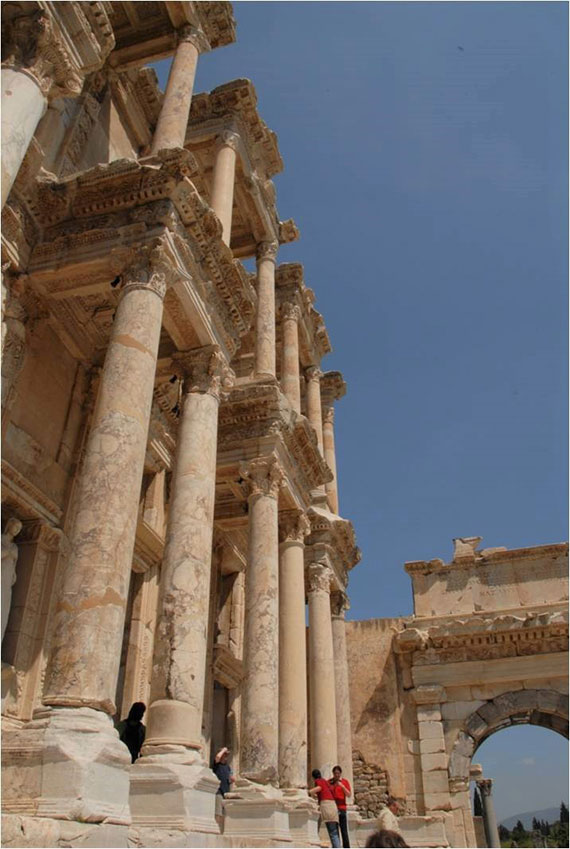
You really do need size indicators. Both the library at Ephesus and the Corinth Canal are huge.

scale for travel photography

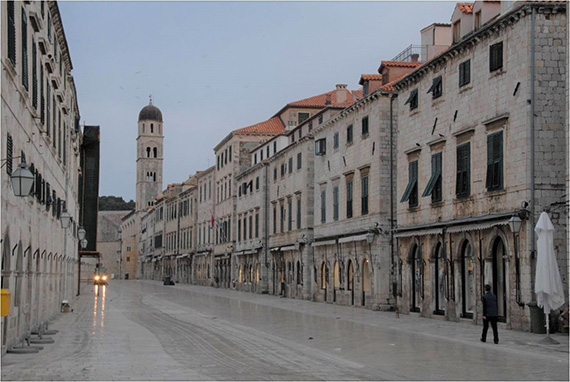
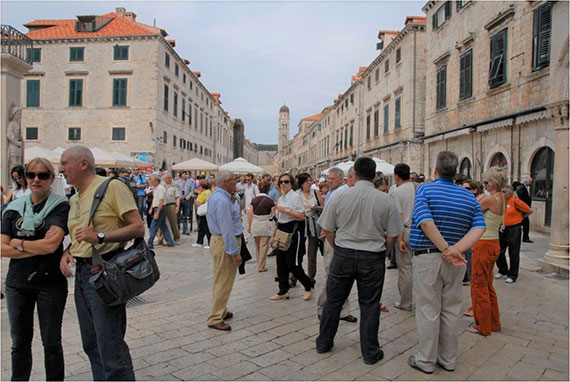
Wherever you are in the world, the time of day can make all the difference to the images you capture, and you should factor this into your plans. For example, if you’re in Dubrovnik you can get delightful images of empty streets if you are out before breakfast.

empty street

If you wait until after breakfast you may find that the cruise ships have arrived and your images will be very different!

crowded tourist spot

Or you can wait for the evening.

evening tourist attraction

This applies to all cities and points of interest that attract crowds. You plan what you would like to have in your image and time it accordingly.

We all want some of our travel images to be slightly different from the usual images you see.

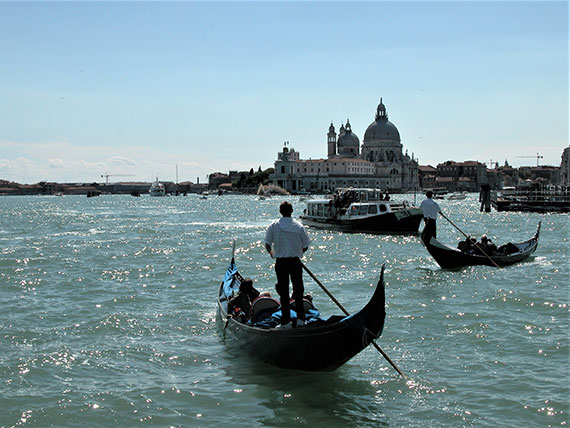
You can take the standard, perhaps obligatory, tourist type images, such as this one of Venice.

venice

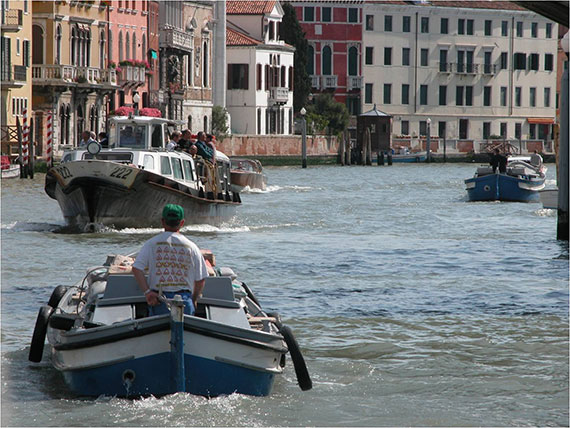
But what about some images of Venice at work?

venice at work

Or images of other parts of the city that aren’t normally featured?

unexplored venice

There are numerous other ingredients that you can use for your travel show. It’s really up to your imagination. In a future article, I will cover subjects such as details, reflections, time of day, and so on. My travel photography ebook covers a wide range.

About the Author:
Roger Lee is a Johannesburg based photographer who runs a one day course based on “we don’t want to drown in detail, we just want to know how to use our cameras and enjoy ourselves!” He also does an ebook version of his course.

- - - - - - - - - - - - - - - - - - - - - - - - - - - - - - - - - - - - - - - - - - - - - - - - - - - - - - - - - - - - - - - - - - - - - - - - - -

The post Travel Photography Slideshow Tips appeared first on PictureCorrect.


from PictureCorrect https://ift.tt/3zUgecP
via IFTTT
lauantai 2. joulukuuta 2023

PictureCorrect.com: This Tip Will Give Your Photos Powerful Perspective

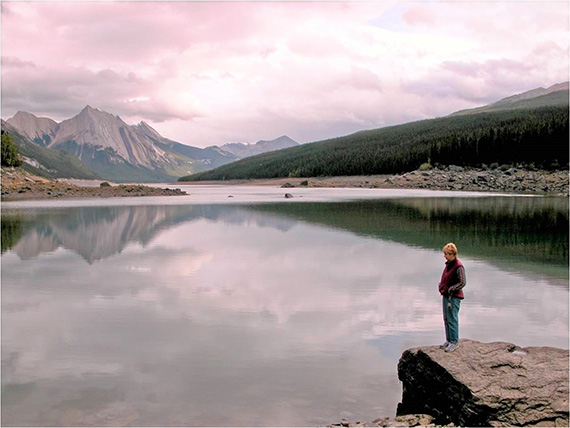
The magnificence of the human machine, also known as the human body, gives us three-dimensional vision. It is that benefit that allows us to evaluate size and distance.

add perspective to photography

Photo by the U.S. Navy

In photography, that benefit becomes obscured, because photos are a two-dimensional medium. This fact of optics is one reason why a photo can appear lifeless and flat.

Quick Tip

One way to establish the size and scale of an object within a photo is to include another object of known size and proportion.

In the above photograph, we can see some of the crew members lined up across the aircraft carrier’s bow. This visual comparison between the human body and the vessel helps viewers comprehend the ship’s enormous size.

In the above photo of an aircraft carrier, not much helps us evaluate the aircraft carrier’s size. However, we do get a slight sense of distance.

add perspective to photography

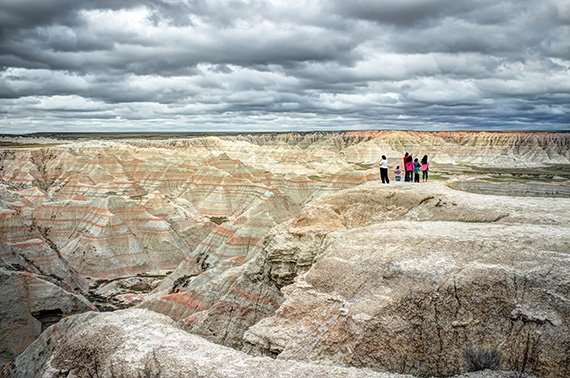
Photograph by Kent DuFault

When your photos, especially landscapes, include people or some other object of a familiar size, it will give your resulting photo depth perspective and a sense of scale.

Without the inclusion of this family standing at the Badlands in South Dakota, it would be impossible to appreciate the vastness of the landscape.

add perspective to photography

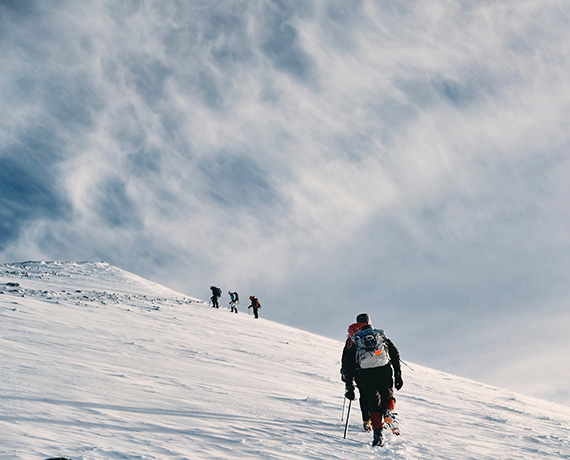
Photo by Todd Diemer

Including an object of a familiar size can also help to establish distance and vertical perspective. Suppose you take your hand and cover up the mountain climbers in the foreground of the above image. It becomes difficult to realize how far away from the camera are the climbers off in the distance.

add perspective to photography

Photo by Lisa Cope

Scale and perspective work both ways.

It can tell us that something is large or far away—or it can tell us that something is small and up close.

The next time you’re out taking pictures, consider what you might include within the frame to give a viewer a sense of size and depth.

About the Author:
Kent DuFault is an author and photographer with over 35 years of experience. He’s currently the director of content at the online photography school, Photzy.com.

For Further Training:

This recently updated & expanded in-depth guide rolls years and years of practical knowledge, condensed into 239 pages packed with training, illustrations, and assignments. Advanced Composition goes far beyond knowing what composition is… (or, even knowing what the tools of composition are). Develop the SKILLS of anticipation, pre-visualization, and timing that are core to capturing great photography.

advanced composition

Updated: The Advanced Composition Guide at 79% Off (Learn More)

Broken into 84 key lessons, 38 assignments, & 117 self-check questions – it delves DEEP into the artistic and technical aspects of photographic composition. With this guide you will learn to SEE light, shadow, lines, curves, space, repetition, and focal points.

Found here: The Advanced Composition Guide at 79% Off

- - - - - - - - - - - - - - - - - - - - - - - - - - - - - - - - - - - - - - - - - - - - - - - - - - - - - - - - - - - - - - - - - - - - - - - - - -

The post This Tip Will Give Your Photos Powerful Perspective appeared first on PictureCorrect.


from PictureCorrect https://ift.tt/QRnd1VN
via IFTTT
perjantai 1. joulukuuta 2023

PictureCorrect.com: Compositional Balance vs the Rule of Thirds

What is the first rule of composition that we all learn at the very beginning of our journey? The Rule of Thirds—right.

What if there was another simple rule, that was as good or better than the rule of thirds?

I used to follow thirds blindly, placing all my subjects and horizons on or near the one-third lines. Don’t get me wrong—it can be very useful in creating strong compositions. The problem arises when we follow any rule blindly without giving any thought to other compositions.

Balance is better than the rule of thirds

What is a balanced composition? It’s actually quite easy.

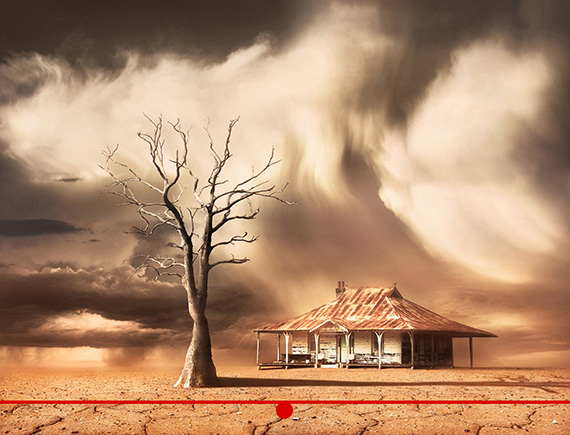
The photo below is an excellent example of a balanced composition. It also happens to suit the rule of thirds, too.

importance of balance in photography

How does it work?

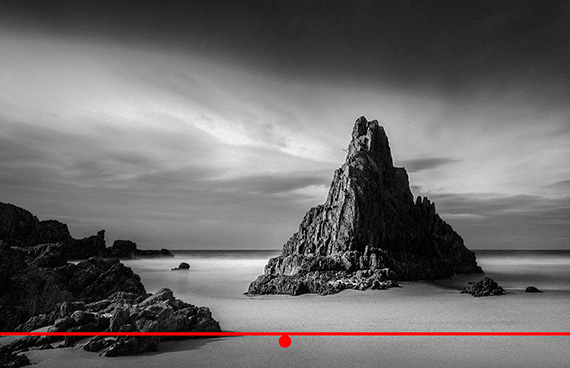
Let’s assume the red line is a see-saw (or teeter-totter) and the red circle in the centre is the pivot point.

To achieve a balanced composition, our aim is to frame the objects within our photo so the see-saw is perfectly balanced. An equal amount of weight on each side.

You can see our rather large triangular subject sits mostly to the right of the centre point. Without the rocks on the left side, the photo would be in danger of being right-side heavy; however, with the inclusion of the rocks, the image is very well balanced.

Have you ever ridden a see-saw with someone much lighter? You probably noticed that, to achieve balance, the larger person needs to slide right up toward the middle. This rule also applies to compositional balance. A large object close to the pivot (middle) can be balanced by a smaller object near the edge of the frame.

Don’t be afraid to put your subject in the centre

importance of balance in photography

A lot of my portfolio photos feature a big, bold subject in a central composition. I get asked a lot why this is the case, and why I don’t use the rule of thirds more often.

The answer is, more often than not, big and bold subjects look odd (due to being off balance) anywhere but over the centre point. You will notice in the above example the horizon is more or less on the one-third line; however, the subject is balanced centrally between the left and right edge.

importance of balance in photography

Above is a very simple and uncluttered, balanced composition. If we modify the image a little to have the subject sit on the rule of thirds (see below), we get an unbalanced and awkward composition that doesn’t work as well.

importance of balance in photography

It’s not all about the rule of thirds

I am getting a little off track here, as I wanted to highlight the power of compositional balance. However, given the rule of thirds has such a huge following among landscape photographers, I feel I should touch on that too.

Firstly, I would definitely say that from a landscape point of view, although they both work depending on the scene, in my opinion balance is much more important than the rule of thirds. Who would have thought? The rule of thirds is touted as the holy grail of composition—but that is just not the case.

When does the rule of thirds work?

My best guess is the current love affair with the rule of thirds came from portrait painting and portrait photography, because it works so well in those fields—and, let’s be honest, that is where photography began.

Often you will see a portrait with the subject positioned to the left or right, and often they will be looking into the large vacant area on the other side of the photo. It works very well; however, most subjects we photograph in landscapes don’t tend to be looking one way or another, so blindly following the rule of thirds often results in an unbalanced photo.

However, there are times when the rule of thirds works very well within landscape photography:

  • Often the horizon looks best placed roughly on the rule of thirds. Having two-thirds foreground and one-third sky can often give the photo a great sense of depth, and two-thirds sky and one-third foreground can result in a feeling of space.
  • The rule of thirds can also work very well if our subject feels like it’s pointing in the direction of the open area. Often if one side of the subject is in light and the other is in shadow, then having the light side pointed into the open space can also result in a strong thirds composition. (See the example below.) The photo is unbalanced; however, the image is successful in a one-thirds composition as the subject looks to be facing the open space.

importance of balance in photography

Consider all your options

There is no right or wrong way to compose a photograph. Next time you line up a shot, consider both balance and the rule of thirds. Two options are always better than one!

importance of balance in photography

Take a look back through your photos and see how many are balanced. Have a play with the crop and see if you can achieve more balanced photos.

Remember, the rule of thirds is still a great compositional tool—however, you now have another option in your toolkit!

- - - - - - - - - - - - - - - - - - - - - - - - - - - - - - - - - - - - - - - - - - - - - - - - - - - - - - - - - - - - - - - - - - - - - - - - - -

The post Compositional Balance vs the Rule of Thirds appeared first on PictureCorrect.


from PictureCorrect https://ift.tt/hCjqzKe
via IFTTT