perjantai 25. elokuuta 2023

PictureCorrect.com: How to Photograph the Northern Lights

Of all the phenomena you can view in the night sky, the northern lights may be the most spectacular. These lights, which are also known as the aurora borealis, are created by charged particles from the sun interacting with gaseous particles in our atmosphere. They also appear in the southern hemisphere, where they are known as the southern lights or aurora australis.
how to capture aurora borealis

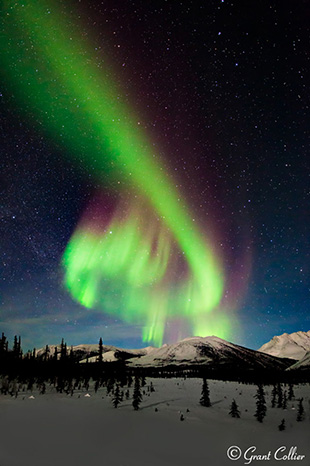
Brooks Range, Alaska, 14mm, f/2.8, 10 seconds, ISO 6400. (Photo by Grant Collier)

Finding the Northern Lights

You can view a forecast for the northern lights at the University of Alaska’s website. This website gives you a general idea of where the northern lights will be visible on any given night. For example, if you are in the northern continental United States, you might be able to see the northern lights if the forecast is rated five or higher. However, to get the best chance of viewing the northern lights, you’ll need to travel even farther north. To discover the best locations, try to find a day when the University of Alaska predicts a forecast of one or two.

Looking at their map, know that anywhere within the bright green circle is a prime viewing spot for the northern lights. Some places that are somewhat easier to access in prime viewing areas are Dawson City and Yellowknife in Canada; Wiseman, Alaska; Iceland and northern Norway.
guide to photographing northern lights

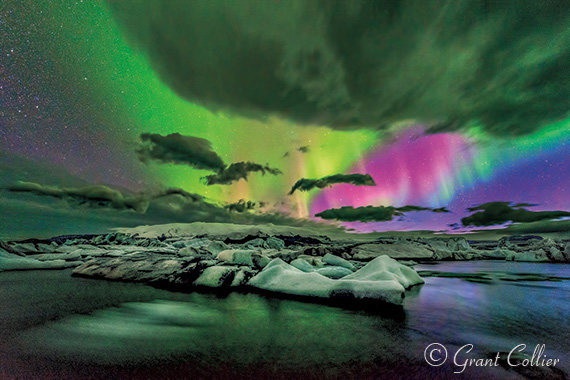
Jokulsarlon Lagoon, Iceland, Nikon D800e, 18mm, f/2.8, 20 seconds, ISO 3200. (Photo by Grant Collier)

What Lens to Use

When shooting the northern lights, it is very helpful to use a fast, ultra-wide-angle lens that has an aperture of f/2.8 or wider. These lenses can let more light into the camera, which will yield higher quality images at night. Perhaps the best lens for shooting the northern lights is the Sigma 14mm f/1.8 Art. This lens has the widest aperture of any 14mm lens, and the Sigma Art lenses are always of very high quality. However, it is quite expensive, with a retail price of around $1,400. A lower-cost option is the Rokinon 14mm f/2.8, which costs around $300. If you prefer a zoom lens, the Tamron 15-30 f/2.8 and Sigma 14-24mm f/2.8 are both very good options.
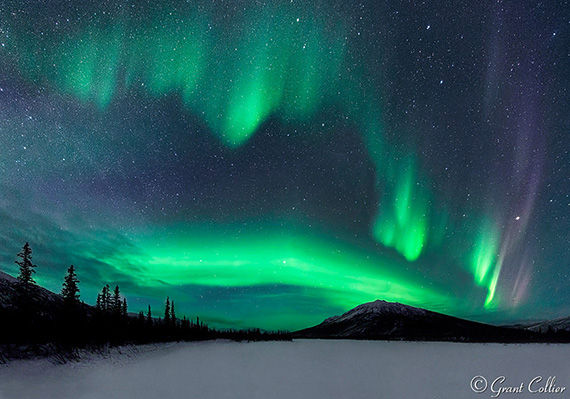
photographing northern lights alaska

Wiseman, Alaska, 14mm, f/2.8, 15 seconds, ISO 6400. (Photo by Grant Collier)

Camera Settings

You’ll typically need to use the widest aperture on your lens, and I recommend a shutter speed between 10 and 15 seconds. If the lights are moving rapidly in the sky, they can start to blur too much with longer exposures. If the northern lights aren’t moving rapidly, you can get away with exposures of 20 to 30 seconds with a wide-angle lens.

Generally, an ISO of 1600 will work well for shooting the northern lights. I recommend underexposing the images a little so that you won’t risk blowing out the highlights if the lights suddenly brighten. You’ll want to frequently check your histogram to make sure you’re not coming close to clipping the highlights. If you are, you’ll need to lower the ISO or exposure length.
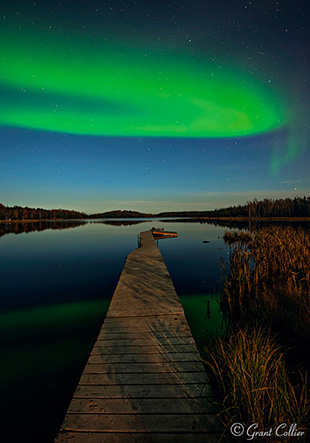
northern lights photography tips

Wooden Pier near Yellowknife, Canada, 15mm, f/2.8, 30 seconds, ISO 1600. (Photo by Grant Collier)

Stitching Images

The northern lights can fill up most of the sky, and even ultra-wide-angle lenses may only capture a portion of the display. To overcome this problem, you can create stitched images to capture more of the scene. A stitched image is one where you take multiple shots, each comprising a small part of the scene you want to photograph. You later use computer software, like Lightroom or Image Composite Editor (Windows only), to stitch these images together. The great thing about stitched images is that they will also produce larger images with more detail and less noise.

If the aurora is bright and moving fast, you’ll typically want to use a very wide lens, like 14mm, to create a single-row stitched panorama. You’ll have to take all of the images pretty quickly. Otherwise, the aurora can move so much that the images won’t stitch together seamlessly. If the aurora is relatively dim, it doesn’t tend to move as fast. In this situation, it’s possible to do multi-row stitched panoramas with up to 20 images. These large stitched images can help minimize noise, which is more noticeable when the aurora is fainter. I recommend a 24mm lens to capture such images.

Stacking Images

Another way to get more detail in an image of the northern lights is to stack multiple images. This is especially useful for getting more detail in the land if you shoot under no moon or a thin, crescent moon. I discuss stacking and stitching images in much more detail in the new, second edition of Collier’s Guide to Night Photography.
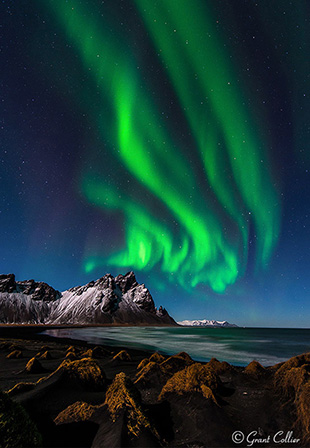
photograph aurora borealis

Vestrahorn Mountain, Iceland, 14mm, f/2.8, 10 seconds, ISO 1600. (Photo by Grant Collier)

When to Shoot the Aurora

The best time of the year to photograph the northern lights is near the spring and autumn equinoxes, in March and September. The northern lights tend to be somewhat more active during those months than others. Never plan a trip to photograph the northern lights between late April and early August. During this time, it isn’t dark for very long, if at all, at the far northern latitudes. If you plan a trip in December or January, it will be dark much of the day, if not all of the day. However, it can be bitterly cold during this time, so spring and autumn are still preferable for all but the most adventurous photographers.

Moon Phase

You can shoot the northern lights under almost any moon phase. The aurora will be brighter under no moon, but any foreground in your shot will likely be rendered as a dark silhouette. Under a full moon, the foreground will be well-illuminated and the aurora will be fainter, but this may not matter. The northern lights are often so bright that they will be easily visible under a full moon. My favorite time to shoot the northern lights is under a moon that is 20 to 50 percent illuminated. It will be dark enough to see the stars and aurora a little better than under a full moon, and you’ll still be able to render a lot of detail in the foreground. In order to be able to shoot under a variety of conditions, I recommend planning a trip so that you arrive near a new moon and leave near a full moon.

Avoid Lens Fog

Since it can be so cold when shooting the northern lights, your lens may fog up during the night. Lenses fog up much faster when they are taken from a warm location to a cold one. One way to prevent this is to keep your camera equipment cold by storing it in the trunk of your vehicle rather than in a warm room. You will, however, want to store your batteries in a warm location, as cold batteries will die faster. Another option to prevent a lens from fogging up is to attach hand warmers to the side of it using rubber bands to help keep it warm.
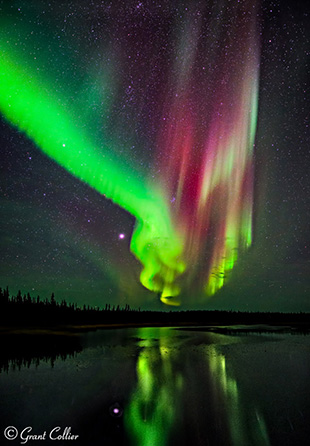
aurora borealis photography guide

Lake near Yellowknife, Canada, 14mm, f/2.8, 15 seconds, ISO 2500. (Photo by Grant Collier)

Practice Near Home First

While there are ways to avoid lens fog, it is more difficult to avoid brain fog when shooting in frigid temperatures. Before paying for an expensive trip to see the northern lights, I recommend becoming proficient in night photography at locations closer to home. Photographing the northern lights is more difficult than photographing most other night scenes. The lights can move fast and may not appear for very long, so you need to be able to make the most of your time when the lights are out. If you practice with easier subjects beforehand, you should be able to come away with some great images.

For Further Training on Night Photography:

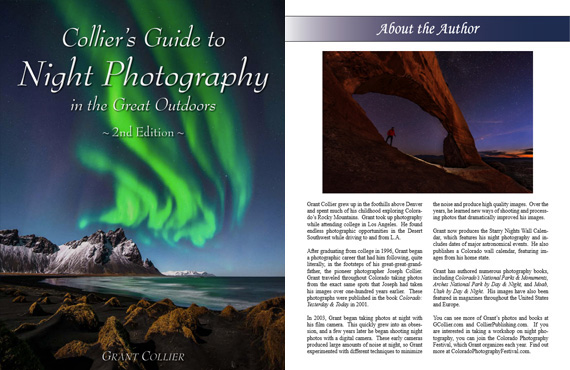
In this fully-updated 2nd edition, Grant Collier sheds light on how to capture these otherworldly images by sharing secrets he has learned over the past 17 years. He explains how to take photos of the Milky Way, northern lights, meteors, eclipses, lightning, and much more.
night photography guide

New: Night Photography Guide 2nd Edition

Our readers can get a discount by using the promo code picturecorrect at checkout which ends soon.

Found here: Night Photography Guide 2nd Edition

- - - - - - - - - - - - - - - - - - - - - - - - - - - - - - - - - - - - - - - - - - - - - - - - - - - - - - - - - - - - - - - - - - - - - - - - - -

Did you appreciate this newsletter? Please help us keep it going by Joining Our Patreon Supporters

What are your thoughts on this article? Join the discussion on our Facebook Page

PictureCorrect subscribers can also learn more today with our #1 bestseller: The Photography Tutorial eBook

- - - - - - - - - - - - - - - - - - - - - - - - - - - - - - - - - - - - - - - - - - - - - - - - - - - - - - - - - - - - - - - - - - - - - - - - - -

The post How to Photograph the Northern Lights appeared first on PictureCorrect.


from PictureCorrect https://ift.tt/ctfQpXd
via IFTTT
torstai 24. elokuuta 2023

PictureCorrect.com: Location Scouting Tips for Landscape Photographers

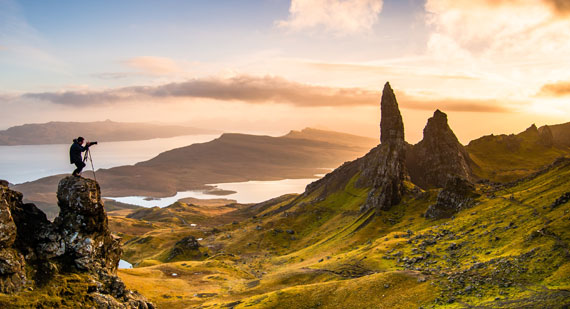
Landscape photography is an art form that captures the vast beauty of nature in all its splendor. But behind every breathtaking shot, there’s often a lot of behind-the-scenes work. One of the crucial steps in this process is location scouting. Finding the perfect spot to set up your tripod can make the difference between a good photo and a masterpiece. This guide aims to provide budding landscape photographers with a comprehensive understanding of how to scout locations effectively.

landscape scouting

Photo captured by Chris Czermak

1. Research, Research, Research!

Before you even step out of your door, the internet can be your most potent tool.

  • Google Earth & Google Maps: These tools offer a satellite view, street view, and user-uploaded images, giving you an almost first-hand experience of a place.
  • Photography Websites & Social Media: Websites like 500px or Instagram can be a goldmine for location ideas. Photographers often tag their locations, giving you a head start.
  • Local Tourism Websites: They often list popular scenic spots, and even if these are frequented by many, knowing them can help you discover less-known locations around them.

2. Time it Right

  • Golden Hours: Sunrise and sunset provide soft, diffused light. Apps like PhotoPills or The Photographer’s Ephemeris can predict the sun’s trajectory, helping you time your shots.
  • Seasonal Changes: Different seasons can bring different moods to a location. Autumn might bring fall colors, while winter might offer a snow-clad wonderland.

3. Reconnaissance Trip

Sometimes, you just have to be there. If possible, visit your chosen location ahead of your main shoot.

  • Check Accessibility: Is it easy to reach? Do you need any permissions?
  • Safety First: Ensure that the location is safe, both in terms of terrain and local conditions.

4. Talk to Locals

Locals often know secret spots that are off the beaten path. A conversation with them might lead you to a gem of a location that isn’t widely photographed.

5. Consider Different Perspectives

Don’t just scout with your eyes at standing level.

  • Elevated Points: Hills, towers, or even drones can offer a unique bird’s-eye view.
  • Ground Level: Sometimes, getting low can present a fresh perspective, especially if there are interesting foreground elements.

6. Take Test Shots

Always carry a camera during your scouting trips, even if it’s just your smartphone. Take test shots to review later. This will give you a better idea of the composition and what focal lengths or gear you might need.

7. Take Notes

Whether it’s a dedicated notebook, a smartphone app, or voice memos, take notes about:

  • Lighting Conditions
  • Best Times to Visit
  • Potential Challenges

8. Be Respectful & Environmentally Conscious

Remember, nature is a privilege to capture. Leave no trace, respect local guidelines, and always prioritize the environment and its inhabitants over getting a shot.

Conclusion

While there’s an element of unpredictability in nature, location scouting equips a landscape photographer with the best chances of capturing that magical moment. With thorough research, patience, and respect for the environment, you can find those hidden spots that resonate with your artistic vision. Happy shooting!

For Further Training:

Currently on sale today, this course titled “Simply Stunning Landscapes” by Joshua Dunlop, founder of ExpertPhotography, offers a comprehensive guide on mastering the intricacies of landscape photography.

simply stunning landscapes

Simply Stunning Landscapes (see what’s covered)

What sets “Simply Stunning Landscapes” apart is its hands-on approach. Instead of confining lessons to theoretical discussions, the course offers practical insights by being shot in various European locations.

Deal ending soon: Simply Stunning Landscapes at 67% Off

- - - - - - - - - - - - - - - - - - - - - - - - - - - - - - - - - - - - - - - - - - - - - - - - - - - - - - - - - - - - - - - - - - - - - - - - - -

Did you appreciate this newsletter? Please help us keep it going by Joining Our Patreon Supporters

What are your thoughts on this article? Join the discussion on our Facebook Page

PictureCorrect subscribers can also learn more today with our #1 bestseller: The Photography Tutorial eBook

- - - - - - - - - - - - - - - - - - - - - - - - - - - - - - - - - - - - - - - - - - - - - - - - - - - - - - - - - - - - - - - - - - - - - - - - - -

The post Location Scouting Tips for Landscape Photographers appeared first on PictureCorrect.


from PictureCorrect https://ift.tt/aU1zxiT
via IFTTT

keskiviikko 23. elokuuta 2023

PictureCorrect.com: Simply Stunning Landscape Photography

Landscape photography can often be a pursuit of passion, filled with moments of triumph and sometimes, disappointment. There is currently a course on sale that seeks to aid photographers in their journey of capturing the essence of a landscape. The course, titled “Simply Stunning Landscapes” by Joshua Dunlop, founder of ExpertPhotography, offers a comprehensive guide on mastering the intricacies of landscape photography.

simply stunning landscapes

Simply Stunning Landscapes (see what’s covered)

The Landscape Photographer’s Challenge

A picturesque scene in front of your eyes doesn’t always translate into a stunning photograph. A vivid sunset, the intricate interplay of light and shadow, or the sheer vastness of a scene can lose its magic when captured improperly. Most photographers have faced this issue: landscapes that looked awe-inspiring in person but appeared lackluster in photos.

Joshua Dunlop, the mind behind this course, resonates with this sentiment and has tailored his lessons around bridging the gap between vision and execution.

A Simplified Approach

While many may believe that the key to excellent landscape photography lies in high-end gear or exotic locations, Dunlop’s methodology is refreshingly straightforward. He emphasizes three core aspects:

  1. Detailed trip planning
  2. Mastering composition
  3. Choosing the right camera settings for a scene

His five-step process focuses on:

  1. Location Scouting – Finding the best spot to capture the landscape.
  2. Weather – Embracing different weather conditions to bring drama to the images.
  3. Time of Day – Recognizing the importance of light and its transformation during different times.
  4. Composition – Implementing a variety of composition rules for a well-framed shot.
  5. Settings – Honing in on essential camera settings to enhance image quality.

Learning From Real-world Scenarios

What sets “Simply Stunning Landscapes” apart is its hands-on approach. Instead of confining lessons to theoretical discussions, the course offers practical insights by being shot in various European locations. This ensures that students can see techniques being applied in real-time, from Slovenia’s enchanting landscapes to the breathtaking vistas of Italy and Austria.

landscapes on location

Additional Resources

To provide a holistic learning experience, the course comes with a slew of bonuses. These range from an exhaustive guide on panorama photography, detailed case studies for understanding the thought process behind each shot, to even tips on monetizing your art. Notably, the Landscape Photography Checklist is a useful tool for photographers to ensure they’re prepared for every shoot.

Final Thoughts

While the course promises a transformation in the way you approach and execute landscape photography, like any other skill, the outcome heavily depends on the dedication of the learner. However, for those willing to commit, “Simply Stunning Landscapes” seems to provide a solid foundation and valuable insights into the world of landscape photography.

How to Get the Course for a Discount Today (Plus Bonuses):

Simply Stunning Landscape Photography is currently 67% off which ends soon (normally $299, currently $99). They have also thrown in bonuses for the first 500 customers. It all comes with an impressive 90 day happiness guarantee so there’s no risk in trying it.

Deal ending soon: Simply Stunning Landscapes at 67% Off

- - - - - - - - - - - - - - - - - - - - - - - - - - - - - - - - - - - - - - - - - - - - - - - - - - - - - - - - - - - - - - - - - - - - - - - - - -

Did you appreciate this newsletter? Please help us keep it going by Joining Our Patreon Supporters

What are your thoughts on this article? Join the discussion on our Facebook Page

PictureCorrect subscribers can also learn more today with our #1 bestseller: The Photography Tutorial eBook

- - - - - - - - - - - - - - - - - - - - - - - - - - - - - - - - - - - - - - - - - - - - - - - - - - - - - - - - - - - - - - - - - - - - - - - - - -

The post Simply Stunning Landscape Photography appeared first on PictureCorrect.


from PictureCorrect https://ift.tt/QOK17Ux
via IFTTT

tiistai 22. elokuuta 2023

PictureCorrect.com: Camera Stability Hacks When a Tripod Isn’t an Option

In the world of photography, capturing the perfect shot often depends on the stability of your camera. While tripods are the go-to solution for most, there are occasions when they might not be at hand, or they may be impractical due to location or circumstance. Fortunately, a few techniques can help you ensure a steady shot, even without the trusty tripod. Here are some handy camera stabilization tricks for those tripod-less moments:

camera stability

Photo captured by James Fitzgerald

Body Brace:

  • Use your own body as a stabilizer. Lean against a wall or tree, ensuring as many points of your body (shoulders, hips, and feet) are making contact.
  • Hold your breath just before you press the shutter to reduce movement further.

Elbow Anchor:

  • Tuck your elbows into your body, using your chest as a makeshift tripod. This provides three points of contact (both elbows and your hands) for maximum stability.

The Ground Technique:

  • Lay down flat on the ground and use your arms to stabilize the camera. This provides more surface area for stability and can be especially useful for capturing low angle shots.

Use A Bean Bag:

  • A small bean bag can be a handy alternative to a tripod. Rest your camera on it, and it can mold to the shape of the camera, providing a stable base. It’s also lightweight and easily portable.

Camera Straps:

  • Extend your camera strap fully and pull it tight against the back of your neck while holding the camera. The tension can act as a stabilizer, reducing shake.

Steady Surfaces:

  • Use any available steady surface such as tables, ledges, or railings. If your camera has a timer, you can also set it on these surfaces, start the timer, and step back to avoid introducing shake.

The String Tripod:

  • Cut a piece of string about twice the height of yourself.
  • Tie each end of the string to the two sides of a flat washer.
  • Step on the washer with the string taut and bring the camera up to eye level, adjusting tension in the string to stabilize the camera.

Increase Shutter Speed:

  • If you’re shooting in manual mode, increase your shutter speed. Faster shutter speeds reduce the chance of motion blur. Just be mindful of the exposure triangle – you might need to adjust ISO or aperture accordingly.

Optical & Digital Stabilization:

  • Many modern cameras and lenses come with built-in stabilization systems. If yours has this feature, make sure it’s activated.

Continuous Shooting:

  • Use the burst or continuous shooting mode. Taking multiple shots in quick succession increases the chance that at least one of them will be sharp.

Lens Choice:

  • Wider lenses are generally easier to hold steady compared to telephoto lenses. If possible, choose a lens with a shorter focal length for hand-held shots.

Post-Processing:

  • While it’s always best to get the shot right in-camera, software like Adobe Lightroom or Photoshop offers shake reduction tools that can help sharpen slightly blurry images.

In the end, the essence of photography lies in the balance between equipment, skill, and creativity. While tripods are incredibly useful, there are numerous ways to ensure your camera is stable for that perfect shot. Embrace the challenges and think outside the box; sometimes, the limitations can lead to the most inventive solutions.

For More Tips & Tricks, Summer Sale Ending Soon:

This #1 bestseller is the most in-depth eBook on how to capture amazing photography anywhere. Over 250 pages of photography tips & tricks from industry insiders. Currently 83% off which ends soon for a Summer Sale if you want to check it out.

It is the product of over a DECADE of research as an insider in the photography industry, assembled to help you learn quickly and avoid the mistakes that I made along the way.

Deal ending soon: The Photography Tutorial eBook Summer Sale

- - - - - - - - - - - - - - - - - - - - - - - - - - - - - - - - - - - - - - - - - - - - - - - - - - - - - - - - - - - - - - - - - - - - - - - - - -

Did you appreciate this newsletter? Please help us keep it going by Joining Our Patreon Supporters

What are your thoughts on this article? Join the discussion on our Facebook Page

PictureCorrect subscribers can also learn more today with our #1 bestseller: The Photography Tutorial eBook

- - - - - - - - - - - - - - - - - - - - - - - - - - - - - - - - - - - - - - - - - - - - - - - - - - - - - - - - - - - - - - - - - - - - - - - - - -

The post Camera Stability Hacks When a Tripod Isn’t an Option appeared first on PictureCorrect.


from PictureCorrect https://ift.tt/mEyKpOU
via IFTTT

maanantai 21. elokuuta 2023

PictureCorrect.com: How to Use the Masking Select Sky Tool in Lightroom Mobile

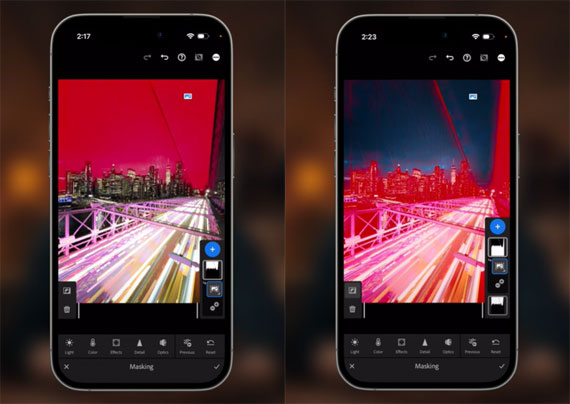
Masking in Lightroom Mobile is a powerful technique that can transform the way you edit photos. Drawing insights from Clifford Pickett’s video tutorial, we delve into the art of isolating and enhancing specific parts of an image using Lightroom Mobile’s masking tools:

Before diving into adjustments, it’s essential to understand the purpose of masking. Masking allows you to apply specific changes to isolated parts of an image, making certain components stand out.

The “Select Sky” Feature:

  1. Locate the Masking Icon: With your photo open in Lightroom Mobile, look for the masking icon (usually at the bottom left).
  2. Choose Your Masking Tool: Upon clicking the masking icon, a blue circle with a plus sign will appear. Tapping this will reveal various masking options.
  3. Opt for ‘Select Sky’: For this guide, we focus on the “Select Sky” option. This feature intelligently detects and isolates the sky portion of your image, allowing for specific adjustments to that area alone.

Enhancing the Sky:

  • Color Adjustments: Once you’ve selected the sky, a color option typically found at the bottom grants you access to color temperature adjustment sliders. Dragging the temperature slider left introduces cooler tones, amplifying contrast between the warm foreground and the cool sky.
  • Boosting Clarity: To bring out cloud details and texture, head to effects and increase the clarity. Even a small shift, say 10 points, can significantly enhance sky details.

masking select sky

Inverting the Mask for Ground Adjustments:

  • Accessing Your Masks: On the right side of the screen, a small vertical line next to your masks can be slid open to reveal detailed information about the masks applied.
  • Duplicating and Inverting: To edit everything except the sky, tap the three dots next to the sky mask. From the drop-down menu, choose “Duplicate and Invert.” This creates an inverted mask that isolates everything but the sky.

Editing the Rest of the Image:

  • Tackling Highlights: Within the newly inverted mask, head to “Lights.” Here, you can drag down the highlights slider to counteract any overexposed areas.
  • Color Cast Correction: To address any unwanted color tones (like the green hue on buildings Clifford mentioned), open the color panel and adjust the tint slider. Move towards magenta to offset green tints.
  • Enhancing Details: Navigate to the effects panel to enhance image texture and clarity. By adjusting these sliders, the image’s details, especially on the ground and structures, will pop more.

Masking for Sharpening:

Post-adjustments, you might want to sharpen specific parts of your image. After boosting the sharpening:

Isolate Sharpened Areas: Use the masking slider under the sharpening tools. Dragging to the right while holding down will show which areas are being sharpened. By setting it to around 60, as Clifford suggests, you ensure that only the desired details (like the skyline) are sharpened, excluding softer areas like the sky.

Conclusion:

Masking in Lightroom Mobile offers precise control over image editing. Through selective adjustments, you can craft an image that resonates, balancing foreground and background, and showcasing the photo’s full potential. Whether you’re a seasoned photographer or a hobbyist, mastering masking will significantly elevate your editing prowess.

For Further Training on Lightroom Mobile:

This is where the new iPhone Editing Academy, a course designed by professional photographer and photo editor, Clifford Pickett, steps in to bridge the gap. Pickett, who has edited over 10,000 photos using nothing but his iPhone and sold many to major corporate clients, has crafted this platform as an accessible way to master photo editing.

iphone editing academy

New: iPhone Photo Editing Academy (see preview videos)

During its launch, the course is on sale at a deeply discounted price. It also includes a full happiness guarantee, if you are not satisfied with the course for any reason simply let them know for a full refund – so there is no risk in trying it.

Launch sale ending soon: iPhone Photo Editing Academy at 80% Off

- - - - - - - - - - - - - - - - - - - - - - - - - - - - - - - - - - - - - - - - - - - - - - - - - - - - - - - - - - - - - - - - - - - - - - - - - -

Did you appreciate this newsletter? Please help us keep it going by Joining Our Patreon Supporters

What are your thoughts on this article? Join the discussion on our Facebook Page

PictureCorrect subscribers can also learn more today with our #1 bestseller: The Photography Tutorial eBook

- - - - - - - - - - - - - - - - - - - - - - - - - - - - - - - - - - - - - - - - - - - - - - - - - - - - - - - - - - - - - - - - - - - - - - - - - -

The post How to Use the Masking Select Sky Tool in Lightroom Mobile appeared first on PictureCorrect.


from PictureCorrect https://ift.tt/q9GRu8N
via IFTTT

sunnuntai 20. elokuuta 2023

PictureCorrect.com: Cruising With Your Camera

Cruising is back, and in a big way. The cruise lines are reporting excellent business as cruising passengers make up for time lost during the shut down. Many first-time cruisers are joining the rush as they realize the wonderful value one can get from a cruise holiday.

cruise photo

As photographers, we want to make the most of the unique opportunities offered on a cruise. Both during the cruise and afterwards when we can re-visit the cruise time and time again with our photographs.

cruise ship photography

Here are a few thoughts and a bit of advice to help with your planning. It really is better to plan what we would like to do in advance rather than to end up with a big collection of random images.

Why do we take images when we are on holiday or, perhaps on a cruise? We do it because we would like beautiful, memorable takeaways that we can look at time and time again and relive the fun we had.

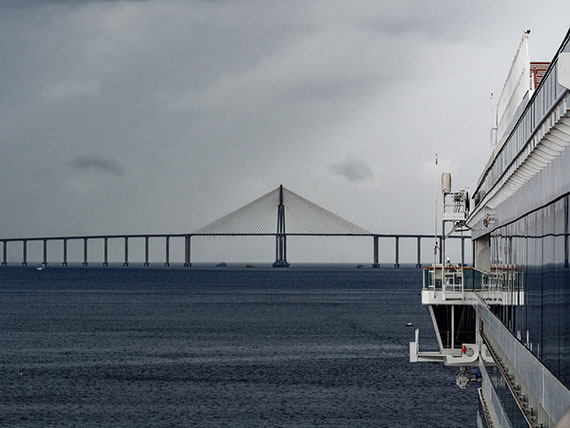
clouds over water

It doesn’t matter what type of camera or mobile phone we have – we just need to make certain that we have something with which to take photographs. We are actually setting out on a Photographic Adventure – a voyage with wonderful travel and outdoor photo opportunities.

travel photo

It all starts with the ship, and it is a good idea to take some shots while boarding to set the scene as it were. We then get to the fun of photography on board a ship – there are special challenges as everything can be moving!

One can find any number of suggestions about onboard photography but here are a few basics to keep in mind – it does also depend on the type of camera so just use the ideas that apply to you. To counteract movement Shutter Speed should be as high as possible…1/1000 second and up?

  • Use ‘Shutter Priority’ of ‘Sports Mode’ = ‘Running Man’ icon
  • Make sure ‘Image Stabilization’ is turned on.
  • ISO Settings: Depending on your camera start at ISO400
  • Experiment going higher – check noise

Also – if the engines are running there will be vibration – there is less with newer ships, but it will still be present. Resting your camera on any part of the ship is not a good idea!

ship rest

On board ship, you are your own best tripod. Using a tripod that rests on the deck may give you vibration blur. The human body is an excellent shock absorber. Brace your hips – upper body is free. Legs apart with knees slightly bent. Try to feel the ships movement. Be flexible – sort of moving with the ship.

If your camera/phone has a continuous or burst setting – try this – one of the series may well be perfect. Dump the rest!

If there are big swells it is worth being at the bow of the ship – as it reaches the top of the pitch, there is a brief stationary pause before it heads down again.

ship bow

Once you are on your cruise ship there is a plethora of interesting details that you can look for and capture and use as photographic props

Using this approach, you can capture a whole range of images that say ‘I am on a cruise’ without having to actually say so.

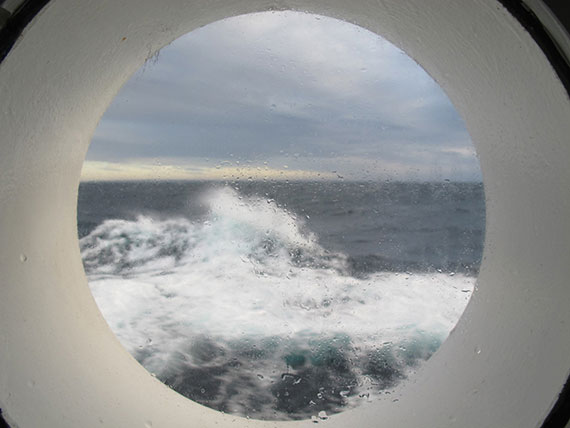
porthole

Portholes are Great

There are just so many opportunities to have photographic fun on board a cruise ship that we will have to cover more of these in the next chapter of Cruising with my Camera.

About the Author:
Roger Lee is a Johannesburg based photographer who runs a one day course based on “we don’t want to drown in detail, we just want to know how to use our cameras and enjoy ourselves!” He also does an ebook version of his course.

- - - - - - - - - - - - - - - - - - - - - - - - - - - - - - - - - - - - - - - - - - - - - - - - - - - - - - - - - - - - - - - - - - - - - - - - - -

Did you appreciate this newsletter? Please help us keep it going by Joining Our Patreon Supporters

What are your thoughts on this article? Join the discussion on our Facebook Page

PictureCorrect subscribers can also learn more today with our #1 bestseller: The Photography Tutorial eBook

- - - - - - - - - - - - - - - - - - - - - - - - - - - - - - - - - - - - - - - - - - - - - - - - - - - - - - - - - - - - - - - - - - - - - - - - - -

The post Cruising With Your Camera appeared first on PictureCorrect.


from PictureCorrect https://ift.tt/T6NqRrK
via IFTTT

lauantai 19. elokuuta 2023

PictureCorrect.com: Juxtaposition: Exercises to Develop Your Photographic Sense of Irony

This article is based on concepts from The Photography Action Cards if you want to dig deeper for further training.

Juxtaposition is a term that applies to many different mediums, including photography.

It is often alternately described as “contrast”. I tend to think of it more as contrast with a sprinkle of irony.

Here is a formal description: juxtaposition is when a photographer puts two objects close to each other, intending to attract a viewer’s attention toward their differences. When the (hopefully ironic) contrast between the two objects is the first thing that attracts a viewer’s eye, juxtaposition is achieved.

juxtaposition in photography

Photo by Kent DuFault

My first example photo, above, was of my big fat Siamese cat sitting in a tiny, undersized delivery box. (That’s a favorite activity for my cat, by the way.)

It’s a classic technique to juxtapose big and small things. If you’re just starting with juxtaposition, this is a great theme to explore. It is also a bit easier to spot in the wild and to compose for beginners.

Challenge #1: Spend a day shooting juxtaposition images that rely on the big-versus-small comparison. Try to make some of your pictures blatant and obvious, while making others more thought-provoking.

The small box in the cat photo above didn’t stop my cat’s need to sit in it—that’s ironic. This example is known as situational irony, and the theme plays well with the photography medium.

Photographing the large cat and the tiny box together interacting together—that is a juxtaposition.

Key Point: Juxtaposition often contains some level of irony. It is the irony that creates a storytelling element for the photo.

juxtaposition in photography

(Photo by Andreas Gücklhorn)

When two elements within your juxtaposed photo are physical objects, they must each have enough visual strength so that a viewer can make the connection between the two and examine the contrast. The image above is a juxtaposition of color, shape and texture.

Suppose a juxtaposition is meant to create a concept, mood or statement. In that case, this is more difficult, as a viewer must identify the juxtaposition and also process where the contrast occurs.

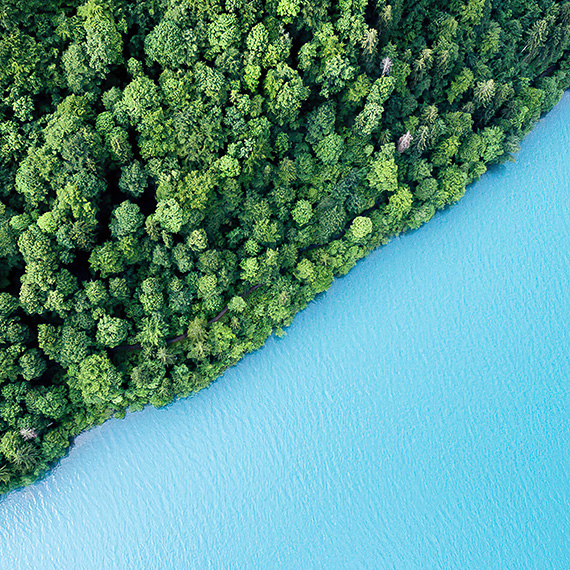
The juxtaposition does not have to be complicated. The technique lends itself well to minimalism. The opposition captured in a juxtaposition can be as simple as land and water.

Critical Thought: The photograph of water and land (above) creates a juxtaposition of nature. There is no irony in this photo, and that’s fine. Irony adds another level to juxtaposition. Without irony, it can be a bit more difficult for a broad audience of viewers to connect the dots in your juxtaposed photographic composition. However, that’s not bad, as it forces viewers to think about what they’re viewing.

Challenge #2: Spend a day out in nature. Concentrate on the juxtaposed objects that nature creates. (Believe me, there many more than you probably realize!) Specifically, look for color contrast, shape and texture to make your images. Try using minimalism to even further challenge yourself.

juxtaposition in photography

Photo by Kent DuFault

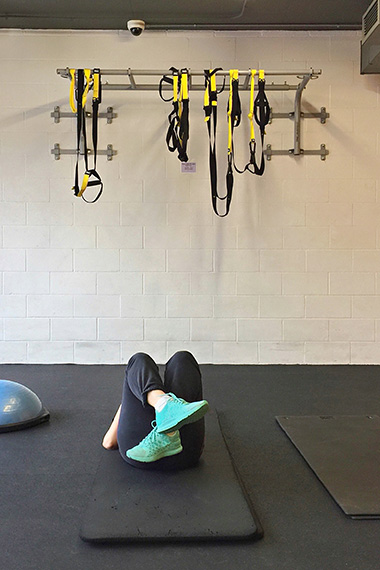
The juxtaposition above occurred at my local gym. I noticed the subject relaxing and looking at her smartphone. There was gym equipment lying unused all around her. That situation created an ironic contrast in my mind.

Remember! Irony and humor are often used with juxtaposition in photography. The difficulty is that not all individuals will see irony and humor in the same way, just as we all don’t find the same things funny. Develop your satirical style and run with it.

juxtaposition in photography

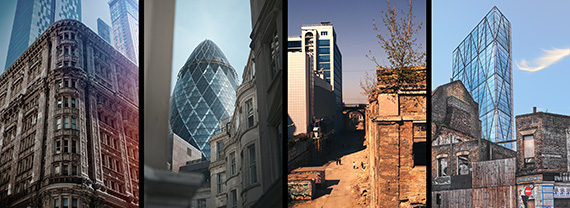
Photo by Shea Rouda

Another fantastic theme to explore when learning about taking juxtaposed photos is “old vs. new”.

Above are four examples of old versus new using architecture as the juxtaposed subject matter.

Challenge #3: Start exploring the old-versus-new juxtaposition using architecture as your subject. Look for interesting angles and lighting that help show the contrast and also help tell a story.

juxtaposition in photography

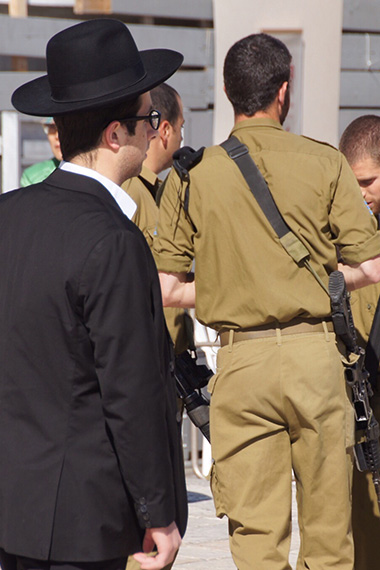
Photo by Tom Gordon

This juxtaposed street shot relies on clothing and props to create the contrast: a man of God and a man of war positioned together, within the same frame, creates a strong juxtaposition.

Juxtaposition is a vital tool for street photography and photojournalism. It can be used to make strong social and political statements. When trying to photograph in this genre, look for two sides of a story within a single composition.

Challenge #4: Not everyone is comfortable with street photography. If you are willing to give it a try, look for ironic contrast among people. The differences can be literally anything that catches your eye. The wider the distinction, the more extensive your audience will become, as more people will comprehend your story. If street photos aren’t your thing—give it a try with children playing or at a family gathering.

Equipment: Here is the ultimate beauty of juxtaposition. You need no special equipment. You can pursue this technique with nothing more than a smartphone. All that is required is a keen eye and a nice dose of irony.

Juxtaposition Examples

Let me close by giving you some hints for juxtaposed photos, and then follow that up with a final challenge and a few case studies. Here are some examples of juxtaposition:

  • Male vs. Female
  • Many vs. Few
  • Wealthy vs. Poor
  • Healthy vs. Unhealthy
  • Light vs. Dark
  • Old vs. Young
  • Active vs. Inactive
  • Valuable vs. Trash
  • Power vs. Weakness
  • Stereotype vs. Broken Stereotype (a personal favorite)
  • Signage vs. Opposing Background
  • Modern Attire vs. Older Styles
  • Near vs. Far
  • Selfie with Opposing Background (I also like this as an exercise as it is introspective)
  • Happy vs. Sad
  • Shapes: Circles vs. Triangles or Squares vs. Lines (or any other variation)

Your Ultimate Challenge: Create as many of these suggested juxtapositions as you can. For at least some of them, compose the shot using a mirror for a more challenging assignment!

Case Studies

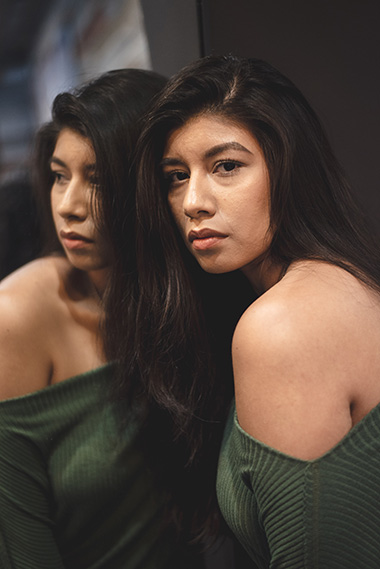
juxtaposition in photography

Photo by Ronny Sison

Technically, one could classify the above image as a juxtaposition. However, it falls short of an essential element for juxtaposed photos—it lacks a story element.

When thinking about your juxtaposed photos, make sure to look past the obvious for more cerebral contrasts. Look for stories!

The portrait of the model with the mirror does represent a contrast, as the image captured two sightlines. But the difference is weak, as it bears no significant story element or insight about the subject.

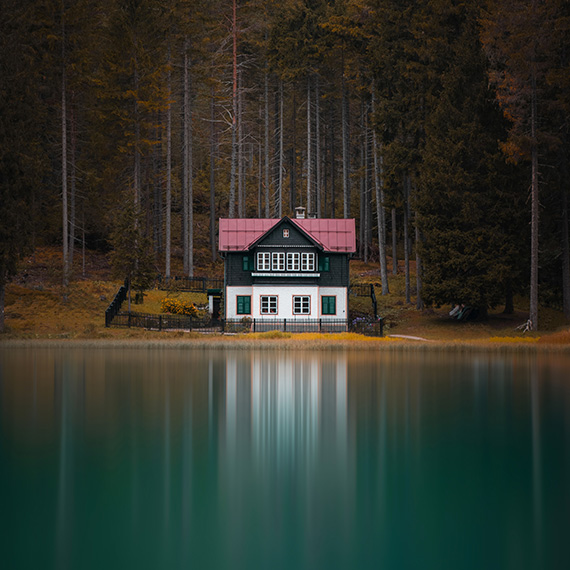
This photo is a perfect example of a juxtaposition between a human-made object and nature.

Composition is the key to successful photography. Juxtaposition is a composition tool that doubles as a storytelling tool.

The image above uses juxtaposition. It also uses symmetry and color contrast to hammer home viewer interest.

juxtaposition in photography

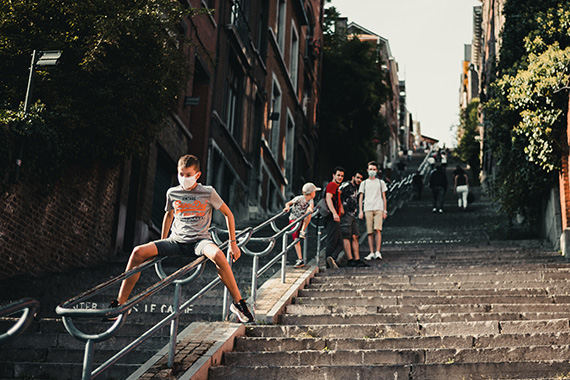
Photo by Michael Blomberg

There are several exciting juxtapositions within this shot. How many can you count?

Here are the juxtapositions I see:

  • Near versus far (that’s an obvious one)
  • Dangerous activity (sliding) versus safe activity (watching)
  • Masked versus unmasked (current health concerns)
  • Coming versus going
  • Up versus down
juxtaposition in photography

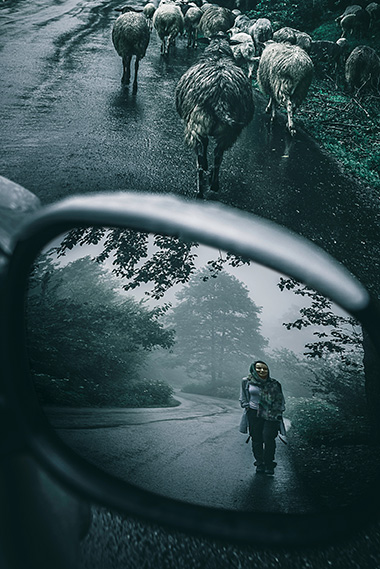
Photo by Kourosh Qaffari

I think this is a very successful juxtaposition. The technique adds a sense of mystery and a story element to the rather mundane activity of herding sheep.

This last example is juxtaposition at its finest, and it used a mirror just for fun!

How did you do with the challenges?

  1. Did you give all the challenges a try?
  2. Were you able to successfully incorporate a mirror?
  3. Did you share your photos with others, and were they able to discern your juxtaposed meaning?
  4. Now that you’ve practiced, how can you improve your next attempt?

About the Author:
Kent DuFault is an author and photographer with over 35 years of experience. He’s currently the director of content at the online photography school, Photzy.com.

For Further Training, Deal Ending Soon:

65 beautifully designed & printable Photography Action Cards are now available that will give you over 200 photography assignments, covering everything you can imagine. They are currently 88% off today if you want to try them out.

photo action cards

New: The Photography Action Cards (Click to See How They Work)

These Action Cards discuss a photographic topic, provide you with suggested considerations, and give you specific photographic assignments. They’ll kick you out of the “nest” to go have a personal discovery experience all on your own.

Found here: The Photography Action Cards at 88% Off

- - - - - - - - - - - - - - - - - - - - - - - - - - - - - - - - - - - - - - - - - - - - - - - - - - - - - - - - - - - - - - - - - - - - - - - - - -

Did you appreciate this newsletter? Please help us keep it going by Joining Our Patreon Supporters

What are your thoughts on this article? Join the discussion on our Facebook Page

PictureCorrect subscribers can also learn more today with our #1 bestseller: The Photography Tutorial eBook

- - - - - - - - - - - - - - - - - - - - - - - - - - - - - - - - - - - - - - - - - - - - - - - - - - - - - - - - - - - - - - - - - - - - - - - - - -

The post Juxtaposition: Exercises to Develop Your Photographic Sense of Irony appeared first on PictureCorrect.


from PictureCorrect https://ift.tt/fOIPKoq
via IFTTT