maanantai 7. elokuuta 2023

PictureCorrect.com: How to Focus a Camera in the Dark

If somebody asked me about some of the difficult scenarios to work in as a photographer, working at night time would definitely make it to the top of the list. But with the challenge in place, the results that you can get from night time photos are truly amazing. The world out there appears kind of different at night. This gives you an opportunity to create photographs with a unique look. And that’s exactly what makes night photography a challenge worth pursuing.

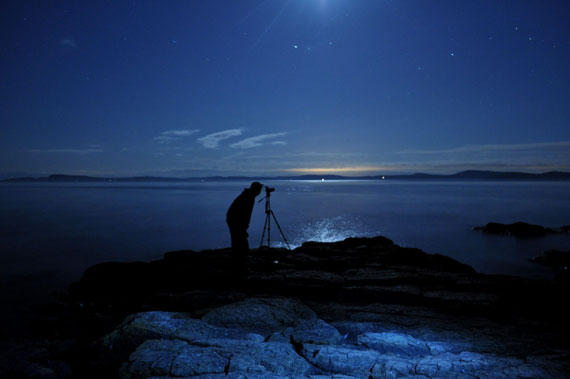
One of the biggest hurdles you will come across when photographing at night time is focusing. With a minimal amount of light around, the sensor in any camera will struggle to detect any contrast. This is why focusing gets so difficult. So, it becomes important that you’re aware of some techniques to help your camera focus better at night.

night focus

Captured by Bryan Hanson

Use Center Focusing Point with Single Servo

If you are not comfortable getting out of autofocus mode, try changing the autofocus area to single, and use the center autofocus point. Since the center autofocus point is more precise and sensitive than other focusing points, this can increase your chances of grabbing focus. And to prevent the lens from hunting around, set the drive the single servo. This way, once the camera locks focus, it won’t hunt further.

Manual Focus Works Best

If autofocus fails continuously, it is best to take matters into your own hands by turning the focusing mode to manual. Switch the focusing mode to manual either with a switch on the lens or through the camera menu. Then, using the focus ring on the lens, you can control where the lens needs to focus.

Use the Rear LCD

With the camera set to focus manually, switch your camera over to live view instead of using the viewfinder. This will allow you to use the digital zoom feature and ensure that you nail your focus.

Focus Peaking

Many modern cameras come with a focus peaking option that overlays the area that’s in focus with some color. This makes it much easier to judge whether the image is in focus or not. To get the most out of this feature, use it in conjunction with manual focus and live view.

Use Artificial Lighting Before the Shot

If the scene or your subject is close by, use some artificial source of light like a flashlight to light up a small portion. Then, you can either focus on that portion manually or by using the autofocus feature. If there’s enough contrast, autofocus should work seamlessly.

For Help Sharpening Blurry Photos:

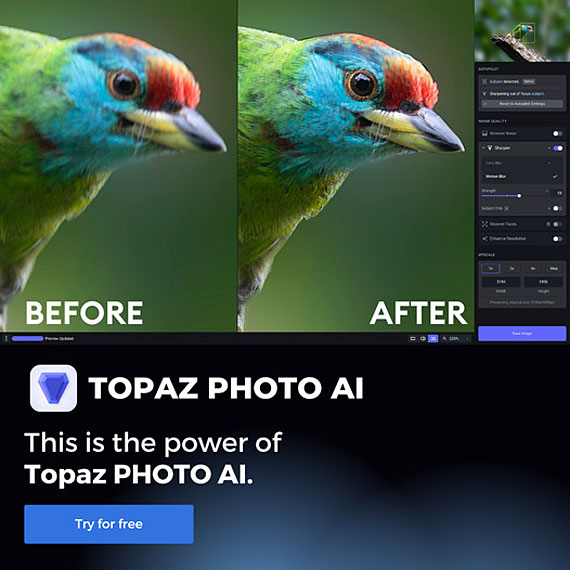
In photo editing news, Topaz Photo AI was recently updated to version 1.5. The company has marked it down $40 off for a short time to celebrate the update if you want to try it out.

topaz photo ai

Topaz Photo AI (see how it works)

Sharpen, remove noise, and increase the resolution of your photos with tomorrow’s technology. Topaz Photo AI supercharges your image quality so you can focus on the creative part of photography.

Deal ending soon: Topaz Photo AI at $40 Off

- - - - - - - - - - - - - - - - - - - - - - - - - - - - - - - - - - - - - - - - - - - - - - - - - - - - - - - - - - - - - - - - - - - - - - - - - -

Did you appreciate this newsletter? Please help us keep it going by Joining Our Patreon Supporters

What are your thoughts on this article? Join the discussion on our Facebook Page

PictureCorrect subscribers can also learn more today with our #1 bestseller: The Photography Tutorial eBook

- - - - - - - - - - - - - - - - - - - - - - - - - - - - - - - - - - - - - - - - - - - - - - - - - - - - - - - - - - - - - - - - - - - - - - - - - -

The post How to Focus a Camera in the Dark appeared first on PictureCorrect.


from PictureCorrect https://ift.tt/7HEAu3p
via IFTTT

sunnuntai 6. elokuuta 2023

PictureCorrect.com: Maximize Image Quality with the Updated Photo AI

In photo editing news, Topaz Photo AI was recently updated to version 1.5. The company has marked it down $40 off for a short time to celebrate the update if you want to try it out. Deal ending soon: Topaz Photo AI at $40 Off

topaz photo ai bird

Updated: Topaz Photo AI (see how it works)

Reduce noise from any ISO – Correct your noisy images and achieve buttery-smooth backgrounds without loss of textures and detail.

Recover sharpness – Instantly sharpen soft focus and improve details and edges lost to slow shutter speeds, lens softness, and missed focus.

Upscale and enhance missing details – Whether cropping in tight or upscaling low-res images, upscale by 600% and reimagine realistic, crystal-clear textures and details.

Recover low-res faces – Upscale and enhance photos of people in unfathomable detail using the next generation of AI.

How to Get Topaz Photo AI for a Discount Today:

It is currently $40 off for their update sale which ends soon. Already own a Topaz product? You may be able to get a special price. Topaz Labs also has a 30 day, no-questions-asked refund policy. That means that if you aren’t happy with the results, you are eligible for a full refund on any of their products within 30 days after purchasing. No risk in trying it.

Deal ending soon: Topaz Photo AI at $40 Off

- - - - - - - - - - - - - - - - - - - - - - - - - - - - - - - - - - - - - - - - - - - - - - - - - - - - - - - - - - - - - - - - - - - - - - - - - -

Did you appreciate this newsletter? Please help us keep it going by Joining Our Patreon Supporters

What are your thoughts on this article? Join the discussion on our Facebook Page

PictureCorrect subscribers can also learn more today with our #1 bestseller: The Photography Tutorial eBook

- - - - - - - - - - - - - - - - - - - - - - - - - - - - - - - - - - - - - - - - - - - - - - - - - - - - - - - - - - - - - - - - - - - - - - - - - -

The post Maximize Image Quality with the Updated Photo AI appeared first on PictureCorrect.


from PictureCorrect https://ift.tt/8nBwoi6
via IFTTT

lauantai 5. elokuuta 2023

PictureCorrect.com: Previsualization: Transforming Your Thoughts into Photos

This article is based on concepts from The Photography Snap Cards which are currently 86% off if you want to check them out.

Oh, they’re just a snapshooter!

That’s kind of the biggest slap in the face that you can give a photographer.

None of us want to believe that we’re snapshooters.

Truthfully, almost none of us are, because we all make decisions as we’re taking a picture—whether we realize it or not.
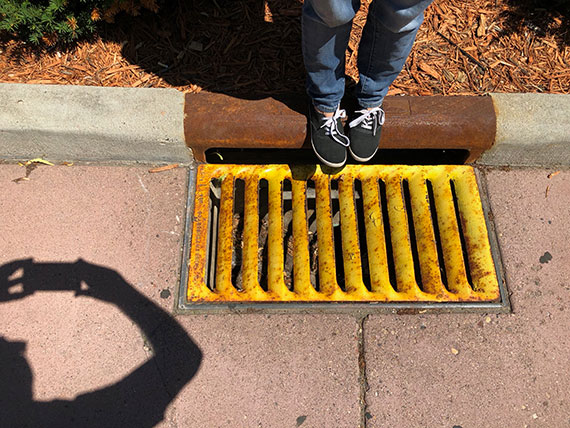
guide to pre-visualization in photos

Photo by Kent DuFault

The picture above may appear to be a simple snapshot—a quick and meaningless moment captured.

However, it was quite the opposite. I conceived the photo and mentally prepared before the camera was even turned on.

There is a photographic term that encompasses this mental process of strategizing and executing an image: pre-visualization.

visualizing photos in your head

Photograph by Kent DuFault

For a moment, imagine the term “pre-visualization” basically means “translation.”

With pre-visualization, you translate a three-dimensional scene, which you can see in real-life, onto a two-dimensional medium—a photograph. As you can imagine, a significant component of pre-visualization is composition.

The photo above is a perfect example. It was taken in Las Vegas from a 12th-floor hotel room. It depicts a cityscape that is partially obscured by a window shade.

What you see here is what I saw in my mind before clicking the shutter. I didn’t see a window shade or a cityscape; what I saw in my mind was a semi-abstract painting depicted in a photograph.

Key Thought: When attempting pre-visualization, imagine your scene printed huge, framed and hanging on a large blank wall. What do you see?
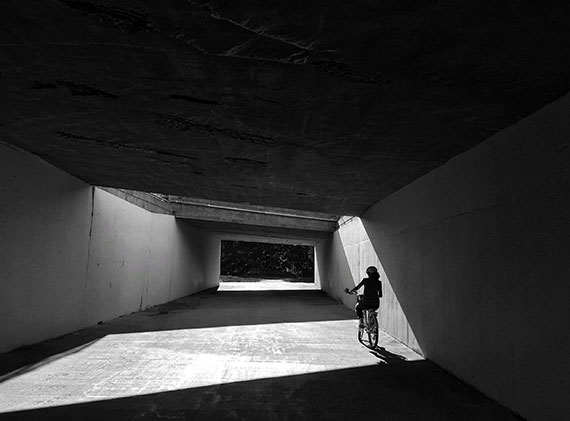
visualize your photos

Photograph by Kent DuFault

Pre-visualization began in Hollywood with moviemaking and the art of storyboarding.

Photographer Ansel Adams is credited with bringing the idea to still photography.

Pre-visualization is the art of seeing the finished photograph in your mind before you ever pick up a camera.

It may sound easy, but it requires developed skills in art knowledge, equipment, composition, lighting, exposure and post-processing.
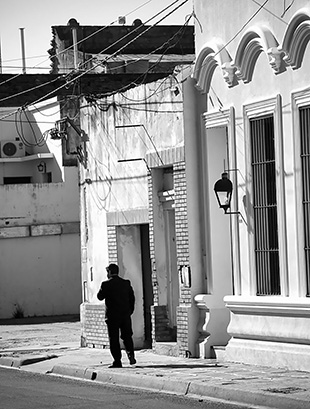
pre-visualization origins

Photograph by Kent DuFault

The first step toward pre-visualization is training your eye to see the world in terms of spatial relationships, rather than literal objects.

A spatial relationship, in art, is the ability to perceive the involvement of an object’s position within a given space.

In this example photo above, I saw the pre-visualized the shape of a man in a dark suit surrounded by the space of white buildings.

Idea: When I began taking photography seriously, a mentor of mine taught me this simple trick to help me develop my ability to see spatial relationships. Just cup your fingers and thumb to form a cylinder, then close one eye and hold the cylinder in front of the open eye.

pre-visualization techniques

Photo by Kent DuFault

Viewing a scene that you wish to photograph through this “lens” removes your peripheral vision and gives you something closer to a two-dimensional perspective. In fact, if you watch documentaries on filmmaking, you will often see the filmmaker using this same technique.

It forces you to see your scene in terms of spatial relationships!
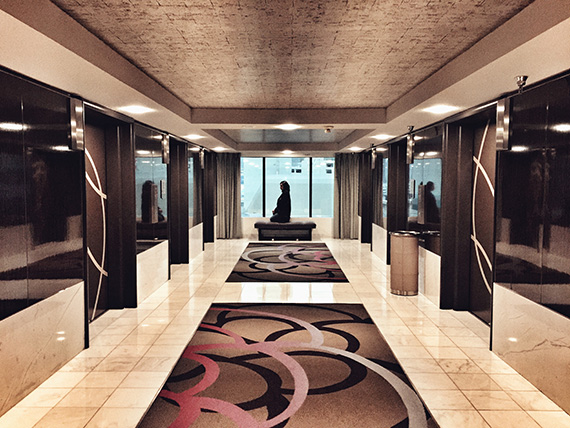
pre-visualization guide for beginners

Photo by Kent DuFault

Critical Thought: Practicing spatial-relationship recognition is the first step in developing professional pre-visualization skills.

A spatial relationship is intrinsically tied to light, shadow, color, and shape.

Another fantastic training tool for developing pre-visualization, similar to the technique above, is to view your scene through squinted eyes and using your fingers to “crop” the scene in front of you.

pre visualization techniques

Photo by Kent DuFault

This activity eliminates details and divides the scene into spatial blocks of light, shadow, color and shape.

Idea: As you begin learning pre-visualization and using your eyes and hands as training tools, it’s best to stick with static subjects like landscapes. Once you’ve improved your pre-visualization to the point of no longer needing these techniques, you’re ready to take on moving scenes.

Key Thought: Moving scenes add an additional level of skill to pre-visualization. This extra skill is called anticipation.

This example photo is a perfect scene to begin pre-visualization practice:
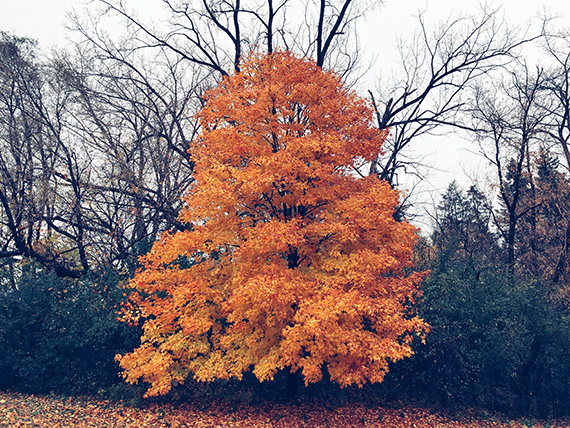
pre-visualization photo guide for amateurs

Photo by Kent DuFault

Look at this picture using the techniques described above. You will see how it breaks down into a spatial relationship of shape, color, line and tone.

Critical Thought: Understanding your equipment is key to pre-visualization. If you don’t know how your equipment will affect the photograph, how can you pre-visualize it?

In my pre-visualization of the autumn tree photograph above, I saw an almost abstract image with blocks of color and a little to no perception of depth.

Knowing this, I selected a telephoto lens to compress the scene. That equipment further enhanced my preconceived idea for this photograph.

Critical Thought: Pre-visualization begins in the mind, advances to the camera and ends in post-production.
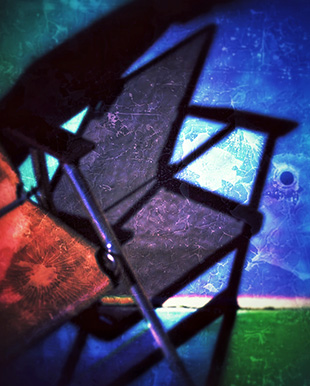
pre-visualization guide for beginner photographers

Photo by Kent DuFault

To take the photograph above, I physically saw an orange lawn chair that was sitting in a driveway in the late afternoon light. It was casting a shadow onto the concrete.

In my mind, I pre-visualized the scene as an abstract watercolor painting.

I physically created the picture by framing it as I saw in my mind’s eye, focusing on the shadow more than the chair.

I asked a friend to stand by the chair to cast a shadow in the upper left third of the frame. I felt this would further add a sense of mystery.

However—this is the crucial point in this illustration—this pre-visualized photograph came together in post-production.

Most of what you see in the final photo is nothing close to what was captured in the original digital file. Still, it perfectly completes what I preconceived as a painting on the wall!
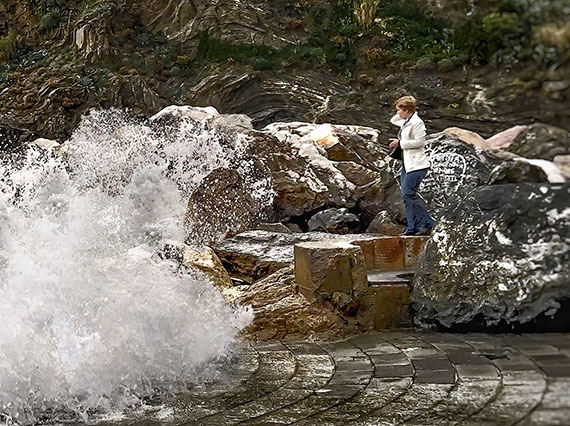
pre-visualization photo manifestation

Photo by Kent DuFault

In the moments before this photograph was taken, I thought, “Oh my god! She better watch out for those waves!” This thought was the formulation of my pre-visualized picture. But more was needed!

Other core skills for pre-visualization are patience, anticipation and timing.

In the example photo, part of my pre-visualization was to capture the danger and drama of the heavy waves crashing onto the beach.

Without the woman, the pre-visualized shot fails.

This picture was born of a pre-visualized concept. However, it also required patience for the idea to materialize naturally. I needed someone or something to enter the frame and provide a sense of drama and potential danger.

It also required anticipation (having my equipment ready) once the shot began to materialize.

Many people were walking in this area. Several of them got close to where this woman was but then backed away.

When I noticed her, I could see she was going to make a point of venturing out further than anyone else.

I anticipated her action and had my equipment ready.

Finally, I timed the shot for the best spatial relationship. As you can imagine, there was a lot of movement here. The woman did not linger out there on those rocks. I had to anticipate and react when both she and the waves were at their peak spatial relationship.

Key Concept: Think of pre-visualization in this order:

  1. Idea
  2. Spatial relationships
  3. Compose the frame in your mind
  4. Imagine the image large and hanging on the wall
  5. Introduce a story element
  6. Have your equipment ready
  7. Be patient for the story to develop
  8. Anticipate the moment
  9. Capture the shot at peak action
  10. Use post-processing to bring your award-winning photograph to life!

Why Don’t You Give It a Try?

  1. Organize a photoshoot where you will spend the better part of a day out taking pictures.
  2. Do not take a picture before spending at least five minutes thinking about the picture and anticipating what it would look like hanging on your wall. Set a timer.
  3. Post-process to your pre-visualized thoughts.
  4. Print a selection of your best efforts. Tape them to a blank wall in your home. Leave them there for a week.
  5. Each day, position yourself five feet in front of each photo and look at it for at least a minute, if not longer.

What Do You Think?

  • Do your finished photographs reflect your initial pre-visualized intent?
  • Were you able to follow through on your pre-visualization from beginning to end?
  • Do you now have a basic understanding of how pre-visualization can advance your photography?

About the Author:
Kent DuFault is an author and photographer with over 35 years of experience. He’s currently the director of content at the online photography school, Photzy.

For Further Training:

The popular Photographer Snap Cards are currently 86% off if you want to check them out! What are these “snap cards”? They are a “Training Boot Camp” in your camera bag. Photography training and reference cars that you can take with you wherever you go.

guide to pre-visualization in photos

New! Snap Cards for Photographers (Click to See How They Work)

Enter 44 printable key photography lessons that you can take with you anywhere! Wherever you are, these SNAP Cards are your own personal photographic mentor- Your boot camp instructor pushing you to new limits.

Deal ending soon: The Photography Snap Cards at 86% Off

- - - - - - - - - - - - - - - - - - - - - - - - - - - - - - - - - - - - - - - - - - - - - - - - - - - - - - - - - - - - - - - - - - - - - - - - - -

Did you appreciate this newsletter? Please help us keep it going by Joining Our Patreon Supporters

What are your thoughts on this article? Join the discussion on our Facebook Page

PictureCorrect subscribers can also learn more today with our #1 bestseller: The Photography Tutorial eBook

- - - - - - - - - - - - - - - - - - - - - - - - - - - - - - - - - - - - - - - - - - - - - - - - - - - - - - - - - - - - - - - - - - - - - - - - - -

The post Previsualization: Transforming Your Thoughts into Photos appeared first on PictureCorrect.


from PictureCorrect https://ift.tt/NUSmdF4
via IFTTT

perjantai 4. elokuuta 2023

PictureCorrect.com: From Photoshop to AI: Evolution of the Photography Industry

The last few decades have witnessed dramatic shifts in the photography industry, evolving from the pure artistry of capturing the perfect shot to a domain replete with cutting-edge technology. This evolution was ignited by the introduction of Photoshop, and today, it is being further accelerated by artificial intelligence (AI) and synthetic photography.

photoshop and ai

Photo captured by Andy Kelly

The Photoshop Revolution

The launch of Adobe Photoshop in 1989 was a monumental leap for the world of photography. This game-changing software moved image manipulation into the digital realm, opening up an expansive universe of creativity and innovation.

Before Photoshop, photographers had to strive for perfection during the actual shoot, with only limited ability to modify the result afterwards. Image retouching and editing were labor-intensive tasks, usually involving a darkroom, chemicals, and skilled hands. Photoshop made these processes significantly easier and more accessible, giving photographers the power to alter reality, create visual illusions, and artistically enhance their images at the click of a button.

One of the key ways Photoshop revolutionized the industry was through democratizing access to image editing. Anyone with a computer could now potentially learn and practice sophisticated photo manipulation techniques. Photoshop became a linchpin in industries ranging from fashion to advertising, from journalism to fine art, giving birth to new roles and professions, such as graphic designers and digital artists.

Moreover, Photoshop initiated a critical dialogue about the ethics and authenticity in photography, challenging the age-old saying, “the camera never lies.” The power to manipulate images to such an extent stirred debates about the representation of reality in photography, altering our understanding of photographic truth.

The AI and Synthetic Photography Paradigm Shift

While Photoshop was a transformative force in the late 20th century, the advent of AI and synthetic photography in the 21st century is redefining the boundaries of the photography industry yet again.

AI-driven algorithms can now automate many of the tasks previously performed by photographers and photo editors. These tasks include adjusting lighting and color balance, recognizing and tagging subjects, enhancing image quality, and even composing an image or predicting the best moment to capture a shot. AI has also given rise to ‘computational photography’, a field that uses algorithms to enhance or extend the capabilities of digital photography.

Synthetic photography, on the other hand, pushes the envelope even further. It involves the creation of realistic images purely from digital or virtual elements. Artists and photographers can now fabricate a scene in three dimensions, set the lighting and weather conditions, pose their virtual subjects, and snap a photo—all within a virtual space. It’s a brave new world that significantly blurs the line between what’s real and what’s artificial, giving creatives an unprecedented level of control and flexibility.

However, just like with Photoshop, these technological advancements also come with ethical considerations. The ability to generate hyper-realistic images synthetically can have implications on truth and deception in visual communication. Moreover, as AI starts to automate more tasks, the industry needs to redefine the roles of photographers and image editors, adding a layer of complexity to the discussion about AI and job displacement.

Conclusion

From Photoshop’s democratization of image editing to AI’s automation of photographic tasks and synthetic photography’s creation of virtual worlds, the evolution of photography has been extraordinary. Each technological leap has not only expanded the creative possibilities for photographers and artists but also sparked valuable discussions about the ethics of image manipulation and the future of the profession.

As we move further into the age of AI and synthetic photography, it’s crucial to navigate these technologies responsibly, acknowledging their potential while being mindful of their ethical implications. In doing so, we can ensure that photography remains a powerful medium of authentic artistic expression and storytelling in the digital age.

For Further Understanding of Synthetic Photography:

This brings us to the just released Synthetic Photography Masterclass, designed by Phil Steele, a veteran in the field of photography education. With over 13 years of experience in teaching online photography and a deep-seated passion for technology, Phil is ideally placed to guide students into the new era of synthetic photography.

The course is not aimed to replace traditional photography but to supplement it, offering photographers an additional and complimentary art form that expands the horizons of their creativity. The course focuses on improving real-world photography skills through practice in a virtual environment, offering the chance to test-drive photo ideas, capture rare scenes, and expand one’s creative possibilities.

ai boat image

The Synthetic Photography Masterclass introduces you to the concept of synthetic photography, helps you gain a firm understanding of the underlying technology, and provides you with the skills required to create synthetic images. This knowledge and the skills acquired will, in turn, keep you at the forefront of this exciting new art form.

Utilizing the powerful generative AI engine, Midjourney, the course equips students with the know-how to create stunning synthetic images. The course includes ten video lessons that cover everything from setting up your Midjourney account to the advanced techniques required to produce photorealistic images.

Launch sale ending soon: The Synthetic Photography Masterclass at 40% Off

- - - - - - - - - - - - - - - - - - - - - - - - - - - - - - - - - - - - - - - - - - - - - - - - - - - - - - - - - - - - - - - - - - - - - - - - - -

Did you appreciate this newsletter? Please help us keep it going by Joining Our Patreon Supporters

What are your thoughts on this article? Join the discussion on our Facebook Page

PictureCorrect subscribers can also learn more today with our #1 bestseller: The Photography Tutorial eBook

- - - - - - - - - - - - - - - - - - - - - - - - - - - - - - - - - - - - - - - - - - - - - - - - - - - - - - - - - - - - - - - - - - - - - - - - - -

The post From Photoshop to AI: Evolution of the Photography Industry appeared first on PictureCorrect.


from PictureCorrect https://ift.tt/p64WeuB
via IFTTT

torstai 3. elokuuta 2023

PictureCorrect.com: 10 Expert Tips for Stunning iPhone Macro Photography

Have you ever peered into the heart of a flower, seen the intricate details on a bug’s exoskeleton, or admired the subtle intricacies of a decaying leaf? You might be thinking, “I’d need a microscope or expensive camera equipment to do that!” However, Emil Pakarklis from the iPhone Photo Academy Summer Sale has shared an enlightening video tutorial on how to delve into this beautiful microscopic world using just your iPhone and a macro lens:

Pakarklis kicks off by discussing the importance of ideal lighting for macro photography. He notes that the best results often come from natural shade or partially cloudy days, as direct sunlight can overexpose your subject, reducing the quality of your image.

While shooting in a forest park, Pakarklis stresses the significance of the composition in macro photography. He uses an ordinary flower as his subject to explain how isolating a single aspect of your subject can enhance the image’s intrigue. Pakarklis demonstrates how the iPhone’s telephoto (2X) lens can help fill the frame with one flower, drawing viewers in and focusing their attention on the flower’s stamens, where the pollen is found.

He soon reaches the limits of the iPhone’s capabilities, though. As he moves closer to the subject, everything goes out of focus due to the minimum focus distance limitation of the iPhone lens. That’s where the SANDMARC 10X macro lens comes in handy.

macro iphone

The key macro smartphone tips:

  1. Choose Ideal Lighting Conditions: Opt for partially cloudy days or locations with natural shade to avoid direct sunlight hitting your macro photography subjects.
  2. Focus on Isolation: Isolate your subject. Instead of capturing several elements in one frame, it can be more compelling to zero in on one object and bring it into sharp focus.
  3. Use a Macro Lens: A macro lens can help you overcome the limitations of the iPhone’s minimum focus distance, allowing you to get much closer to your subject.
  4. Try Different Lens Combinations: Pakarklis uses a SANDMARC 10X macro lens attached to both the 1X and 2X lenses of his iPhone for varying levels of closeness and focus.
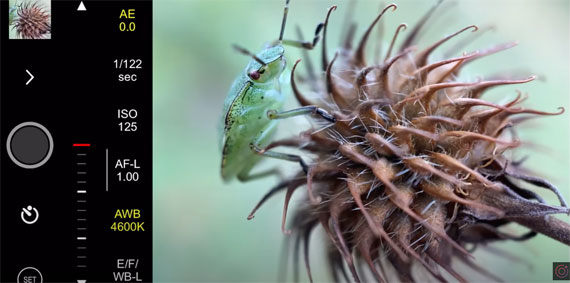
  5. Use a Third-Party Camera App: To ensure the iPhone uses the correct lens (especially when using a macro lens), Pakarklis recommends using a third-party camera app, such as ProCam or Lightroom mobile app.
  6. Adjust App Settings for Macro Photography: Turn on image stabilization to reduce hand shake, and change the photo format to HEIC for smaller file size and more color preservation. Also, ensure that the iPhone’s image processing techniques are in use for the highest photo quality possible.
  7. Shoot Multiple Shots: Macro photography can be tricky with tiny hand movements resulting in a massive camera shake, hence take multiple shots to ensure that at least one is in focus.
  8. Use a Diffuser: A diffuser can help eliminate direct light that might be shining on your macro photography subjects, providing better color saturation and control over the lighting.
  9. Embrace the Challenges: Shooting insects or moving subjects in macro photography is notoriously difficult. It requires a lot of patience and luck, but the results can be astonishing.
  10. Explore and Experiment: The best macro photography subjects can be the most ordinary objects. Take the time to explore and experiment with different perspectives.

The world, indeed, is filled with wonders to those who take the time to look closely.

For Further Training:

iPhone Photo Academy is an in-depth online course that will show you how to take incredible iPhone photos. With the right knowledge an iPhone can be used to take photos that are so good that most people would never even believe that they were taken with a phone. It is currently 84% off for their Summer Sale which ends soon!

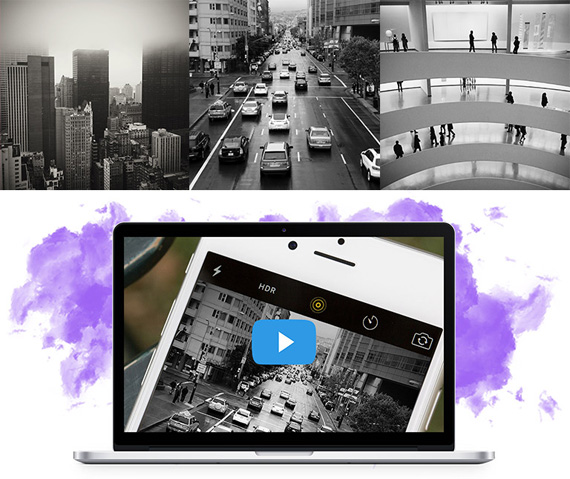
iphone photo tutorials

iPhone Photography Tricks (Click to See More Examples)

The best camera is the one that is always with you. But having the iPhone with you is only half of the equation. The other half is knowing how to use it to take outstanding photos.

Deal ending soon: The iPhone Photography Academy at 84% Off

- - - - - - - - - - - - - - - - - - - - - - - - - - - - - - - - - - - - - - - - - - - - - - - - - - - - - - - - - - - - - - - - - - - - - - - - - -

Did you appreciate this newsletter? Please help us keep it going by Joining Our Patreon Supporters

What are your thoughts on this article? Join the discussion on our Facebook Page

PictureCorrect subscribers can also learn more today with our #1 bestseller: The Photography Tutorial eBook

- - - - - - - - - - - - - - - - - - - - - - - - - - - - - - - - - - - - - - - - - - - - - - - - - - - - - - - - - - - - - - - - - - - - - - - - - -

The post 10 Expert Tips for Stunning iPhone Macro Photography appeared first on PictureCorrect.


from PictureCorrect https://ift.tt/yiX8EVm
via IFTTT

keskiviikko 2. elokuuta 2023

PictureCorrect.com: Understanding Diffused Light

Today’s article was kindly shared with us by Ignacio Palacios, author of the 12 Types of Natural Light which is designed to help photographers harness the incredible power of light.

If you don’t like strong contrast in your images, this is the light to use.

Overcast days don’t mean you can’t shoot. While a white overcast sky does nothing for grand landscape images, the lack of shadows present in diffused light is an opportunity to crop the sky out of your composition and move in closer to photograph the details. The color of this light comes from the whole sky, which acts like a giant soft-box, which in the right situation can create a very dramatic outcome.

diffused light

Gelada Monkey under soft overcast light, Ethiopia.

Use the moments to photograph more ‘intimate’ images, abstracts or ‘landscapes within the landscape’, as I call it. The resultant effect will be a soft low-contrast scene. Diffused light can also take the form of a shady spot on a sunny day and it is great light to photograph waterfalls with the harshness of light having been removed, giving you the ability to create a long exposure without burning the highlights.

frozen lake

Frozen lake in Iceland.

Light is diffused by the presence of clouds and as this light becomes diffused and spreads out, the edges of shadows in your image start to soften. This is a mellower light, gentler on the subject. I love photographing people and wildlife when there is diffused light as it removes unattractive shadows. But as I said, this is not such a great light to use when you photograph landscapes because your images will lose dimension and texture. Don’t miss that unique landscape shot though!

For Further Training:

Creating magnificent images requires the photographer to have full control over the tools at their disposal and understanding how light works is one of the most important elements to have in your creative arsenal. Grasping how light works is complex as it bounces off some subjects, passes through others, creates large or small shadows, influences colour and has a dramatic effect on your final image.

natural light eBook

Finding Light in Photography

Understanding how to harness this incredible power of light requires you to understand the concepts of position, strength and colour and our success as photographers depend on our ability to predict and choose the best light or learn to work with what we have on offer.

This is a fantastic book for photographers of all skill levels. The book is full of beautiful images along with lots of helpful tips and techniques.

Found here: The 12 Types of Natural Light Guide

- - - - - - - - - - - - - - - - - - - - - - - - - - - - - - - - - - - - - - - - - - - - - - - - - - - - - - - - - - - - - - - - - - - - - - - - - -

Did you appreciate this newsletter? Please help us keep it going by Joining Our Patreon Supporters

What are your thoughts on this article? Join the discussion on our Facebook Page

PictureCorrect subscribers can also learn more today with our #1 bestseller: The Photography Tutorial eBook

- - - - - - - - - - - - - - - - - - - - - - - - - - - - - - - - - - - - - - - - - - - - - - - - - - - - - - - - - - - - - - - - - - - - - - - - - -

The post Understanding Diffused Light appeared first on PictureCorrect.


from PictureCorrect https://ift.tt/kwGU3ac
via IFTTT

tiistai 1. elokuuta 2023

PictureCorrect.com: Synthetic Photography Masterclass

As technology continues to evolve and intertwine with our daily lives, a groundbreaking innovation has emerged that stands to reshape our very perception of photography. Known as “Synthetic Photography“, this revolutionary process has the potential to redefine how we capture, create, and share visual content.

synthetic image

Understanding Synthetic Photography

At its core, synthetic photography is a product of advanced artificial intelligence (AI) technologies, used to generate lifelike images. Leveraging complex algorithms and machine learning models, synthetic photography allows users to create convincing images from textual descriptions or from blending and transforming existing images, which often defy the boundaries of traditional photography. This technology generates ‘photographs’ of people who do not exist, landscapes that have never been, and scenes which might otherwise be impossible to capture with a conventional camera.

Implications for Traditional Photography

Given the advent of this revolutionary technology, many photographers may be left pondering the relevance of their current skills. Will traditional photography become obsolete? Are years of knowledge and experience rendered insignificant?

The good news is, absolutely not.

Conversely, traditional photography skills offer a foundation from which to dive into synthetic photography. Knowledge of composition, lighting, camera angles, aperture, and f-stops remain pivotal in the synthetic realm. Such knowledge and understanding can guide the generation of synthetic images, contributing to a better, more authentic visual outcome. As such, synthetic photography shouldn’t be seen as a threat, but rather as an opportunity to extend and diversify one’s creative toolkit.

ai boat image

How to Use It:

This brings us to the just released Synthetic Photography Masterclass, designed by Phil Steele, a veteran in the field of photography education. With over 13 years of experience in teaching online photography and a deep-seated passion for technology, Phil is ideally placed to guide students into the new era of synthetic photography.

The course is not aimed to replace traditional photography but to supplement it, offering photographers an additional and complimentary art form that expands the horizons of their creativity. The course focuses on improving real-world photography skills through practice in a virtual environment, offering the chance to test-drive photo ideas, capture rare scenes, and expand one’s creative possibilities.

The Synthetic Photography Masterclass introduces you to the concept of synthetic photography, helps you gain a firm understanding of the underlying technology, and provides you with the skills required to create synthetic images. This knowledge and the skills acquired will, in turn, keep you at the forefront of this exciting new art form.

Utilizing the powerful generative AI engine, Midjourney, the course equips students with the know-how to create stunning synthetic images. The course includes ten video lessons that cover everything from setting up your Midjourney account to the advanced techniques required to produce photorealistic images.

Launch sale ending soon: The Synthetic Photography Masterclass at 40% Off

- - - - - - - - - - - - - - - - - - - - - - - - - - - - - - - - - - - - - - - - - - - - - - - - - - - - - - - - - - - - - - - - - - - - - - - - - -

Did you appreciate this newsletter? Please help us keep it going by Joining Our Patreon Supporters

What are your thoughts on this article? Join the discussion on our Facebook Page

PictureCorrect subscribers can also learn more today with our #1 bestseller: The Photography Tutorial eBook

- - - - - - - - - - - - - - - - - - - - - - - - - - - - - - - - - - - - - - - - - - - - - - - - - - - - - - - - - - - - - - - - - - - - - - - - - -

The post Synthetic Photography Masterclass appeared first on PictureCorrect.


from PictureCorrect https://ift.tt/i7akYtB
via IFTTT