keskiviikko 26. heinäkuuta 2023

PictureCorrect.com: What Lenses Work Best for Beautiful Background Blur?

This article is based on concepts from Creating Beautiful Background Blur if you want to dig deeper for further training.

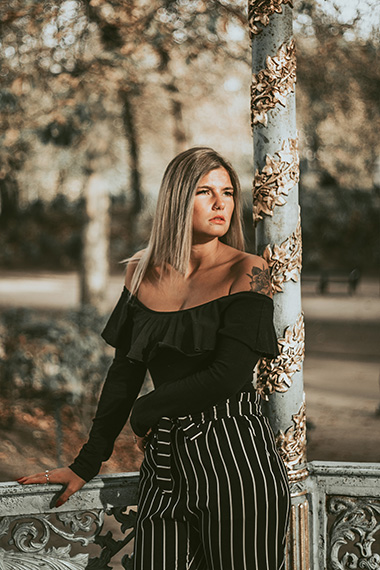
Here is a portrait that uses background blur to make the model pop from the background.

best camera lens for background blur

Photo by Dan Tyler; 50mm at f/1.8

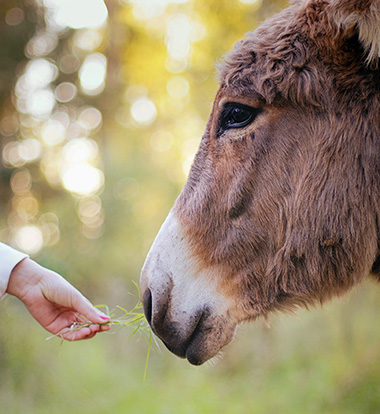
Background blur is an excellent composition tool to set your subject apart from their surrounding areas. It’s another way of saying “minimum depth of field”.

Newer photographers, with entry-level equipment, often find the idea of background blur difficult, because no matter what they do they cannot create the effect.

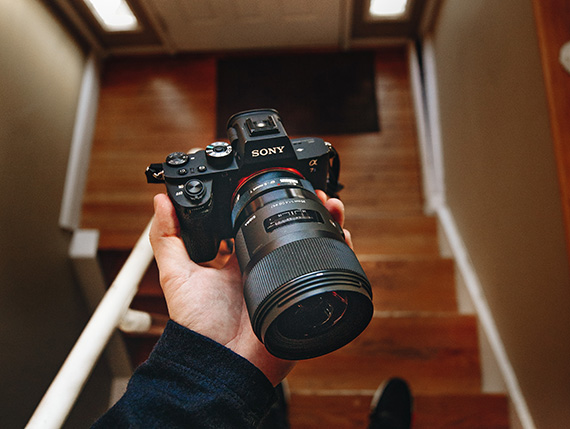
best camera lens for background blur

Photo by Matthew Hamilton

Blurring a background requires several elements of photography to be successful. First and foremost is the lens.

For that reason, in this article, we will concentrate on lens selection to create optimal background blur.

Quick Tip

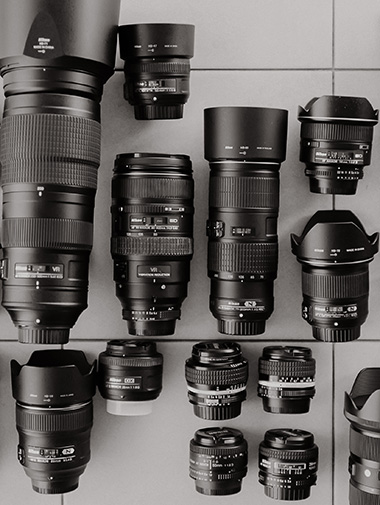
best camera lens for background blur

Photo by CHUTTERSNAP

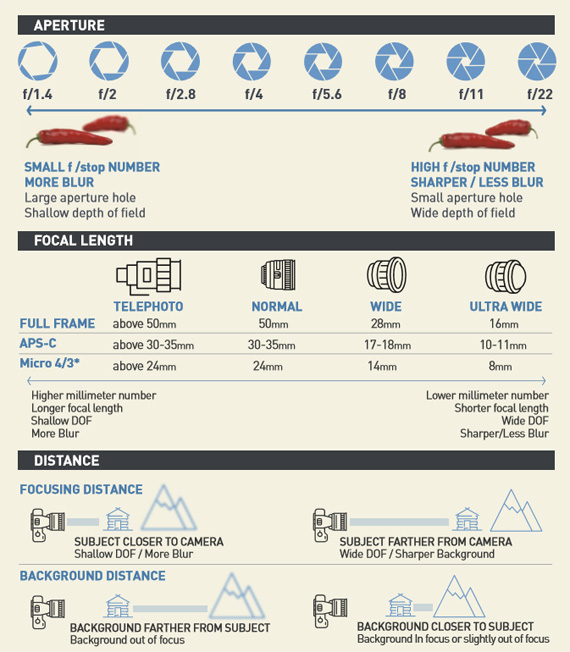
Your first consideration when blurring a background is the focal length of the lens.

The longer the focal length, the more blur will be created at a given f-stop.

For example, at f/2.8, a 200mm lens will create more background blur than a 50mm lens.

Wide-angle lenses will not create a noticeable background blur effect at any f-stop.

Any lens wider than a “normal” field-of-view lens will create a negligible background blur, even when you have set the f-stop to the widest opening.

A normal field of view is between 50 and 55mm for a full-frame sensor and 28-34mm on a camera with an APS-c sensor.

A “normal” lens is one that closely mimics the field of vision for the human eye.

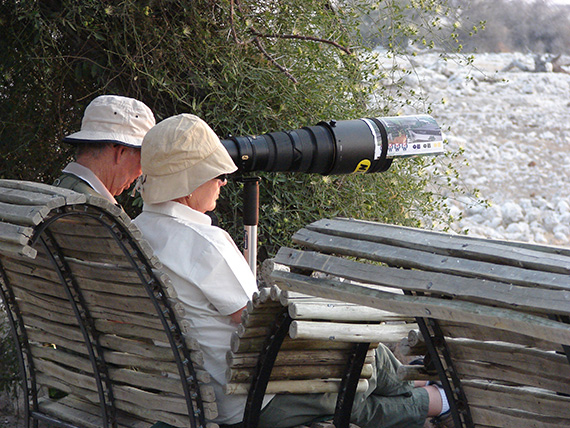
best camera lens for background blur

Photo by Vicky Sim

The lens in the image above is most definitely not a “normal” lens. A very long telephoto lens like this would create background blur even at smaller apertures!

What about the relationship between aperture and background blur?

The photographic term “fast lens” refers to the largest aperture available on the lens. A lens with a very wide maximum aperture is a faster lens than a similar lens with a smaller maximum aperture.

This fact of optics is why creating background blur with kit lenses is difficult to impossible. They generally have a smaller maximum aperture.

The lens above has a maximum aperture of f/1.4. This lens would be considered very fast, and it would be extremely efficient at creating background blur.

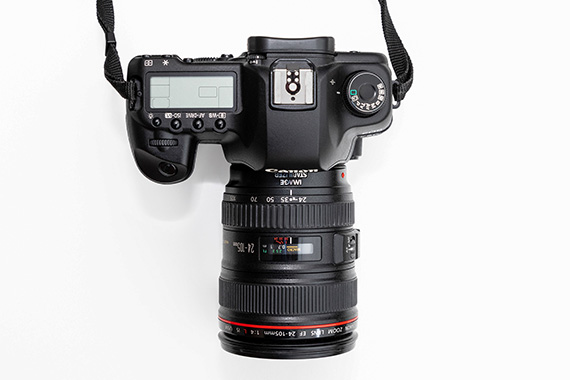
This Canon 24-105mm zoom lens has a maximum aperture of f/4. This lens is not as fast a lens as compared to the previous example, where the maximum aperture was f/1.4.

Some lenses display the aperture scale outside the lens (such as the Nikon 85mm).

Other lenses only display the aperture scale inside the viewfinder, such as Canon 24-105mm zoom lens.

Most lenses have variable apertures. The one exception is mirror lenses. They have a fixed aperture, usually around f/8.

Quick Tip

With a zoom lens (variable focal length), such as the Canon example, the lens will create more background blur at a longer focal length setting versus a shorter focal length setting.

For example, this Canon lens set at the maximum aperture of f/4 will create more background blur at the 105mm focal length setting versus the 24mm focal length setting (where it would create little to no background blur).

Conclusion: When selecting a lens for background blur…

  • A lens with a longer focal length works better than a shorter one.
  • A lens with a wider maximum aperture works better than a lens with a smaller one.
  • A “fast lens” is one that has a large maximum aperture (f/2.8 or larger).
  • Kit lenses, as a general rule, are not very fast and therefore do a poor job of creating background blur.
  • Wide-angle lenses are also a poor choice for creating background blur.
  • A lens focal length starting at a “normal” field of view (matching the human eye) and escalating toward longer focal lengths (telephoto) creates the best background blur.
  • When using a zoom lens (variable focal length), the longest focal length will create a better background blur than the shorter focal lengths at the maximum aperture.
best camera lens for background blur

Photo by Martin Castro; 50mm at f/1.4

Note: Some zoom lenses have a “variable” maximum aperture. You would want to consider this when choosing a focal length for background blur with a zoom lens.

About the Author:
Kent DuFault is an author and photographer with over 35 years of experience. He’s currently the director of content at the online photography school, Photzy.com.

For Further Training:

Imagine having the knowledge to confidently create beautiful background blur, in any situation with any lens. Creating Beautiful Background Blur is a comprehensive technical training guide on the subject of depth of field – filled with in-depth tutorials and secrets to creating gorgeous, creamy, bokeh background images – including with pet photos. It is currently 68% off today if you want to check it out.

background blur settings

Mastering beautiful background blur with your camera (see more of the settings inside)

Designed to be the only depth-of-field guide you’ll ever need and the initial reviews have been great. When you finish studying this premium guide, you won’t have a haphazard understanding of lenses, optics, depth of field, and bokeh. The author wrote it so his readers would have an “expert level” understanding on these subjects. P.S. try the coupon code picturecorrect at checkout for even more of a discount which ends soon.

Deal ending soon: Bokeh & Depth of Field Pro Guide at 68% Off

- - - - - - - - - - - - - - - - - - - - - - - - - - - - - - - - - - - - - - - - - - - - - - - - - - - - - - - - - - - - - - - - - - - - - - - - - -

Did you appreciate this newsletter? Please help us keep it going by Joining Our Patreon Supporters

What are your thoughts on this article? Join the discussion on our Facebook Page

PictureCorrect subscribers can also learn more today with our #1 bestseller: The Photography Tutorial eBook

- - - - - - - - - - - - - - - - - - - - - - - - - - - - - - - - - - - - - - - - - - - - - - - - - - - - - - - - - - - - - - - - - - - - - - - - - -

The post What Lenses Work Best for Beautiful Background Blur? appeared first on PictureCorrect.


from PictureCorrect https://ift.tt/sqHlNtK
via IFTTT

tiistai 25. heinäkuuta 2023

PictureCorrect.com: Light Painting Photography Techniques: 7 Useful Tips

Light painting is a fun photography technique where photographers use camera flashes, flashlights, and spotlights to paint light in a scene. It can easily qualify as the best/most fun night photography technique. Although many photographers have attempted it before, only a few have mastered the technique. Below are some very useful tips to consider when you want to perfect your light painting skills.

1. Try out different light sources

This is very important You shouldn’t try painting everything using the same light. To avoid odd and flat pictures, consider using different light sources, otherwise your work will defy the sole purpose of light painting, which is to create unique light impressions on different landscape parts at night.

light painting techniques

Photo by David Russo; ISO 400, f/4.5, 30-second exposure.

2. Use dimmable light sources

For the best results, you need to choose dimmable light sources, because light painting relies heavily on light intensity. To get the best results, you must be able to alter light intensity whichever way you like to ensure every part of a photo gets the right amount of light.

3. Take care of the noise

It is important to note that long exposures create more noise. Because of this, take time painting in light, but don’t forget to factor in this small detail; it can be the difference between good and bad lighting photography.

4. Take multiple shots

To get the best light painting photos, you need to take as many shots as possible. Multiple shots help you treat different parts of a photo separately which should be the case in light painting.

5. Use flashlights that don’t have hot spots

Moving your flashlight beam randomly when taking light photos doesn’t make a big difference even if your flashlight has a hot spot (a bright circle located at the center of the beam). The hotspot does, however, make a big difference when you are considering fine details in scenes. If you don’t have money to buy the perfect flashlight, consider taping tissue paper or wax paper over your flashlight lens to eliminate hot spots.

light painting tricks

Photo by Stephen Poff; ISO 100, f/11.0, 67-second exposure.

6. Include night photography techniques

Just because you are light painting shouldn’t mean you forget typical night photography techniques. You must consider techniques like mirror lockup, cable release, long exposure noise reduction, etc., to ensure you get the best outcome.

7. Mix ambient light

You should also remember to incorporate ambient light—like street lights or moon light—to add mood to your photos. Using flashlights shouldn’t mean you ignore all other light sources.

best light painting tips

Photo by Dave Edens; ISO 1600, f/25.0, 15-second exposure.

Keep these tips in mind next time you head out for a light painting shoot.

About the Author:
Swee Shiong Chong writes for SG East Photography, a photography blog on techniques and equipment that is used in creating all types of photography from around the world.

- - - - - - - - - - - - - - - - - - - - - - - - - - - - - - - - - - - - - - - - - - - - - - - - - - - - - - - - - - - - - - - - - - - - - - - - - -

Did you appreciate this newsletter? Please help us keep it going by Joining Our Patreon Supporters

What are your thoughts on this article? Join the discussion on our Facebook Page

PictureCorrect subscribers can also learn more today with our #1 bestseller: The Photography Tutorial eBook

- - - - - - - - - - - - - - - - - - - - - - - - - - - - - - - - - - - - - - - - - - - - - - - - - - - - - - - - - - - - - - - - - - - - - - - - - -

The post Light Painting Photography Techniques: 7 Useful Tips appeared first on PictureCorrect.


from PictureCorrect https://ift.tt/d7FGzXY
via IFTTT

maanantai 24. heinäkuuta 2023

PictureCorrect.com: Diagonal Leading Lines in Photography

Of all the lines used in photography, diagonals are the most dynamic. You can use them to create a strong impression of movement or you can use them to create a tremendous sense of depth. All images are created with lines—some vertical, horizontal and others converging—but knowing how to place them affects the mood and composition of the final image.

diagonal leading lines

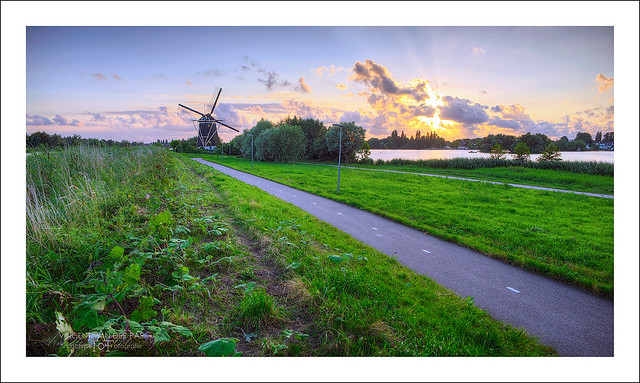
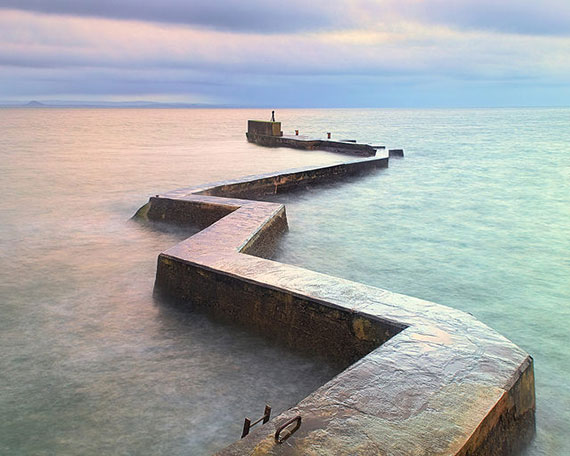
“Prinsenmolen Sunset” captured by Vincent van der Pas

A sense of order is created with vertical and horizontal lines, implying stability and strength. Diagonals are unbalanced and appear to be unstable. What they communicate is dynamic, yet precarious. They always appear to be falling over or not quite secure. This is what lends itself to a dramatic image.

The easiest way to create diagonals is simply by tilting your camera. Slanted views of horizontals and verticals and can easily be created by the photographer. I find that a bit of tilt to my camera adds a little slant to the image and creates a perfect diagonal line.

Try capturing a simple image like a car or skyscraper by tilting the camera forty five degrees and see the effect you create. What happens to the image? The car looks as if it is going fast while skyscraper appears to be reaching for the sky. This effect is created simply by simply turning your camera

When shooting from high up from a bird’s eye view, you can really create some stunning images. Look for lines then tilt the camera. The bird’s eye vantage allows you great leeway, as there is no right way, no up or down; everything is two dimensional. Experiment with patterns and color, and you will arrive at some dramatic compositions.

Don’t be afraid to use crazy angles and change your viewpoint when shooting with diagonals. They will help give you a sense of depth and perspective. They tend to lead the eye to whatever focal point you decide, to a place where they end or disappear into nothing. Diagonals encourage the eye of the viewer to follow, almost like the Judas goat at the abattoir that leads the livestock to the slaughter. A set of footprints, a curved hedge, or river can be used to guide the viewers to the point of focus. But you must lead them to something that has a strong interest otherwise the viewer is left feeling that the image is incomplete.

Then there is the zigzag effect when using diagonals in patterns. The repeated pattern can also be used to drag the eye into the image over a larger area of the frame. These patterns are dynamic and, when used with horizontals and verticals, become even more dramatic.

I have always chosen diagonals as my favorite lines because they are so dynamic and add something to my images. Bottom line though, as you learn digital photography, you need to experiment and practice what you learn in order to master it. Happy shooting!

About the Author:
Wayne Turner has been teaching photography for 25 years and has written three books on photography. He has produced 21 Steps to Perfect Photos; a program of learner-based training using outcomes based education.

- - - - - - - - - - - - - - - - - - - - - - - - - - - - - - - - - - - - - - - - - - - - - - - - - - - - - - - - - - - - - - - - - - - - - - - - - -

Did you appreciate this newsletter? Please help us keep it going by Joining Our Patreon Supporters

What are your thoughts on this article? Join the discussion on our Facebook Page

PictureCorrect subscribers can also learn more today with our #1 bestseller: The Photography Tutorial eBook

- - - - - - - - - - - - - - - - - - - - - - - - - - - - - - - - - - - - - - - - - - - - - - - - - - - - - - - - - - - - - - - - - - - - - - - - - -

The post Diagonal Leading Lines in Photography appeared first on PictureCorrect.


from PictureCorrect https://ift.tt/9FRLQYg
via IFTTT

sunnuntai 23. heinäkuuta 2023

PictureCorrect.com: The Photographer’s Palette: The Role of Color in Composition

Relevant reminder: launch sale ending soon for the Composition Cheat Sheets at 81% Off

Colors are the silent narrators of the stories that unfold through photography. They can evoke emotions, guide the viewer’s eye, and create a compelling composition. Photographers, both amateurs and professionals, should consider color as an essential tool in their creative arsenal to enhance the visual storytelling experience. In this blog post, we delve into the importance of color in photography composition and how you can use it effectively.

photo colors

Photo captured by Richard Schneider; 35mm, f/13, 1/125s, ISO 125

The Role of Color in Photography Composition

Photography is a visual medium that relies heavily on composition, the arrangement of visual elements within a scene. A well-composed photo has a balance of elements that guide the viewer’s eye through the image, creating a visually pleasing and engaging experience.

One of these elements, often overlooked, is color. Colors can have different psychological effects on the viewer. They can stimulate emotions, highlight subjects, create depth, and even convey concepts and ideas. Understanding the role of color in photography can, therefore, elevate your compositions, taking your photos from merely “good” to “outstanding.”

Color Theory and The Color Wheel

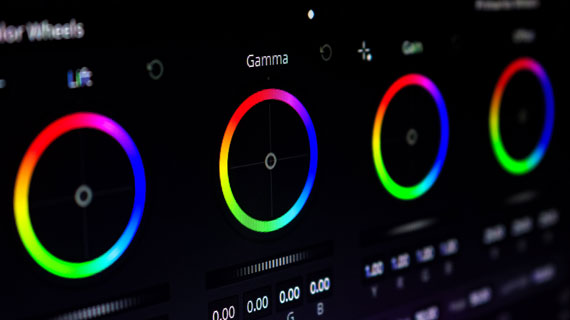
Before diving into the practical aspects, understanding some basics of color theory can be beneficial. Central to color theory is the color wheel, which includes primary colors (red, blue, yellow), secondary colors (green, orange, purple), and tertiary colors – the result of mixing a primary and a secondary color.

Colors opposite each other on the color wheel are complementary colors, and when used together, they create a vibrant contrast. Analogous colors, those close together on the wheel, can establish a sense of harmony and cohesion.

color wheel

Photo captured by Irham Setyaki

Using Color in Photography Composition

  1. Complementary Colors: Complementary colors can make your subject pop, making the viewer’s eye immediately drawn to it. The stark contrast created by these color pairings can add a dramatic effect to your photographs.
  2. Analogous Colors: Using analogous colors can create a sense of harmony and consistency. These colors work well together and create a calming, peaceful effect. They are excellent for capturing serene landscapes, quiet street scenes, or intimate portraits.
  3. Monochrome: A monochrome color palette doesn’t mean just black and white. It involves using different shades, tints, and tones of a single color. This approach can produce a striking, impactful image by playing with light and shadows.
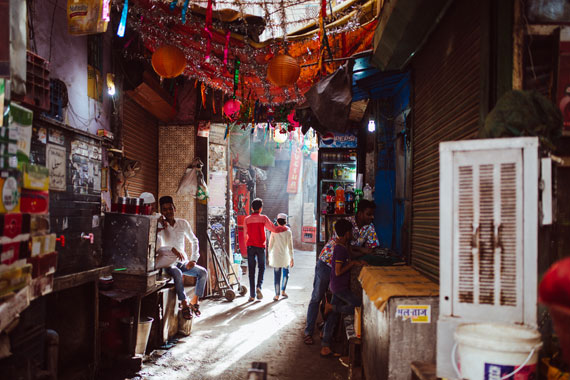
  4. Color and Mood: Colors can evoke a specific mood. Warm colors (red, orange, yellow) typically stir up feelings of warmth and comfort, while cool colors (blue, green, purple) elicit feelings of calm and relaxation. Use color to enhance the atmosphere or emotion you want to convey in your photograph.
  5. Color as a Leading Line: Color can be used as a leading line to guide the viewer’s eye towards your subject or a specific area in your image. Bright, saturated colors tend to draw attention, so use them strategically.
  6. Color for Depth and Dimension: You can use color to add depth and dimension to your photos. Warm colors appear closer to the viewer, while cool colors seem to recede into the background.
color composition

Photo captured by Amit Gaur; 35mm, f/1.8, 1/60s, ISO 100

Understanding Color Balance and Post-Processing

In digital photography, understanding color balance is crucial. Cameras interpret colors differently than the human eye, so adjusting the color balance, usually through White Balance settings, can significantly influence the overall mood of your photograph.

In post-processing, tools like Photoshop or Lightroom can help correct color balance, adjust saturation and vibrancy, or apply color grading to further emphasize the mood or narrative you want to express.

Final Thoughts

In the world of photography composition, color is a powerful tool waiting to be fully exploited. Mastering the use of color takes practice and experience, but once you grasp its potential, your photos will never be the same. So, the next time you’re framing a shot, consider not just the subjects and shapes, but the colors and the story they can tell. After all, every hue in your palette is another word in your photographic vocabulary.

For Further Training:

Do you ever have trouble remembering all the elements of composition? These new Composition Cheat Sheets have you covered. With clear, concise information on all the essential elements of composition, you’ll never be unprepared again. They are currently 81% off for the launch sale which ends soon if you want to check them out.

composition cheat sheets

Composition Cheat Sheets (see all the elements covered)

The perfect companion for any photographer. Print one out whenever you need it. These cheat sheets consolidate crucial composition-related information, allowing you to concentrate on what truly matters – composing striking photographs.

Launch sale ending soon: The Composition Cheat Sheets at 81% Off

- - - - - - - - - - - - - - - - - - - - - - - - - - - - - - - - - - - - - - - - - - - - - - - - - - - - - - - - - - - - - - - - - - - - - - - - - -

Did you appreciate this newsletter? Please help us keep it going by Joining Our Patreon Supporters

What are your thoughts on this article? Join the discussion on our Facebook Page

PictureCorrect subscribers can also learn more today with our #1 bestseller: The Photography Tutorial eBook

- - - - - - - - - - - - - - - - - - - - - - - - - - - - - - - - - - - - - - - - - - - - - - - - - - - - - - - - - - - - - - - - - - - - - - - - - -

The post The Photographer’s Palette: The Role of Color in Composition appeared first on PictureCorrect.


from PictureCorrect https://ift.tt/S5Kn3qI
via IFTTT

lauantai 22. heinäkuuta 2023

PictureCorrect.com: Rain, Reflections, and the City: Urban Photography on Wet Days

Final reminder: only hours left for the Urban iPhone Photography Launch Sale

Often seen as an inconvenience, rainy days can in fact be a goldmine for photography enthusiasts, particularly those who love to capture urban landscapes. With the right techniques, what could be a gloomy, wet day transforms into a playground of vibrant reflections, textures, and strikingly beautiful scenes. Here are some essential tips to make the most of your rainy day urban photography:

urban rain

Photo captured by Guillaume Flandre; 23mm, f/1.4, 1/500s, ISO 800

1. Gear Up

First and foremost, protecting your camera gear is a priority. There are many weather-sealed camera bodies and lenses available on the market, but if you don’t own one, don’t worry. A rain cover for your camera will do just fine and is usually quite affordable. For a makeshift solution, even a plastic bag can be useful, provided you handle your equipment carefully. Don’t forget an umbrella or a waterproof jacket to keep yourself dry and comfortable.

2. Embrace Reflections

One of the most spectacular things about photography on a rainy day is the appearance of reflections. Wet surfaces, puddles, and glass panes become mirrors reflecting the city’s life in a different perspective. Reflections can bring a surreal and artistic touch to your photos. Look for those perfect puddles and use them to create a dramatic impact by including city structures, lights, and even pedestrians.

3. Look for Details

Rain transforms the ordinary into the extraordinary. Raindrops on a railing, wet footprints on the pavement, beads of water on a café window – these details may seem mundane but can add depth to your photography. Focusing on these minute details can give your viewers a fresh perspective on the familiar urban environment.

rainy day details

Photo captured by Alexei Maridashvili

4. Play With Light

Rainy days might seem dark and gloomy, but they are filled with unique lighting opportunities. The overcast sky acts as a giant diffuser, providing a soft, even light that’s perfect for capturing the city’s character. The vibrant city lights become even more pronounced in the rain, especially at dusk or night. The contrasting lights and the dark environment create high drama and ambiance in your images.

5. Capture Movement

The hustle-bustle of the city is amplified on rainy days. People dashing with umbrellas, vehicles splashing water, raindrops trickling down window panes – these movements can add a dynamic touch to your photos. Using a slow shutter speed will let you play around with motion blur, conveying a sense of speed and urgency that aligns with the mood of a rainy day.

6. Experiment with Black and White

Black and white photography and rainy days make for a potent combination. It brings out the mood, contrasts, and textures in a more pronounced manner. Particularly in an urban setting, black and white can amplify the timeless character of the cityscape, making your photographs dramatic and intense.

black and white rain

Photo captured by masahiro miyagi

7. Post-Processing

Finally, don’t forget the power of post-processing. You can enhance the moodiness of your rainy day pictures by adjusting the contrast, sharpness, and saturation. Experimenting with various filters can also highlight the different elements you’ve captured.

Rainy days offer a unique canvas for your urban photography. While the rest retreat indoors, it’s your chance to step out and explore the city from a refreshed and renewed perspective. Happy shooting!

For Further Training, Launch Sale Ending Tonight:

Urban photography is not about traveling to a famous metropolis or owning an expensive camera. It’s about finding and capturing beauty in any city, or any town, with whatever camera you have at hand. That is why iPhone Photography School just released this new course, Urban iPhone Photography, with best-kept secrets to take stunning photos in any city…with the camera always in your pocket!

urban iphone photography

New: Urban iPhone Photography (see preview videos)

During its launch, the brand-new course is on sale at a deeply discounted price. It also includes a full happiness guarantee, if you are not satisfied with the course for any reason simply let them know for a full refund – so there is no risk in trying it.

Final day: Urban iPhone Photography Course at 80% Off

- - - - - - - - - - - - - - - - - - - - - - - - - - - - - - - - - - - - - - - - - - - - - - - - - - - - - - - - - - - - - - - - - - - - - - - - - -

Did you appreciate this newsletter? Please help us keep it going by Joining Our Patreon Supporters

What are your thoughts on this article? Join the discussion on our Facebook Page

PictureCorrect subscribers can also learn more today with our #1 bestseller: The Photography Tutorial eBook

- - - - - - - - - - - - - - - - - - - - - - - - - - - - - - - - - - - - - - - - - - - - - - - - - - - - - - - - - - - - - - - - - - - - - - - - - -

The post Rain, Reflections, and the City: Urban Photography on Wet Days appeared first on PictureCorrect.


from PictureCorrect https://ift.tt/W3LPcO9
via IFTTT

perjantai 21. heinäkuuta 2023

PictureCorrect.com: Tips for Using Patterns in Photography

Patterns are basically just repeated shapes, objects or colors either ordered in precise formations or just random designs scattered across a scene. The important thing about patterns is that they create images that are very pleasing to the eye and add a new dimension to your photos.

Using patterns in photos

Photo by Sharafat Khan; ISO 100, f/4.0, 1/200-second exposure.

Patterns can be found everywhere in our world, from natural forms to our urban and industrial environments. Use them effectively in an image and you’ll create a photo that is dynamic and attracts the eye to the main subject or focal point. It will help you learn digital photography in interesting ways.

There are two ways to look at patterns. Take a bird’s eye view and look down on say a car park where you’ll see predictable rows of vehicles. Then the other way is to get in closer and look for not so obvious patterns like tire treads and grill patterns. If you really want to be successful in shooting a pattern make sure that you fill the whole frame so that the pattern extends form edge to edge.

So what are the most effective ways to use patterns in your photography? Here are a few ways.

1. Regular patterns

These are easily identifiable and make really outstanding images especially when there is a lot of color involved. Rows and rows of soldiers in red jackets make up a really great pattern formation. Be sure to try different angles and viewpoints to get more interesting shots. Regular patterns are made up of ordered rows of geometric designs or other objects of the same shape and size. Office blocks made up of rows of windows, rows of trees in an orchard or even a honeycomb.

the best ways to use patterns in photography

Photo by _namtaf_; ISO 100, f/7.1, 1/800-second exposure.

2. Irregular patterns

These form an interesting image just by the irregular nature of the pattern. Objects that are randomly placed in a scene but fairly close together still reveal a sense of repetition. For example, a sky full of parachutists with colored parachutes above them or the leaves on a tree or even a forest floor with a carpet of leaves or acorns. None of these have regular patterns but they are still identified as patterns. Again by filling the frame edge to edge you will emphasize the actual pattern and contain it with great effect.

3. Multiple patterns

This is an interesting one and you’ll often see it in a wall of say an ancient building where different additions have been made. The regular pattern goes in one direction and changes as a new addition of bricks or tiles has been added hundreds of years later.

photography pattern tips

Photo by Sven Hoffmann; ISO 800, f/8.0, 1/170-second exposure.

Brick paving leading up to a tiled wall will reveal a contrast between two types of patterns. Sometimes you’ll see this with the old and new as in a stone wall with a corrugated metal structure behind it.

4. Breaking the pattern

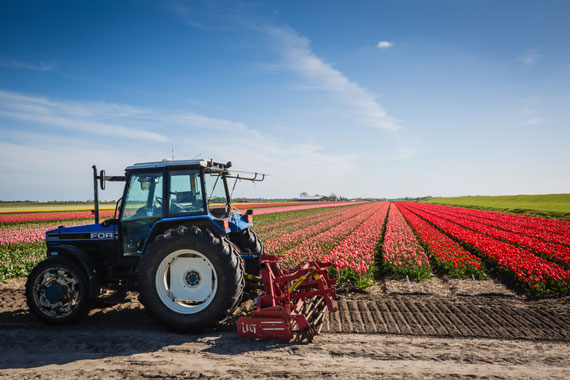
Picture this. A tray of thirty eggs all uniform in color and size with just one egg that has been broken revealing the bright yellow yolk. The uniformity of pattern is interrupted by the single broken egg. This doesn’t weaken the patterned effect as you would think but strengthens the overall image quite dramatically. These are created pattern breaks, but, by looking for them occurring natural is the challenge. For example, the field of red tulips in a Dutch field with just one yellow flower growing in the middle, or, a row of cars at factory storage facility with one color breaking the pattern. A fun experiment is creating your own pattern breaks with shells on the beach or acorns in a forest. You don’t have to have an object that is different to the rest. I shot a great image of a tiny shoot of a baby pine tree pushing its way through a carpet of brown pine needles. The green shoot contrasted against the brown needles and made an outstanding image.

beautiful pattern photography

Photo by Matthias Weinberger; f/9.0, 1/1000-second exposure.

As you learn digital photography, the idea of using patterns creates an opportunity for seeing with your photographic eye. Look for patterns within patterns as with the car park I mentioned earlier. Taking the time to see is vital when trying to create a great image. You will often find that in getting closer and looking for detail you’ll often spot a unique pattern opportunity.

About the Author:
Wayne Turner has been teaching photography for 25 years and has written three books on photography. He has produced 21 Steps to Perfect Photos; a program of learner-based training using outcomes based education.

For Further Training:

Are you ever tired of your photos looking dull or boring? These new Composition Cheat Sheets have you covered. With clear, concise information on all the essential elements of composition, you’ll never be unprepared again. They are currently 81% off for the launch sale which ends soon if you want to check them out.

composition cheat sheets

Composition Cheat Sheets (see all the elements covered)

The perfect companion for any photographer. Print one out whenever you need it. These cheat sheets consolidate crucial composition-related information, allowing you to concentrate on what truly matters – composing striking photographs.

Launch sale ending soon: The Composition Cheat Sheets at 81% Off

- - - - - - - - - - - - - - - - - - - - - - - - - - - - - - - - - - - - - - - - - - - - - - - - - - - - - - - - - - - - - - - - - - - - - - - - - -

Did you appreciate this newsletter? Please help us keep it going by Joining Our Patreon Supporters

What are your thoughts on this article? Join the discussion on our Facebook Page

PictureCorrect subscribers can also learn more today with our #1 bestseller: The Photography Tutorial eBook

- - - - - - - - - - - - - - - - - - - - - - - - - - - - - - - - - - - - - - - - - - - - - - - - - - - - - - - - - - - - - - - - - - - - - - - - - -

The post Tips for Using Patterns in Photography appeared first on PictureCorrect.


from PictureCorrect https://ift.tt/AB6abKc
via IFTTT

torstai 20. heinäkuuta 2023

PictureCorrect.com: Lighthouse Photography Tips

This article is based on concepts from The Photography Action Cards which are currently 88% off if you want to check them out.

Lighthouses are a favorite subject for photographers, because they are romantic. However, some realities can make creating an excellent lighthouse photo challenging.

This article will provide you with some valuable insight into improving your lighthouse pictures, and we will discuss these skill points:

  • Composition with a limited point of view
  • Spotting problems: crooked horizon, trash cans
  • Balancing exposure between the sky and foreground
  • Creating sharp photos in a windy environment
  • Preparing for variable light conditions and weather

“Lighthouses are not just stone, brick, metal and glass. There’s a human story at every lighthouse; that’s the story I want to tell.” ― Elinor DeWire

Elinore DeWire is an American author that specializes in writing about lighthouses, and her quote is good advice for us photographers.

Photo by Pixabay

If you want to create romantic imagery of lighthouses, think about the human connection.

Showcase the sense of isolation and consider the impact a lighthouse would have upon a lonely sailor coming home.

Camera POV—Point of View

Some lighthouses are short and stout. However, the vast majority of lighthouses are tall and imposing structures.

Pro Tip: The height of the structure will play a critical role in helping you select your POV and lens. If the horizon line is visible, make sure that it is straight and not angled one way or the other.

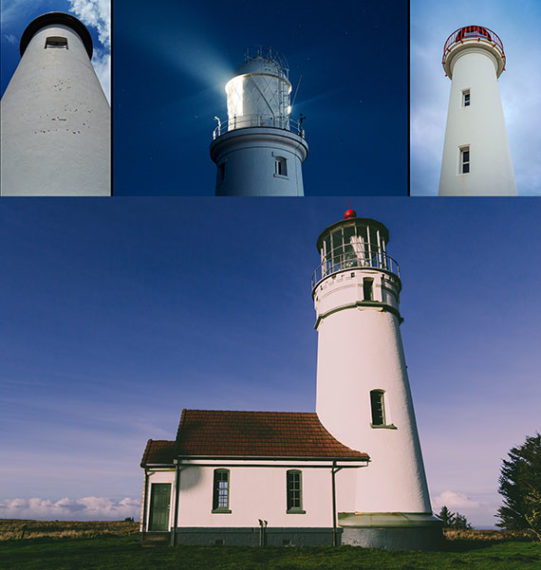
Tall lighthouses are large and imposing structures. If you get close to the tower, you will likely be limited to a POV that looks upward with a wide-angle lens or a moderate telephoto for close-ups.

examples of bottom-up lighthouse POV

Clockwise from top left: Photos by Daniel Reyes, Louis Reed, Louis Renaudineau and Eric Muhr

While there is nothing wrong with the upward view, it doesn’t lend itself to a romantic lighthouse picture. But by all means, take a few of these shots as well—if you have access.

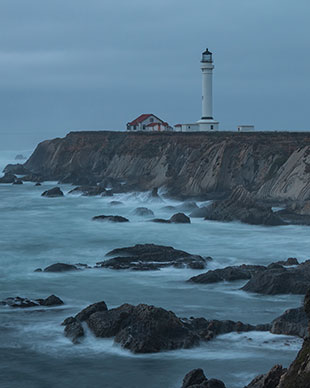
Critical Point: The romantic POV for a lighthouse will often come from some distance away, rather than close to the site itself. A lighthouse will usually be placed out upon a point of land, and there can be other points of land to either side of it. Look to these areas on either side for a camera position that can include the lighthouse’s surrounding environment, which will create a romantic visual story. A lighthouse is often best captured from an elevated point of view with the water stretching out behind it.

Access to lighthouses can range from complete access, where you can go inside and climb the stairs to the prism, to limited access where you might not even be allowed on the grounds.

Pro Tip: If you live near your subject lighthouse, you can visit it many times and explore different points of view and access moments. If you’re on vacation, and your opportunity is a one-shot deal, it will be worth your time to do some research online. You want to know the access limitations, weather conditions and sunrise and sunset times during your visit.
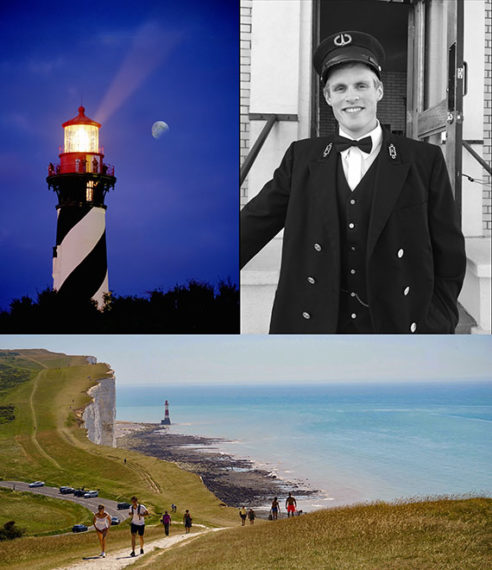
Top photos by Kent DuFault; bottom by Mike

Equipment:

  • Camera: Any camera, including a smartphone camera
  • Lens: Any lens, but typically, you want a moderate wide-angle to medium telephoto
  • Lens Hood: Highly suggested to prevent lens flare
  • Filters: Graduated ND and/or a polarizing filter can be convenient and helpful
  • Tripod: Best to get one with a sturdy head and a wired or wireless remote shutter release, if you want to give some long-exposure shots a try or plan to shoot in low light
  • Flashlight: A great tool if you arrive or leave in the dark, especially if you are walking along cliffs
  • App software: Photo Pills (this software, while optional, locates the sunrise and sunset on a map and can help you determine the best shooting location before you arrive)
  • Notepad: Take notes and be sure to record location metadata on your camera
how to take great lighthouse photos

Photo by Keith Luke

Think About This:

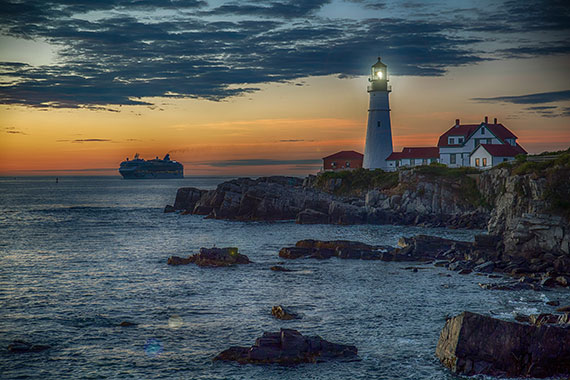
Romanticizing a lighthouse picture means adding drama. There are several ways to do this. Including a ship in the background is fabulous addition if you’re lucky enough to see one. You can also include working personnel like the lighthouse keeper, as I did in a previous example photo. Explore all the possibilities.
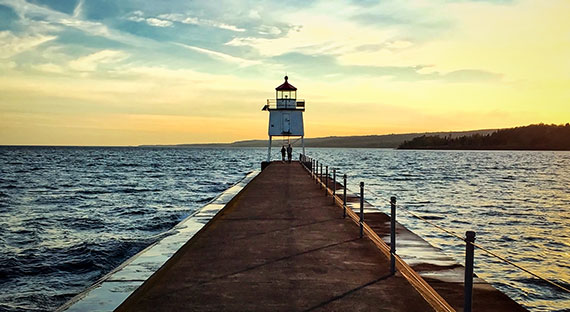
golden hour lighthouse

Photo by Kent DuFault

I visited this lighthouse at sunset. The lighting was perfect. However, I wasn’t lucky enough to catch a vessel going in or out of the harbor. Then a couple walked past me and out toward the structure. It was the perfect human element that I needed to create my romanticized lighthouse story.

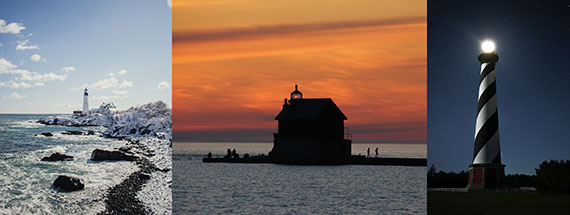
We’ve all heard the virtues of photographing during the golden hour. With romantic lighthouse photography, the time of day plays a critical role.

how time of day affects lighthouse photos

From left: photos by Adam Bixby, James Peacock and Cam Bradford

In the example photos above, the leftmost picture was taken under midday light. The scene is quite extraordinary. However, it lacks romantic drama due to the lighting.

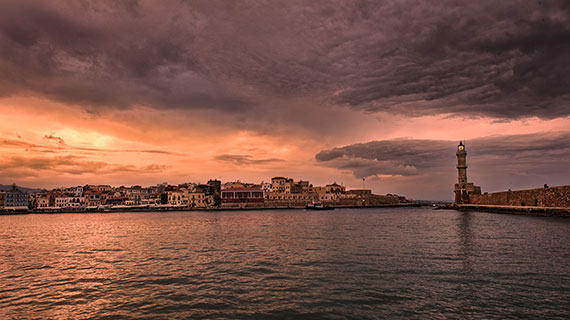
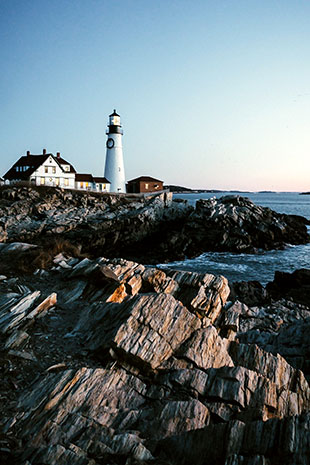
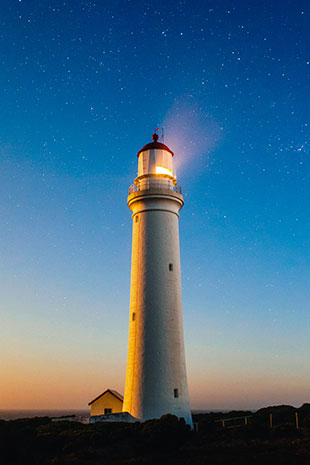
The center photo represents what you might expect around sunrise or sunset, while the rightmost picture results from shooting the lighthouse after sunset in the twilight hour.

Pro Tips!

  • Avoid shooting during midday light. If that’s the only opportunity to photograph, consider using some glass filters on your lens. (More on that in a minute.)
  • Sunrise and sunset are great options for light. Arrive early. You want to set up and be ready when the magic happens. Bring a flashlight so you can see in the dark. A headlamp also works well.
  • Sunrise and sunset can be great for capturing your lighthouse in silhouette. Make sure you select a point of view that places the lighthouse structure against the bright sky.

Post-sunset is a superb time for romantic lighthouse photography. The best shots will occur when there is still some light left in the sky—up to 45 minutes after the sun drops below the horizon.

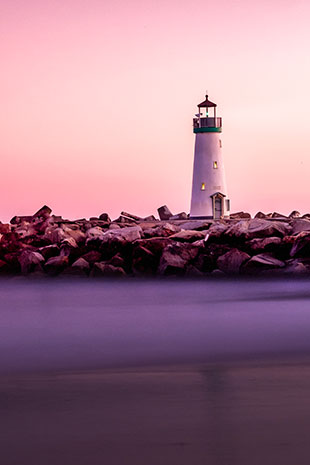
romantic lighthouse lighting

Photo by Everaldo Coelho

Gear Hack!

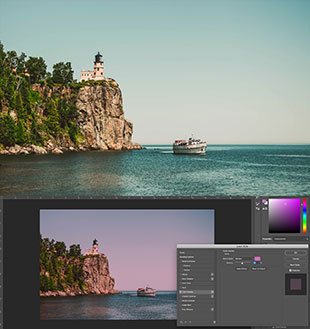
Let’s say you don’t have an option but to visit your lighthouse subject at midday. This scenario is one of those moments where a colored glass filter on the lens can save the day. You can also accomplish a color wash in post-production.

Pro Tip: If you’re going with a color filter on the lens, keep it light in hue and density. Colors that work well are pink, violet, blue and very light shades of red.

how to color wash lighthouse photos

Original photo by Atharva Tulsi; editing by Kent DuFault

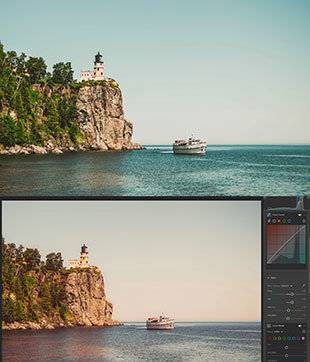
The original photo was taken in midday light. It lacked any sense of romance in the lighting.

You can add a color wash to your lighthouse image in Photoshop using the layer style option in the layers palette. Make sure you duplicate the background layer and then highlight it before clicking on layer styles. You cannot use layer styles on the background layer.

You can also add a color wash to a bland lighthouse picture in Lightroom.
lightroom editing lighthouses

Color wash

Pro Tip: When creating a color wash in post-production, using a minimalist approach is often more appealing than going with deep shades of color.

In Lightroom, the tools you will use to create a romantic hue of color are curves, color, and the color mixer or HSL (depending upon your version of Lightroom).

Beware of fakes!

Be careful with your post-production!

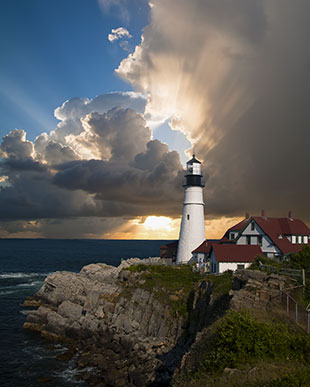
In this lighthouse picture, the sun was behind the photographer and to the right of the camera. You can tell by the shadows on the buildings.

how to spot a fake photo

Photo by Pixabay

There must have been a bland sky, and the photographer decided to drop in a sunset.

The problem is that the lighting doesn’t match up—backlighting and front lighting in the same picture?

It is obviously fake.

Become a student of light, and don’t create fake lighting!

Let’s cover a few final critical features to creating romantic lighthouse photos.

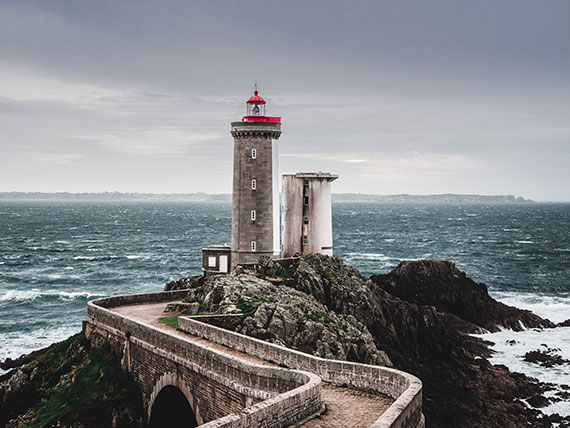
bad weather means good lighthouse photo

Photo by Cayetano Gil

The weather is a definite dramatic factor in lighthouse photography.

In fact, the worse the weather is, the better.

After all, the very function of the lighthouse is to guide when inclement weather prevents visual contact.

Your chances of the lighthouse lamp being turned on are much higher!

Pro Tip: Inclement weather often brings the wind. You must stabilize your camera, especially if you will try and capture some long exposures (such as in the example photo above.) Having an excellent steady tripod with a decent sized head is crucial. Look for a vantage point that is protected from the wind. Bring some sandbags and bungee tie them to hang down from the tripod between the three legs. There are commercially available sandbags for photography purposes, or you can make your own.

how to take dramatic lighthouse photos

Photo by George Desipris

If a pleasing and storytelling environment surrounds your lighthouse, take some shots that include it.

These are the four lenses that I carry for my lighthouse photography.

  • Canon EF 16-35mm f/2.8L III USM
  • Canon EF 24-70mm f/2.8L II USM
  • Canon EF 70-200mm f/2.8L IS III USM
  • Canon EF 300mm f/4L IS USM

If your POV is distant, try to include some meaningful foreground objects to add depth perception.

add foreground elements to photos

Photo by Mitch McKee

Pro Tip: Keep your eyes sharpened and look for garbage cans, cars, power lines or any object that can interfere with your photo’s romanticized intent.

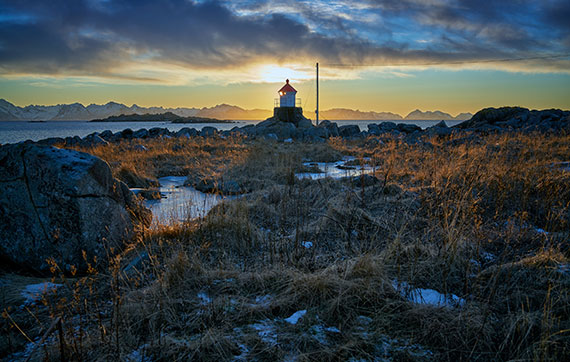
If you’re down near the water, look for tidepools to catch a reflection for added impact.

great lighthouse photo tips

Photo by Pixabay

In Conclusion

  • Lighthouses can be tall or short and stout; choose your POV accordingly
  • An elevated POV often best portrays the romantic aspect of a lighthouse
  • Keep your horizon line straight
  • Access can be limited, and you may find your best camera angle from some distance away from the tower
  • When possible, include a human element
  • You can create dramatic and romantic lighthouse images with any camera—more equipment just gives you more options
  • Be aware of the environment—bring a flashlight and watch your footing
  • It’s best to shoot a lighthouse at sunrise or sunset; dusk can also create dramatic effects, especially if the lighthouse lamp is on
  • You could add color with glass filters or post-production techniques if the lighting is lackluster
  • Don’t create a fake-looking picture!
  • Inclement weather is your friend
  • Include the surrounding landscape if it romanticizes the story of your image
  • Including foreground objects adds depth perception
  • Reflections can add a neat effect if you’re near the water
awesome lighthouse photo

Photo by Joshua Hibbert

Now You Should Give It a Try!

Pick your subject lighthouse.

Do pre-location research online. Try to determine the best time of day and angle. Depending upon the location, plan to shoot at sunrise or sunset.

Use the following camera settings:

  • Manual mode or aperture priority mode
  • Drive mode to single shot
  • Mount the camera to a tripod and use a remote shutter release
  • Start at ISO 200 (adjust as necessary)
  • Maintain a shutter speed of 1/15th or faster for wide-angle lenses, and 1/60th or faster for longer telephoto lenses
  • Use all the focusing points
  • Set the metering mode to matrix/evaluative/pattern
  • Use single shot focus mode
  • Set the white balance to auto
  • Shoot in camera raw (additional .jpeg optional)
  • Adjust aperture from f/2.8 to f/11 depending upon the depth of field
  • Use a foreground object if possible

How did you do?

  • Did you correctly place the focus for the intended depth of field window?
  • Is the lighthouse sharp and free of camera shake?
  • Did you compose the image using the sample pictures for ideas?
  • Is your image free of unwanted humanmade objects (garbage cans, etc.)?
  • Did you frame the shot tight enough or wide enough?
  • Does your photo convey the romance of the location?
  • Is the color pleasing? (It doesn’t need to be accurate)
  • Is your exposure balanced between the sky and foreground?
  • Did you experiment with motion blur in the water while keeping the lighthouse sharp?

About the Author:
Kent DuFault is an author and photographer with over 35 years of experience. He’s currently the director of content at the online photography school, Photzy.com

For Further Training:

Expand your shooting skills with 65 beautifully designed & printable project sheets that will give you over 200 photography assignments, covering everything you can imagine! The Photography Action Cards are currently 88% off.

photo action cards

New: The Photography Action Cards (Click to See How They Work)

These Action Cards discuss a photographic topic, provide you with suggested considerations, and give you specific photographic assignments. They’ll kick you out of the “nest” to go have a personal discovery experience all on your own.

Deal ending soon: The Photography Action Cards at 88% Off

- - - - - - - - - - - - - - - - - - - - - - - - - - - - - - - - - - - - - - - - - - - - - - - - - - - - - - - - - - - - - - - - - - - - - - - - - -

Did you appreciate this newsletter? Please help us keep it going by Joining Our Patreon Supporters

What are your thoughts on this article? Join the discussion on our Facebook Page

PictureCorrect subscribers can also learn more today with our #1 bestseller: The Photography Tutorial eBook

- - - - - - - - - - - - - - - - - - - - - - - - - - - - - - - - - - - - - - - - - - - - - - - - - - - - - - - - - - - - - - - - - - - - - - - - - -

The post Lighthouse Photography Tips appeared first on PictureCorrect.


from PictureCorrect https://ift.tt/dAwqiZm
via IFTTT