keskiviikko 7. kesäkuuta 2023

PictureCorrect.com: Zone Focus Tutorial for Street Photography

If you’ve ever tried your hand at street photography, you know how fast-paced this genre is. People move in all directions and actions happen spontaneously. You need to go with the flow and always be ready to take photos.  This is where zone focusing comes in handy. Street photographer Jonathan Paragas shows how to master zone focusing for street photography:

“Zone focusing allows you to nail focus every single time and focus even faster than the fastest auto-focus system in the world.”
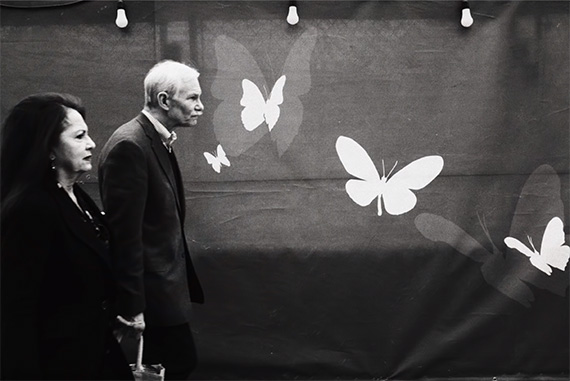
street photography focus technique

Zone focusing helps you capture a sharp photo at just the right moment.

The zone focusing method lets you set a predetermined range of focus. For instance, you can set the lens to focus on subjects between three and seven feet away. Everything in that range will be in sharp focus.
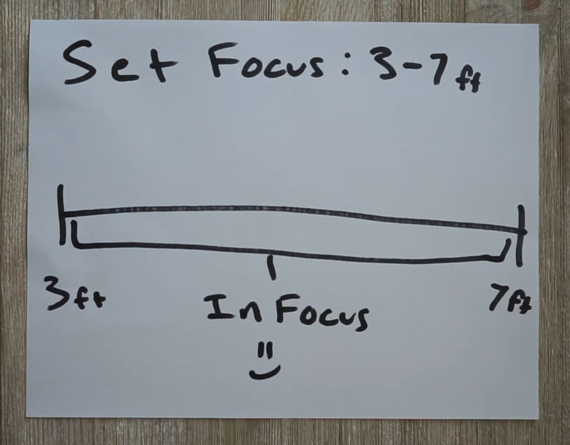
zone focus example

Focus Range

How Zone Focusing Works

Zone focusing works best with wide angle lenses. Lenses like 24mm, 28mm, and 35mm deliver good results when using this technique. While you can still get acceptable results at 50mm, the method will not be effective with longer lenses.

Quickly reviewing the relationship between aperture and depth of field, you might recall that wider apertures cause fewer things to be in focus. Conversely, higher aperture values have a greater depth of field with more things in focus.

“I found that zone focusing works best between f/8 and f/16.”

To use zone focusing, you need to understand how to use the hyperfocal distance scale on your lenses. If you have a look at your manual lenses, you can see three basic things: the aperture ring, mirrored aperture markings, and the distance scale.

“The mirrored aperture markings are there to tell you the range of focus you will have at any given aperture.”

In the video, you can see that at f/16, the marking read 3 on the left and 10 on the right. This means that the zone of focus, in this case, will be from three to ten feet. And at f/4, the range will be from four to five feet. You can thus set your aperture depending on the range of focus you want.
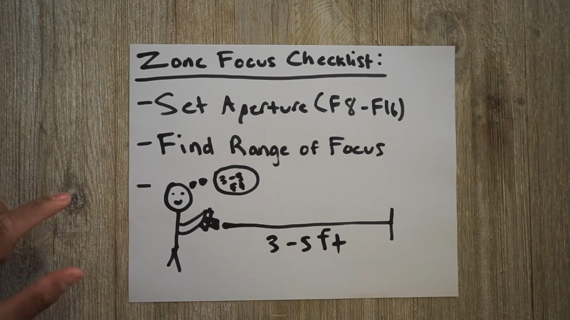
zone focus checklist

Zone Focus Checklist

Now all you need to do is go out, make sure your subjects are within the predetermined range of focus, and take a photo.  As long as the scene or subject is within your calculated range of focus, the image will turn out sharp.
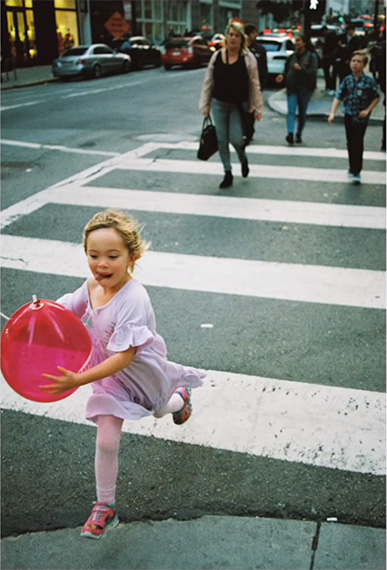
zone focusing

Wait for your subject to move into your focus zone.

Go ahead and give zone focusing a try if you’ve been struggling to attain focus quickly.

- - - - - - - - - - - - - - - - - - - - - - - - - - - - - - - - - - - - - - - - - - - - - - - - - - - - - - - - - - - - - - - - - - - - - - - - - -

Did you appreciate this newsletter? Please help us keep it going by Joining Our Patreon Supporters

What are your thoughts on this article? Join the discussion on our Facebook Page

PictureCorrect subscribers can also learn more today with our #1 bestseller: The Photography Tutorial eBook

- - - - - - - - - - - - - - - - - - - - - - - - - - - - - - - - - - - - - - - - - - - - - - - - - - - - - - - - - - - - - - - - - - - - - - - - - -

The post Zone Focus Tutorial for Street Photography appeared first on PictureCorrect.


from PictureCorrect https://ift.tt/JdCI83c
via IFTTT
tiistai 6. kesäkuuta 2023

PictureCorrect.com: Garden Macro Photography Tutorial

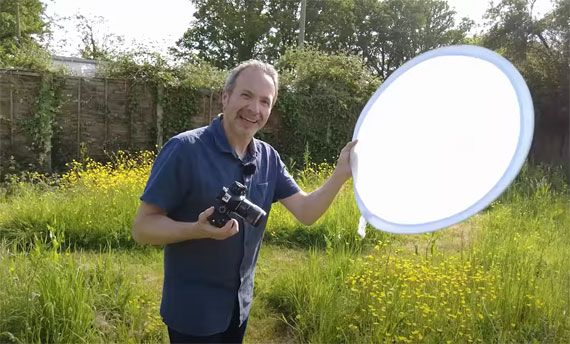
Macro photography is an exciting and adventurous field where you capture the details of small objects at close range, making them appear larger than life. Noted photographer Gavin Hoey recently embarked on a ‘garden safari,’ highlighting key aspects of macro insect photography. If you’re intrigued by the minute details of the insect world and are considering trying out macro photography, this video is a great starting point. Below, we outline the key takeaways from Hoey’s video:

Gavin’s first advice is to “stop and wait and look.” Rather than hastily scouting for subjects, taking the time to look for movement allows you to spot insects that you would have missed otherwise. Remember, this form of photography is about observing tiny, often overlooked, details.

Essential Gear for Macro Photography

For beginners in macro photography, a standard kit lens with a close-up filter or extension tubes can suffice. However, for serious macro photographers, an actual macro lens is necessary, one that can achieve life-size reproduction of one to one. Hoey uses the Olympus 60 millimeter macro, but all camera manufacturers offer their own versions.

Light is another critical component. Natural light can be used initially, but Hoey suggests using flash for better control and quality of images.

Adjusting for Natural Light

Natural light, particularly full sun, can be harsh and create unflattering shadows. To counter this, Hoey suggests shooting in the shade and adjusting camera settings accordingly. However, if your subject is in the sunlight, using a five in one reflector can create artificial shade, providing softer lighting and enabling more detailed shots.

Getting Close-Up Shots

Gradually moving closer to your insect subject, beginning from a reasonable distance, allows you to get more intimate shots without startling the insect. Using autofocus, either single point or continuous, helps maintain focus on the moving subject. To avoid disturbing the insect, it’s best to avoid using the viewfinder at close range. Burst shooting is also recommended, as it increases the chances of getting a perfectly focused shot.

garden macro

Flash Setup for Macro Insect Photography

Flash photography in macro insect photography offers advantages like sharper, crisper images, more details, and the control of light. Hoey uses a basic manual flash, Flashpoint Zoom lithium ion, connected to his camera via a PC sync cable. Using a magic arm, the flash is positioned a few inches in front of the lens for the optimal lighting effect.

Camera Settings for Macro Photos with Flash

When using flash, the camera should be set in manual mode. Hoey suggests using a flash sync speed (250th of a second for his Olympus OM1), an aperture of f8 for more depth of field, and the lowest possible ISO for best quality.

However, using a flash also has its disadvantages. It can cast shadows that might scare off insects, and it is less convenient due to its size and bulk.

Composition Techniques

Leveling with your insect subjects rather than shooting from above can give your photos more power. For an even more impactful shot, try to get eye contact with the insect. Although difficult, it gives remarkable results when achieved.

Depth of Field

For maximum sharpness, it is recommended to work at f8 to avoid the blurring caused by diffraction at narrower apertures. If more depth of field is needed, take multiple pictures and stitch them together in post-processing.

Photography is not just about capturing beautiful frames; it’s also about observing and discovering the unseen world around us. Gavin Hoey, though primarily a studio portrait photographer, finds macro photography a fascinating hobby. His journey into his garden is a perfect example of how macro photography allows us to explore and appreciate the intricate details

- - - - - - - - - - - - - - - - - - - - - - - - - - - - - - - - - - - - - - - - - - - - - - - - - - - - - - - - - - - - - - - - - - - - - - - - - -

Did you appreciate this newsletter? Please help us keep it going by Joining Our Patreon Supporters

What are your thoughts on this article? Join the discussion on our Facebook Page

PictureCorrect subscribers can also learn more today with our #1 bestseller: The Photography Tutorial eBook

- - - - - - - - - - - - - - - - - - - - - - - - - - - - - - - - - - - - - - - - - - - - - - - - - - - - - - - - - - - - - - - - - - - - - - - - - -

The post Garden Macro Photography Tutorial appeared first on PictureCorrect.


from PictureCorrect https://ift.tt/2dRNL5a
via IFTTT

maanantai 5. kesäkuuta 2023

PictureCorrect.com: What is Noise in Photography?

When we talk about “noise” in the world of photography, we’re not referring to audible sound. Instead, this term signifies something entirely different. Noise in photography denotes the visual distortion seen in an image, often manifesting as random specks or grain. But what exactly causes it, and how can we minimize it? Let’s delve deep into understanding the phenomenon of noise in photography.

noise in photography

Photo captured by Dollar Gill

1. Defining Noise in Photography

In simple terms, photographic noise can be likened to the ‘static’ or ‘snow’ you might remember seeing on old televisions when the signal was weak. It appears as tiny, irregular colored pixels or specks scattered throughout an image, giving it a coarse, grainy look. Noise can make your photos look less sharp and degrade the overall quality.

There are two types of noise that commonly occur in digital photography – luminance and chrominance noise. Luminance noise affects the brightness of pixels, producing a grainy effect akin to film grain, whereas chrominance noise results in random color pixels appearing in the image.

2. Causes of Noise

There are several reasons noise can occur in your digital images. The most common culprits are high ISO settings, long exposures, and inadequate lighting.

  • High ISO settings: ISO measures the sensitivity of your camera’s sensor to light. A higher ISO value amplifies the sensor’s response to light, helping to capture images in low-light conditions without using a flash or tripod. However, this amplification process also magnifies the inherent electronic noise in the sensor, resulting in a noisier image.
  • Long exposures: Long exposure photography involves keeping your camera’s shutter open for a prolonged period, which can result in noise. As the sensor of the camera continues to record light, it also heats up, and this increase in temperature can cause digital noise.
  • Inadequate lighting: Underexposing your photos, either intentionally or due to poor lighting conditions, can also contribute to noise. When you try to brighten such images in post-processing, the noise gets amplified along with the brightness.

3. Managing Noise in Your Photos

While you cannot completely avoid noise, there are techniques to manage it effectively.

  • Optimum ISO Settings: As a rule of thumb, it’s best to stick to the lowest possible ISO setting that allows you to adequately expose your image. Modern cameras perform very well at higher ISOs, but it’s still wise to stay as low as possible to reduce the risk of noise.
  • Correct Exposure: It’s always better to get your exposure right in-camera. Underexposing your photo and trying to fix it in post-processing is a sure way to introduce noise.
  • Use Noise Reduction Software: Many software tools can help reduce noise in post-processing. Such as Topaz Photo AI or Lightroom and Photoshop.

4. Embracing the Noise

While noise is generally seen as undesirable, it’s not always a bad thing. When used creatively, it can add a sense of atmosphere, mood, or a retro aesthetic to your images. It’s all about your vision as an artist and how you want to express it.

Noise in photography is often seen as an unwelcome guest, but with the right understanding, you can control and sometimes even embrace it. Photography, at its core, is about capturing light, and noise is part of this process. So the next time you see those grainy specks in your images, remember – it’s just your camera’s unique way of recording the world around you.

For Help with Noise Reduction:

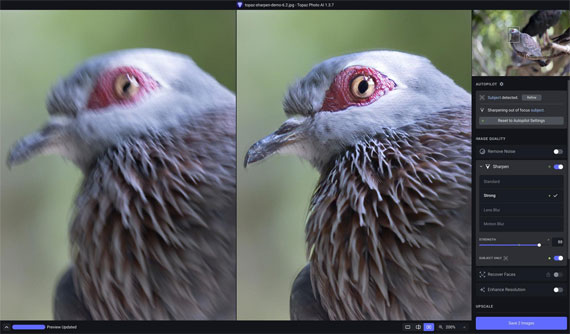
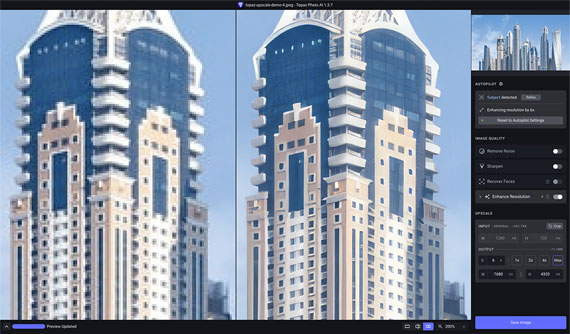
In photo editing news, Topaz Photo AI was recently updated; version 1.3.7 introduces substantially improved noise reduction for non-raw image formats like jpeg, tiff, and png, along with other overall improvements. The company has marked it down $40 off for a short time to celebrate the update if you want to try it out.

topaz photo ai

Topaz Photo AI (see how it works)

Sharpen, remove noise, and increase the resolution of your photos with tomorrow’s technology. Topaz Photo AI supercharges your image quality so you can focus on the creative part of photography.

Deal ending soon: Topaz Photo AI at $40 Off

- - - - - - - - - - - - - - - - - - - - - - - - - - - - - - - - - - - - - - - - - - - - - - - - - - - - - - - - - - - - - - - - - - - - - - - - - -

Did you appreciate this newsletter? Please help us keep it going by Joining Our Patreon Supporters

What are your thoughts on this article? Join the discussion on our Facebook Page

PictureCorrect subscribers can also learn more today with our #1 bestseller: The Photography Tutorial eBook

- - - - - - - - - - - - - - - - - - - - - - - - - - - - - - - - - - - - - - - - - - - - - - - - - - - - - - - - - - - - - - - - - - - - - - - - - -

The post What is Noise in Photography? appeared first on PictureCorrect.


from PictureCorrect https://ift.tt/iRALmu7
via IFTTT

PictureCorrect.com: Interesting Photo of the Day: Midnight Sunrise in Senja

Of all the breathtaking natural phenomena that we can witness, the midnight sun phenomena in Norway is definitely something special. For about 76 days a year, between May and July, northern parts of Norway get to enjoy sunshine 24 hours a day. The sun just gets close to the horizon and starts rising again. How cool is that? And as photographers, just think about the photography opportunities this presents.

Luckily, when photographer Marco Grassi was in Senja, he got to experience this interesting phenomenon when he managed to take the following image. The result is simply out of this world:

“Magical Midnight Sunrise in Senja, Norway” by Marco Grassi (Via Reddit. Click image to see full size.)

Considering that Grassi took the image at midnight, it simply blows the mind seeing the sun rays lighting the cliff. But that’s Norway for you. As the sun was still low, it’s beautiful to see how it’s lighting up selective parts of the landscape. This is why, while the side of the cliff facing the sun is bright and warm, the other end still appears dark and has a much cooler look. It’s beautiful to see how the light and color are on totally opposite ends of the spectrum.

“This place in northern Norway is a photography paradise all year round, but it’s during the summer that you can best enjoy its beautiful hikes and endless sunrises & sunsets.”

Also, the composition of the image is brilliant. The rocks in the foreground beautifully work as a leading line to guide us toward the cliff’s center. Furthermore, the cliff not only divides the image symmetrically but also features a different time of day on either side. The more you look at the image, the more beautiful it gets. Brilliant work by Grassi.

- - - - - - - - - - - - - - - - - - - - - - - - - - - - - - - - - - - - - - - - - - - - - - - - - - - - - - - - - - - - - - - - - - - - - - - - - -

Did you appreciate this newsletter? Please help us keep it going by Joining Our Patreon Supporters

What are your thoughts on this article? Join the discussion on our Facebook Page

PictureCorrect subscribers can also learn more today with our #1 bestseller: The Photography Tutorial eBook

- - - - - - - - - - - - - - - - - - - - - - - - - - - - - - - - - - - - - - - - - - - - - - - - - - - - - - - - - - - - - - - - - - - - - - - - - -

The post Interesting Photo of the Day: Midnight Sunrise in Senja appeared first on PictureCorrect.


from PictureCorrect https://ift.tt/UmnajkA
via IFTTT

PictureCorrect.com: Lens Considerations for Pro Wildlife Photography

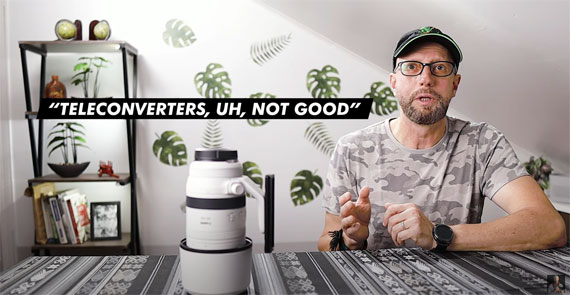
Photography enthusiasts often feel that their equipment is holding them back, particularly when it comes to bird and wildlife photography. There is a common belief that capturing professional-quality images requires top-of-the-line gear that could potentially cost as much as a new car. However, according to professional nature photographer Greg Basco, this simply isn’t the case. His recent video highlights the potential of telephoto zoom lenses as a more affordable and accessible alternative to pricey prime lenses, specifically for bird and wildlife photography:

Basco acknowledges the allure of large, expensive telephoto prime lenses. The fantastic image quality, snappy autofocus, and effective use of teleconverters are undeniably attractive. However, he also points out their drawbacks: their cost (ranging from $11,000 to $15,000) and their weight (between six and seven pounds), which can make them challenging to carry around and travel with.

In contrast, telephoto zoom lenses, available for under $3000, can also produce pro-quality bird and wildlife photography. Basco shares his experience using Canon’s 100-500mm RF zoom lens and Sigma’s 150-600mm contemporary zoom lens, which he managed to acquire for just $600. Despite being less expensive and lighter, these lenses still deliver in terms of autofocus, image stabilization, and sharpness.

Of course, cheaper telephoto zoom lenses come with their own limitations. They gather less light, which requires more ISO to maintain the same shutter speed as with prime lenses. However, Basco suggests that advancements in software like DxO PureRaw and Topaz DeNoise AI make this less of an issue.

Another drawback of telezooms is that they are limited in terms of focal length, meaning they may struggle to blur out the background of your photos. However, Basco sees this not as a limitation but as an opportunity for creativity. It pushes you out of the “mental jail” of consistently filling the frame, allowing for more diverse, story-telling shots.

The inability to consistently fill the frame with the subject can compel photographers to embrace the smaller size of the subject in the frame. This, according to Basco, can result in photos that tell a story and give a sense of place. For example, while a photo of a single Chilean Flamingo may be beautiful, an image of a group of flamingos at a distant Salt Lake in the Atacama Desert provides context and tells a more compelling story.

wildlife lens

A key advantage of using telephoto zoom lenses is that they force you to consider how the background can contribute to the composition of your photo. This, in turn, enables you to consider how you can use light, tones, and colors in different parts of a wider scene to enhance your exposure. These constraints can improve your overall photography skills.

So, whether you’re a budding wildlife photographer on a budget or a seasoned professional wanting to diversify your portfolio, telephoto zoom lenses could be the tool you’ve been waiting for. They offer an affordable and more accessible entry into professional-quality bird and wildlife photography while also challenging you to think more creatively about your composition and use of light.

Basco’s message is clear: great photography is about more than just your equipment. It’s about embracing what you have, thinking creatively about your shots, and making the most of the conditions. It’s a democratic view that makes bird and wildlife photography more accessible to all – and one that could indeed revolutionize your own approach to the field.

- - - - - - - - - - - - - - - - - - - - - - - - - - - - - - - - - - - - - - - - - - - - - - - - - - - - - - - - - - - - - - - - - - - - - - - - - -

Did you appreciate this newsletter? Please help us keep it going by Joining Our Patreon Supporters

What are your thoughts on this article? Join the discussion on our Facebook Page

PictureCorrect subscribers can also learn more today with our #1 bestseller: The Photography Tutorial eBook

- - - - - - - - - - - - - - - - - - - - - - - - - - - - - - - - - - - - - - - - - - - - - - - - - - - - - - - - - - - - - - - - - - - - - - - - - -

The post Lens Considerations for Pro Wildlife Photography appeared first on PictureCorrect.


from PictureCorrect https://ift.tt/ANpaKO6
via IFTTT

sunnuntai 4. kesäkuuta 2023

PictureCorrect.com: Photo AI: Improved Noise Reduction in Low Light Images

In photo editing news, Topaz Photo AI was recently updated; version 1.3.7 introduces substantially improved noise reduction for non-raw image formats like jpeg, tiff, and png, along with other overall improvements. The company has marked it down $40 off for a short time to celebrate the update if you want to try it out. Deal ending soon: Topaz Photo AI at $40 Off

photo ai image

Photo AI Update (see more photo examples)

The new models generally produce less artifacts, preserve more detail, and offer more controllable sliders than before. Based on their quality testing, Topaz Photo AI now performs 13% better on average with default Autopilot settings on noisy images.

There are now four options in the (non-raw) Remove Noise filter:

  • Normal v2: Preserves maximum detail on images with a low-to-moderate amount of standard ISO noise.
  • Strong v2: Removes moderate-to-high amounts of standard ISO noise while preserving detail, but does not deal well with already-processed images.
  • Normal: Older model version that will be replaced in a few releases.
  • Strong: Removes non-standard noise, like when a noisy image has been upscaled, pre-processed, or otherwise damaged. Blasts away noise but also removes more detail.

You’ll see an improved ability to retain natural detail in the v2 models for most images.

cityscape sharpness

Upscale and enhance image details

Other improvements

  • Fixed Face Recovery sometimes only applying to half a face, not showing in the preview, and working improperly when switching scales
  • Autopilot now sometimes selects the Lens Blur model and recommends higher Sharpen Strong values
  • Login prompt has updated messaging and no longer activates every launch in certain circumstances
  • Fixed downscaling and lowered limit from 0.5x → 0.2x
  • Improved raw handling by adding new lens correction profiles, fixing various color issues, and fixing several issues with XMP sidecar files
  • Keywords are no longer truncated when saving to formats that use IPTC metadata
  • Added ← / → hotkeys for switching between images and Esc to close Preferences panel
  • Fixed app freeze when manually checking for updates fails
  • CLI now respects Autopilot preferences and can preserve folder structure with –recursive flag

How to Get Topaz Photo AI for a Discount Today:

It is currently $40 off for their update sale which ends soon. Already own a Topaz product? You may be able to get a special price. Topaz Labs also has a 30 day, no-questions-asked refund policy. That means that if you aren’t happy with the results, you are eligible for a full refund on any of their products within 30 days after purchasing. No risk in trying it.

Deal ending soon: Topaz Photo AI at $40 Off

- - - - - - - - - - - - - - - - - - - - - - - - - - - - - - - - - - - - - - - - - - - - - - - - - - - - - - - - - - - - - - - - - - - - - - - - - -

Did you appreciate this newsletter? Please help us keep it going by Joining Our Patreon Supporters

What are your thoughts on this article? Join the discussion on our Facebook Page

PictureCorrect subscribers can also learn more today with our #1 bestseller: The Photography Tutorial eBook

- - - - - - - - - - - - - - - - - - - - - - - - - - - - - - - - - - - - - - - - - - - - - - - - - - - - - - - - - - - - - - - - - - - - - - - - - -

The post Photo AI: Improved Noise Reduction in Low Light Images appeared first on PictureCorrect.


from PictureCorrect https://ift.tt/y0Zzuaf
via IFTTT

PictureCorrect.com: Abandoned Building Photography Tutorial: 11 Tips

Abandoned buildings can be a great source of images that portray broken emotional connection and also the power of time. However, there is a certain level of preparation and precautionary measures to take into consideration. Photographer James Kerwin with COOPH presents 11 useful tips and tricks to photograph abandoned buildings in the following video:

Before starting out with photographing abandoned building, please be cautioned that urban exploration can be dangerous. Be sure to exercise caution and only enter at your own risk.

1. Go Prepared

Preparation is the key. Kerwin suggests the following points to prepare yourself for photographing abandoned buildings:

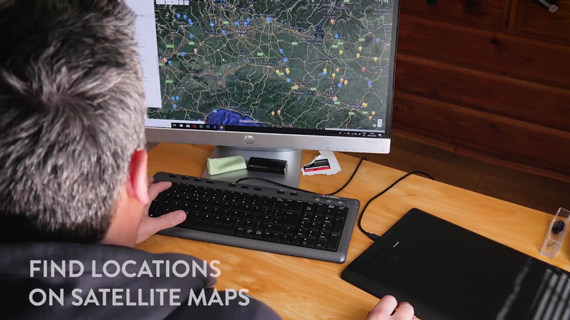
  • Make use of satellite maps to find locations. Google Maps is often the best source.
  • Bring a sturdy tripod with you in case you need to take low light shots.
  • Have a flash light or headlamp ready.
  • Bring a friend. Who knows what kind of danger might be lurking around.
  • Have a lens cloth handy. Abandoned buildings can be dirty, causing dust to settle on the front element of your lens.

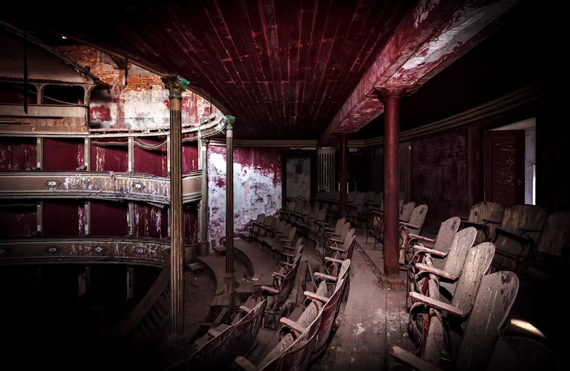
abandoned building photography

2. Capture Neglect

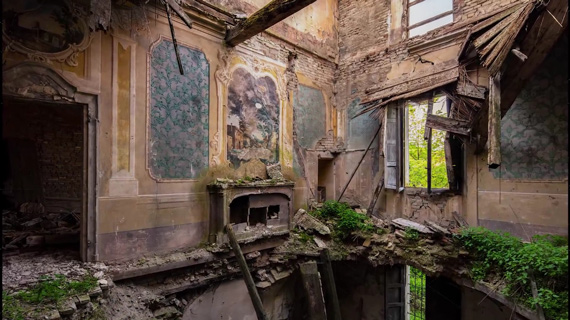
As mentioned earlier, photographing abandoned buildings is a perfect way to show broken connection—a connection that now seems like neglect. You can use this as an opportunity to document the impact that time has had on the building.

  • Shoot abandoned dining tables that previously represented family union.
  • Portray how cracks and fissures have developed around the house with the passage of time.
  • See if any ceilings have fallen and created a void.

neglected builings

3. Seek Natural Light

Natural light can be the best source to portray the mood in an abandoned building. Artificial light may not allow you to really capture the feeling that an abandoned building possesses. Find a soft, natural light source with some penetrating sunbeams. Such light adds ethereal vibes to your images.

abandoned building natural light

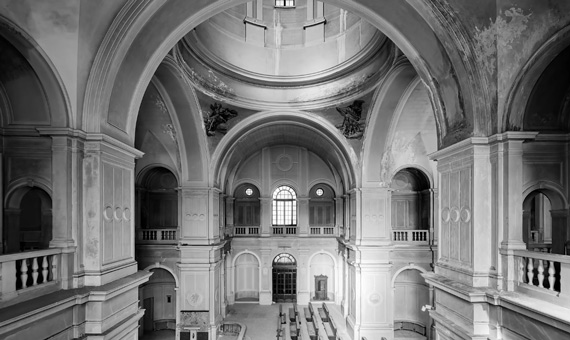
4. Look for Symmetry

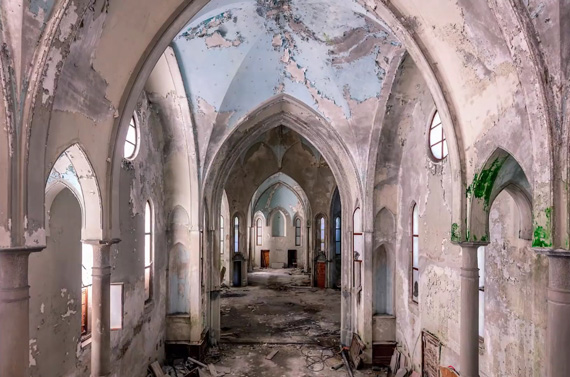
Human beings are “programmed” to love symmetry. A symmetrical distribution of elements in your frame can draw the viewer’s attention to your image. Try shooting down the center point for a near mirror mage.

symmetry in photography

5. Capture Nature

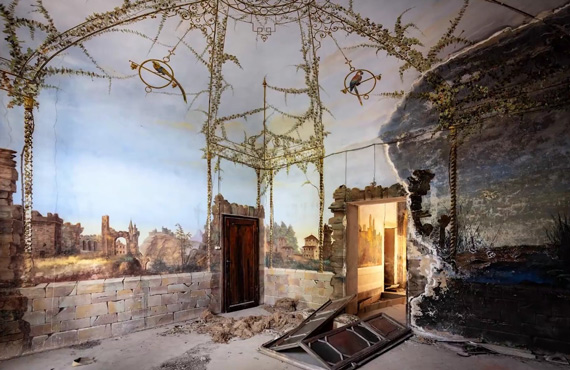
Nature often starts taking over abandoned buildings. Use this as an opportunity and choose to shoot in heavily overgrown locations. This way, you can illustrate that mother nature is the one who is in charge. This also allows you to convey the message that the abandoned building has been long forgotten.

nature in abandoned structures

6. Find Shadows

Shadows are other important elements that add drama to your images. Try to incorporate shadows as much as possibles. However, if the lighting conditions are challenging, you can make use of external flashes to brighten up certain images. If done properly, it allows you to create strong contrast and capture dramatic and gloomy aesthetics.

shadows add drama to abandoned building photos

7. Include Staircases

Stairs form compelling leading lines. Keep and eye out for staircases and shoot square on. To further add interest, you can also use staircases to add geometric elements to your image.

staircase photography

8. Add Shapes and Patterns

Look around the struture and try to find some appealing shapes and patterns. We tend to perceive regular patterns as calming effect and are naturally attracted to them. On the other hand, asymmetrical patterns create busy and chaotic visuals and can still draw attention. Try to play around and find out what your viewers prefer.

shapes and patterns abandoned buildings

9. Shoot in Black and White

Shooting in black and white can be a great method to flatten contrast and give the image an aged look.

using black and white

10. Look for Vibrancy

The building might have fallen apart, but there can still be areas inside that are vibrant and colorful. Spend some time to look around and find some vibrant scenes and capture the beauty of abandonment. Make the colors in your images pop during your edit.

abandoned building photography vibrance

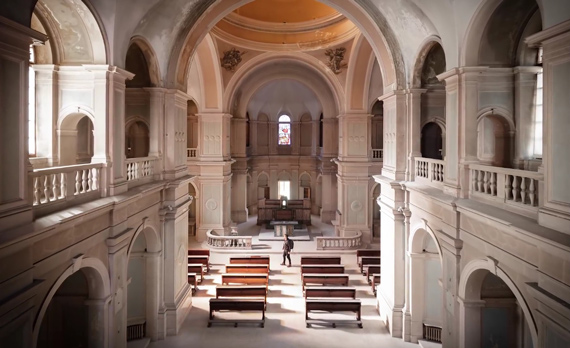
11. Use a Tilt Shift Lens

If the ceilings are high, you might have a difficult time getting an image with straight walls and pillars. They help you in getting images without perspective distortion. Using tilt shift lenses, you can also experiment with panoramas and ultra wide shots. To give a sense of how high the ceiling really is, you can even add a person to the scene.

tilt shift lenses abandoned structures

Photographing abandoned buildings can be a great exercise to push your creative limits. I hope that you can make use of some of the tips and tricks discussed in the article on your next outing.

- - - - - - - - - - - - - - - - - - - - - - - - - - - - - - - - - - - - - - - - - - - - - - - - - - - - - - - - - - - - - - - - - - - - - - - - - -

Did you appreciate this newsletter? Please help us keep it going by Joining Our Patreon Supporters

What are your thoughts on this article? Join the discussion on our Facebook Page

PictureCorrect subscribers can also learn more today with our #1 bestseller: The Photography Tutorial eBook

- - - - - - - - - - - - - - - - - - - - - - - - - - - - - - - - - - - - - - - - - - - - - - - - - - - - - - - - - - - - - - - - - - - - - - - - - -

The post Abandoned Building Photography Tutorial: 11 Tips appeared first on PictureCorrect.


from PictureCorrect https://ift.tt/ba5nYuv
via IFTTT