perjantai 3. helmikuuta 2023

PictureCorrect.com: Interesting Photo of the Day: Moonlit Waterfall

Technology in photography has come a long way. The developments have allowed photographers to capture images that were once nearly impossible to take. Whether it be the focusing system, the speed, or even sensitivity, cameras have matured very well. It’s now up to photographers to decide how to use such capable systems to capture their visions. Photographer Matt MacPherson captured the following image of Palouse Falls lit only by the moon:
“Palouse Falls by Moonlight” by Matt MacPherson (Via Reddit. Click image to see full size.)

MacPherson shot this incredible image with his Nikon D810 and 16mm lens. The center of attraction definitely has to be the silky smooth water of the falls. The low light conditions allowed him to take the image using a long exposure. To capture the shape of the water body, and the surrounding landscape, he took the photograph from a higher vantage point. Doing so also allowed him to get the moon in the shot, which is the only source lighting the scene.

- - - - - - - - - - - - - - - - - - - - - - - - - - - - - - - - - - - - - - - - - - - - - - - - - - - - - - - - - - - - - - - - - - - - - - - - - -

Did you appreciate this newsletter? Please help us keep it going by Joining Our Patreon Supporters

What are your thoughts on this article? Join the discussion on our Facebook Page

PictureCorrect subscribers can also learn more today with our #1 bestseller: The Photography Tutorial eBook

- - - - - - - - - - - - - - - - - - - - - - - - - - - - - - - - - - - - - - - - - - - - - - - - - - - - - - - - - - - - - - - - - - - - - - - - - -

The post Interesting Photo of the Day: Moonlit Waterfall appeared first in the Photography Tips category on PictureCorrect.


from PictureCorrect https://ift.tt/YA6GUQD
via IFTTT

PictureCorrect.com: How to Keep Your Camera Stable for Sharp Photos at Slow Shutter Speeds

Amateurs and pros alike face the fact that slower shutter speeds and camera shake lead to blurred images. This tutorial by David Bergman demonstrates some of the main reasons for camera shake and how to overcome them:

Camera Shake Rule of Thumb

The old school rule of thumb about camera shake is that as long as the denominator of the shutter speed is bigger than the focal length, you can avoid image blur. That means that if you’re shooting at 50mm, you should select at least a shutter speed of 1/50 of a second or faster to get a blur-free image. In the real world, the wider the focal length, the less the camera shake.

rule of thumb for shooting handheld at slow shutter speed

Modern lenses come with built-in image stabilization and selectable ISO. These are great in terms of speeding up the shutter speed and getting blur-free images.

Use higher ISO to negate camera shake

Body Positions to Prevent Camera Shake

There are a host of techniques that you can adapt in order to minimize camera shake.

First, keep one hand underneath the lens barrel (as demonstrated below) in order to stabilize it.

proper camera holding position

Keep one hand under the lens.

Tuck your elbows in to your body to reduce movement.

how to shoot without camera shake

Spread your feet slightly so you’re properly balanced.

spread your legs to balance yourself

If possible, lean against a wall or a tree for additional support.

trips to shoot with camera shake

Take slow, deep breaths and press the shutter release at the end of your exhale.

Look through the viewfinder instead of at the LCD screen to compose shots. Holding your camera up against your faces gives you an extra bit of support.

use the viewfinder rather than the lcd screen

If you have to use the back LCD screen, use the camera neck strap and hold it as far and as hard as you can. It should give you some leverage to get sharp clean video footage.

shoot without camera blur using slow shutter speed

Make use of your neck strap.

Finally, if you’re still plagued by the problem of camera shake, set your camera to burst mode and fire away as many shots as you can. Chances are you will get at least a few frames that are perfectly sharp.

Do you have any tips to add?

- - - - - - - - - - - - - - - - - - - - - - - - - - - - - - - - - - - - - - - - - - - - - - - - - - - - - - - - - - - - - - - - - - - - - - - - - -

Did you appreciate this newsletter? Please help us keep it going by Joining Our Patreon Supporters

What are your thoughts on this article? Join the discussion on our Facebook Page

PictureCorrect subscribers can also learn more today with our #1 bestseller: The Photography Tutorial eBook

- - - - - - - - - - - - - - - - - - - - - - - - - - - - - - - - - - - - - - - - - - - - - - - - - - - - - - - - - - - - - - - - - - - - - - - - - -

The post How to Keep Your Camera Stable for Sharp Photos at Slow Shutter Speeds appeared first in the Photography Tips category on PictureCorrect.


from PictureCorrect https://ift.tt/ADfOCK2
via IFTTT

torstai 2. helmikuuta 2023

PictureCorrect.com: Complete Macro Photography Tutorial

Macro photography is a unique type of photography that involves capturing extremely close-up images of small objects. In this video tutorial, Adam Karnacz of First Man Photography takes us through the complete guide to macro photography:

Gear:

The first thing you’ll need for macro photography is a camera. A macro lens is the best option, but you can also use a regular lens with macro tubes that allow your lens to focus closer. In addition to a camera and lens, a flash is also useful for macro photography.

Capturing the Shots:

In the video, Adam takes us through the process of setting up and taking macro photos. He uses a flash in manual mode and sets it up off-camera to avoid harsh contrast in his images. He also uses a tripod and a trigger to help keep the camera steady during the shoot.

coffee macro

Macro coffee photo captured by Anastasiia Chepinska

Post-processing:

After the shoot, Adam demonstrates how to do some basic post-processing on his images in Lightroom. He shows us how to adjust the exposure, contrast, and color in his images to make them pop.

Printing:

Finally, Adam demonstrates how to print his macro photos in the best way possible. He explains the importance of using high-quality paper and a good printer for printing images that will last.

Macro photography is a fun and creative type of photography that can lead to some beautiful and unique images. Whether you have a macro lens or use macro tubes with a regular lens, the process of taking macro photos involves some gear, careful shooting, and some post-processing. With the right tools and a little bit of patience, anyone can start creating beautiful macro images.

- - - - - - - - - - - - - - - - - - - - - - - - - - - - - - - - - - - - - - - - - - - - - - - - - - - - - - - - - - - - - - - - - - - - - - - - - -

Did you appreciate this newsletter? Please help us keep it going by Joining Our Patreon Supporters

What are your thoughts on this article? Join the discussion on our Facebook Page

PictureCorrect subscribers can also learn more today with our #1 bestseller: The Photography Tutorial eBook

- - - - - - - - - - - - - - - - - - - - - - - - - - - - - - - - - - - - - - - - - - - - - - - - - - - - - - - - - - - - - - - - - - - - - - - - - -

The post Complete Macro Photography Tutorial appeared first in the Photography Tips category on PictureCorrect.


from PictureCorrect https://ift.tt/eICThrg
via IFTTT

PictureCorrect.com: Interesting Photo of the Day: Urban Light and Shadow

Light and shadows: these are two of the most important elements of a photograph that beginner photographers can easily ignore. Being focused on the subject and story is important, of course, but by paying more attention to the interplay between light and shadows, you will be surprised to see how much they can elevate your images. They can sculpt your photos, as they do in the following image taken by photographer Christian D’Antonio. Notice how simple yet spectacular the image appears:

light and shadows

“Capturing Light and Shadows” by Christian D’Antonio (Via Imgur. Click image to see full size.)

D’Antonio took this image on the streets of Toronto, Canada, with a Sony A7III and a Sigma 24-70 lens at 1/1000s, f/7.1 and ISO 300. He shot it at around three or four in the afternoon.

“I had been visiting this building now and then, waiting for the sun to strike it perfectly—in a way I could get light on one side and none on the other. I had to wait an hour to get this shot.”

The first thing we can observe in the image is the fantastic composition of light and shadows. The stark contrast between light and dark is what makes this image really beautiful. Thanks to his patience, Christian was able to capture the image exactly as the cyclist in red passed through the intersection, creating a pop of balanced color with the red walls of the downtown building.

How often do you pay attention to light and shadows when taking photographs? If you don’t, we hope this image inspires you to start.

- - - - - - - - - - - - - - - - - - - - - - - - - - - - - - - - - - - - - - - - - - - - - - - - - - - - - - - - - - - - - - - - - - - - - - - - - -

Did you appreciate this newsletter? Please help us keep it going by Joining Our Patreon Supporters

What are your thoughts on this article? Join the discussion on our Facebook Page

PictureCorrect subscribers can also learn more today with our #1 bestseller: The Photography Tutorial eBook

- - - - - - - - - - - - - - - - - - - - - - - - - - - - - - - - - - - - - - - - - - - - - - - - - - - - - - - - - - - - - - - - - - - - - - - - - -

The post Interesting Photo of the Day: Urban Light and Shadow appeared first in the Photography Tips category on PictureCorrect.


from PictureCorrect https://ift.tt/NBkx2jy
via IFTTT

keskiviikko 1. helmikuuta 2023

PictureCorrect.com: Interesting Photo of the Day: Lofoten Islands Norway Sunset

The Nordic countries are a sort of enigma for many travel photographers. Their barren and lunar-like topography in some places and wild seasons have always attracted shutterbugs. While Iceland has been getting a lot attention these days because of its breathtaking natural beauty, Norway isn’t too far behind. This image by Christian Ringer is simply divine:

ethereal Norway

Reine Village, Lofoten Islands, Norway (Via Imgur. Click image to see full size.)

Ringer shot this image near Reine Village in the Lofoten Islands. If there were ever a competition for one image that could sum up the ethereal beauty of Norway, this one would be a top contender.

- - - - - - - - - - - - - - - - - - - - - - - - - - - - - - - - - - - - - - - - - - - - - - - - - - - - - - - - - - - - - - - - - - - - - - - - - -

Did you appreciate this newsletter? Please help us keep it going by Joining Our Patreon Supporters

What are your thoughts on this article? Join the discussion on our Facebook Page

PictureCorrect subscribers can also learn more today with our #1 bestseller: The Photography Tutorial eBook

- - - - - - - - - - - - - - - - - - - - - - - - - - - - - - - - - - - - - - - - - - - - - - - - - - - - - - - - - - - - - - - - - - - - - - - - - -

The post Interesting Photo of the Day: Lofoten Islands Norway Sunset appeared first in the Photography Tips category on PictureCorrect.


from PictureCorrect https://ift.tt/NEtUZhm
via IFTTT

PictureCorrect.com: Portrait Photography: 5 Beginner Mistakes to Avoid

Starting something new is always the hardest part. Chances are you’ll feel lost most of the time. The worst part is when you keep repeating the same mistakes and you have no one to correct you. In photography, this can severely impact your attitude and budding career before it even takes off. If you’re someone trying out portrait photography for the first time, and struggling with finding good advice, you’ll love what we’ve got for you today. In this video, portrait photographer Chris Chu shares some tips on avoiding common portrait photography mistakes. Whether you’re a film photographer or a digital shooter, you’ll definitely find his tips useful.

One common mistake that a lot of beginner portrait photographers make is to include a lot of elements in the frame. This is counterproductive, as the surrounding elements compete with the main subject, thereby diluting the essence of the image. As Chu suggests, a better approach is to cover a greater portion of the frame with the main subject. This draws attention to the subject. Another good idea is to use a shallow depth of field to blur the distracting elements and make the subject stand out. But, again, as Chu later points out, it is not always a good idea to have your lens wide open every time just to obliterate the background.

Context is definitely important—and you can provide context by using a reasonably greater depth of field. While doing so, make sure that the background or foreground elements don’t interfere with the subject. Instead, look at how those elements can frame the subject better, or even act as pointers or leading lines to guide the viewers toward the subject.

Besides these beginner problems and solutions, Chu also shares some useful tips regarding ways to avoid blurry and out-of-focus images. He also shares some useful tips on and nailing your skin tones and keeping focus sharp. These tips will definitely help you improve your portrait photography, so we highly recommend you watch the complete video.

Which is your favorite portrait photography tip for beginners?

- - - - - - - - - - - - - - - - - - - - - - - - - - - - - - - - - - - - - - - - - - - - - - - - - - - - - - - - - - - - - - - - - - - - - - - - - -

Did you appreciate this newsletter? Please help us keep it going by Joining Our Patreon Supporters

What are your thoughts on this article? Join the discussion on our Facebook Page

PictureCorrect subscribers can also learn more today with our #1 bestseller: The Photography Tutorial eBook

- - - - - - - - - - - - - - - - - - - - - - - - - - - - - - - - - - - - - - - - - - - - - - - - - - - - - - - - - - - - - - - - - - - - - - - - - -

The post Portrait Photography: 5 Beginner Mistakes to Avoid appeared first in the Photography Tips category on PictureCorrect.


from PictureCorrect https://ift.tt/pZ8dR7B
via IFTTT

PictureCorrect.com: New: Black & White Photo Editing In-depth Course

Creating great-looking B&W images is about more than just removing color via “desaturate”, or moving a few sliders up and down with a black and white adjustment layer. Landscape photographer Steve Arnold created this course to help photographers master the critical concepts. We were able to arrange an exclusive 40% discount for our readers today if you want to check it out. Deal ending soon: The Creative Black & White Editing Course

black and white photo editing

Some of the many lessons covered in this course:

  • Learn the instructor’s three favorite methods of converting your images to black and white for the ideal starting point for the rest of your editing (some work better than others depending on the type of photo)
  • Discover the shockingly simple tools and techniques in Photoshop (that you’re probably already using for other purposes) that are the keystone of this style of fine-art black and white architectural images
  • Learn the counter-intuitive way to use a black and white version of an image to enhance the light in your color images
  • Discover the most effective techniques for creating the best selections for your architectural B&W’s (hint – this style is all about selective adjustments)
  • How to darken a sky fully (without losing detail) to create the perfect backdrop for your eye-popping architectural abstracts
  • These techniques will have you pushing the pixels pretty hard, which can lead to some issues along the edges (halos etc). Learn how to prevent those when possible and where not, how to repair and resolve them if they do appear (also useful for non-bw photos)
  • Discover how to create the “glossy” black and white look for your cityscape / architectural images
  • Learn how to give matte surfaces a unique glossy appearance that leaves people wondering how the heck you did it
  • How to manipulate light and contrast in new and exciting ways to add something a little more “creative” to your portfolio

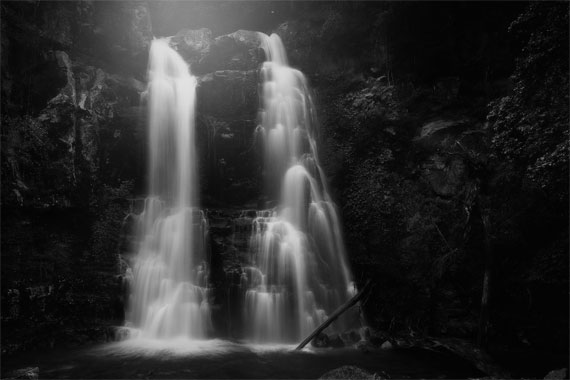
black white waterfall

If you’ve ever wondered why your black and white photos look flat and uninspiring, then this course gives you the answers – and the solution!

It also includes a 60 day happiness guarantee so there is no risk in trying it.

Deal ending soon: The Creative Black & White Editing Course at 40% Off

- - - - - - - - - - - - - - - - - - - - - - - - - - - - - - - - - - - - - - - - - - - - - - - - - - - - - - - - - - - - - - - - - - - - - - - - - -

Did you appreciate this newsletter? Please help us keep it going by Joining Our Patreon Supporters

What are your thoughts on this article? Join the discussion on our Facebook Page

PictureCorrect subscribers can also learn more today with our #1 bestseller: The Photography Tutorial eBook

- - - - - - - - - - - - - - - - - - - - - - - - - - - - - - - - - - - - - - - - - - - - - - - - - - - - - - - - - - - - - - - - - - - - - - - - - -

The post New: Black & White Photo Editing In-depth Course appeared first in the Photography Tips category on PictureCorrect.


from PictureCorrect https://ift.tt/aOL5JVK
via IFTTT