maanantai 2. marraskuuta 2020

PictureCorrect.com: Good Cameras Can Take Bad Photos

“I would love to be a better photographer… if only I had a better camera.” This is a comment I hear every day in my gallery. What many people don’t understand is that the type of camera you use is not the key to improving your photography.
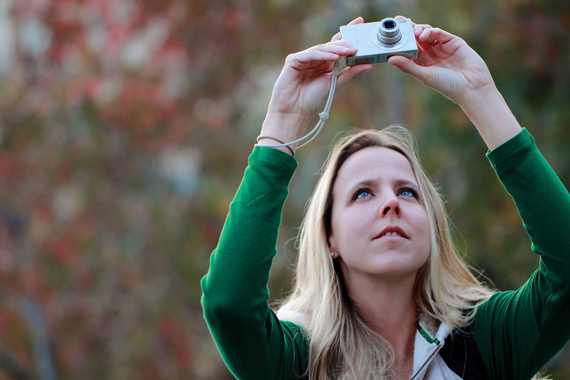
digital camera photographer

“PhotoWalk” captured by Vincent Miao

Pride makes it hard to admit that we are just not very good at something. Photography is no exception. Of course, it is much easier to blame the camera. The trouble is, if we want to take better photos, will buying a better camera make that happen?

Of course not.

The truth is, you can take better photos no matter what sort of camera you have. Digital cameras have become so advanced that almost all cameras now have aperture and shutter speed settings, not to mention amazingly powerful optical zoom lenses. These are features that, until very recently, were only available on DSLR cameras. So if you want to take better photos, the features are right there in front of you. All you have to do is take the time to learn how to use them.

To take better photos, start with the manual that came with your camera. It will tell you how to operate the major settings, although it may not be so good at explaining what they are for. Then find the information you need to understand how those settings will help you take better photos. There are courses, workshops, books and e-books that will tell you what you need to know.

If you do pay good money for a course or e-book, make sure it is about taking better photos. These days, a lot of the information out there is about fixing your photos on a computer and not about taking better photos.
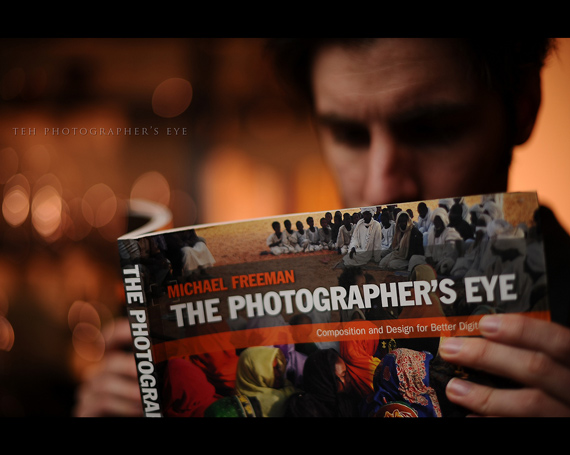
photography book

“Day Sixty Eight” captured by Dustin Diaz

A lot of what you can learn has nothing to do with the camera. That’s right. You can improve your photography without changing one thing about your camera. My experience in nature photography has taught me that the way you use the light to capture your subject makes a huge difference. The weather and the time of day can affect the light, so your timing and patience can be the difference between a snapshot and a great photo.
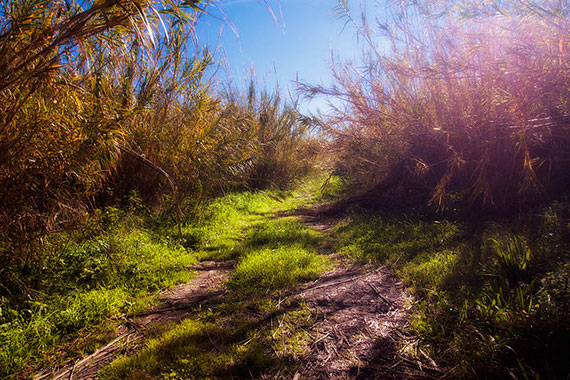
reasons good cameras take bad photos

Photo by Theophilos Papadopoulos; ISO 100, f/9.0, 1/125-second exposure.

Developing an eye for composition is an essential skill that actually has nothing to do with the price tag on your camera. You can go a long way toward better photography by learning to think like an artist, not like a tourist. A good guide to photography should teach you this important element of photography.

Here are a few simple examples.

If you are photographing a waterfall, try looking at the scene creatively. Perhaps you can stand back and take a photo that follows the flow of water upstream, with the waterfall in the background. You might find a more interesting angle looking through the branches of a tree. There is always an alternative to just snapping the most obvious shot.
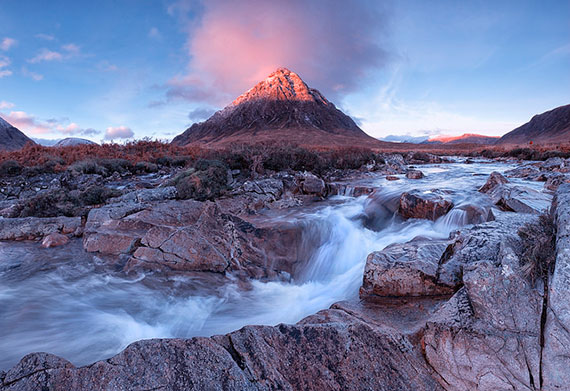
good camera but bad photos why

Photo by john mcsporran; ISO 100, f/13.0, .3-second exposure.

When photographing people and animals, think about the best way to position them to make a stronger composition. Instead of putting them in the middle of the photo looking straight at the camera, try positioning them to one side, looking in toward the center of the picture.
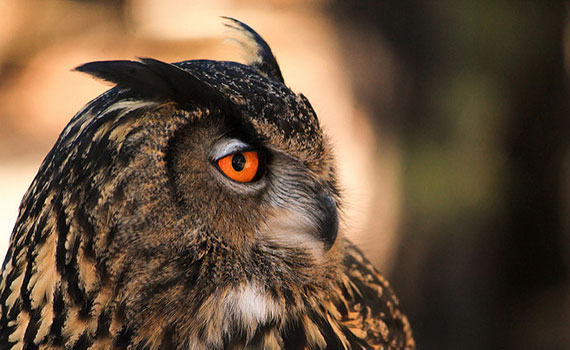
https://www.flickr.com/photos/joaoferraosantos/8686559018/

Photo by Joao Santos; ISO 800, f/5.6, 1/400-second exposure.

These are just a couple of simple ideas to get you thinking. The point is this: you can take great strides to becoming a better photographer by concentrating on the artistic aspects of the craft, rather than just the technical.

Of course, many things you can do with a compact camera, you can do even better if you have a DSLR camera. But buying a better camera is not going to help you take better photos if you just switch it to automatic and keep taking snapshots. So here’s my tip: don’t overspend. Just buy the camera you can afford, then really learn how to use it. It’s as simple as that. No matter which camera you have, you can take better photos with a bit of knowledge and a bit of practice. If you decide to upgrade later, so be it, but learning the basics of good photography will get you a lot further than succumbing to the “if only I had a better camera” mindset.

Now, if only I had better golf clubs…

About the Author:
Andrew Goodall writes for http://www.naturesimage.com.au and is a nature photographer based in Australia. He manages a gallery in Montville full of landscape photography from throughout Australia.


Go to full article: Good Cameras Can Take Bad Photos

What are your thoughts on this article? Join the discussion on Facebook

PictureCorrect subscribers can also learn more today with our #1 bestseller: The Photography Tutorial eBook

The post Good Cameras Can Take Bad Photos appeared first on PictureCorrect.


from PictureCorrect https://ift.tt/2yWvOOC
via IFTTT

PictureCorrect.com: Interesting Photo of the Day: Misty Magical Morning

Landscape photographers will often tell you that the best time to go out to take photos is during the early mornings. During this hour, it’s like Mother Nature also wakes up from a good night’s sleep. We get to see beautiful misty and foggy conditions in cooler places, and the show is truly worth watching. Have a look at the following image that photographer Nicu Moldovan took in Pasul Tihuța, a mountain pass in Romania’s Bârgău Mountains. The image will definitely urge you to leave your bed early and head out to take some photos:

misty hills

“Misty Magical Morning” by Nicu Moldovan (Via Reddit. Click image to see full size.)

Moldovan took the image with his Sony A7III and Sigma 100-400mm DG OS lens at 300mm, f/11 and 1/100.

The misty condition in the image is definitely the hero in the image. With a great portion of the hills covered by the mist, it gives the image a surreal look. Some might even find it spooky while others can imagine as if the hills are floating on the clouds.

“My intent was to show the cold and nostalgic atmosphere that was present there.”

Another interesting aspect of the image is how beautifully he’s used a telephoto lens to photograph this scene. The 300mm focal length has created a beautiful compression and made it appear as if the hills are stacked upon each other. Even then, the eyes flow effortlessly from the bottom to the top.

And since he took the image even before the sun was up, you cannot make out the actual colors of the landscape. The shades of blue work better, lending the scene a dreamlike atmosphere.


Go to full article: Interesting Photo of the Day: Misty Magical Morning

What are your thoughts on this article? Join the discussion on Facebook

PictureCorrect subscribers can also learn more today with our #1 bestseller: The Photography Tutorial eBook

The post Interesting Photo of the Day: Misty Magical Morning appeared first on PictureCorrect.


from PictureCorrect https://ift.tt/329ohKT
via IFTTT

PictureCorrect.com: Analyzing the Documentary Photo Style of Tish Murtha

British documentary photographer Tish Murtha was best know for covering marginalized communities, social realism and lives of the struggling working-class people. Most of her images were captured in Newcastle and around the northeast of England around the 1970s and ’80s, during economic trouble. Murtha also had a certain affinity for children and youth, so viewers will find them as common subjecrs in her work. In today’s video, photographer Sean Tucker discusses Murtha’s style and the qualities that set her apart:

Murtha herself was brought up in a working-class family. She had to work multiple jobs to pay the bills while learning about documentary photography on the side. Because of her upbringing, she was quickly able to connect with her subjects. But similar backgrounds aren’t the only connection she shared had with them—she also spent plenty of time with her subjects, so she could better understand and access private moments in their lives.

Murtha also commonly handed over prints to her subjects. This helped her build trust with them. All of these qualities allowed Murtha to photograph authentic and honest moments, which are qualities that define her style.

And while there is no shortage of documentary photographers capturing sorrow, pain and sadness, Murtha took a different approach. As Tucker explains:

“Her images did not look down on these children. They celebrated their reselience and their resourcefullness as they just got on with daily life as best they could.”

If documentary photography is something that interests you, you’ll love Tucker’s analysis of Murtha’s work. Be sure to watch the entire video.


Go to full article: Analyzing the Documentary Photo Style of Tish Murtha

What are your thoughts on this article? Join the discussion on Facebook

PictureCorrect subscribers can also learn more today with our #1 bestseller: The Photography Tutorial eBook

The post Analyzing the Documentary Photo Style of Tish Murtha appeared first on PictureCorrect.


from PictureCorrect https://ift.tt/34P6QB2
via IFTTT

sunnuntai 1. marraskuuta 2020

PictureCorrect.com: 10 Tips for Taking Great Cityscape Photos

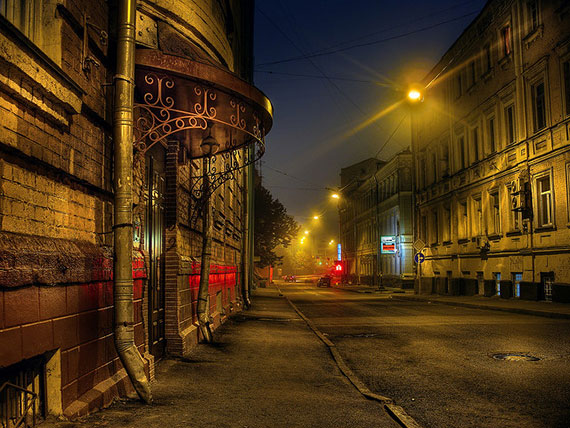
Cities are not only home to many people’s residences, businesses and offices – they are also full of energy, power and vitality. There are many things that make a city great and capturing the true essence of a city in one single photograph is a very hard thing to do.

how to take amazing cityscape photographs

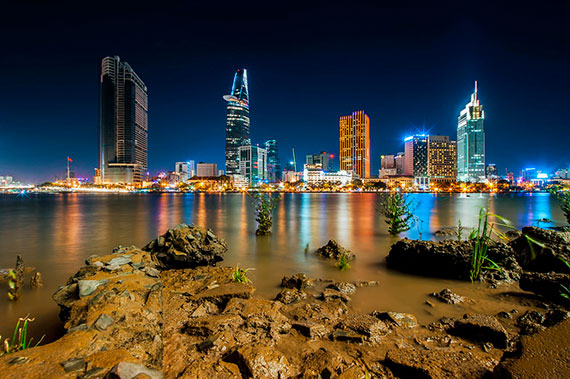
Photo by Vinh Pham

The main thing that encapsulates and defines a city can actually differ depending on the time of the day and even the season. During the morning cities can look peaceful and calm, whilst during the evening or nighttime they can come alive with activity and purpose.

Most of the people that call a particular city home don’t take the time to stop and marvel at the magnificent landmarks and sights that make their own home city such a wonderful place to be a part of. A really good city photograph not only shows off the majestic buildings in the heart of the city centre, but should also showcase some of the more enthralling aspects and delights that day to day city life has to offer.

1. Choose an Interesting Subject – Make sure you have an interesting subject for the photo, either in the middle section of the photo or in the foreground.

2. Have a Mix of Foreground & Background – Ensure that you have a good mix of interesting foreground and background areas in the entire photo.

techniques for capturing cityscape photography

Photo by Luc Mercelis; ISO 100, f/4.5, 1/1500-second exposure.

3. Leave Room to Crop – When you are framing up the photo in the viewfinder make sure that there is some room around the edge of the photo to crop the final image.

4. Use a Level Tripod – Before taking the photo make sure that you use a level tripod so that the horizon is straight. Even though you can fix this later in photoshop it is easier to do it right in the first place to save yourself the hassle.

5. Keep the Sun Behind You – Try and keep the sun behind you so that you get the most amount of light on your the city and the sky has a brilliant blue look to it.

6. Choose the Right Time of Day – Try to take photos as early or as late as possible in the day, as these times generally give the best light and produce more shadows and detail on your photos.

7. Use the Correct Exposure – When setting the exposure for a photo make your reading is taken on the brightest part of the photo so that there is no overexposure.

cityscape photography methods

Photo by Kat Northern Lights Man; ISO 1000, f/3.2.

8. Use a Timer or Remote – Always use a timer or remote control to take the photo so that there is not any camera shake caused by you when you depress the shutter button.

9. Use a Polarizing Filter – On your SLR camera use a polarizing filter to remove the light reflections that bounce off of windows and metal objects.

10. Use a High Quality Wide-Angle Lens – In order to get crisp results from your SLR camera invest in or rent a good quality lens. They may be expensive but it will be well worth the money in the cityscape arena.

By using all of the above tips you are sure to see a noticeable improvement in any photo that you take of city buildings or skylines. Not only will your cityscapes be clearer and well defined, but they will also have a wide spectrum of color and light, which is the sign of a great photo.

take better cityscape pictures with these tips

Photo by Alexey Kljatov; ISO 93, f/2.8, 1-second exposure.

About the Author:
This article was written by Rueben Hird, his site on landscape photography also has a range of city photography displayed from interesting metropolitan areas around the world.


Go to full article: 10 Tips for Taking Great Cityscape Photos

What are your thoughts on this article? Join the discussion on Facebook

PictureCorrect subscribers can also learn more today with our #1 bestseller: The Photography Tutorial eBook

The post 10 Tips for Taking Great Cityscape Photos appeared first on PictureCorrect.


from PictureCorrect https://ift.tt/2haoR2O
via IFTTT

PictureCorrect.com: Interesting Photo of the Day: Rainy Day at the Texas State Fair

Focusing is critical when taking any image. Where you choose to focus can determine how viewers interpret the image. Take the following image by photographer Timothy Alsbrooks, for instance. Instead of focusing on the fair ride, he chose to focus on its reflection:

“Texas State Fair” by Timothy Alsbrooks (Via Reddit. Click image to see full size.)

“I sat on my rain cover in a puddle for like ten mins trying to pick my favorite composition. Honestly wish it had more of a reflection and not just the bokeh/cobblestone.”

Alsbrooks used his Nikon D500 with Tokina 11–16 f/2.8 lens to get this shot. Had he focused on the ride, the image would have turned out to be a common one. But by focusing on the reflection on the ground, it looks as if the ground is burning. It can also be interpreted as burning charcoal on the ground or lava seeping out. Feel free to interpret the image in your own way.


Go to full article: Interesting Photo of the Day: Rainy Day at the Texas State Fair

What are your thoughts on this article? Join the discussion on Facebook

PictureCorrect subscribers can also learn more today with our #1 bestseller: The Photography Tutorial eBook

The post Interesting Photo of the Day: Rainy Day at the Texas State Fair appeared first on PictureCorrect.


from PictureCorrect https://ift.tt/2DllymL
via IFTTT

PictureCorrect.com: Macro Photography on a Budget Tutorial

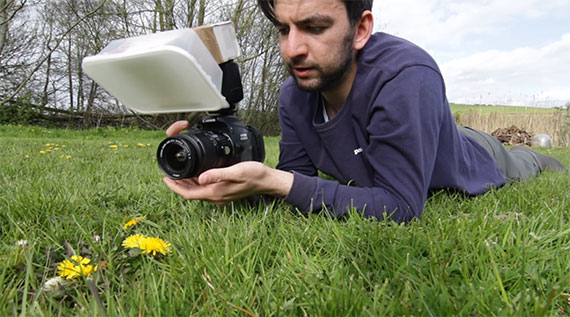
The entry into the world of macro photography often starts with the macro mode on a point & shoot camera. But for DSLR shooters the it’s a bit more complicated. You’ll need either a dedicated macro lens, which is expensive, special adapters for reverse mounting a lens, or extension tubes. Adam Kappa explains how to use extension tubes for shooting macro photography on a budget:

Camera

Any DSLR will do. No need to go overboard or splurge on expensive gear.

Lens

A kit lens is enough for the purpose of shooting macro photos using the technique discussed in the video.

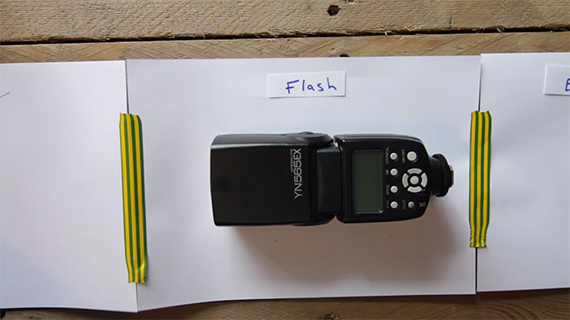
External Flash

flash for macro photography

You need something to throw light onto your subject. Ambient light is not enough, as the working distance is really small. You can get the cheapest external flash that you can find, as long as you can manually set the amount of light that the flash can fire.

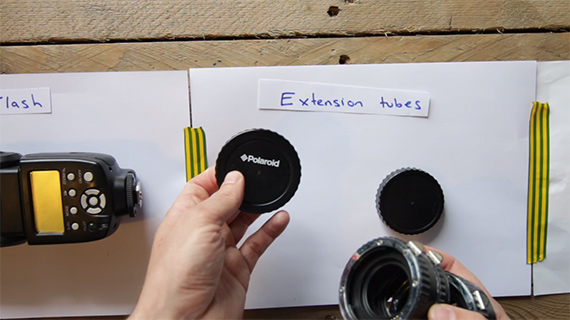
Extension Tubes

Extension tubes are basically what the name suggests.

extension tubes

They extend the front element of the lens closer to the subject and therefore away from the sensor. There are different versions of extension tubes. Some expensive ones allow you to auto-focus. But you don’t always need auto-focusing extension tubes.

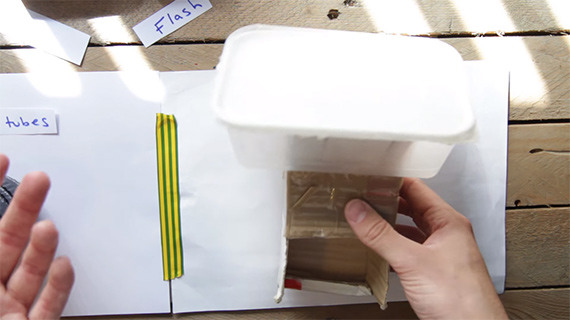
Softbox (DIY)

This part is important, especially if you’re using an external flash.

DIY softbox

You need to be able to find a way to soften the light. To make a softbox, all you need is a clear takeout food box (or similar), paper towels, and transparent gum tape (brown tape will also do).

Camera Settings

Set your camera to manual focusing. Set your focus to infinity. Turn off image stabilization.

how to use extension tubes

Choose a big f-number (e.g. f/11) to get a larger depth of field. In a macro setting the smaller the f-number, the quicker the image will lose depth of field. You may not want that. On the other hand, some photographers do want that. So, it all depends on your preference.

These settings are subjective and depend on your specific shooting requirements. Leave the shutter speed at 1/200 of a second. This will be dependent on the maximum sync speed of your camera. Leave the ISO at 500.

Finally, adjust the focusing and the zoom rings to get closer or farther away as necessary for the right shot.

diy macro photography

Have you tried using extension tubes? How did it go?


Go to full article: Macro Photography on a Budget Tutorial

What are your thoughts on this article? Join the discussion on Facebook

PictureCorrect subscribers can also learn more today with our #1 bestseller: The Photography Tutorial eBook

The post Macro Photography on a Budget Tutorial appeared first on PictureCorrect.


from PictureCorrect https://ift.tt/2xHzyjQ
via IFTTT

Axminster Photography Group Photos: Crazy Waves


via Axminster Photography Group Photos Feed https://ift.tt/3220b4B