 Despite how meticulous and careful I am with my equipment, it always amazes me how quickly dust, fingerprints, and overall grime builds up on and inside my camera bodies and even on lenses. Casual photographers will probably not immediately notice problems with dirt until little specs begin showing up on final images. Oftentimes it’s when I start seeing little specks of dust in clear areas of my images (usually in areas of the sky on landscape photographs) that I know that my image sensor needs to be cleaned. Despite improved technology to remove dust from camera sensors, a routine of cleaning and maintenance is necessary to avoid common dust related problems. Fortunately with a little care and common sense, most cleaning tasks can be performed relatively inexpensively with over-the-counter products. In this guide, I am going to walk you through a few of the steps that I take to maintain and keep my Canon DSLR cameras clean and ready for the next shoot.
Disclaimer
I have to add the short disclaimer that all the information provided in this free guide should be performed carefully and at your own risk. There is a risk any time you expose the inside of your camera and make contact with the image sensor. This guide is a walk-through of the steps I take to clean my own equipment and is not intended to be all-inclusive. I cannot be responsible for damage that occurs to your camera during cleaning. Consider sending your camera to the manufacturer for maintenance if you feel uncomfortable with any part of this article. Always check with your camera’s manufacturer for specific information on cleaning and maintenance.
When Should You Clean Your Camera?
I can only answer this question based on my own experience. Photographers will have to establish a routine that works best for them. The main issue is that dust enters digital single lens reflex cameras and settles on the image sensor during the time the photographer removes and switches lenses. Unless you choose to never remove the lens from your camera, dust is an unavoidable part of DSLR photography.
I clean my camera (and particularly the image sensor) when I start seeing a significant amount of dust particles and other foreign material on my images. I primarily see dust specs on images shot at higher f-stops (e.g. f/22). My experience has been that it is much more difficult to detect foreign specks on images at lower (wide-open) f-stops primarily because dust and other material are thrown out of focus. This is similar to how you can shoot through a chain link fence at lower, wide-open f-stops and make the links virtually disappear.
I once ran into an online tutorial that suggested that digital photographers should clean their image sensor every week! Frankly I cannot imagine a situation where I would need to clean my sensor that often. Even professional photographers switching between lenses multiple times a day should not have to clean the image sensor that often. I would even go as far as to suggest that the problem of dust probably plagues amateur photographers more so than professionals because they typically have access to only one camera body. Most professional photographers work with several cameras and varying focal length lenses for speed; therefore they are not likely to remove lenses as often as photographers who are limited to one camera body.
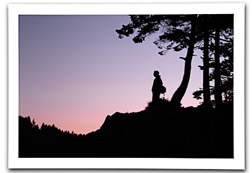
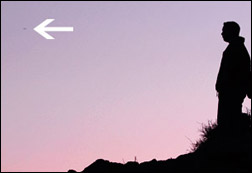 Dust can usually be found in clear areas of an image. Cleaning the image sensor should be on an as-needed basis only to minimize the risk of scratching or damaging it. Remember, each time you expose your camera’s sensor to the outside world you are putting it at risk of collecting even more dust and airborne matter (including moisture). Each time you physically touch the sensor with a cleaning brush or any other tool you risk scratching, gouging, and even cracking it. If you change lenses with any degree of regularity, dust will eventually make its way onto your final images forcing you to use a program like Photoshop to remove it. Every serious digital photographer should know how to use the cloning and healing tools available in Photoshop to remove foreign objects that show up in final images.
What is a Charged-Coupled Device (Image Sensor) Anyway?
Most of today’s high-resolution digital single lens reflex cameras come equipped with a charged-coupled device (image sensor) image sensor (rather than a CMOS). A CDD is the equivalent to digital film. High-resolution image sensors are made up of millions of tiny cells that convert incoming light into electrons. An in-camera processor reads the value of each cell and coverts it to a digital value (binary ones and zeros). image sensors are only able to measure the intensity of the light that falls on each of the cells. Red, green, and blue colored filters are placed over the image sensor to render color. A method called interpolation combines all three colors to produce a full color image.
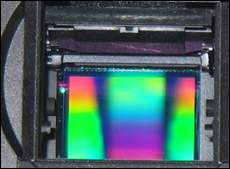 Image Sensor from a Canon 20D. It is worth noting that you are actually cleaning the filter above the image sensor rather than the image sensor itself (see “Cleaning the Image Sensor” below).
Why Not Send Your Camera to the Manufacturer for Cleaning?
Most manufacturers can clean your camera (including the image sensor) and send it back to you. The main drawback to this is that it can be very expensive and the turn around time can be lengthy. For example, let’s say that your camera manufacturer charges $50 for a routine cleaning (the cost can be much higher than that). You will also need to pay to have it packaged, insured, and shipped. All of this can really add up if you need to send your camera in every few months. The upside to sending your camera in is that the manufacturer assumes the risk of cleaning and has all of the necessary equipment to do it safely. In the end it comes down to how often you use your camera and how comfortable you are with doing the cleaning yourself. If you choose to have someone else clean your camera for you, be sure to send it to retailers authorized by the manufacturer.
Camera Handling Practices
Keeping your camera clean begins with everyday camera handling practices. This is important because establishing good camera handling habits will help minimize the amount of dust and other foreign objects that your camera is exposed to. It is never a good idea to expose the inside of your camera body for long periods of time. Lenses should be switched quickly and in clean environments. This generally comes down to planning.
Think for a moment before you remove lenses. Are you in a place that is relatively dry and clean? It is unlikely that you will always have a choice when you’re switching between lenses in the field; however it might be necessary to move a little bit to minimize your exposure. For example, if you are shooting near a waterfall, move as far away as possible from the falls itself to avoid exposing the inside of your camera to mist and airborne moisture. The same is true of sand and dust. If you are shooting on a farm where there is a lot of dirt and dust flying, move to a quieter place before removing your lens.
On a fairly regular basis I get the opportunity to fly in small two and four seat helicopters to shoot aerial photographs. From experience I have learned that it is extremely important to avoid switching between lenses while flying or even while on the ground when the rotor blades are spinning. The reason for this is simply that the air is moving so quickly through the cabin that it is impossible to avoid dust and other airborne matter from entering the camera during the brief moment it takes to switch to a new lens. Again this really comes down to planning. When I am in the air, I try to take two cameras with me. I take one with a wide-angle lens and another for telephoto zooming. Doing this eliminates the need to switch lenses and the risk of sucking in airborne particulates.
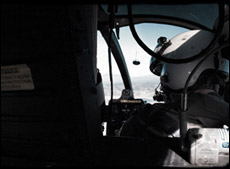 Dust can easily get sucked into your camera while flying. Generally the best places to switch camera lenses are inside (e.g. home or studio) or in the cabin of a vehicle if you are in the field. Another option is to place your camera into a clean gym bag or backpack and switch lenses (which I would only reserve for extreme circumstances). Obviously you cannot always pick the location where you will need to switch lenses; however these are the steps I suggest taking to minimize exposure to the image sensor:
Wherever you are at, have the replacement lens out and ready to go. A common mistake people make is to remove the lens from the camera first and then fumble around trying to find a replacement lens in the camera bag. I usually remove the rear lens cap and orient the red/white lens alignment dot so that I can quickly align it with my index finger when I go to attach it to my camera body. Next, since dirt and grime fall downward, turn your camera body upside down (with the camera lens facing toward the ground) and remove the lens. Once the lens has been removed, quickly pickup the second lens so that your index finger is aligned with the red/white dot and attach it to the camera body. The whole process should only take a few seconds. Making this a practice should significantly reduce the amount of time your image sensor is exposed to the outside elements.
Routine Cleaning
Every couple of weeks I pull out all of my camera gear so that I can wipe it down and look for possible damage. I start by powering down my cameras to reduce any static electricity that may have built up on the electronics. Next I blow air into the inside compartment of each camera with a hand pump blower. It is worth mentioning that you should never use canned air or any device that blows high-pressured air on your camera. It is also a very bad idea to blow air into your camera from your mouth. A hand pump bulb blower will not remove foreign particles that have been stuck onto your camera’s sensor, but it is usually effective in removing small bits of dust that reside inside the camera compartment, around the lens ring, and even on the sensor. I typically remove the lens, turn the camera body upside down and squeeze several bursts of air into the direction of the mirror and image sensor sensor. I am very careful to keep the tip of the blower outside the camera and not to enter the main compartment. You can blow air directly onto your sensor by using the sensor lock up feature available on most of today’s DSLR cameras.
Next I remove the front and rear caps of all my lenses and blow any dust that has settled on the glass. I then use a small, clean lens tissue (designed for glass) to wipe away any remaining dust or smudges. I also wipe down the outside of each lens and camera body with a clean cotton diaper (it’s soft!) prior to returning them to my camera bag. I go through this routine every couple of weeks or after being in the field for extended periods. Consider wearing lint free gloves during this cleaning process.
Cleaning the Image Sensor
As I mentioned earlier, I only physically clean an image sensor when I begin seeing specs of dust on my images. I do not subscribe to the idea of cleaning the sensor as part of a regular routine. I prefer to clean it only as necessary. I might even wait until I see more than just a few anomalies on my images before taking action and utilize cloning tools instead. Photographing a piece of white paper or a white computer screen is an effective way to determine how dirty your sensor is.
I use a product called Sensor Swab, which includes sterile, flat-tipped swabs and cleaning solution (usually sold separately). A box of twelve swabs can be purchased for around $45. The cleaning solution is about $10. This should cover about twelve sensor cleanings. If you consider this cost for a moment, you will quickly see why learning how to clean the image sensor yourself can save you quite a bit of money over time. Once you are ready to get started, find a clean, quiet place to work uninterrupted. This is not something you want to do with young children around or in an environment with lots of distractions. I unusually clean my camera equipment while sitting at a table with bright overhead light. Consider wearing lint free gloves during this process. First I turn my camera on and navigate to the mirror lock up feature in the main menu. After locking up the mirror, I remove the lens and expose the image sensor (image sensor). You can identify the image sensor by looking toward the rear of the inner compartment. The image sensor should look like a small, flat rectangle. This is the area that we are going to focus in on (no pun intended!) for cleaning.
I place two or three drops of the cleaning solution onto the tip of a new swab and gently wipe across the image sensor horizontally from left to right (if you are looking at the back of the camera). It is important not to drip too much cleaning solution onto the swab. Also be careful not to use too much pressure with the swab. I press down on the swab just enough to slightly bend the tip against the sensor. After cleaning your sensor a few times, you will get a good sense for how much pressure is necessary. I suggest erring on the side of caution and use very slight pressure the first time through.
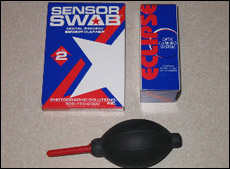 Sensor Swab by Photographic Solutions, Inc. After making the first sweep, I turn the swab over and make a second sweep in the same direction, this time using the dry side (or opposite side) of the swab. If you have a full size sensor, you may need to make several overlapping passes. I do not recommend wiping back-and-forth (sweeping right to left and back again) with the swab as you could create streaks.
It should only be necessary to make a couple passes with the swab to remove most dust related material on the image sensor. Using too much solution or making too many passes risks creating streaks and cementing dust onto the sensor. Also remember that your swab will likely pick up quite a bit of foreign material and that you do not want to redistribute this onto the sensor by overdoing it. It is usually prudent to make just a few passes with the swab and then take a few test images to see if your sensor is clean. You can always go back with a new swab and run through the cleaning process again.
 It’s worth noting that the main ingredient of the cleaning solution is methanol, which is highly flammable. Never clean your camera near open flames or heat sources. You are also unable to take methanol based cleaning solution with you on an airplane when you travel.
Learning how to properly clean your camera’s image sensor can save you time and money while minimizing unwanted dust specs from showing up in your final images. With a little maintenance and care your camera should last many years to come.
About the Author:
Steve Paxton currently lives with his wife and two children in the Seattle area. Steve has been a photographer for over ten years and has spent most of that time shooting with a variety of Canon 35mm cameras. His experience ranges from wedding and portrait work to crime scene photography; although he particularly enjoys the solitude of shooting landscapes.
Go to full article: Cleaning and Maintaining Your Digital Single Lens Reflex Camera
What are your thoughts on this article? Join the discussion on Facebook
PictureCorrect subscribers can also learn more today with our #1 bestseller: The Photography Tutorial eBook
The post Cleaning and Maintaining Your Digital Single Lens Reflex Camera appeared first on PictureCorrect.
from PictureCorrect https://ift.tt/2xNO7nP
via
IFTTT