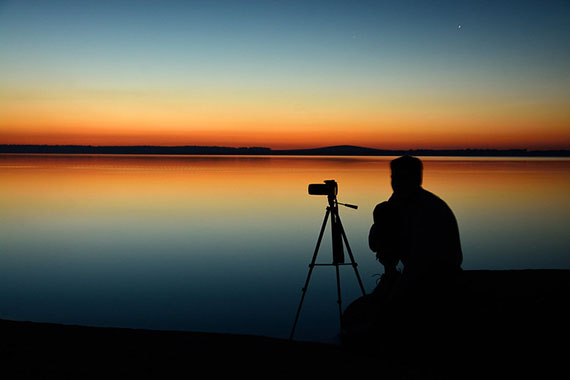
Ready to take your photography to the next step? If so, this comprehensive collection of tips may be just what the doctor ordered. Paul Farris covers a wide variety of topics aimed specifically for beginners learning the ins and outs of their cameras.
The fact of the matter is, not many of us make the most out of the tools we have at our disposal. Sometimes it isn’t obvious how a certain feature or accessory should be applied in a practical setting. Other times, we simply don’t realize that there’s something available to aid in photographic challenges.
Through Farris, you’ll learn the answers to vexing questions like:
How can I take better exposed, more balanced images with my iPhone?
What’s the best way to minimize camera shake without spending a cent?
Which accessories will do the most to protect my camera?
How can I minimize digital noise in my images?
What’s the best way to discover new artists on Instagram?
When should I utilize features like exposure compensation or program mode?
Today’s the day to take initiative and begin your journey towards improving as an artist. Who knows – this clip may have information that changes the way you shoot for good.
In the world of bird photography, the hummingbird is certainly one of the most challenging to photograph. This little bundle of flying energy and its ability to zoom and dart makes this bird difficult to capture. This article provides you some tips to help you better photograph this flying marvel.
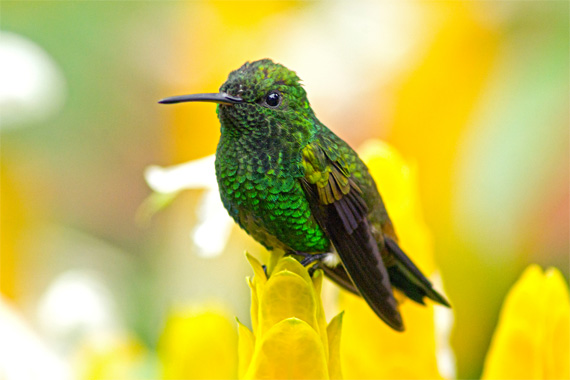
“Hummingbird” captured by PictureSocial member Félix León
Set out the Hummingbird Welcome Mat
Most places in North America have hummingbirds either seasonally or year round. Your local Audubon Society can tell you when to set the feeders out. You can also find out if the hummingbirds in your area migrate, so you can remove the feeders in time for the hummingbirds to migrate and avoid freezing in the cold. Every serious hummingbird photographer needs a hummingbird feeder. The things you want to look for with feeders are that they are easy to clean and that they are filled with a solution of sugar water.
Most birders suggest using 4 parts water to 1 part sugar; you can try using a 3:1 mixture, as well. Keep the feeders filled so that the hummingbirds don’t head to a more reliable nectar station. Don’t forget to remove the feeders regularly for cleaning, and then put them right back up. Remember to never use food coloring because it is not needed to attract them and can cause a dangerous growth on the hummingbirds’ beaks.
Feeders, Perches, and Flowers
The biggest challenge with taking hummingbird pictures is that they rarely hold still. Hummingbirds are constantly zooming and darting, so it makes it difficult to photograph them. Many photographers try following the hummingbirds (with camera in hand) in the hopes of getting a shot. However don’t follow the hummingbirds but instead be patient and stay in one location.
You want to think about the kind of bird pictures you want and then set things up to help increase your chances of getting the shot. After that, it’s a matter of getting comfy and having your camera ready. Many photographers use a stabilizer device, like a tripod or monopod, so the camera is always ready for the next shot. Some photographers use blinds so they can move without worrying about scaring off a hummingbird.
If you want pictures of the hummingbirds hovering, you’ll need to remove the perches from your hummingbird feeder. Although this may seem a little mean, if you plug up all of the holes on the feeder but one, it will make it easier to get a good hummingbird picture. You will still have hummingbirds zipping around trying to chase off the other birds from the feeder regardless of what you do.
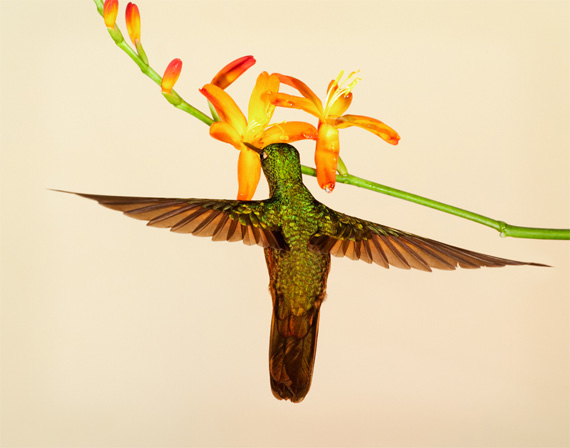
“Chestnut-breasted Coronet” captured by PictureSocial member Dean Newman
Now if you want to take a picture of a hummingbird perching, watch where the dominant male goes after he gets a drink at the feeder. Usually, hummingbirds will perch where they have a good view of the feeder. And if the perch isn’t a good location for you to get photos, do some rearranging. Try moving the feeder near a perch so you can get a better picture.
You can also move it farther from the natural perches and add a new perch that is in a photo friendly location. The hummingbird won’t mind as long as he or she can keep an eye out for intruders. Eventually the hummingbirds will get used to you and your camera, but movement will likely frighten them off, so make sure you’re in a quiet area with very little activity.
If you have a particular flower that would make a lovely picture with the hummingbird but they are never there long enough for you to press the shutter release, try this photographer’s trick: Using an eye dropper, gently fill the flower with some sugar water. This only works for a short time though, because after a couple hours the blossom will wilt and then it will die.
As with feeders and perches, you can also hang a basket of flowers to help attract them for photographing. Regardless of what type of “feeder” your hummingbird uses, you will still have less than 8 seconds to take your picture. Still, it pays to be patient and not press the shutter until after the hummer’s had a sip of nectar. If your flash frightens them off, it’s likely they won’t return to the feeder.
Check Your Background
The best background for hummingbird photography is something dark green that doesn’t have any distractions, like brown twigs or branches. If you want a mobile background, try a dark green potted plant or a painted poster board. The main thing is to have a dark background that makes the hummingbird’s colors pop.
Hummingbird photos in Google Images will give a good idea of what type of backgrounds work and don’t work. Note how brilliantly colored hummingbirds fade into some backgrounds, like the bright green, sun lit trees and shrubs. A shaded area behind the feeder or perch also works well as a good background.
With a photo editor like Photoshop Elements, you can use the software’s filters to blur the background, creating depth of field that puts the hummingbird in the spotlight so to speak. Adobe has tutorials on this on their website.
Lights, Camera, Action
After you have things set up, it’s just a matter of finding a nice, comfy place to sit nearby with your tripod and camera. In order to freeze their beating wings, you will need a high speed flash but you can still get some great pictures with a good compact camera by using these tips.
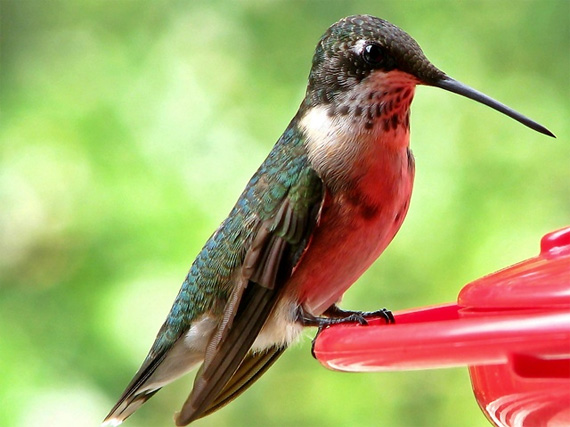
Photo captured by PictureSocial member tjosborne
Even though hummingbirds can be very tricky to photograph, by using these tips and having some patience you will soon be enjoying your beautiful collection of hummingbird pictures framed on the wall.
About the Author:
Autumn Lockwood is a writer for YourPictureFrames.com and loves shopping for picture frames. If you’re looking for gallery picture frames, visit our website or call us at 1-800-780-0-699.
Astro photography takes quite a bit of skill and patience, but also a bit of luck. Skill and patience is something that you’ll have to work with. But, you need to be really lucky to be around a place where the sky gets really dark. A pitch black sky means that the stars in your image will turn out absolutely dazzling and make your image pop. Photographer K Chay took this image of the Milky Way at the Church of the Good Shepherd in New Zealand and the dark sky has done wonders to the image:
“Milky Way From The Church of the Good Shepherd, New Zealand” by K Chay (Via Reddit. Click image to see full size.)
Chay took the image with his Nikon D800 at ISO 1600. The image is a composite of two exposures: one for the sky and the other for the foreground. While he shot the sky at night, he shot the foreground in the evening prior to the stars turning up. He then later processed the image using DeepSkyStacker.
The important thing that one has to take care of when capturing this kind of shot is to have an interesting landmark in the foreground. And Chay has executed it beautifully. Having a foreground that people can recognize adds context and relevance to the image. Otherwise, the image could be from anywhere. This is more important if you are taking travel photos. Including a popular landmark instead of just shooting the sky lets you capture not just the photo, but the memories and experiences associated with that place too.
Street photography is where most photographers start their photography journey. After all, it’s in the streets where most of the stories, people, great composition and lighting can be found – and all that for free. But, as convenient as the resources are available in the street, capturing an intriguing street photo takes equal perseverance. Photographer Jason Vong brings to you 5 street photography tips from professional street photographer Kenneth Hines, Jr.:
Use Prime Lenses
Prime lenses force you to move around, and their image quality is usually better than those of zoom lenses. They’re also usually smaller and lighter too, and that’s helpful for you to move around the street without drawing in much attention.
Shoot in Aperture Priority Mode
Don’t listen to what others say. You don’t always need to be shooting in full manual mode. In genres like street photography, you don’t always get the time to fiddle with your camera settings. You need to make split second decisions, and aperture priority mode is perfect for such instances. Set your aperture depending on how much of the scene you want in focus, and let the camera work its magic.
Pay Attention To Your Surroundings
Besides focusing on taking photographs, also be wary of what’s happening around you. Anticipation is a key part of street photography. And, you can do that only when you pay attention to the people around, and the environment you’re in.
“I always try to anticipate where people are going to go, where people are going to walk, what are people going to do, and just be ready.”
Don’t Be a Perfectionist
“Sharpness isn’t everything, break the rules, and just be comfortable in knowing your gear.”
Perfect photos exist mostly in the perfect conditions. But when you’re out in the streets, think of it like being in the wild. Pay greater attention in capturing the right moment. Other factors are secondary.
Visualize The Final Image
“Take your photo and edit in your mind first.”
Before you even press the shutter button, try and visualize the image in your head. Knowing what you want will help you in getting most of the image right in-camera. Besides aiding in composition, visualizing the final image also helps you in determining the type of mood you want to set. This makes post-processing so much easier.
These are some really awesome tips from Hines. Which one is your favorite? If you’re feeling stuck with street photography, you might want to give these tips a try.
The internet is unquestionably full of sunset photos, all stunning in their own right. But every once in a while you come across a real knockout. Tobias Richter, for example, has taken this standout image of the sun beginning to retreat into the horizon over the Lofoten archipelago in Norway:
A View of thesunset from Reinebringen Peak. Photo by Tobias Richter. (Via 500px. Click image to see full size.)
Richter managed to create this beauty on a Canon 5D Mark II, using a focal length of 16mm, while setting his aperture to f/16 at a low ISO of 50. The shutter speed was a lengthy full second long. Richter says he uses either a neutral density or graduated neutral density filter in nearly all of his images to help achieve lower shutter speeds and a higher dynamic range.
“It is my intent to capture the beauty of untouched nature…”
ISO is one of the important settings that you can manipulate in your camera. Understanding how ISO works in digital photography can save you from many difficult low light situations, which is primarily what this setting is used for.
The term ISO has been widely used since the days where film cameras were popular. Those days, the term ISO refered to film speed or how sensitive a film was to light. Film generally comes in various ISO speeds, and photographers can swap films with different film speeds to achieve the desired effect. However, in the digital world, this process has been simplified, as we can adjust the ISO setting with just a few clicks. Today, with digital cameras, we generally refer to ISO as how sensitive the image sensor is to light.
ISO is measured in numbers which can be anywhere from 100 up to 3200 or more. The higher the ISO number, the more sensitive the sensor is to light, while the lower the ISO number, the less sensitive the image sensor is to light. The sensitivity of the image sensor affects your shutter speed and aperture combination in order to obtain a properly exposed picture. When changing your camera’s ISO number, be sure to check your camera’s light meter to ensure that your picture will be properly exposed. If not, you might have to change your shutter speed or aperture so that just enough light will enter and hit the image sensor.
When shooting in higher ISO mode, your picture will contain more grains and will be noisier as the image sensor will be more sensitive to light. When your camera’s image sensor is more sensitive, it will give an artificial boost to the light signal that hits the sensor. This is not clean light, it is amplified light, which also amplifies undesired noise in the light, resulting in grains appearing in your pictures. Shooting in higher ISO mode also allows you to use a smaller aperture or faster shutter speed or a combination of both. Higher ISO mode is typically used when shooting in low light conditions where you need your camera’s image sensor to be more sensitive to light so that the light would be amplified. Although this may produce noisier and grainier pictures, but it will ensure that you are able to capture the scene even in low light.
Example of a High ISO Speed Photo
When shooting in a lower ISO mode, your picture color will be richer and better quality. This is because less noise will be collected by the image sensor as it is less sensitive, thus, resulting in finer grains in your picture. Shooting with a lower ISO also allows you to use a wider aperture or slower shutter speed or a combination of both. An example of using a low ISO number would be when you are shooting in broad daylight. It is a good idea to use a lower ISO number when there is enough light around and you do not need your camera’s image sensor to be more sensitive to light, as this will only create more noise in your picture.
Photo by Riccardo Cuppini; ISO 100, f/5.6, 1/250-second exposure.
As a rule of thumb, your ISO should always be set at the lowest number whenever possible so that higher quality pictures can be produced. However, there are many cases where we need to bump our ISO to a higher number for proper exposure.
A few ISO examples:
1) When you’re trying to capture a moving subject in a low light area (e.g. a concert), you would need to bump your ISO higher, so that you can use a faster shutter speed to freeze the moving subject.
2) There are many places where flash photography is not allowed, such as in museums. You could bring along a tripod, mount your camera on it, and use a slow shutter speed for more light exposure. However, a tripod is not always handy, so we have to rely on our ISO setting. Just bump your ISO higher, and you will be able to use faster shutter speed to reduce the possibility of your hand shaking.
3) There are times when you are gathered in low light areas with friends for a barbecue or in dimly lit restaurants and you wish to capture a special moment. You do not want to spoil the scene with a sudden burst of flash, which would create a very unnatural feel to the picture. Do it without flash and bump your ISO higher with a faster shutter speed, and you will be able to preserve that natural low light mood.
Using ISO to increase the sensitivity of the camera’s image sensor can help boost the brightness of your pictures at the cost of quality. This can be your life saver in many low light situations. You would prefer to have captured a picture that is bright and with some noise in it rather than a picture that is dark with no noise.
About the Author: Roy Lee is a freelance photographer residing in Malaysia, who specializes in wedding, portrait, and landscape photography.
Being able to nail the exposure in-camera is something every photographer should be able to do. It’s quite essential as you’ll be able to deliver results with optimal quality and details. It also cuts down a pretty good chunk of time you’d otherwise spend in correcting exposure in post. Photographer Pye Jirsa from SLR Lounge talks about 3 tips that will teach you how to expose for your photos while maximizing your camera’s details and dynamic range:
LCD Brightness
Straight out of the box, the displays on the back of the cameras are designed to get bright outdoors, and dim down when indoors. This makes it inconsistent for judging exposure.
“I don’t want you to rely on your screen to judge exposure.”
To make the LCD more consistent, change its brightness from Auto to Manual. Then pick any brightness level that you’re comfortable with. And that’s it. No matter whether you’re indoors or outdoors, the LCD will now give a consistent output.
Turn On Highlight Alert
Highlight alert notifies you if you’re clipping the highlight details. Be sure to go through your camera menu and look for this option, and enable it. If the image that you’ve taken has lost details on the highlights, it will let you know by blinking in those clipped areas. You can then adjust your camera settings accordingly to fix the issue.
Use Flat Picture Profile
The preview that the camera shows is based on the picture style/profile that you’re shooting in. This therefore affects the histogram as well. To make sure that your images retain as much detail as possible, set a custom picture style with minimal sharpness, contrast, saturation. Using such flat/neutral picture style in conjunction with the histogram will allow you to set your camera to make the utmost use of the camera’s dynamic range.
If getting correct exposure in-camera has been your weak point, try these simple tips out. You’ll be surprised with the boost in efficiency in your workflow.