torstai 30. tammikuuta 2020

PictureCorrect.com: Interesting Photo of the Day: Venice at Sunset

When somebody mentions Venice, what is the first thing that you think of? Most likely you’re picturing the canals flowing through the city, the rich architecture, and the gondolas right? Well, that’s how any traveler would think of the place. When photographer Michael Sidofsky was around Venice, he captured the following image which really showcases the essence of this beautiful city. If you don’t look close enough, you could even mistake it for a painting:

Venice during sunset

“Venice During Sunset” by Michael Sidofsky (Via Reddit. Click image to see full size.)

Sidofsky took this image from the Rialto bridge with his NIkon D750 and the 70-200 f/2.8 lens.

The beautiful combination of light and shadows is what makes this image appear so magical. The golden light has set the perfect mood to this image. The appearance is so “soft and cozy” that it feels as if an artist has delicately and skillfully painted the beautiful buildings.

The gondola in the foreground is yet another point of attraction in this image. Including it in the frame has added a sense of relevance to the image. And if you look carefully, you can anticipate that Sidofsky must have waited patiently for the gondolier to pass across the building’s reflection on the water. This has created more of a silhouette and emphasized the subject. This is indeed a very well-composed image by the photographer.


Go to full article: Interesting Photo of the Day: Venice at Sunset

What are your thoughts on this article? Join the discussion on Facebook

PictureCorrect subscribers can also learn more today with our #1 bestseller: The Photography Tutorial eBook

The post Interesting Photo of the Day: Venice at Sunset appeared first on PictureCorrect.


from PictureCorrect https://ift.tt/2Oc0S4E
via IFTTT

PictureCorrect.com: Fashion Photography Dramatic Lighting Tutorial

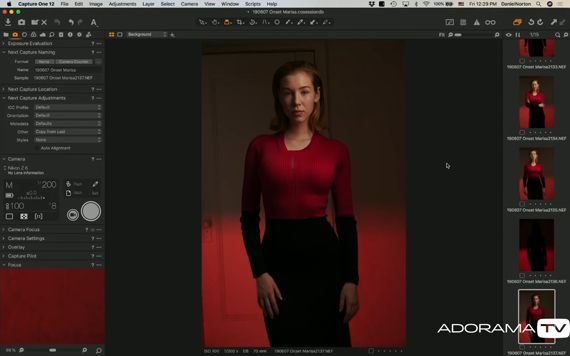
Fashion photography does not always have to be only about the dress or the model. You can create interesting fashion photographs if you play around with lighting and use it to complement the dress itself. Photographer Daniel Norton from Adorama demonstrates how you can use gels with lights to create graphical interest in fashion photography:

As the model is wearing a dress with a red top and a black bottom, Norton’s idea is to create a background to complement just that. The idea is thus to create a background that’s dark at the top, and red at the bottom.

To create the bottom red portion of the background, Norton uses a Profoto light with a red gel. To prevent the light from spreading all across the wall, he uses a flag on top of the light.

With the second light turned on to illuminate the model, she is fairly lit.

image with model light turned on

If you feel that the shadow is a bit too much, you can always add in a reflector to bounce some light back onto the model. In his case, Norton uses a silver reflector to add some specular highlights on the model’s face.

“Look at the outfit, think about how it’s going to be presented.”

This kind of photo shoot works great if you’re up for an editorial shot. It wouldn’t work for the traditional white catalog shot. So definitely try this technique out if you want a moody fashion portrait.


Go to full article: Fashion Photography Dramatic Lighting Tutorial

What are your thoughts on this article? Join the discussion on Facebook

PictureCorrect subscribers can also learn more today with our #1 bestseller: The Photography Tutorial eBook

The post Fashion Photography Dramatic Lighting Tutorial appeared first on PictureCorrect.


from PictureCorrect https://ift.tt/2uMk4Ps
via IFTTT

keskiviikko 29. tammikuuta 2020

PictureCorrect.com: Photo Composition Tips

One aspect of photography that photographers constantly strive to improve is composition. It’s one of those things that you spend your entire photographic career working on. There are many considerations to be made on what to include in the frame and—equally important—what to leave out, and it can sometimes be a little overwhelming trying to get the hang of it.

There are, however, some simple rules that we can follow to help compose stronger, more interesting images.

creative compositions for photography

Photo by Tom Thiel; ISO 100, f/8.0, 1/200-second exposure.

Horizon

The position of the horizon can have a huge impact on an image. It can direct interest to the foreground if there’s a dominant element in this part of the frame, or it can make a big sky look even bigger and add a sense of scale. Position your horizon for a reason. You can do this by deciding what the focal point of your image is. (i.e. what your image is about). If you want to show an approaching storm over a mountain ridge, then you might place your horizon at the bottom of the frame to allow the storm clouds to dominate.

If however, your image is about the mountain range itself, then positioning the horizon higher in the frame will show the height of the mountains and show their relation to the foreground in front of you.

It’s often said that you should avoid positioning the horizon in the center of the frame, as this can create confusion about the focal point of the image. Is it about the approaching storm or the mountain range? This is generally a good rule to follow, however, as with most rules in photography, there is always a time where it can be broken. Sometimes all the elements within the frame just balance better with the horizon in the center. This is where instinct comes in. If your horizon simply feels better in the center, then leave it there.

Lines

Photographs are composed of a series of lines. Straight lines and curved, horizontal, vertical and angled. Understanding the lines in your image and using them to your advantage can help you create much stronger images. All lines start and end somewhere, such as the converging lines of a road leading into your image, which can imply a journey or distance. Lines that are neither horizontal or vertical give an image a feeling of energy, while an image comprised of dominant horizontal and vertical lines has a more static feel. Curved lines soften an image and can change the mood of a photograph altogether to something more relaxing or tranquil.

Combining these lines within a photograph gives you shapes. Each shape within the frame interacts with each other shape and the frame itself. Learning to see how these shapes interact with each other allows you to focus more clearly on the elements that help to tell your story—and leave out those that don’t. This is quite a difficult thing to do as it requires you to detach yourself from a scene and view it only as a series of shapes or lines, but once practiced it becomes second nature. Before long you’ll be doing it without thinking.

photography creative composition tips

Photo by Mark Shahaf; ISO 400, f/5.6, 1/1600-second exposure.

Aspect Ratio

While considering what goes into the frame, also consider the frame itself. Most cameras have a 3:2 aspect ratio, which means that the horizontal side of the frame is half again longer than the vertical side. This doesn’t necessarily mean that every photograph you make needs to have these dimensions. In the case of the mountain range discussed earlier, you might decide that a more panoramic shape works better to show the scale of the mountains. Or if you’re photographing portraits or still life, a square frame may give better balance to the lines and shapes of the image. Digital photography and post processing software allows you to crop and adjust the frame easily to find the balance that suits your image.

Understanding and practicing the techniques above regularly helps to give you a clearer idea of what story you wish to tell when you make your photographs, and the best way in which to do this—and this is when we can make our images stronger.

About the Author:
Mark Eden is a freelance travel photographer and writer, who creates images and articles for various print and digital publications. Expanse Photography is his website and blog.


Go to full article: Photo Composition Tips

What are your thoughts on this article? Join the discussion on Facebook

PictureCorrect subscribers can also learn more today with our #1 bestseller: The Photography Tutorial eBook

The post Photo Composition Tips appeared first on PictureCorrect.


from PictureCorrect https://ift.tt/2Hrj2KA
via IFTTT

PictureCorrect.com: Interesting Photo of the Day: Cannon Beach Patterns

Cannon beach in Oregon never fails to make it to the list of best beaches of the world. Besides the sandy and gorgeous shoreline, Haystack rock is another wow factor of this place. When you see it, you get to feel how majestic it really is. Photographer Nathaniel Merz took the following image of the place during sunset, and it surely gives you a hint of how beautiful the beach really is:

“Sunset From Cannon Beach, Oregon” by Nathaniel Merz (Via Reddit. Click image to see full size.)

Merz took the image with his Canon 5D mark IV and the 24-105mm f/4 lens. The interesting patterns on the sand with the sun-kissed dune grass together make for an interesting foreground. The golden glow from the setting sun has really done its magic making even the grass appear interesting. And how can we miss the Haystack rock crowning the sandy beach and standing tall in the background. The dramatic evening sky with a purple tint set as the backdrop to the ocean and the Haystack rock adds to the overall aesthetic of the image.

Have you had a chance to visit the beautiful Cannon beach?


Go to full article: Interesting Photo of the Day: Cannon Beach Patterns

What are your thoughts on this article? Join the discussion on Facebook

PictureCorrect subscribers can also learn more today with our #1 bestseller: The Photography Tutorial eBook

The post Interesting Photo of the Day: Cannon Beach Patterns appeared first on PictureCorrect.


from PictureCorrect https://ift.tt/2O6rPqg
via IFTTT

PictureCorrect.com: Importance of the Moment in Street Photography

Street photography is all about capturing the right moment. While some moments present themselves out of the blue, other moments can be anticipated. Your composition may be great, but an interesting moment is the final factor that creates a spark in your image. Without it, your street photography will feel incomplete. In this video, photographer Ibarionex Parello talks about the importance of the moment in street photography:

Anticipate Where Your Moment Will Be

If you’ve been taking street photos for a good amount of time, chances are that you’re able to anticipate where your moment will happen. In such cases, make sure that you set your camera, and the composition in a way that the subjects(s), and the moment are free from any kind of distraction.

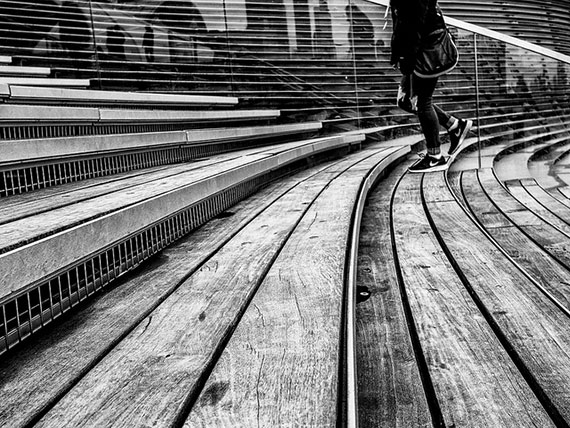
For instance, in the image below, you may notice that even though the background is pretty busy, the photographer has snapped the image only when a major portion of the girl’s body is against the clear blue sky.

“You have to know when you want to make the shot. I am not in favor of just using a camera in burst mode and just hoping.”

Capturing Several Moments

If you get lucky, you might even capture several moments moments in a single frame. Surely, this can’t always be anticipated. But, if you’re able to anticipate several moments coming together, make sure that they don’t interfere with each other. Let each moment stand out.

multiple moments in a single photo

A person walking across, a couple going up, and a figure in red coming down; the three moments in this photograph.

Capture Interaction

When moments are predictable, you get better time to prepare yourself to take the image. In such circumstances, wait for the moment when multiple subjects are interacting with each other. This conveys a stronger message. While you’re waiting for the right moment when subjects interact, you can pay attention to get the light, shadows, colors and patterns right. And when there’s interaction, snap the photo.

“There’s a visual tension that arises as a result of having both hands in the frame. And that’s the moment that you’re looking for.”

people handling ice

“Don’t be in such a rush just to make the snapshot because you’re afraid of missing something. You really have the choice to slow down and make sure that you’re capturing a genuine moment.”

Which kind of photographer are you? The one who waits patiently to create and capture a moment, or the one who just snaps away? Try being the former one if you can.


Go to full article: Importance of the Moment in Street Photography

What are your thoughts on this article? Join the discussion on Facebook

PictureCorrect subscribers can also learn more today with our #1 bestseller: The Photography Tutorial eBook

The post Importance of the Moment in Street Photography appeared first on PictureCorrect.


from PictureCorrect https://ift.tt/317rOHL
via IFTTT

tiistai 28. tammikuuta 2020

PictureCorrect.com: 7 Beginner Tips For Sharper Photos

Scott Kelby, the author of many digital photography books says, “If your photos aren’t sharp then the rest doesn’t matter.” Key to any image is its sharpness, and in order to get those photos pin sharp you need to follow some basic guidelines.

what to do for sharper crisper photographs

Photo by Mike Monaghan

There’s nothing worse than looking at a portrait photo and seeing that the eyes are out of focus with a perfectly sharp nose. The eyes are the windows to the soul and their sharpness is critical to a good image. There are times when we want slightly out of focus images or parts of images out of focus. But, mostly we want crisp and clear images. Here are some steps for sharper images:

1. Pin sharp starts with a tripod

Every professional photographer, and many amateurs, will tell you that a tripod is an essential part of your gear if you want sharp images. Of course it’s not always possible to use one, but, when you can, use one. It stabilizes your camera and stops camera shake from unsteady hands. A good, sturdy tripod costs money, but it’s a basic part of your kit and fundamental to sharp images. Many photographers also opt for small flexible tripods that can be wrapped around objects and work in virtually any situation.

2. Cable Release or Remote

Don’t press the shutter; use a cable release. A cable release is a cable that goes to a connection on your camera. By pressing the cable release you don’t transfer any movement from your hand to the camera. The same can be done with a wireless remote.

3. Self-Timer

If you have forgotten to bring your cable release or your compact camera doesn’t allow its use, use the self-timer. All cameras, including compacts, have this feature. Although you still press the shutter, there is a time delay of 2 to 10 seconds, allowing camera shake to subside before the shutter is activated. Still, you need to press the shutter button gently to limit any transferred shake.

how to take the sharpest photos

Photo by Michaela Loheit; ISO 100, f/8.0, 1/640-second exposure.

4. Mirror lock-up

This feature is something only for digital SLR camera owners. When the shutter is depressed, a mirror, which is in between your sensor and the viewfinder, pops up to allow light to pass and hit your sensor. This micro movement can affect your final image so what manufactures have added is a mirror lock-up. It locks the mirror in position once you have composed your image. Although you can no longer see the image through the viewfinder it prevents the micro movement from affecting your image. Use it if you are fanatical about sharpness.

5. Use your lens’s sharpest aperture

All lenses have a sweet spot. They are sharpest at this aperture–usually two stops below fully open. Unfortunately, this applies only to DSLRs. You should be able to tell by looking at your images and finding which images are usually the sharpest. Check the EXIF data by right clicking on your image on the computer and seeing what aperture it was taken at. Then shoot at this aperture whenever you can.

6. ISO

Avoid increasing your ISO as this causes your image sharpness to degrade. Instead, shoot on a tripod. Shooting on higher ISOs adds noise to the images, which is the reason for images lacking in sharpness.

tips for sharper images

Photo by wbeem; ISO 100, f/3.5, 1/40-second exposure.

7. Turn off image stabilization

If you have a lens or camera that has image stabilization or vibration reduction, turn it off. There are tiny motors inside the lens which stabilize the image but also contribute to lack of sharpness through vibration. They are great for low light/handheld situations like weddings, but when you’re using a tripod, turn it off.

These are a just a few tips for getting sharper images. No single one will improve your sharpness, but used together they will improve your overall sharpness in an image.

About the Author:
Wayne Turner has been teaching photography for 25 years. Passionate about photography, radio and video, he is a Radio CCFm producer and presenter in Cape Town.


Go to full article: 7 Beginner Tips For Sharper Photos

What are your thoughts on this article? Join the discussion on Facebook

PictureCorrect subscribers can also learn more today with our #1 bestseller: The Photography Tutorial eBook

The post 7 Beginner Tips For Sharper Photos appeared first on PictureCorrect.


from PictureCorrect https://ift.tt/2EU8KBQ
via IFTTT

PictureCorrect.com: Interesting Photo of the Day: Long Exposure of Highway Traffic

Long exposure photography has the potential to inject life even into the most mundane scenes. Take the following example of the long exposure of a highway in Madrid for instance. Something that gives the impression of a noisy environment otherwise, appears soothing in the long exposure taken by photographer Adrian Aparicio:

“Long Exposure of the Highway Traffic” by Adrian Aparicio (Via Reddit. Click image to see full size.)

The image is a 30 second exposure that Aparicio took using his Sony A7III. Considering that he took it during the golden hour in the evening, he had to use a neutral density (ND) filter so as not to overexpose the image.

The curve of the road, along with the light trails of the vehicles immediately draw us into the image. And that’s a good indication that the composition on this image is an effective one. Further, the low visibility at the end of the road adds to the mood of the image. Although that’s smog we’re talking about, it seems to have added some aesthetic to this image.


Go to full article: Interesting Photo of the Day: Long Exposure of Highway Traffic

What are your thoughts on this article? Join the discussion on Facebook

PictureCorrect subscribers can also learn more today with our #1 bestseller: The Photography Tutorial eBook

The post Interesting Photo of the Day: Long Exposure of Highway Traffic appeared first on PictureCorrect.


from PictureCorrect https://ift.tt/313lsJE
via IFTTT