torstai 6. kesäkuuta 2019

PictureCorrect.com: What Not to Do in Your Travel Photography

There are a lot of travel photography videos out there, most describing all the things you should do to get the perfect travel photos. What many of them don’t do, however, is tell you what not to do. In the video below, Mark Harrison bucks the trend by telling us seven (and more) of his favorite travel photography no-nos:

Travel photography is one of the most popular genres, and rightfully so. Who doesn’t want to fill their Instagram feed with awesome photos of the places they’ve been? But finding ways to make those photos unique and well-composed while having a good time doing it? That’s a bit more challenging.

1. Avoid posting the “classic” travel photo
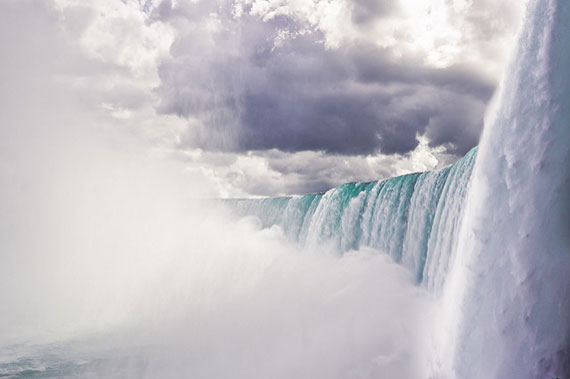
don't take the boring shot

While this isn’t a bad image, it’s entirely predictable.

This may seem obvious, but it’s pretty difficult to get a unique image if you’re taking the shot that’s “expected.” Spend some time experimenting with new ways of looking at things. While this can include using different gear (e.g. interesting lenses or drones), simple changes to point of view and perspective can make a world of difference.

At the same time, if getting the quintessential touristy photo is important to you, by all means take the shot. Just don’t limit yourself to those types of shots.

2. Don’t avoid tourist areas
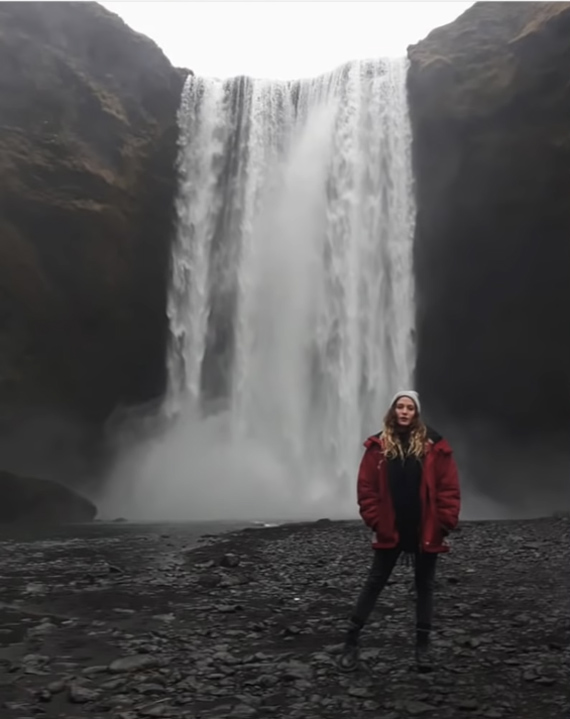
Don't avoid tourist spots - just get creative

There’s a reason why a destination becomes a tourist spot. Usually it’s because there’s something interesting or beautiful to be found there. The trick is again to exercise your creativity. Find a non-standard way to capture whatever the location has to offer.

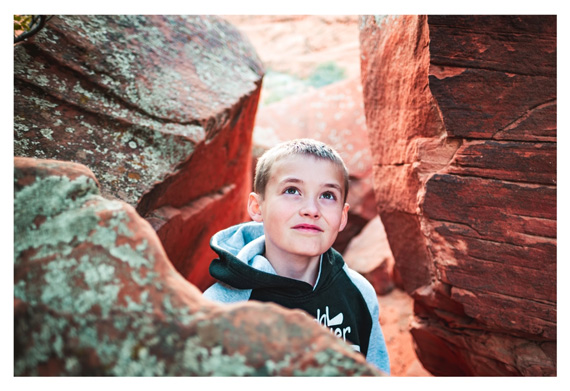
3. Don’t frame the subject looking the wrong way
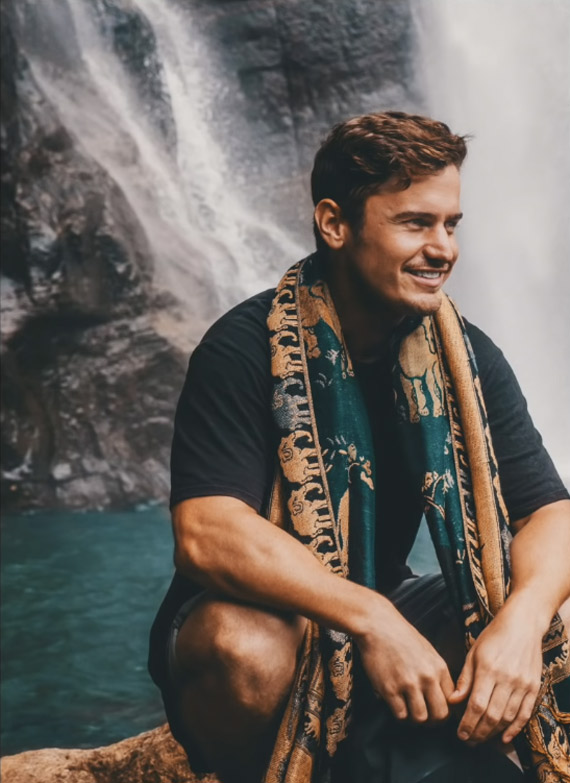
Pay attention to your framing

The place where the subject of your photo is looking has a lot of visual weight; it’s where the viewer’s eyes will want to go. That’s why it looks funny when you frame the subject so that they’re looking at the frame of your photo rather than into it.

4. When shooting sunsets, don’t leave as soon as the sun dips below the horizon
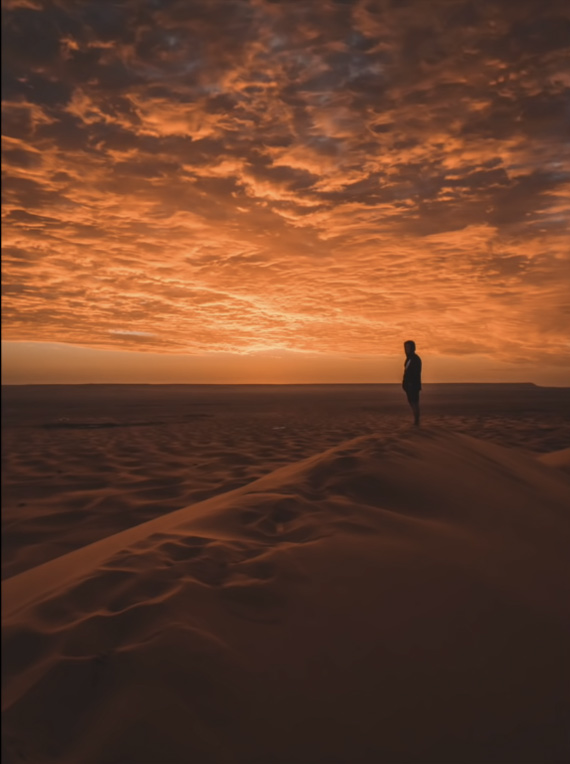
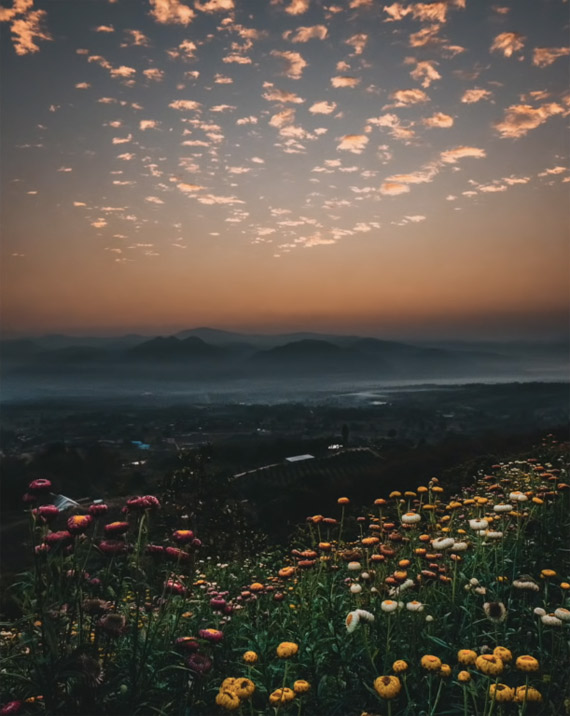
Wait for the blue hour

If you’ve taken the time to get to an amazing spot for the golden hour, then you’re really cutting yourself short if you leave the moment the sun sets. Some of the most beautiful reflected light happens after the sun dips beneath the horizon, not to mention the incredible light displays on clouds. Stay through at least the first half of the blue hour. By then you’ll be able to see if you’re going to get some more stunning sights or if the light’s just over.

5. Avoid messy backgrounds

Clean up your background

The background of an image is easily as important as the subject, and a messy background can seriously detract from the overall impact of your photo. The background needs to either isolate or frame the subject. It’s especially important to avoid having trees or telephone poles growing out of your subject’s head.

6. Avoid carrying too much gear
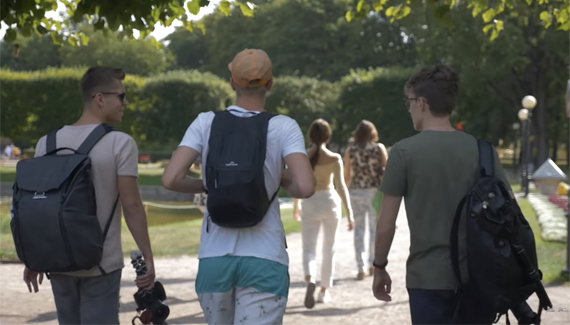
Go easy on the gear load

While it’s nice to know that you have everything you might possibly need on a shoot, carrying more gear than is comfortable, especially if you’re on a long excursion, can definitely distract from your overall experience. A sore back and shoulders can often be avoided if we just take what we know we’re going to need—not every lens in our collection.

(That being said, I’ve often been known to carry my 60–300mm zoom on a hike in the hopes that I might see some interesting wildlife.)

7. Be careful not to over- or under-edit your images
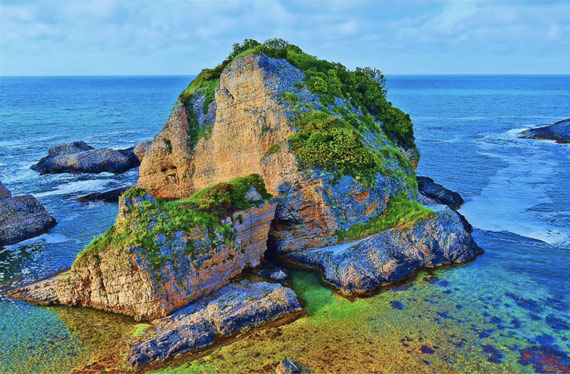
Avoid over-editing

Harrison’s last tip is probably the one most frequently abused. We’re so used to seeing over-saturated and otherwise unrealistic images in our feed. It’s often a challenge not to match them. But your images will come out looking more realistic if you go at the editing with a light hand. One rule of thumb is to adjust the image to where you think it should be then back it off by 10 or 15 points.

On the other hand, not editing your photos wastes a huge amount of potential. Simple things from lens corrections and levels/curves adjustments to straightening the horizon and adding a bit of sharpening can really help bring out the best in your work.

In the end, Harrison’s tips are all quite useful. But it’s important to remember that they’re just guidelines.

What are your travel photography dont’s?


Go to full article: What Not to Do in Your Travel Photography

What are your thoughts on this article? Join the discussion on Facebook

PictureCorrect subscribers can also learn more today with our #1 bestseller: The Photography Tutorial eBook

The post What Not to Do in Your Travel Photography appeared first on PictureCorrect.


from PictureCorrect http://bit.ly/2KymoPZ
via IFTTT

PictureCorrect.com: This Photography Lighting Technique Turns Day to Night

The idea of lighting a model with a candle light sounds great, but it can be tricky. When it comes to executing the shot, the light is simply not sufficient. So, how about photographing nighttime photos during the day? Photographer Gavin Hoey from Adorama shows you how:

When shooting in a room during the day to achieve a nighttime effect, you may be tempted to close the curtains and block out all the light. But Hoey suggests that you open up the curtains instead and let the light in to set the ambiance. You can then adjust your camera settings to control the light that is captured by the camera.

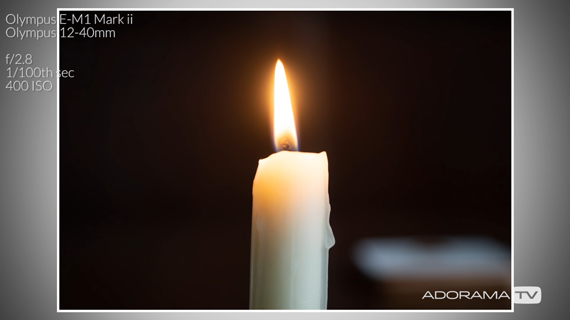
Meter for the Candle

When the candle is lit, it will be the brightest thing in the shot. Hoey meters for the burning candle at f/2.8, 1/100 second, and ISO 400.

metering the candle

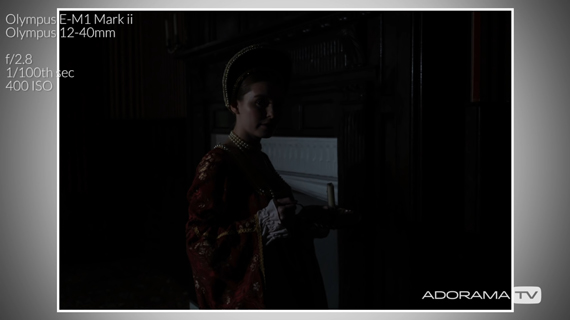
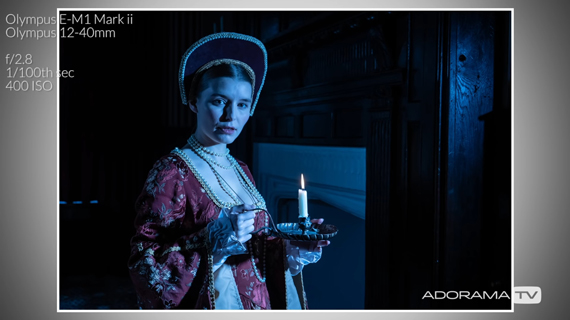
Next, with the camera fixed at those settings, he takes an image of the model in her environment. As you can see, he’s able to capture some detail on the model and the background.

image of model in dark condition

“I want some detail but not too much. Remember, this is nighttime effectively.”

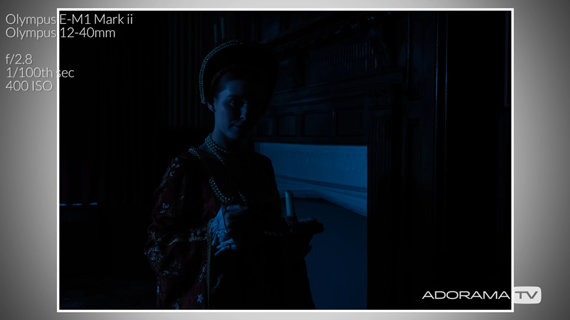
To add to the night effect, Hoey sets his camera’s white balance to 3000K. This makes the scene appear blue giving it a night feeling.

white balance set to cold setting

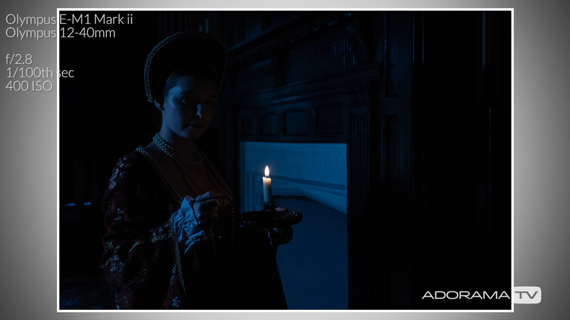
Once the mood is set, Hoey lights up the candle to see if it has any effect to light up the model.

dark image of model with candle lit

As you can see, the candle absolutely does nothing to light up the scene. This was pretty much expected.

Lighting and Color Balance

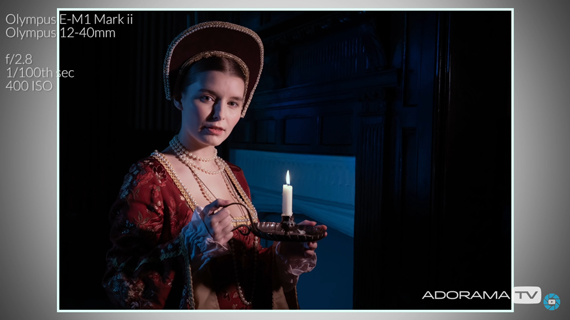
Since the light from the candle is simply not enough, Hoey uses an eVOLV 200 with a grid. This avoids any unnecessary spilling of light into the scene and illuminates just the model.

When deciding on what power to use, keep in mind that you’re aiming to replicate a night scene, so you’ll want to use the lowest power possible. Hoey starts from lowest power setting of 1/128, and here’s what he gets:

image of model with candle in night

“If the flash is too bright, I could move it further away. But, if it’s not bright enough, I could just increase the power.”

In the image above, the exposure looks just about right. The obvious concern is the color. Since the white balance is set to the cooler side, even the light from the flash appears blue. To tackle the issue, Hoey adds in a stack of orange gels to the flash.

using gels to warm the colors

“It’s worth remembering, of course, when you put the gels on your flash, it will reduce the brightness from the flash so you may need to adjust it a little brighter to compensate.”

Feeling that the background is darker than he wants it to be, Hoey adds in an XPLOR 400 as a background light. Again, since it’s nighttime that we are trying to replicate, Hoey makes sure that it’s set to its lowest power setting.

adding lighting to the background

“The whole idea here is to balance the exposure with the candle light. You don’t want to lose any detail in that candle.”

Post-Processing

Once done taking pictures of the model in artificial night conditions, Hoey goes on to edit the images, giving them a finishing touch.

First, he notices some areas in the images that appear warmer than they should be. To fix them, he creates a new layer and paints over those areas with a blue color. With the blending mode set to “Color” and by lowering the layer opacity, he gives a realistic effect to the image and the reflection on the mirror.

Next, Hoey aims to add a glow around the candle:

  • He adds a new layer and samples a color from the model’s skin.
  • With a large soft brush selected, he clicks once on the flame and changes the layer’s blending mode to “Lighten.”
  • To make the glow not so obvious, he then reduces the layer’s opacity.
  • Following these same steps, he adds a glow to the candle’s reflection on the mirror.

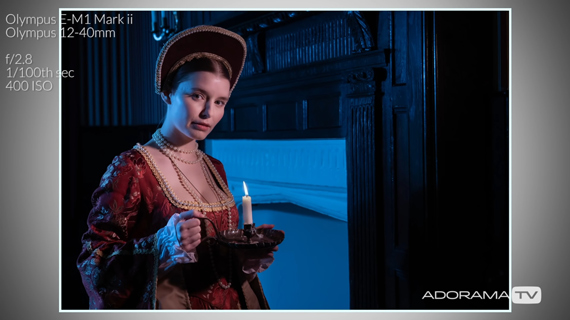
image of model taken at day to replicate night time

Can you tell from the final image that it was taken during daylight?


Go to full article: This Photography Lighting Technique Turns Day to Night

What are your thoughts on this article? Join the discussion on Facebook

PictureCorrect subscribers can also learn more today with our #1 bestseller: The Photography Tutorial eBook

The post This Photography Lighting Technique Turns Day to Night appeared first on PictureCorrect.


from PictureCorrect http://bit.ly/31bvQyA
via IFTTT

keskiviikko 5. kesäkuuta 2019

PictureCorrect.com: Street Photography Tips at Night

Taking pictures at night gives an image a completely different feel because it captures different stories of daily life—sometimes more dramatic than the ones captured during the day. There is also a whole new cast of characters at night that make taking pictures on the streets after dark an even more adventurous experience in street photography.

street photography at night

Barcelona, Spain © Juan Jose Reyes

Just by decreasing the available light, we increase the element of mystery in the image. Don’t get me wrong, it could still be an average image. Just because it was taken at night the picture won’t magically become a great photograph, but it might become a little bit more interesting. It may make the viewer ask just a few more questions. And depending on where you are, it may even add an element of danger.

“You don’t have to go looking for pictures. The material is generous. You go out and the pictures are staring at you.” –Lee Friedlander

night street photo

South Beach, Miami Beach, FL © Juan Jose Reyes

Here are a few tips for taking street photos at night:

1. Don’t use flash

I think this is key for several reasons. First, the ugly artificial light that results from the flash is just too harsh and unnatural. It also calls way too much attention to the photographer, and the idea in street photography is to blend in, not stand out like a lighthouse. Also, people expect the flash to go off after you take a picture at night; when they don’t see the bright light coming from the camera that was pointed at them, they think that you didn’t take a photo and they probably won’t question you. I never use flash when I shoot at night (or day or ever, for that matter). It might take some practice but in a short time you won’t miss it.

street photographer

Barcelona, Spain © Juan Jose Reyes

2. Increase the ISO

More than a suggestion, this is a necessity. Unless you increase the ISO, the shutter speed might become too slow and the whole picture will be way too blurry to even see what’s going on. As I wrote before, a little bit of motion blur is fantastic and makes for great street photography shots. But if the photo’s too blurry it loses the effect and is just confusing.

High ISO will also give the image some “noise” and it will look grainy, which is a great look for street photography. Make grain and blur your friends, not your enemies.

“New images surround us everywhere. They are invisible only because of sterile routine convention and fear.” –Lisette Model

3. Use available light to your advantage

Find a bright corner or a storefront window and position yourself in a way that it will light your subject’s face. Or maybe you want the light to their backs to make them silhouettes. Either way is fine, the choice is yours. It’s all a matter of moving around the light. Find what works and wait for an interesting subject to walk by. Try pointing the camera into the inside of storefronts or brightly lit buses; the light may be just enough to capture great scenes of people unaware that you are capturing the scene.

street photo

Barcelona, Spain © Juan Jose Reyes

4. Use fast lenses

Fast lenses, with maximum apertures such as f/2.8 or f/1.4 are great for low light situations. The same thing applies to full frame cameras. Any lens or camera is fine but full frame cameras or fast lenses make things easier because they have a better sensitivity to light. Use what you have and practice and look at the results before you invest your paycheck in a more expensive camera or lens.

“Anything that excites me for any reason, I will photograph; not searching for unusual subject matter, but making the commonplace unusual” –Edward Weston

5. Avoid isolated areas

It’s not necessary to go to a dangerous area to get interesting pictures. Any crowded area will do, especially if you are just starting.

low light street photography tips

Miami Beach, FL © Juan Jose Reyes

Taking pictures on the streets at night is not the usual thing to do, but if you want to give your street photography a little extra excitement consider going out for a walk after the sunlight has been replaced by street lamps.

About the Author
Juan Jose Reyes is a street photographer based in Miami, Florida (juanjosereyes.wordpress.com).


Go to full article: Street Photography Tips at Night

What are your thoughts on this article? Join the discussion on Facebook

PictureCorrect subscribers can also learn more today with our #1 bestseller: The Photography Tutorial eBook

The post Street Photography Tips at Night appeared first on PictureCorrect.


from PictureCorrect http://bit.ly/2iyqJnt
via IFTTT

PictureCorrect.com: Domestic Documentary Photography: 9 Tips

No matter what genre of photography you’re into, your most intimate photos will always be of your friends and family. You may not appreciate the fashion photographs that you take now in your later days, but the images of your near and dear ones will always remain special. In this video, Andrew shares nine tips for better family photographs:

1. Always Have Your Camera Handy

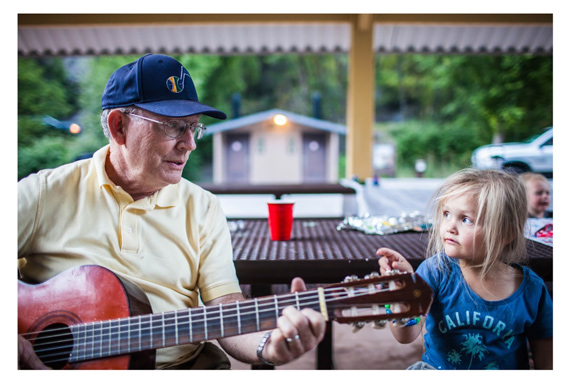
You can’t anticipate when something really interesting might happen when you’re with your family. It’s always a good idea to have a camera with you to capture those special moments. At home, have the camera easily accessible. You don’t know when something fun and interesting may happen that you’ll cherish later.

have your camera handy

“If your camera is in a camera bag in the closet, I guarantee you will miss some of the best moments that can happen around the home.”

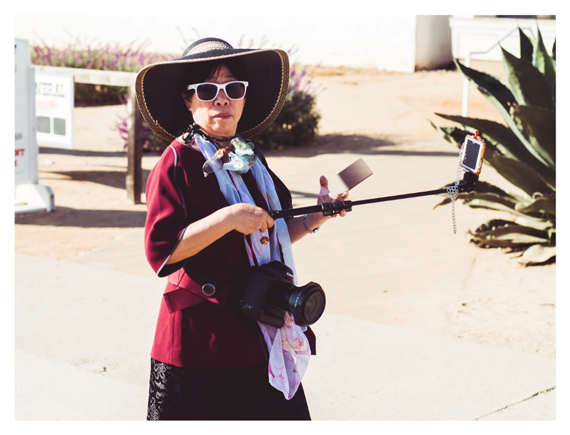
However, it’s also important that you consider the size factor. The bulkier the camera and the lens, the more inconvenient for you to have it around. Big equipment also draws attention and makes family members aware of what they’re doing.

“A camera should be convenient. But it should not be so convenient that you forget that it’s with you.”

2. Always Be Aware

Awareness is what differentiates good photographers from bad ones. Poor and inexperienced photographers take photos only when the scene is set. The resulting images feel mundane.

“You just hiked a mountain. What do you do? You take a photo of the family in front of the view.”

be aware when with family

On the other hand, good photographers have their subconscious mind always thinking about moments that could make great photos. If you happen to have a camera around, you will be able to take advantage and get the photos. Also, having a camera with you will keep your mind thinking about potential moments worth capturing.

3. Story is More Important Than Medium

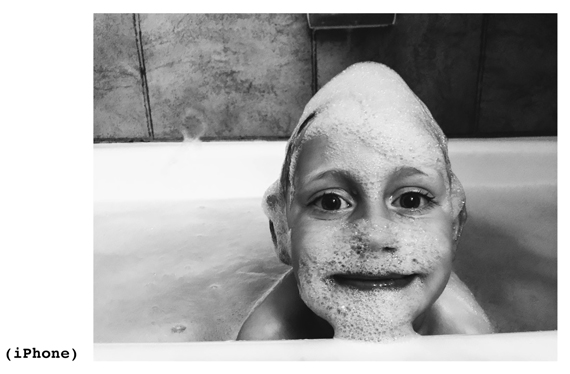
While having a camera with you wherever you go is ideal, not having a camera with you shouldn’t keep you from capturing the moments that are in front of you. Instead of wishing that you had your camera with you, make use of your smartphone camera. Photographing the moment is what matters the most.

4. Know Your Gear Well

Photographic moments come unannounced and don’t stay for long. It’s essential that you know how to operate your gear efficiently. This increases your chances of capturing the perfect moments.

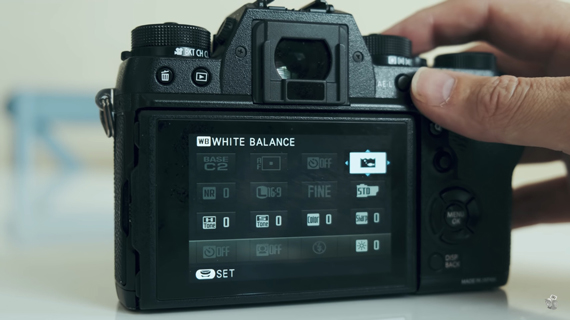
A good practice to ensure that you don’t miss to capture precious moments can be to reset your gear once you’re done shooting. For instance, after shooting in low light, set everything back to the default or auto mode so that you can quickly operate it next time. Also, learn how you can launch your smartphone camera quickly.

“Doing so will save you from missing or messing up shots next time you pick up your gear.”

know your camera well

5. Don’t Be Too Proud to Shoot in Auto

“‘Only noobs shoot in auto mode’ is a terrible excuse.”

Of course you need to know how to balance the exposure and set your focus. But what importance will all that have if you miss out on your shot while adjusting the settings?

“If you’re worried about impressing people, then stop missing good shots.”

6. You Don’t Have to Photograph Every Step of the Journey

When out with your family traveling, you don’t need to take photos in front of every interesting thing that you see. Chances are, you won’t like it later because these kinds of photos don’t tell a story. Try to take photos that become a part of a memory.

avoid taking unnecessary photos

“You’re not trying to create a log book. What you’re trying to create is a poem. Good poems say a lot more with less. Use a small number of photos to capture the emotion of a full journey.”

7. Bring More Interest to Your Shots

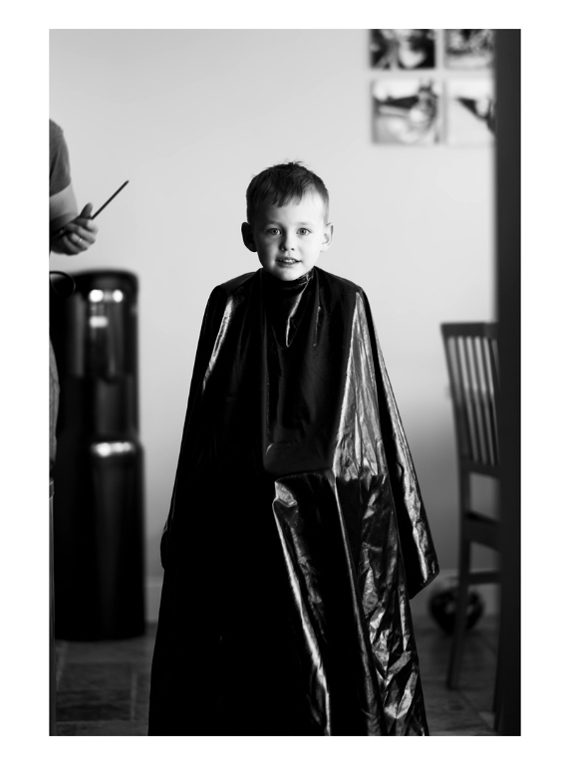
Using a wide aperture to blur out the background is a basic way to isolate the subject and draw attention. But that’s not enough. Look for other ways you can separate the subject. See if you can move around to place the subject on a contrasting background. Can the light play a role to add interest to the subject? See if you can frame the subject in some way. Compose to get rid of distracting elements.

framing a family member

“In short, be aware of all the elements surrounding your subject and brace them. Don’t completely obliterate them by always blurring everything into oblivion.”

8. Don’t Be Too Harsh On Yourself

You won’t be able to photograph every moment. Lamenting over such lost opportunities will only make photography stressful. And you’ll stop enjoying what you do.

“But the only real way forward is to rejoice in the moments you’re able to catch. And accept and learn from the moments that you don’t.”

9. Stop Trying to Recreate Lost Moments

If you miss out on photographing a certain moment, you may be tempted to recreate that moment. For instance, maybe your child did something awesome that you missed. Telling them to do it again, this time with your camera pointed at them, may make them feel stressed.

“If you do this too often, your children will start the resent the camera and you. Instead, accept that you missed the moment. Enjoy the moment for the joy that it brought you and go get your camera so that you’re ready for the next time something interesting happens.”

Keep some of these interesting points that Andrew shared in mind. They’ll definitely help you take better photos of your family!


Go to full article: Domestic Documentary Photography: 9 Tips

What are your thoughts on this article? Join the discussion on Facebook

PictureCorrect subscribers can also learn more today with our #1 bestseller: The Photography Tutorial eBook

The post Domestic Documentary Photography: 9 Tips appeared first on PictureCorrect.


from PictureCorrect http://bit.ly/2Ikpe8D
via IFTTT

PictureCorrect.com: How to Fix Reflections in Food Photography

Reflections can be used to tell a story or add a sense of symmetry. They work amazingly in genres like landscape photography or street photography. But they’re not always welcome. In food photography, for instance, reflections are often distracting. Professional food photographer Joanie Simon shares her tips on how to deal with reflections on silverware:

Types of Reflections

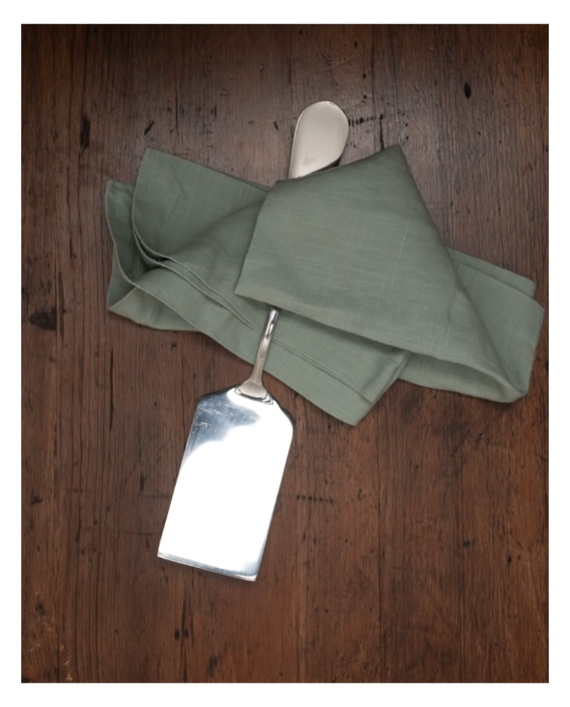
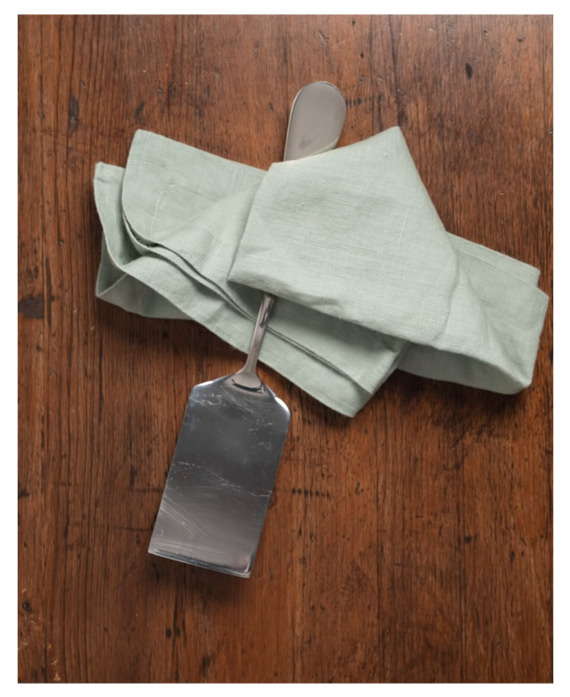
Direct reflection occurs off of a surface that is highly reflective (shiny). In the case of food photography, the utensils and silverware are good examples of objects that produce direct reflection. What distinguishes direct reflection from other types is the intensity of the reflection. In this photo of a spatula, the reflection is almost as bright as the source due to direct reflection.

direct reflection from a spatula

Diffused reflection occurs when light strikes non-shiny objects. The reflecting light rays are scattered randomly and hence the reflection is not too bright. Consider the napkin in the above image. It’s an example of diffused reflection.

Managing Reflections

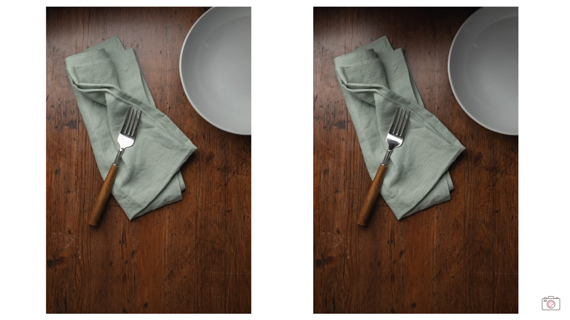
By now, you must have guessed that it’s the direct reflections that you need to worry about. To manage reflections, Simon discusses the concept of “Family of Angles.” According to this concept, you only get a direct reflection when your camera is within a certain range of angles. Beyond that, the direct reflections won’t bother you.

To avoid direct reflections, you simply need to place your camera outside of the reflected path of the light.

managing reflection in food photography

“I’m generally not crafting the light specific to the forks and the knives and the flatware. I’m creating the light so that it’s most flattering for the food and that the flatware is supplemental to the image.”

The aim is to enhance your main subject (food) while making sure that the utensils don’t cause a distraction. It’s not always possible for you to move the camera around and sacrifice composition. A trick is to simply move the flatware so it doesn’t catch any direct light. Tilt or reposition the cutlery until you see that the distraction is eliminated. Simon’s trick when repositioning items is to use a little bit of museum putty.

repositioning the knife to manage reflection

If you cannot change the position of the flatware, you can use a gobo. They can help in blocking the light falling within the family of angles thereby getting rid of the distraction.

using a gobo to cut reflection

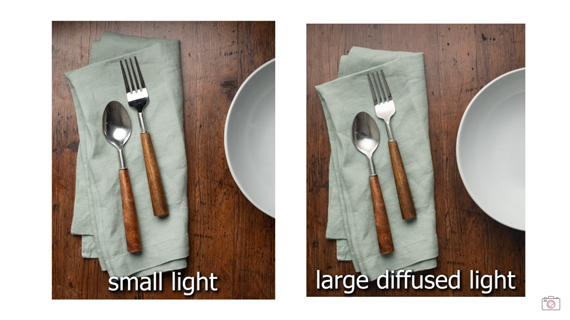
And then there are spoons. A highly polished curved surface can really cause issues with reflections. Because of the curvature that they have, they form reflections of almost the entire space around them.

Simon uses two strategies to minimize reflections when photographing a scene with spoons.

  1. Use a very large light source that creates a diffused, soft light. This fills in as much of the family of angles present in the spoon with soft and diffused light thereby softening the highlights. You can achieve this by adding a big diffuser in front of your flash.
    using diffused light to control reflection
  2. Get yourself a set of cutlery that’s less shiny. People may call it cheating but it surely gets the job done. Alternatively, you can use a “matte spray” or a “dulling spray” over the surface of shiny spoons. This diffuses the light and avoids harsh reflections.
    matte spray to reduce cutlery reflection

With these handy tips, you certainly won’t have to worry about getting reflections during your food photography sessions.


Go to full article: How to Fix Reflections in Food Photography

What are your thoughts on this article? Join the discussion on Facebook

PictureCorrect subscribers can also learn more today with our #1 bestseller: The Photography Tutorial eBook

The post How to Fix Reflections in Food Photography appeared first on PictureCorrect.


from PictureCorrect http://bit.ly/2HXgWEL
via IFTTT
tiistai 4. kesäkuuta 2019

PictureCorrect.com: Waterfall Photography Tips and Techniques

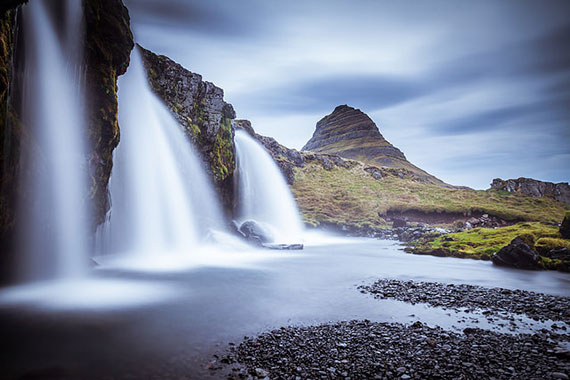
Waterfalls seem to grab the hearts and minds of people. Go to any location that has one or more waterfalls and it is pretty much a guarantee that they will be a major attraction, if not the main attraction, of the area. However, as beautiful as waterfalls are, it is not so easy to capture that beauty with a camera. It is easy to produce pictures of waterfalls; it is not so easy to produce powerful images.

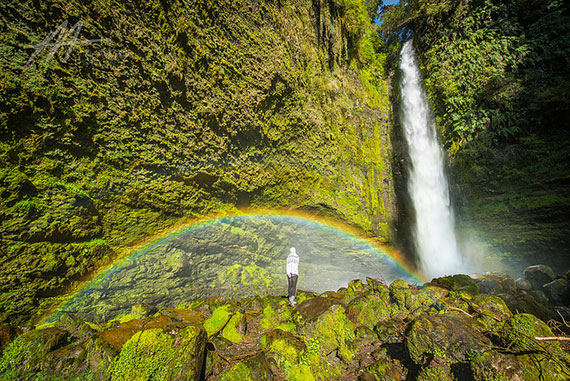
techniques and tips for photographing a waterfall

Photo by Andrés Nieto Porras; ISO 50, f/6.3, 1/30-second exposure.

Waterfalls provide their own unique set of problems which requires a unique set of solutions. This article is about those unique problems and the solutions that allow photographers to produce images that communicate the power and beauty that is inherent in the waterfalls that stand before their lenses.

Weather

Weather plays a huge part in producing great waterfall images. Quite simply, waterfalls do not photograph well in nice, sunny weather. The best time to photograph waterfalls is in overcast weather.

Some waterfalls will photograph best in light overcast. Light overcast produces a light that is gentle but which still has enough power to bring out the colors in a scene. Other waterfalls photograph best in strong overcast. Strong overcast can produce a very moody image with a power to convey that sense of mood in an image. In fact, very powerful waterfall images can even be produced in rainy weather (during a break in the rain).

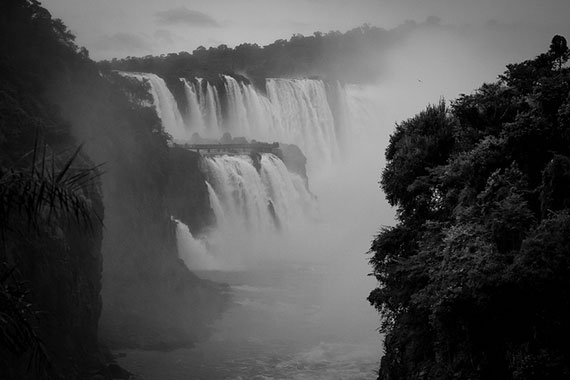
capturing waterfalls with your camera

Photo by Adam Allegro; ISO 50, f/9.0, 1/40-second exposure.

An Old Filter

One of the major challenges in photographing waterfalls has to do with water getting on the lens (or the filter in front of the lens). Powerful waterfalls can drop huge amounts of water which produces a mist. In other cases, the weather may produce fog, drizzle, or rain that gets on the lens. All of this can be exacerbated by wind (which always seems to be pointed directly toward my lens).

A partial solution is to place an old, clear filter in front of the lens while the equipment is being set up. Once the photographer is ready to go, the photographer will need to remove the filter from the lens in order to take the shot.

Tripod

Don’t even think of photographing a waterfall without a tripod. A large part of the nature of waterfalls is the movement of the water. This movement is most often captured with shutter speeds that are slow enough that clear images can not be produced with a handheld camera.

tripod use with waterfalls

“Fiery Autumn Waterfall” captured by Forest Wander

White Balance

The lighting involved with waterfall shots can be tricky. In overcast or rainy conditions, the light will likely have a blue tint. If the waterfall is in a forest, the light may bounce off the trees and pick up a green tint. Neither the auto white balance nor the preset white balance options on a camera will guarantee accurate white balance. The best solution is to perform a manual white balance (your camera manual will explain how for your particular camera).

Polarizer

Objects that are wet tend to produce glare. This glare is often polarized. This is particularly an issue with waterfall shots because the rocks and vegetation near the waterfall will be wet and will almost certainly have a certain amount of glare. A polarizer will remove the glare. In addition, a polarizer has a secondary effect. By removing the glare, the color saturation will improve.

Bubble Level

Sadly, the human eye is not a very good judge of whether a camera is level. Luckily, a bubble level is designed specifically for leveling a camera. A bubble level is an inexpensive, small, easy to use device that fits into the hot shoe of a camera and allows a photographer to verify that the camera is level. It works in the same way as a carpenter’s bubble level. Simply center the bubble between the lines and the camera is leveled.

how to take good pictures of waterfalls

Photo by dahorsburgh; ISO 800, f/10.0, 1/800-second exposure.

Composition

Identifying and capturing strong composition is an extremely important part of creating powerful waterfall images. While the purpose of this article is not to carry out a thorough review of composition, a couple of aspects of composition, curves and environment, will be covered.

Curves can make or break a waterfall image. With waterfalls, two types of curves are particularly important. The first type of curve is the curve formed by the water. Waterfalls that have water that flows or falls in such a way as to form curves tend to create much more interest than waterfalls where the water simply falls straight down. In essence, graceful curves add an element of elegance to a waterfall. The second type of curve is any curved object that points toward the waterfall. This type of curve will repeatedly direct the attention toward the waterfall and strengthen it as the center of interest.

The second major component of waterfall composition, covered in this article, is the environment surrounding the waterfall. This is extremely important to many waterfall shots. By itself, falling water is not always that interesting. Rather, it is the surrounding environment that gives waterfalls much of their character. Therefore, why not include some of that environment in the image to bring out the waterfall character. The surrounding rocks, trees, and vegetation can make the waterfall image come alive.

Shutter speed

What shutter speed should be used to blur the falling water? That seems to be the first question that people usually ask about shooting waterfalls. However, there is no such thing as one correct shutter speed for shooting waterfalls! Rather, the proper shutter speed is a function of five factors.

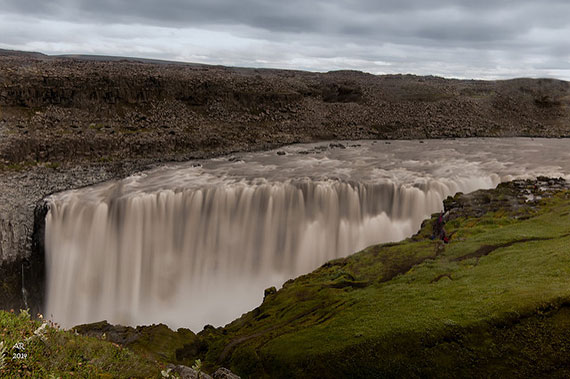
take better waterfall photos

Photo by Anita Ritenour; ISO 100, f/25.0, 10-second exposure.

  • The amount of blur desired
  • The volume of water
  • The speed of the water
  • The distance between camera and water
  • The direction of water flow with respect to the lens

In short, the best shutter speed varies from one waterfall to another. At first, that might sound a little bit daunting, “How can I ever figure out the best shutter speed; it changes from one waterfall to the next?” Actually, with a digital camera, it is easy to find the best shutter speed. You can simply take some test shots at different shutter speeds and examine the results on the camera monitor. Zooming in on the monitor will allow you to see the water detail fairly well.

For large waterfalls with huge volumes of tumultuous water, where it is desired to capture the violent nature of the falling water, 1/100 second is a good shutter speed with which to start. For smaller waterfalls, waterfalls with less water, or waterfalls where it is desired to produce a dreamy look, a shutter speed of 1/2 second to 2 seconds might be used.

Exposure

Getting the right exposure can sometimes be a challenge when photographing waterfalls. Probably, one of the biggest problems is that it is easy to clip the highlights in the water. What this means is that the detail in the water is lost, and the water becomes just a big area of pure white. When this happens, the water just doesn’t look very real. The solution for this problem is to take a test shot of the waterfall and check the histogram on the monitor of your digital camera. If the histogram is cut off on the right side, the highlights have been clipped. If this is the case, the exposure needs to be decreased.

tips and techniques to use for capturing waterfalls

Photo by Martin Strattner; ISO 100, f/11.0, 1/250-second exposure.

Summary

With these tips, you should be on your way to capturing some great waterfall images.

About the Author
Ron Bigelow (www.ronbigelow.com) has created an extensive resource of articles to help develop photography skills.


Go to full article: Waterfall Photography Tips and Techniques

What are your thoughts on this article? Join the discussion on Facebook

PictureCorrect subscribers can also learn more today with our #1 bestseller: The Photography Tutorial eBook

The post Waterfall Photography Tips and Techniques appeared first on PictureCorrect.


from PictureCorrect http://bit.ly/2C4oQpM
via IFTTT