tiistai 9. huhtikuuta 2019

PictureCorrect.com: Make Sure Your Photographs Tell a Story

Today’s photo tip–make sure all of your photos tell a story–is easy to understand but not so easy to put into practice. The good news is that, like anything else, it gets easier and better with experience.

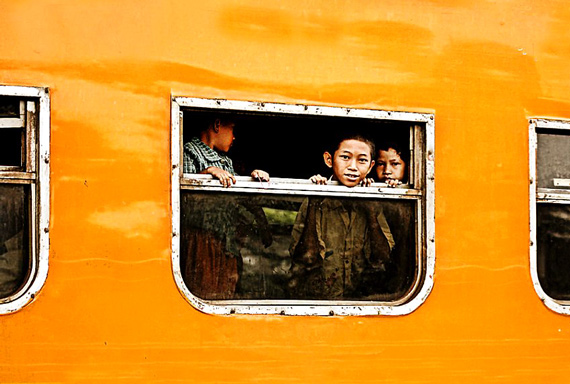
travel photography

“Orange Carriages” captured by PictureSocial member Cornelius Rahmadi Witono

In an interview, military photographer of the year, Master Sergeant Jeremy Lock, said that he looks for two things in a photograph: a face and a story. Admittedly, anyone can stumble on a lucky shot where everything falls into place and they win a bunch of awards, but Master Sgt. Lock has won the military photographer of the year six years in a row; he obviously knows what it takes!

Today, we will discuss the storytelling aspect of an award winning photo. This concept is so important that I wanted to talk about it a bit and give you a photo training project.

An award winning image needs more than good exposure, sharp focus, and so on. It needs a story. Something that will engage the viewer and make him or her want to keep looking at the photo–and possibly even get some personal meaning from it. The problem is that it’s difficult to get this quality into your art. It takes being aware that a story is needed and the ability to find that story.

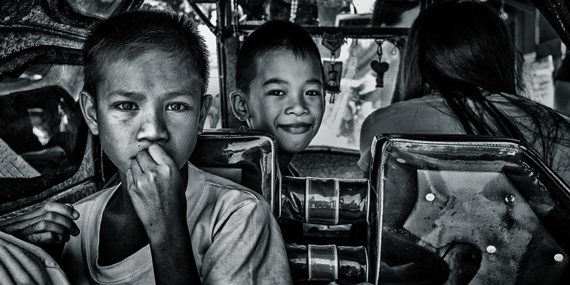
candid portrait photography

“Bukas Na Kami 8” captured by PictureSocial member Rob Castro

Here’s a project that may help you put the storytelling concept into your photography. For the next few weeks, every time you think about it, look around and ask, “If I had to take only one picture of this, what would be the ideal way to communicate exactly what is happening?” Once you’ve decided the best way to communicate what is happening, ask yourself, “What is the least I could show that would clearly indicate what is happening?” In other words, first try to find the defining image, then strengthen it by eliminating extraneous details.

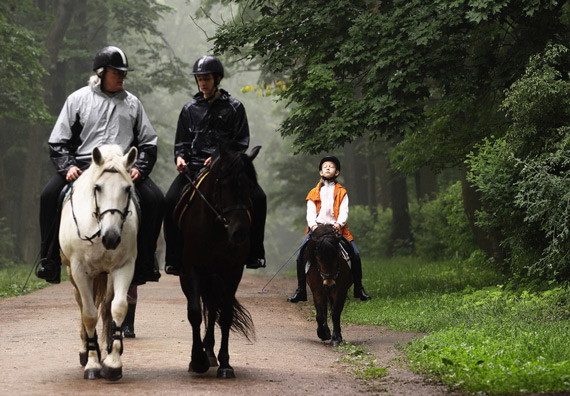
candid photography

“Untitled” captured by PictureSocial member Lilia Tkachenko

Do this exercise while at home, at work, driving to and from work, walking the dog–whenever you think of it. Eventually, looking for the story and finding the best way to visually tell the story will become a habit, and it will start to show up in your art.

However, without a thorough grounding in the basics, you cannot hope to master the more advanced concepts. So, of course we’re assuming you know how to get your concepts into the camera with aperture, exposure, composition, and so on. Art can’t happen if you are struggling with the technical details. They have to be almost second nature. If you feel you are weak in these basic areas do whatever you can to learn to control your camera. Practice, take courses, or get a friend to help out.

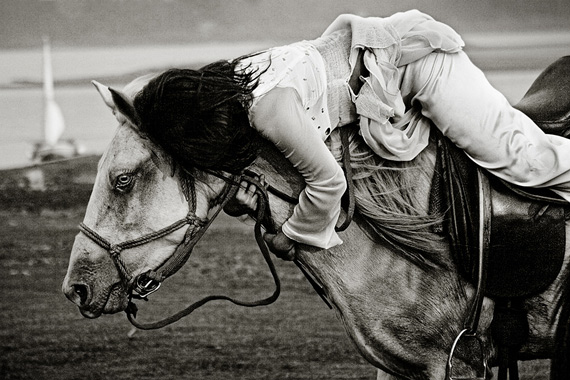
emotional photography

“Horse Hug” captured by PictureSocial member Thomas Jeppesen

In the meantime start looking at everything around you as a photo story, then decide how you could best tell that story in one photograph.

About the Author:
Dan Eitreim writes for ontargetphototraining.com. He has been a professional photographer in Southern California for over 20 years. His philosophy is that learning photography is easy if you know a few tried and true strategies.


Go to full article: Make Sure Your Photographs Tell a Story

What are your thoughts on this article? Join the discussion on Facebook

PictureCorrect subscribers can also learn more today with our #1 bestseller: The Photography Tutorial eBook

The post Make Sure Your Photographs Tell a Story appeared first on PictureCorrect.


from PictureCorrect http://bit.ly/2Iq7KsX
via IFTTT

maanantai 8. huhtikuuta 2019

PictureCorrect.com: Shutter Speed: Get Creative

The shutter speed setting on your camera has two purposes. The first is to help you obtain the correct exposure. The second—and this is the one of interest to creative photographers—is to determine the way that the camera records movement.

understanding shutter speed

Fast shutter speeds to capture action

Freezing Motion

This is perhaps the most obvious example. You can use fast shutter speeds to freeze motion, just as I did at a reenactment of a mediaeval jousting tournament. A shutter speed of 1/1000 (plus setting the autofocus to its predictive mode) froze the galloping horse in mid-stride.

The precise shutter speed you need to freeze motion depends on the speed and angle at which the subject is moving plus the focal length of the lens you’re using. Digital cameras make shutter speed selection easy; you can check the image on your camera’s LCD screen to see if the selected speed was fast enough.

Moving Out of Automatic Mode

If you’re accustomed to using your camera in any of its fully automatic modes, then please stop right now. The best way to harness the power of the shutter speed setting is to decide for yourself which setting to use. Always remember that the camera is just a light-tight box with an electronic sensor that records light. It’s a machine, a tool. It has no heart or soul. These things come from you.

maunual mode DSLR

Shutter Priority Mode

The best way to set the shutter speed is to use Shutter Priority mode. On my Canon EOS cameras this is depicted with the letters Tv, which stand for Time value. In Shutter Priority, you set the shutter speed and ISO, and the camera sets the aperture automatically according to the light reading from its internal light meter. It’s really easy to use and, best of all, you have complete control.

Middle of the Road

For most photos you will probably use a middle of the road shutter speed setting. By this I mean anything from around 1/50 to 1/250 second. These are typically the speeds that your camera will set in fully automatic, or that you would choose if you wanted to take a photo hand-held (ie without the support of a tripod or monopod) and prevent camera-shake (more on that in a moment).

shutter priority mode DSLR

With a bit of thought you can still use these shutter speeds creatively. I took the above photo in Antigua, Guatemala using a shutter speed of 1/60 second. Antigua has lots of beautiful, colorful colonial architecture. I was photographing the buildings in the photo when I noticed a local man approaching on a bicycle.

I realized that he would add interest to the photo, changed the shutter speed, then pressed the shutter button just as he appeared in the frame. 1/60 second was fast enough to prevent camera shake (the buildings are sharp), but slow enough to blur the motion of the man on the bike, giving a sense of movement. Can you imagine the result if I had used 1/1000 second? The man on the bike would be frozen, and I don’t think the photo would have as much impact.

Camera Shake

Camera shake is one of the main causes of poor photos that newcomers to photography experience. Camera shake is the thief of sharpness. There is no point in buying good glass if you are not holding the camera correctly, or setting shutter speeds that are too slow. There are two steps to prevent camera shake when hand-holding a camera:

  • Hold the camera correctly. Use one hand to support the camera body. The camera sits in your palm and you use your fingers to adjust the focusing or zoom rings. The other hand holds the grip. You also need to be balanced. If you are off balance then it’s harder to hold the camera steady.
eliminate camera shake

A steady technique to hold the camera

  • Select the correct shutter speed. If you’re using an APS-C camera, a general guide is to invert the focal length of the lens, find the nearest shutter speed, then halve it. For example, if you are taking a photo with the 55mm end of a kit lens, invert the focal length: 1/55. Find the nearest shutter speed: 1/60 second. Halve it: 1/125 second.

If you have a full-frame camera then you don’t need to to halve the shutter speed. A shutter speed of 1/60 second should be sufficient to obtain a sharp image with a 50mm lens.

Using Slow Shutter Speeds

Here’s where the shutter speed dial gets really exciting. There is just so much creative stuff that you can do here. Here are a few examples to whet your appetite:

Slow-Sync Flash

We used a roundabout in a children’s playground to create this image. I sat on the opposite side of the roundabout to my model and asked her to spin us around. I set a shutter speed of 1/30 second which created the blurred background.

motion blur

Slow-sync flash with 1/30 sec shutter speed

Here’s the crucial bit: I used a Speedlite flash mounted to the camera, set it to automatic and let the camera calculate the exposure. The result—the burst of flash froze my model in mid-spin.

Intentional Camera Movement

When is camera shake not camera shake? When it’s intentional camera movement. For this technique set a slow shutter speed then deliberately move the camera during the exposure. It’s a bit hit and miss until you get the hang of it, but for inspiration look at the work of Chris Friel, a photographer who has mastered the technique (you can read my interview with him here).

motion blur

Intentional camera movement with slow shutter speed of 1/2 second

It works best for me in black and white, whereas Chris Friel uses it a lot in color. Use your camera’s LCD screen to look at your photos as you make them and analyze the result of your camera movement and shutter speed. You can gradually change both until you end up with a pleasing result.

A Tripod to Support the Camera

If you look at the water in this photo you will see how a slow shutter speed transforms it to an ethereal milk-white blur. I asked my model to stand still throughout the exposure so that she recorded sharply.

using a tripod

Tripod support with 1/2 second shutter speed

I took several photos as it was inevitable that she would move a little and that let me select the sharpest one. I supported the camera on a tripod and used a cable release to fire it to avoid camera shake.

Long Exposure Photography/Bulb Exposure

I took this photo at dusk. The low light levels meant that I needed a shutter speed of 48 seconds at f/8. The result is what is known as long exposure photography. The long exposure blurs the motion of the sea. The streak of light in the sky is from an airplane approaching a nearby airport.

long exposure photography

Use bulb mode for very long shutter speeds such as this one: 48 seconds.

Long exposure photos work because low light is atmospheric and they record the scene in a unique way. You don’t see the world like this with your naked eye, and you won’t see it recorded like this in a video or a painting.

Hopefully this article has opened your eyes to the creative possibilities presented by your camera’s shutter speed setting.

About the Author:
My name is Andrew S. Gibson and I’m here to help you take better photos. I’ve taken photos in over 60 countries, studied for a degree in photography and worked as Technical Editor for EOS magazine. Now I’m a freelance writer and I make a living writing and teaching people about photography. In recent years I’ve lived in the UK, China and New Zealand, which is now my home.


Go to full article: Shutter Speed: Get Creative

What are your thoughts on this article? Join the discussion on Facebook

PictureCorrect subscribers can also learn more today with our #1 bestseller: The Photography Tutorial eBook

The post Shutter Speed: Get Creative appeared first on PictureCorrect.


from PictureCorrect http://bit.ly/2GalFSt
via IFTTT

sunnuntai 7. huhtikuuta 2019

PictureCorrect.com: 7 Questions to Help You Find Your Perfect Personal Photography Project

Looking for the perfect photo project can sometimes be as challenging as searching for the perfect shot. Personal photo projects are a good way to motivate yourself to shoot more pictures, stretch your creativity, or even support the causes that are important to you, but how do you find the right ones? What do you do with the photos once you’ve found the perfect project? Here are seven questions to jump start your creative thinking.

faces of africa photography project

photo by Mark Fischer

1. What are your hobbies?

This should be obvious, but you want your project to be something you will be motivated to continue over the long term. What better motivation than something for which you already have an interest? Take your hobbies and look for ways to document them, explain them, or showcase them.

2. What are your communities?

Churches, clubs, or informal groups can also provide options for personal projects. Because you are a member of these communities, you have access to get in close and share what attracts you to them. Alternatively, you can help them tell their story.

3. What magazines do you read?

The magazines you read reflect your interests, but you can also find another creative benefit. Each magazine has its own editorial style. Give yourself the assignment to shoot in their style and then personalize the photos to make your own version of the publication.

flute photo

photo by John Liu

4. What skills do you want to master?

Let’s say you want to get better at portrait photography, a project that allows you to focus on that skill would be ideal. 100 Strangers is a project that lets you pair portraits with street photography. That can be a fun combination.

5. What are your values?

This is a little more abstract, but your value system can be an interesting place to find ideas. What do you care about? There’s probably a way to tell that story or support a cause with your talents.

6. What makes you angry?

Someone once told me that the things that make you angry can usually point you to your purpose. For instance, if you get mad every time you think about (insert your issue here), working to right the wrong might be your true calling. What makes you crazy out there? Use your photos to document those injustices, or maybe you can highlight your solution. That might be more satisfying than you think.

7. Who inspires you?

This could actually be a portrait angle or a values angle. A theme that follows the people who inspire you can be rewarding. One of my friends created a personal heroes project that is similar to this idea.

What will you do with the images?

Finding a personal project is satisfying all by itself, but what you decide to do with the images could provide an extra level of motivation.

  • Blog them – This is probably one of the easiest ways of sharing a project. Blogs allow you to become your own publisher and share your photos and thoughts in an ongoing timeline. Share them with your community and inspire a conversation.
  • Donate them – For every cause or topic, there is likely a nonprofit in desperate need of photos. Volunteering to support a needy organization is a great way to use your talents. You get a creative outlet. They get resources to tell their story and propel their mission. You can’t beat that.
  • Photo book them – These days it’s so easy to create your own photo book or other product. Online sites make it easy to create a coffee table-quality book that showcases your work and ideas. You can sell them or keep them as your own personal brag piece.
  • Publish them – If there is a news component to the project you select, you might find your community newspapers eager to publish your photos. All editors love impactful images, and someone who sends them great storytelling photos will soon become a best friend. You get exposure. Newspapers get content. Readers learn.
  • Sell them – Just because it’s a personal project, doesn’t mean you can’t make money from it. Your personal online gallery could allow you to offer your photos for editorial or commercial use. You might even consider stock or micro stock photography sites.

If none of these ideas appeal to you, try a Project 365 – photo a day or Project 52 – photo a week. This has the added benefit of motivating you to take more pictures regularly.

No matter how your personal photo project unfolds, you will find that there are great rewards both in the process of creating and in the sense of accomplishment when you have completed it.

About the Author:
Lynford Morton (www.shutterbuglife.com) spends weekends at Washington, DC’s favorite locations—making new friends and sharing his love of photography with eager new photographers.


Go to full article: 7 Questions to Help You Find Your Perfect Personal Photography Project

What are your thoughts on this article? Join the discussion on Facebook

PictureCorrect subscribers can also learn more today with our #1 bestseller: The Photography Tutorial eBook

The post 7 Questions to Help You Find Your Perfect Personal Photography Project appeared first on PictureCorrect.


from PictureCorrect http://bit.ly/2KdugI9
via IFTTT
lauantai 6. huhtikuuta 2019

PictureCorrect.com: Top Tips for Photographing People

I’ll start with what I feel is the most important thing to think about.

Interacting with Your Subject

As a photographer of people, the relationship I establish with my customers is key. Not just because they pay me, but also because I want to get the best from them. I spend a lot of time and effort getting to know my clients. I have spent all my life working with people and I use all of my skills to really understand what makes them tick. It can make the difference between nicely shot photographs or beautiful images that really show the emotion between them.

To achieve this I not only get to know them but I let them get to know me, I share my personality with them. I build up a trust that means when I ask them to do something they do it, believing in me. That’s what you need to do. You probably won’t have time for three meetings and a pre-shoot beforehand like I do with my brides and grooms, but you can still achieve something.

Do you know the subject at all? No? Then before you take any pictures spend some time getting to know them and letting them get to know you! Chat over a cup of coffee. Relax in each other’s company.

If you already know them quite well, still take some time to talk before you start. Tell them what you’re going to do and what they should expect as you take their picture. Ask them about the style of pictures they like.

Calm their fears if they say, “I don’t like having my picture taken.” By the way, 99 percent of people say that to me and my aim is to hear them say, “I really enjoyed that,” after a photo shoot! This time invested will pay fantastic dividends as you start to shoot and they are relaxed and trusting with you. I’ll talk about children in more detail in part two, but getting to know your subject and explaining what you’re doing is even more vital when you’re photographing children.

Composition

This is the second most important thing to consider when you are making someone’s portrait. The picture won’t only show them, it will show their surroundings and maybe other people or objects. Are you able to take the subject where you want or are you limited to say their garden or a room in their house? If possible, go to the location beforehand and have a look around. Look for places that will make a good backdrop. Don’t discard anything; it doesn’t have to be a nice view. One of my favorite places is a beach in Devon where there is a beautiful old stone wall. So how do you choose a place?

environmental portrait

. photo by John Ragai

Keep in mind that your picture will be about a person or persons, so wherever you choose it shouldn’t take over the picture. Nor should it be the focal point or be too distracting. What would make it distracting? The eye will tend toward areas that are bright or colorful, so look at your background (and foreground) carefully. Is there anything in it that will take the viewer’s eye away from your subject? You should consider carefully exactly where you place your subject against your chosen background.

Make sure that they don’t have a building, lamppost, or other object growing out of their head! Move yourself or your subject. If you’re shooting inside someone’s house, don’t be afraid to ask him or her to move (see below reference lighting) and ask them to take pictures and personal effects down from the walls. You need to decide whether you are going to shoot your subject at full length or whether you are going to crop in close.

Whatever you decide, the rule is to avoid the joints. Don’t end your picture at a joint such as the knee, as it can make it look like the limb has been amputated. It’s fine to crop a limb but just not at a joint.

Lastly, think about where you will place your subject in the frame. Dead center is fine, but it can be a little boring. Placing the subject off center (in the left or right third) looking into the unused space can look really nice and pleasing to the eye. Put their head in the top third, too.

My biggest piece of advice to improve your composition is to look at pictures in books and magazines. Look at how they are composed. Where is the subject and how are they placed in the frame? Look at what you like and copy it.

Lighting

You don’t need to be an expert or own a bunch of fancy gear to take a nice, well-lit picture. The best light to use is natural light, and the best natural light is overcast light. The main reason is the bigger the light source the softer the light. And what bigger light source could you get than an overcast sky? There are other advantages, like the lack of harsh shadows; your subject won’t be squinting and colors are not all bleached out, as they would be in bright sunlight.

lighting for portrait photography

photo by Arvin Asadi

If it’s a sunny day and your only chance to photograph this person, don’t despair. Move them into the open shade and make sure there is some light falling on them. If there’s no shade and it’s bright sunlight, you have to make a choice. The classic choice is to have the sun falling directly on the face. This will light them up but it will be hard for the subject.

The other thing you could do is to have the sun directly behind them. This will necessitate the use of some fill in flash to light up their face. It works best if you can alter the amount of flash that is fired at the subject until it is just enough to give a nice natural look to the face. If you can’t alter the amount of flash, be aware that it may look a little bit unnatural. You could always move back to lessen the amount and crop later in the computer back to what you originally wanted.

If you can only shoot inside, use the natural light from an open door or a window. Place your subject so this light falls gently on their face—it will even work through the glass if the weather isn’t cooperating. Try to avoid using direct flash in their face wherever possible. You could also use a reflective surface to throw light onto the subject. You don’t need to pay out on expensive reflectors, but if you do, use white for older people as it’s kinder on the skin and silver on the younger faces to give them more zing!

Avoid gold reflectors unless you really want to give your subject a golden glow. A piece of white card or a white sheet will work well in the absence of a reflector. The closer the card/sheet to the subject, the more light that will fall on them. Experiment by moving it around until you find the best spot. Remember to make sure it’s not in the picture; you might need a helper to hold it for you! You could also use a mirror but the effect will be much more pronounced so place much further back.

About the Author:
Marion Frances has a professional wedding photography company in Devon, providing a complete wedding photography service.


Go to full article: Top Tips for Photographing People

What are your thoughts on this article? Join the discussion on Facebook

PictureCorrect subscribers can also learn more today with our #1 bestseller: The Photography Tutorial eBook

The post Top Tips for Photographing People appeared first on PictureCorrect.


from PictureCorrect http://bit.ly/2G6kmUz
via IFTTT

perjantai 5. huhtikuuta 2019

PictureCorrect.com: How to Use Lens Adapters (Video Tutorial)

Before you get into the whole business of adapting lenses, you need to understand why it’s done. Proprietary camera systems force you to buy lenses that are designed for that system for perpetuity. There may be great optics available on a different system, but you cannot use them unless you migrate to that other system—or use an adapter. Adapters act as bridges between two otherwise incompatible systems:

Adapters alter the flange distance of the camera, making it possible for the adapted lens to focus pretty much the same way as it would normally do on a proprietary camera body. The flange distance is the distance between the lens and the sensor.

In the image below you can see the comparative flange distances for a standard mirrorless camera (on the right) and a DSLR (on the left).

flange distance

Flange Distance

The mirrorless camera has a DSLR lens mounted on to it with the help of an adapter. This one pulls the lens away, making up for the difference in flange distance.

As Tony Northrup explains, some adapters are capable of transferring information back and forth between the lens and the camera body. This allows lenses to be auto-focused and even image stabilization to be used pretty much the same way.

Not all lenses can be adapted quite the same way on all camera bodies. This chart further demonstrates which lens systems can be adapted on which camera bodies.

introducing camera adapters

Camera body / lens system adaptability

These are some of the highlights from the video:

  • An adapter alters the flange distance along with blocking light seepage when you mount an incompatible lens to a camera body.
  • Nikon lenses can be mounted on Canon systems, but with a lot of handicap. Mounting Canon lenses on Nikon bodies is much more difficult.
  • Pentax cameras cannot really accept Nikon and Canon lenses. But its lenses can be mounted on Nikon and Canon systems.
  • Sony E mount cameras are the best option for mounting non-proprietary lenses.
  • Intelligent adapters allow communication between the lens and the camera body.
  • Even with the best of smart adapters, auto-focusing is only about 80–85 percent reliable.
  • When you put in a big lenses on smaller sensors, crop factor comes into effect. For example, a 50mm lens will become a 75mm on an APS-C camera like the Sony a6300.
  • Speed boosters are available that can take an image produced by a large sensor lens and focus it down to the size of a smaller sensor. They tend to work the opposite to what tele-converters do.

Do you have any other advice or insight for photographers new to adapting lenses?


Go to full article: How to Use Lens Adapters (Video Tutorial)

What are your thoughts on this article? Join the discussion on Facebook

PictureCorrect subscribers can also learn more today with our #1 bestseller: The Photography Tutorial eBook

The post How to Use Lens Adapters (Video Tutorial) appeared first on PictureCorrect.


from PictureCorrect http://bit.ly/2uLu1te
via IFTTT
PictureCorrect.com: Understanding an Essential Photo Editing Skill: Masking

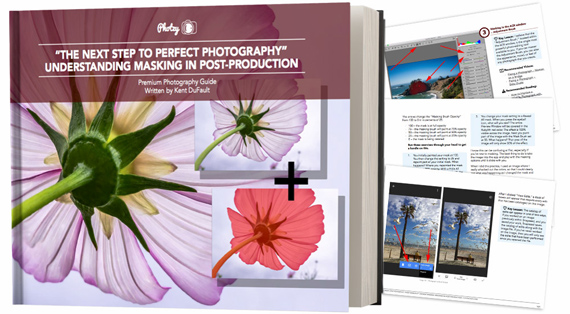
Achieving perfect photography requires more than just in-camera skills in today’s environment. Yes, even the professionals now rely on post-production skills to PERFECT their images. One of the most important photo editing skills to learn is called “Masking” and a new in-depth guide was just released to help photographers master it. “This is THE no.1 editing skill I wish I’d learnt when I started…” We were able to negotiate a 52% discount for our readers today which ends soon. Deal found here: Understanding Masking for Photographers at 52% Off

understanding masking

Masking: A Critical Skill for Photo Editing (Click to Learn More)

How many times have you returned home to review your pictures only to spot something you missed when you took the shot? Something that totally ruins the photograph…

After you read this new masking guide you’ll realize that you are no longer tied to what you find. You can clean up the bugs in your shots. Fix those less than perfect rose petals. Take out that pesky truck that parked right in the middle of your landscape shot.

It includes 171 pages of training, illustrations, and self-check quizzes. Covering the masking techniques and secrets in ALL of the popular editing software packages. (Inc. Lightroom, Photoshop, Elements, Camera Raw & Mobile Photography editing apps. It covers it all!)

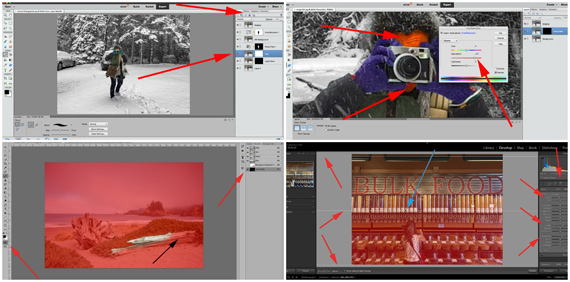
masking photo editing tutorials

Tutorials from the Understanding Masking In-depth Guide

Some of the Many Topics Covered:

  • Never again waste a photo because of some unwanted object in the background…
  • Discover how to mask and improve your photographs not only with your computer but also on your mobile phone!
  • The Honest, no “bull crap” truth about leaving visual artifacts behind- (You don’t want to be the photographer that does this.)
  • How to use both “Reveal All” and “Hide All” masks to their advantage
  • Learn how to “Mastermind” masking and layers—
  • The dirty little “Secrets of Clipping Masks”
  • Clear straightforward advice on how to keep multiple masks in a neat and tidy order.
  • Why your masking technique will live or die based on your knowledge of feathering…
  • Why many photographers will miss opportunities because they don’t know how to properly use masking (and why you won’t because you’ll have that knowledge)!
  • Surprising solutions to altering masks in Lightroom
  • Discover the Pure magic and Joy of Creating the “Perfect” photograph—
  • And so much more!

How to Improve Photos with Masking (Click to Learn More)

About the Author:
Kent DuFault has helped thousands of photographers like you, with his various best-selling books. He has an incredible teaching method. It’s simple to follow, easy to understand and never boring. Imagine sitting down with an old friend for a fireside chat. That’s what learning from Kent is like. The art of masking can seem intimidating. With this guide Kent provides you with easy step-by-step instructions.

How to Get a Discounted Copy Today (With Bonuses):

We were able to negotiate a 52% discount (normally $40, currently just $19). It also comes with an unbeatable 90-day, double-your-money-back guarantee so there’s no risk in trying it. Plus, you’ll get a bonus masking cheat sheet and bonus tutorial video with our deal – all of which ends soon.

Deal found here: Understanding Masking for Photo Editing at 52% Off


Go to full article: Understanding an Essential Photo Editing Skill: Masking

What are your thoughts on this article? Join the discussion on Facebook

PictureCorrect subscribers can also learn more today with our #1 bestseller: The Photography Tutorial eBook

The post Understanding an Essential Photo Editing Skill: Masking appeared first on PictureCorrect.


from PictureCorrect http://bit.ly/2tS1MK8
via IFTTT
PictureCorrect.com: How to Read Clouds as a Photographer

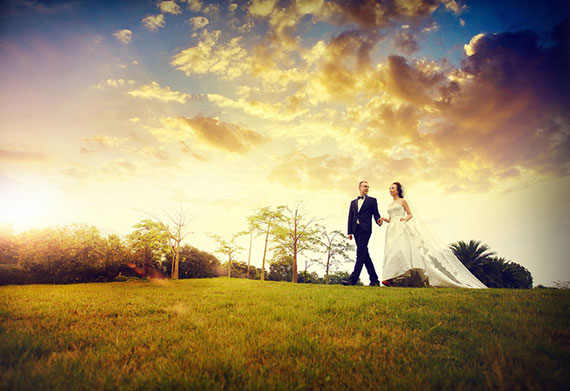
Having been a wedding photographer in Sydney for a few years, I’m continually amazed at how much my photography is dependent on weather conditions. What I have found more surprising, however, is how much this has driven me to study weather patterns—clouds, in particular. In a sense, a good photographer is also a good meteorologist. Perhaps you haven’t given much thought to cloud patterns as a photographer. If so, this article is for you, and my goal is to persuade you to become a good meteorologist.

In an industry where art and texture are everything, you won’t want to miss the enormous spectre of the sky on your shoot. Growing in your ability to read the clouds will determine and enhance your shoot. There are a few key clouds I encourage you to read and use to your visual advantage.

Cirrus Clouds

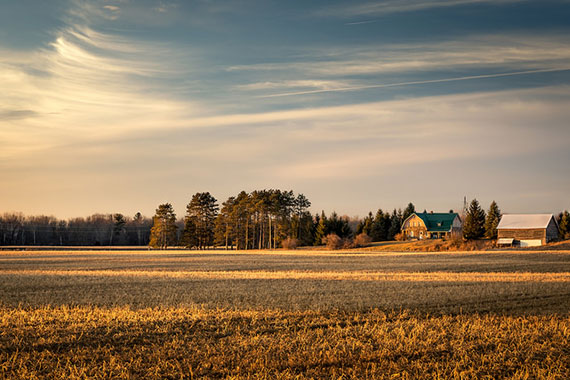
First are the “high” clouds, called cirrus clouds. They are atmospheric clouds shaped like white, wispy tufts. When they extend like sheets, they are then known as cirrostratus clouds and have a beautiful veil-like appearance to them. These clouds provide a wonderful textured backdrop to your wedding photos, and when you boost your recovery levels to high in Lightroom, it really emphasizes the texture. You may rest assured that there is low likelihood of precipitation with cirrus clouds.

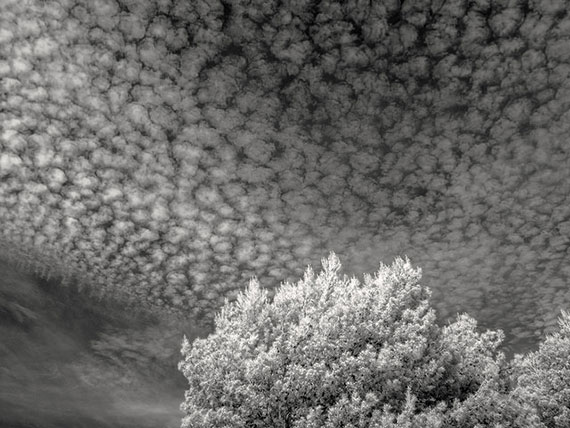
cirrus clouds

photo by Chris Collins

Altocumulus Clouds

Secondly, there are the altocumulus clouds, which are at the middle level and are grouped into masses or rolls like cotton balls. They are often rippled and have dark shading, which results in a very epic look, especially if you boost the contrast in post-production. However, they may also signal thunderstorms later in the day, especially when they gather height. In my experience, when you encounter altocumulus clouds, make the most of them, but be sure you have a plan in case light showers do come.

Stratus Clouds

Thirdly, there are the typical middle (altostratus) or low (nimbostratus) cloud sheets, which are evenly dull depending on their weight. They color the sky uniformly, reducing it by several shades of dark grey. When photographing in this weather, remember to boost your exposure and leave the rest to post-production. The chance for rain is fairly high, so I recommend you definitely have a wet weather backup plan!

Cumulonimbus Clouds

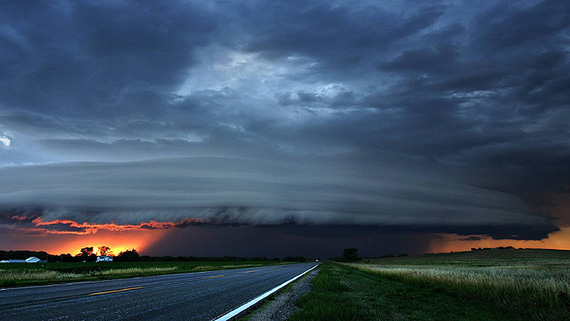
Finally there are the large, mushroom-shaped clouds called cumulonimbus, which are very tall and dense. These epic clouds often produce lightning, so if you are very daring you may use this to your advantage by capturing a lightning shot in the background as you shoot the bride and groom!

cumulonimbus clouds

photo by Zooey

I hope this small survey has persuaded you that a good photographer is also a good meteorologist. Rather than despising the weather conditions on your wedding shoot, observe the weather patterns and use them to your advantage.

About the Author:
Dan Au Photography runs on love, vibrance, and personality. As a wedding photographer in Sydney, they deliver story-telling, candid moments, and imaginative concepts. And all with a fun-loving (and quirky!) heart.


Go to full article: How to Read Clouds as a Photographer

What are your thoughts on this article? Join the discussion on Facebook

PictureCorrect subscribers can also learn more today with our #1 bestseller: The Photography Tutorial eBook

The post How to Read Clouds as a Photographer appeared first on PictureCorrect.


from PictureCorrect http://bit.ly/2gC9vnD
via IFTTT