torstai 3. toukokuuta 2018

PictureCorrect.com: Interesting Photo of the Day: Sunset over Ceahlau

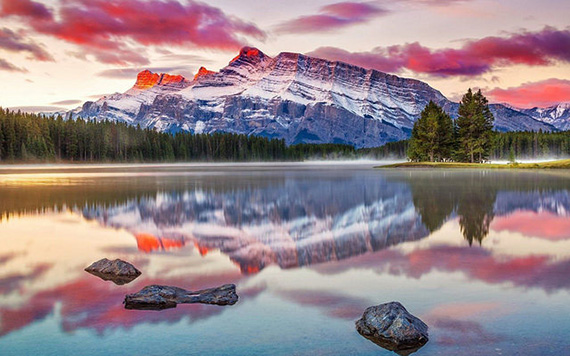
Photographer Lazar Ovidiu has managed to make a frozen landscape look almost warm in this magical shot of a sunset over Romania:

red winter sunset romania

“Red Code” by Lazar Ovidiu (Via 500px. Click image to see full size.)

Ovidiu captured this photograph on the Ceahlau Massif, a mountain in the Carpathians, using a Canon 7D and Tokina’s 12-24mm ultrawide lens.


Go to full article: Interesting Photo of the Day: Sunset over Ceahlau

What are your thoughts on this article? Join the discussion on Facebook

PictureCorrect subscribers can also learn more today with our #1 bestseller: The Photography Tutorial eBook

The post Interesting Photo of the Day: Sunset over Ceahlau appeared first on PictureCorrect.


from PictureCorrect https://ift.tt/2rjbbIu
via IFTTT

PictureCorrect.com: 10 Wedding Photography Blunders You Don’t Want to Make

Do you want to know how to avoid the biggest mistakes you can make while shooting a wedding? If you’re looking to get in to the wedding photography business, or even if you’ve got some experience, this is a great video to watch and learn from. Pye Jirsa and Shivani Reddy from SLR Lounge polled 200 wedding photographers to find out the top avoidable blunders wedding photographers make, and some of them might be surprising:

1. Backing up without looking behind you

This is the number one mistake, and it can be very dangerous. Jirsa tells us about the time his second shooter at a wedding backed up without realizing there were steps right behind her. The steps were right in front of the cake table, and Jirsa made the save of his life when he ran behind his second photographer and caught her before she fell right into the wedding cake.

2. Running out of memory cards or batteries

This should be obvious, but so many photographers forget to check they have enough memory space. Running out of memory just before a big moment like the first kiss is a massive screw-up. The same thing applies if your camera batteries die during the ceremony. Always make sure you have spare batteries and enough cards.

3. Noisy autofocus beeps/loud shutters

These distracting noises can really annoy people, and if there is a video team there, you and your noisy camera won’t be popular with them. Shoot with silent shutter, and turn your autofocus beep off in your camera menu.

4. Not having a backup camera

You should have at least one back-up camera, even if it’s a lesser model than your main one.

5. Being on your phone in front of your clients

It looks unprofessional to be constantly checking your phone. If you have the wedding day timeline stored on your phone and you need to check it, make sure you tell your clients what you’re doing and show it to them.

6. Stepping on the bride’s train/veil

This happens quite a lot; watch where you put your feet.

7. Cultural insensitivity

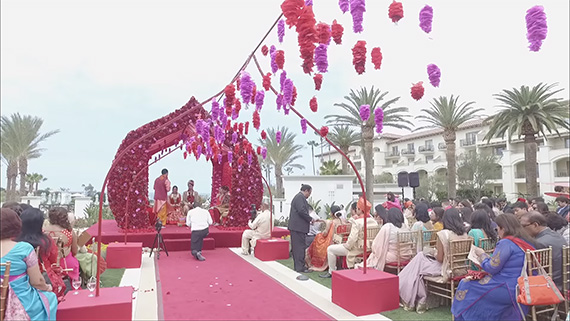
Be aware of any customs that you need to follow if you are shooting a wedding for a culture different from your own, such as making sure you take your shoes off before stepping on the Mandap during an Indian wedding ceremony.

8. Blocking the guests’ view

Try staying low to the ground until the time comes for you to take your shots to avoid unhappy guests.

9. Standing in front of vendor camera angles

If there are videographers there, talk to them before the ceremony and try to work around them so you’re not screwing up their shot.

10. Improper wedding attire

Don’t turn up at a wedding in old yoga pants. Dress like a guest to look professional, with men in a dark suit and women wearing a long skirt or pants suit.

avoid wedding photography mistakes

If you follow these guidelines, you’ll hopefully be set for the next wedding you shoot to go off smoothly. After all, you don’t want people to remember you as the wedding photographer who ruined the big day by making one of these blunders!


Go to full article: 10 Wedding Photography Blunders You Don’t Want to Make

What are your thoughts on this article? Join the discussion on Facebook

PictureCorrect subscribers can also learn more today with our #1 bestseller: The Photography Tutorial eBook

The post 10 Wedding Photography Blunders You Don’t Want to Make appeared first on PictureCorrect.


from PictureCorrect https://ift.tt/2rjFnCx
via IFTTT

keskiviikko 2. toukokuuta 2018

PictureCorrect.com: Camera Settings for Landscape Photography Tutorial

If you’ve ever wondered how landscape photographers work out what their camera settings should be, this video by Adam Karnacz is for you:

Karnacz takes us on location in the Yorkshire Dales and sets up three different shots.

He explains that he’s been reluctant to talk about his camera settings before, because he didn’t want that to become the most important thing for beginners to focus on, but he decided to devote a whole video to it.

Karnacz always shoots in manual mode, because he wants his camera to be an extension of him. For that, he needs full control over what the camera is doing. He shoots solely in RAW format too.

The first thing he does is get his camera on his tripod, then he thinks about the exposure triangle: the relationship between aperture, ISO and shutter speed.

Karnacz usually starts with ISO 100, as that covers most situations. For aperture, if he has something in the foreground close to the lens, he will choose a higher aperture such as f/16 so that it’s all in focus. If there’s nothing in the foreground he wants to capture he shoots between f/8 and f/11 for maximum sharpness. He then adjusts his shutter speed to get the right exposure for the image he’s taking.

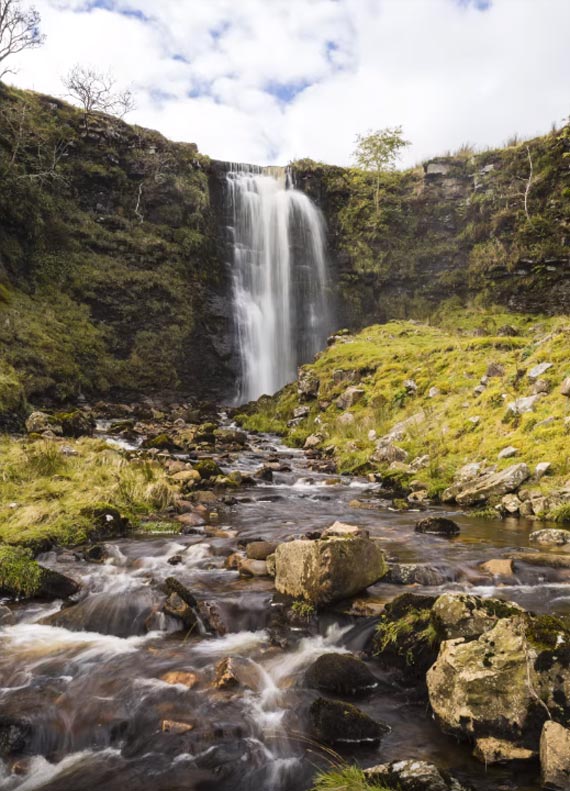
The first shot Karnacz sets up for is of a waterfall. He says waterfalls are great for practising in manual mode, and he uses a circular polarizer to cut reflections from the water and wet rocks. He has to shoot at f/22 with the polarizer on, and sets his shutter speed for 1/4 of a second. At this speed, the image will have nice movement of the water—silky but not unnaturally so.

landscape photography settings

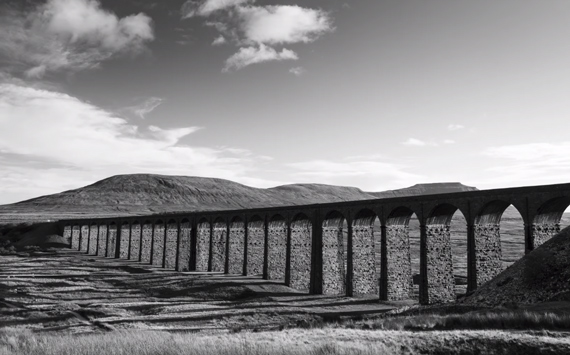
The next shot is one of Ribblehead Viaduct with the hills in the background. Karnacz shoots in f/16 because there are some reeds in the foreground of the shot and he wants them in focus. He starts off with his settings at 1/10 second and ISO 100.

He looks at the built in camera light meter to check, then looks at live view, using the LCD screen to see how the image will look at those settings. He also uses the histogram to adjust and get it as good as possible.

Focusing is done by using touch to focus in live view, because on his Canon 5D Mark IV this is a perfect way to focus. If you don’t have that feature, he suggests using autofocus to get your focus, then switching the lens to manual focus. He also uses the 2 second timer on his camera to help reduce camera shake when he presses the shutter.

best settings for landscape photos

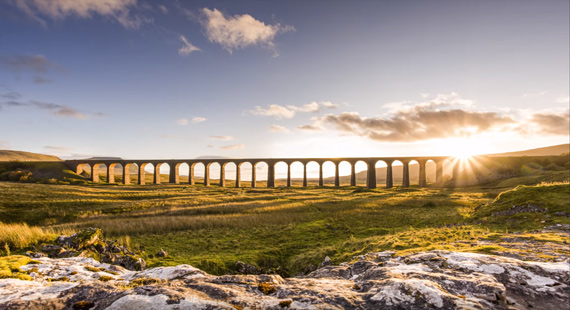
The last shot  is also taken at the viaduct, with the sun behind it as it sets, so the light shines through the arches. He has his settings at f/16 and ISO 100.

Karnacz explains that shooting at sunset is a challenge, as you have a much brighter sky than a foreground. There are two options for this: bracket or use an ND grad filter. Karnacz chooses to bracket as he finds it easier, setting the brackets around two stops either side.

tips for landscape photography

“It’s not the camera settings that are going to make you a great landscape photographer, it’s about the visualization and getting out into these amazing landscapes and putting your personality into your photographs.”

For further training: The Landscape Photography Chapters


Go to full article: Camera Settings for Landscape Photography Tutorial

What are your thoughts on this article? Join the discussion on Facebook

PictureCorrect subscribers can also learn more today with our #1 bestseller: The Photography Tutorial eBook

The post Camera Settings for Landscape Photography Tutorial appeared first on PictureCorrect.


from PictureCorrect https://ift.tt/2JM1JEl
via IFTTT

PictureCorrect.com: Tips for Photographing Urban Landscapes & Cityscapes

Landscapes are an extremely rewarding type of photography, but you don’t have to venture out of town to capture sweeping panoramas or breathtaking views.

Urban landscape photography or cityscape photography is a type of scenic photography that’s quickly growing in popularity. Due to the fact that most of the world lives in or near cities, urban landscapes provide an excellent chance to photograph some landscape images without having to wait until you travel to a scenic nature spot.

With urban landscapes, there are plenty of photo opportunities just waiting to be captured at a city near you—or maybe even right outside your door.

cityscape photos

In order to capture the best urban landscapes possible, you’ll want to use many of the same techniques that you use when photographing traditional landscapes. But there are a few opportunities and challenges that are unique to urban settings. To help you get the most out of your cityscape photography, here are some tips to get you off to a great start.

Bring Your Gear

While you don’t want to have to pack around a bunch of heavy gear especially if you’re going on foot, try to bring along a wide angle lens if you have one. These lenses have a wider angle of view making them a great option for photographing in the city where space if often limited. They also tend to exaggerate the sense of depth and scale in an image making the foreground look closer and the background smaller, and further away. Of course, you may also want to consider bringing a telephoto if you’re interested in capturing details, or creating images that are “flatter.”

how to photograph a cityscape

You’ll also want to bring a tripod, especially if you’re doing early morning or nighttime scenes, or any type of long exposure photography like light trails, or gently blurred clouds. Finally, don’t forget to bring along your filters—a polarizing filter will come in handy when photographing modern, glass buildings, as it will help to cut the glare from reflections.

Remember Rules of Composition

Composing cityscapes is similar to creating landscape images. The same basic rules of composition still apply and keeping them in mind will help you to create powerful photos. Look for a focal point, and try to find leading lines that will draw the viewer’s eye through the image. Be sure to balance the composition, and make sure one section isn’t too heavy. Don’t forget to use colors, contrast, patterns, and texture to help you create your images. Textures and patterns are especially prevalent in urban settings and can be found in a number of places like graffiti, brickwork, and architecture; while contrasting colors, textures, shapes—or even subjects—such as the old buildings against modern, new skyscrapers, can also be found in the city.

Consider the Time of Day

The best time of day for urban photography will depend largely upon your personal preference and the style of photography that you’re going for. Early morning is preferred by many photographers, since the lighting is often at its best just after dawn, and there are fewer distractions. The streets are usually less busy in the very early hours before rush hour, that is, and there’s less litter on the roads.

Late morning or afternoon can also produce excellent lighting though. The sun is at an angle, and side lighting is ideal for highlighting textures and showcasing details. Then, of course, you have the beautiful golden light from the evening golden hour, and as the dusk turns to night, you’ll be able to capture the beautiful city lights, or even create light trails from traffic using a long exposure—and a tripod.

urban decay photography

Aim to Capture the Vibe

Every city has a unique vibe. Your job is to capture the atmosphere and create an image that will instantly transport your viewers to the scene. Look for ways to encapsulate the setting. Before you start snapping, take a few minutes to survey the scene at hand, and soak up your surroundings. What do you notice? What catches your eye? What’s one thing that sums up the essence of the neighborhood? This will give you a great place to start and will show you what you should include in the image.

Include People

While many photographers hate it when unsuspecting pedestrians photobomb their photos, often, incorporating a human element into a composition can make for an excellent photo. People can add life and interest to a scene, and can also be used to convey a sense of scale. However, if your composition doesn’t call for people, don’t use them. Make sure you intentionally leave them out.

aerial city view

Think Unique

Although it can be challenging, look for ways to make your photos unique! If you’re photographing famous buildings, a bridge, or a well-known landmark, you’ll want to find ways to capture it in a way that’s different from every other snapshot out there. Look out for details or patterns that are easy to overlook, or find some interesting foreground to include in the image. Changing your perspective can often mean the difference between a standard snapshot and a spectacular image.

Look Up

If you’re next to tall, towering buildings and skyscrapers, don’t forget to look up! Often, angling the camera up can result in a great composition. This is another situation where a wide angle lens will come in handy, helping you to fit it all in. A wide angle will also produce the illusion that the buildings are leaning, resulting in an imposing, dynamic image.

urban landscape photography at night

Go Off the Beaten Path

Finally, not everything happens in the center of the city. While you might find the most action downtown, don’t forget to venture out a ways too. You might be surprised at how many unique things there are just waiting to be captured. You will also probably find it quieter on the outskirts of town, and you may even discover a new angle to photograph the city from.

Just remember to stay safe when venturing into new areas. Take a friend and stay alert if you’re unfamiliar with the neighborhood.

Just because well-known skylines have been captured before, doesn’t mean that you have to take the same photos. Try to think of ways that you can make your images unique. Look for new vantage points, or try to find opportunities to frame the scene in an unexpected way. Have fun hunting for unique photo opportunities, and enjoy capturing images that are all yours!

Do you enjoy photographing urban environments? We’d love to see your work! Feel free to share your images with us in the comments.


Go to full article: Tips for Photographing Urban Landscapes & Cityscapes

What are your thoughts on this article? Join the discussion on Facebook

PictureCorrect subscribers can also learn more today with our #1 bestseller: The Photography Tutorial eBook

The post Tips for Photographing Urban Landscapes & Cityscapes appeared first on PictureCorrect.


from PictureCorrect https://ift.tt/2rkfxyz
via IFTTT

PictureCorrect.com: Interesting Photo of the Day: Beautiful Winter Scene In Kyoto, Japan

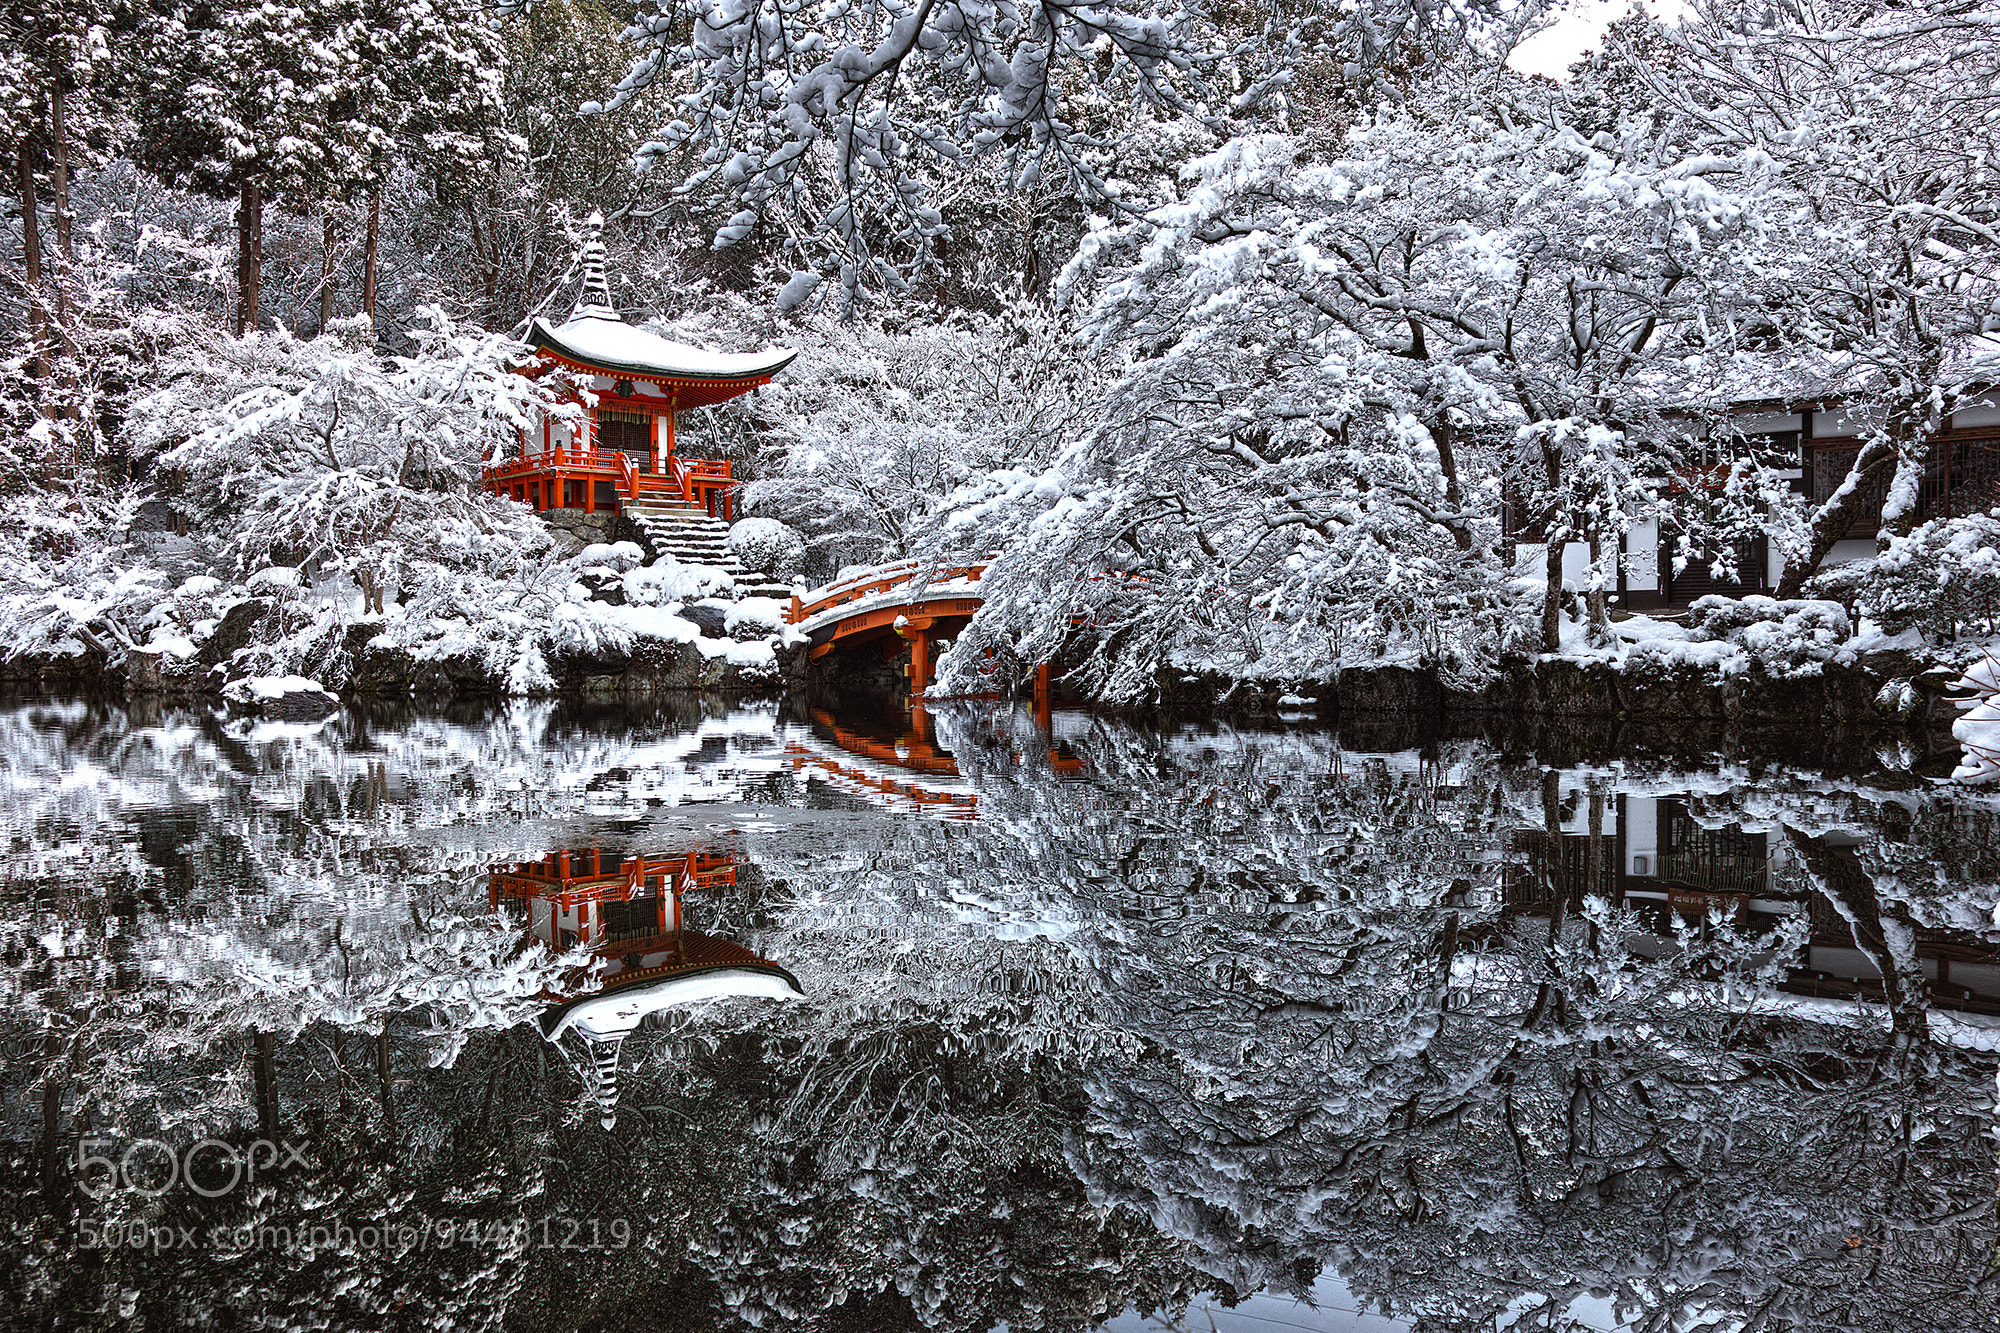
It’s amazing how a light dusting of snow can completely transform an already beautiful scene. This serene image of the snow covered Daigo-ji temple in Fushimi-ku, Kyoto was taken by the talented Japanese photographer Azul Obscura:

kyoto japan photography snow

A snow covered Daigo-ji temple in Kyoto, Japan. (Via 500px. Click to view full size.)

Daigo-ji is a UNESCO world heritage site and an important example of a Shingon Buddhist temple. The largest temple in Kyoto was established in the 9th century, but it was later restored by hegemon Toyotomi Hideyoshi in the 16th century. The site includes several temples and buildings set upon the entire mountain of Daigo-san.

The new year’s snow fall on the mountain created an opportunity Obscura could not miss.

“New Year’s Day, it was heavy snow in Kyoto. The next day morning, I went to Daigoji without hesitation. There was incredibly beautiful scenery, I felt like I was in a dream…”

The image was shot with a Sigma SD1 Merrill.


Go to full article: Interesting Photo of the Day: Beautiful Winter Scene In Kyoto, Japan

What are your thoughts on this article? Join the discussion on Facebook

PictureCorrect subscribers can also learn more today with our #1 bestseller: The Photography Tutorial eBook

The post Interesting Photo of the Day: Beautiful Winter Scene In Kyoto, Japan appeared first on PictureCorrect.


from PictureCorrect https://ift.tt/2w7mQ22
via IFTTT

tiistai 1. toukokuuta 2018

PictureCorrect.com: 7 Tricks for Nikon Photographers

Are you a Nikon photographer looking to unlock some quick techniques to use for photo efficiency? Photographer Steve Perry demonstrates some useful tricks for Nikon users:

1. Save Your Settings

Many Nikon cameras allow you to save your settings so that you don’t accidentally adjust or reset them. To do this, first insert an empty memory card, format it, and go to your Setup Menu. Scroll down to “Save/load settings” and click to save your current settings to that memory card!

2. Rename Your Files

Instead of using the default DSC prefix for all of your image files, you can set your own to help organize your files. First, head to your Photo Shooting Menu and select “File naming.” From there, you can choose the three letter prefix for your files.

3. Viewfinder Level

Perry demonstrates how he has his joystick programmed to show the virtual horizon line in his viewfinder when he pushes it in. This helps him see if his image angle is tilted one way or the other. When you move your camera left or right, lines will appear in your viewfinder displaying which direction the horizon is tilting.

tips for nikon cameras

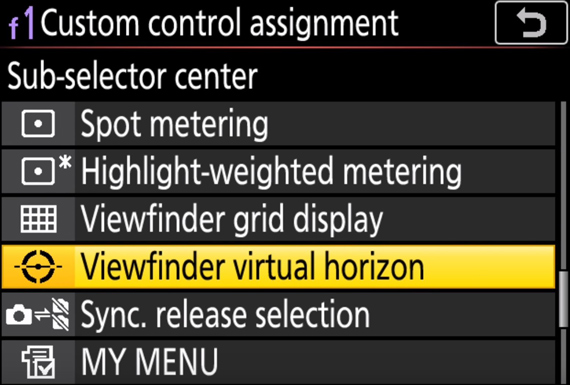
For Nikon cameras before 2016, go to your Custom Setting Menu and select Controls. Both the “Assign Fn button” and “Assign preview button” options support viewfinder virtual horizon. If you select either of them, you can scroll through the different programmable options. “Viewfinder virtual horizon” can be found near the bottom.

Newer Nikons are a bit different. From the Controls menu, select “Custom control assignment.” On the left side, you can change the Preview button (Pv) or Fn1 button to the viewfinder virtual horizon by selecting either and scrolling to that option.

nikon photography tips and tricks

4. High Speed Flash Sync

First, head to the Custom Setting Menu and select Bracketing/flash. In your “Flash sync speed” menu, most Nikons have an option called Auto FP that allows you to use faster shutter speeds than the normal sync speed, as long as you have a supported flash unit. Keep in mind that your flash range will be diminished, so you will need to shoot closer with this setting turned on.

5. Easy ISO and Easy Exposure Comp

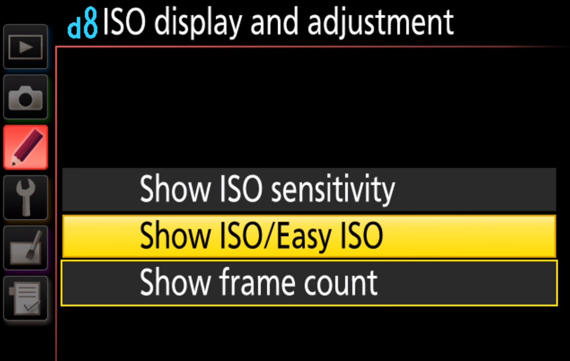
Easy ISO is a helpful feature on Nikons but is no longer commonly available on newer models. To see if it works for yours, head to the Custom Setting Menu and select “Shooting/display.” Scroll down to see if you have the “Easy ISO” option and select it to turn it on. Without that option, you can instead select “ISO display and adjustment” and choose “Show ISO/Easy ISO.”

For exposure compensation, select “Metering/exposure” in the Custom Setting Menu. From there, turn on “Easy exposure compensation.” Your main command dial will now easily adjust the ISO or exposure, depending on which option you turned on.

nikon camera secret features

6. Viewfinder Grid

Head to the Custom Setting Menu and select “Shooting/display.” Next, select “Viewfinder grid display” and turn it on to give it a try!

7. Exposure Delay Mode

For longer exposures, you sometimes nudge your camera and cause some image blur. This setting will delay the exposure to prevent that from happening. From the Shooting/display menu, select “Exposure delay mode” and choose how many seconds you want for each delay.

As a Nikon photographer, did these tips help you? These settings are also available on other camera brands, but the instructions won’t be quite the same. Refer to your camera manual and you should be able to find out how to make these adjustments!


Go to full article: 7 Tricks for Nikon Photographers

What are your thoughts on this article? Join the discussion on Facebook

PictureCorrect subscribers can also learn more today with our #1 bestseller: The Photography Tutorial eBook

The post 7 Tricks for Nikon Photographers appeared first on PictureCorrect.


from PictureCorrect https://ift.tt/2I3mgqS
via IFTTT

PictureCorrect.com: 5 Unusual Tips for Being Good at Photography & Everything Else

Of course, there are way more than five tips for being a good photographer.

life lessons for photography

photo by maf04

But, I’m focusing on these five for now, because they seem to be such a surprise to the students that come to my photography workshops.

That’s aside from the fact that I don’t focus on f-stops, shutter speed, and types of lenses. That would be like telling someone who’s learning to drive that a car has a steering wheel, a brake, and an engine. F-stops and other technical details can be learned in one lesson, and the more you use your camera, the better you will get at them.

Those technicalities are not what make a good photographer. In the same way, having a convection oven doesn’t make you a good cook and having a Lamborghini doesn’t make you a good driver.

Technology and technical learning, like most other regurgitated learning, do not make anyone a good anything.

To succeed in any individual department of life, you need to be good at life as a whole. And that means being aware, awake, and alive. Machinery can’t do that for you.

That said, becoming aware is a journey. We are often so conditioned by society and our upbringing that we can’t see beyond the conventional. So, here are some tips about how to start waking up to life.

1. Let go of your mind

Its endless monkey chatter and insistence on judging things as good or bad will block your instinctive sense of what works. Instead of thinking, listen—with your attention, not your ears. (Your attention is actually your soul.)

2. Remember, it’s not the camera that takes the photo

It’s you. All of you. Not just your physical eyes. When the whole of you is attuned to the whole of what you’re photographing, the image that results will be remarkable. (The same applies to everything in life. If you bring your entire attention to bear on whatever you are doing right now, you’ll have the best outcome.)

3. Be aware of essence, energy, and spirit in everything you do

Everything is energy. Frequencies differ, which is why a chair looks different from a dog. But, at its core, in its essence, everything emits and absorbs energy. If you allow yourself to tune into the energy, you will be able to capture it via your camera and in the way you express your life.

4. Reject fear in favor of love

Fear is the mind’s favorite tool for distracting you from what matters in life. Fear arises from our regrets and anguish about the past and projects itself into anxieties about the future. Photos taken in a state of fear will fail. Love, on the other hand, is not some vague, sentimental concept. It’s the result of being in the present moment, noticing with full awareness and without judging what is happening right now. That calm, soft, accepting mindfulness makes whatever you see meaningful. It therefore makes whatever you capture meaningful. What you capture carries your mindfulness.

reject fear

photo by Benjamin Balázs

5. Let what you’re photographing come to you

Let it show itself. Which comes back to listening, paying attention. If you’re being ever so busy choosing the subject according to your mind’s dictates and you’re moving around to get the ‘right’ angle, you’ll miss what is whispering that it needs to be shown to the world. Stop. Listen. Be aware. Make the photograph about something other than yourself and the ego that wants to be praised for being the best photographer in the world. Be a servant of what needs to be shown.

About the Author:
Photographer, author, designer, visionary, teacher, inspirational speaker, philanthropist… Marlene Neumann‘s creative vision and celebration of life is visible and felt through her astounding photographs.


Go to full article: 5 Unusual Tips for Being Good at Photography & Everything Else

What are your thoughts on this article? Join the discussion on Facebook

PictureCorrect subscribers can also learn more today with our #1 bestseller: The Photography Tutorial eBook

The post 5 Unusual Tips for Being Good at Photography & Everything Else appeared first on PictureCorrect.


from PictureCorrect https://ift.tt/2HKVaRN
via IFTTT