sunnuntai 29. huhtikuuta 2018

PictureCorrect.com: Shoot for the Moon: Tips on Photographing the Moon

If care is not taken when photographing the moon, it is likely that you will get either an overly dark photo, a moon that looks like the sun, a very small moon, or all of the above. I would like to offer some tips on a different strategy for making compelling moon photographs.
moon photography

“Moon” captured by PictureSocial member Navid Qureshi

So let’s first discuss why it is so difficult to photograph the moon. There are two main issues:

  1. the brightness of the moon
  2. the size of the moon

Almost everyone has experienced a “moon-lit night”. This is when a full moon, or nearly full moon, lights up a dark night. You see everything around you fairly well, which is evidence that the small amount of sunlight that the moon reflects is actually quite bright.

Why is this a problem for moon photography? When the moon is so bright and everything itself is much darker, it is impossible to make a photo where both the moon and the subject are clearly visible. Either the moon is very bright and washed out (and everything else is properly exposed), or the moon’s details are well-defined, but everything else is black or very dark. We’ll get to possible solutions in a little bit.

The other problem with moon photography is that the moon is actually quite small in the sky. Using a normal lens will cause the moon to appear very small in the resulting photo. This will not usually create a compelling image, even if the frame is properly exposed. Of course, you can use a zoom lens and take a photo of the moon, but that is usually pretty boring.

Tips for Photographing the Moon

So what is a photographer to do? My suggestions are as follows:

  • Plan on photographing a full moon at or near moonrise or moonset, when the moon is very near the horizon.
  • Look for interesting subjects that are large (e.g., buildings or trees), are in a flat region, and are visible from a distance of a few hundred feet to a few hundred yards.
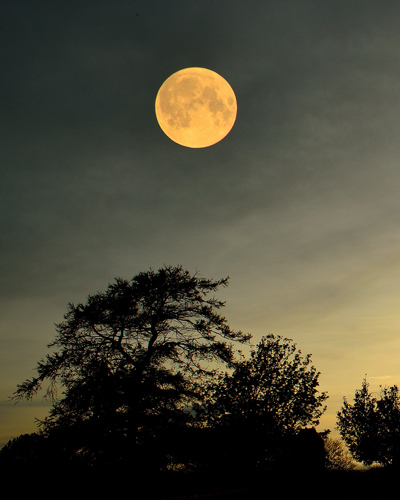
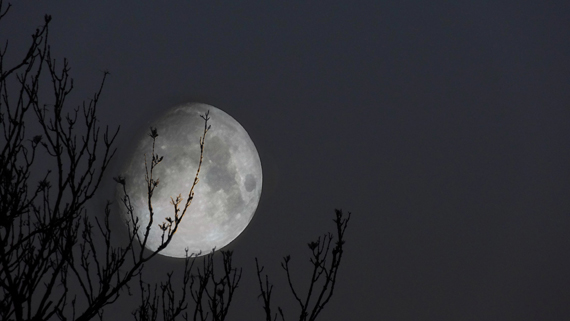
moon and trees

“The Super Moon” captured by PictureSocial member Fergal Gleeson

  • Research the direction/angle (the azimuth) where the moon will rise or set in a given month, and select a location where the moon will be easily be visible and adjacent to the subject from a distance.

OK, you may not be able to easily visualize these ideas, but let me explain what I’m trying to accomplish here. I want you to photograph the full moon near the horizon, from a distance, and with an interesting subject in the frame. The reason I want you to photograph the full moon near the horizon is because the light it is emitting nearly matches the ambient light of the rest of the world at that time. That’s because the sun is directly behind you and it is illuminating both the moon and your subject equally.
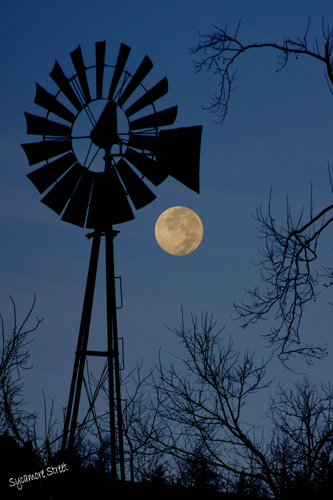
moon and windmill

“Windmill Moon” captured by PictureSocial member David Farmer


This concept of even lighting only works with the full moon, because during other phases of the moon the moon is either too high in the sky or below the horizon when the sun is behind you.

Now, simply photographing the moon near the horizon does not alone make for an interesting image. So think about making the moon LARGE in the frame, and in combination with an interesting subject. This is the hard part. You obviously will be using a zoom lens for this, so you will be shooting BOTH the moon and the subject from a distance. They need to be very near each other in the frame. This is where a lot of planning is needed. You need a large, unobstructed, flat area for this (i.e. no hills, trees, buildings, etc) so that the rising or setting moon is visible.

There are websites for researching the direction and time of moonrises and moonsets throughout the year. There are only about 12 full moons per year (sometimes 13), so you may end up getting very few good opportunities to make the shots you are planning. And don’t forget about mother nature–a single cloud can ruin all of your plans.

I hope you can make use of these tips in your moon photography.

About the Author:
This article was written by Matt Shrier (shadesofgreenphoto.com), a photographer based in Bucks County Pennsylvania.


Go to full article: Shoot for the Moon: Tips on Photographing the Moon

What are your thoughts on this article? Join the discussion on Facebook

PictureCorrect subscribers can also learn more today with our #1 bestseller: The Photography Tutorial eBook

The post Shoot for the Moon: Tips on Photographing the Moon appeared first on PictureCorrect.


from PictureCorrect https://ift.tt/2w3tQgy
via IFTTT

PictureCorrect.com: Interesting Photo of the Day: Salt Lake City Fog

There is a golden rule in landscape and nature photography. Leave home before sunrise and come back long after sundown. These two extremes ensure that you capture both the Golden Hour and the Blue Hour. This image by Hansi Photo sums up this rule perfectly:

beautiful smog

Salt Lake City Fog (Via Imgur. Click image to see full size.)

To capture this stunning photo, Hansi Photo hiked through waist deep snow to the top of some mountains in Emigration Canyon just in time for sunset.

The picture captures a common phenomenon known as inversion. It’s basically smog—but of the worse kind. A large city like Salt Lake City in Utah has a lot of vehicular and industrial pollution. Surrounded by mountains, this valley almost transforms into a pot with cold air getting trapped by warm air.

The situation gets worse during winter. Pollution fills in and the air becomes suspended, rendering it unbreathable. The image however, captures none of the seriousness of the problem, but everything that is stunningly aesthetic about the scene. Looks, as they say, can be deceiving!


Go to full article: Interesting Photo of the Day: Salt Lake City Fog

What are your thoughts on this article? Join the discussion on Facebook

PictureCorrect subscribers can also learn more today with our #1 bestseller: The Photography Tutorial eBook

The post Interesting Photo of the Day: Salt Lake City Fog appeared first on PictureCorrect.


from PictureCorrect https://ift.tt/2r9NmCZ
via IFTTT

PictureCorrect.com: Crop vs. Full Frame Cameras: Can You Tell the Difference?

If you search the internet on the topic of full frame vs. crop frame sensors, you’ll tend to find that most people say full frame is the only way to go if you want professional-looking photos.

Not so, says Manny Ortiz in this video he made to highlight the real-world comparison of crop and full frame cameras:

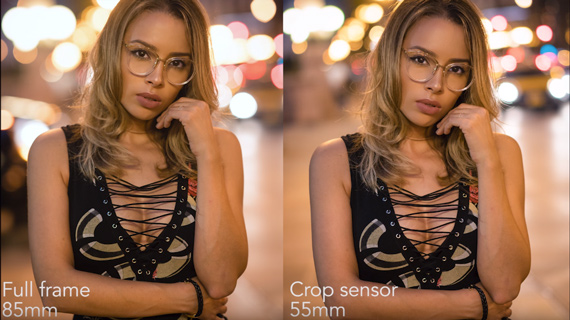
Ortiz used a $6,000 full frame Sony A9 with a 85mm f/1.4 Gmaster lens, and a $2,000 crop frame Sony A6500 with a 55mm f/1.8 Zeiss lens to shoot the same images in the same lighting conditions. You may well be surprised to see the image comparisons side-by-side.

Ortiz says that there is a misconception that full frame cameras will take your work to the next level, but in his opinion it’s just not true.

All the images in this comparison were edited in exactly the same way to make the comparison fair, and there are no major differences.

A good lens will make a far bigger difference to the quality of your work than a full frame sensor, Ortiz points out. He also stresses that clients don’t care if your camera is is a full or crop sensor. What matters to them is good composition, lighting, and retouching.

full frame vs crop frame

Full Frame Camera Advantages

  • Bigger dynamic range
  • Better color
  • Creamier backgrounds with better depth or field
  • More detailed images when you zoom in
  • More leeway in post-processing

what is the difference between full frame and crop frame

If a crop frame camera is all you can afford at the moment, Ortiz shows us that you can still make great images that your clients will love.

“You can create amazing work with what you have in your hand. Get a good lens and invest in some education.”


Go to full article: Crop vs. Full Frame Cameras: Can You Tell the Difference?

What are your thoughts on this article? Join the discussion on Facebook

PictureCorrect subscribers can also learn more today with our #1 bestseller: The Photography Tutorial eBook

The post Crop vs. Full Frame Cameras: Can You Tell the Difference? appeared first on PictureCorrect.


from PictureCorrect https://ift.tt/2HC8dcv
via IFTTT

perjantai 27. huhtikuuta 2018

PictureCorrect.com: Interesting Photo of the Day: Southern Alps of New Zealand

The natural beauty found all throughout New Zealand is unparalleled. It’s no wonder so many photographers from all parts of the world flock there or at least daydream about visiting the enchanting place. A quick look at the photo below and most of us will be sent into a fit of photography-related swooning:

stunning landscape photos

“Fractures” (Via 500px. Click to see full size.)

The image of the Southern Alps was taken by Kah Kit Yoong, a travel and landscape photographer, who used a Canon 5D Mark II and a 24-105mm 4L IS lens to get the shot.

“The magnificent southern alps of New Zealand. One of my favourites from 2010 when I spent 5 weeks travelling around the south island scouting for workshop locations. These crevasses are immense by the way, several stories high.”


Go to full article: Interesting Photo of the Day: Southern Alps of New Zealand

What are your thoughts on this article? Join the discussion on Facebook

PictureCorrect subscribers can also learn more today with our #1 bestseller: The Photography Tutorial eBook

The post Interesting Photo of the Day: Southern Alps of New Zealand appeared first on PictureCorrect.


from PictureCorrect https://ift.tt/2r5q28G
via IFTTT

PictureCorrect.com: 4 Macro Water Photography Tricks

Are you looking for a new challenge or new direction with your macro photography? Shooting macro with water is a fun way to get some great shots; you just need a little inspiration. This video from COOPH gives you just that with four ways to use water to maximize your creativity:

1. Water Tank

  • Fill a clear tank with water.
  • Get in close with a tripod.
  • Make water drops with a straw or use a sponge.
  • Put a colored card at the back of the tank for a dynamic backdrop.
  • Capture the droplets hitting the water.
  • Use colored plastic to modify your light.
  • Shoot the water droplets just after impact.

close up of water droplet

2. Water Distortions

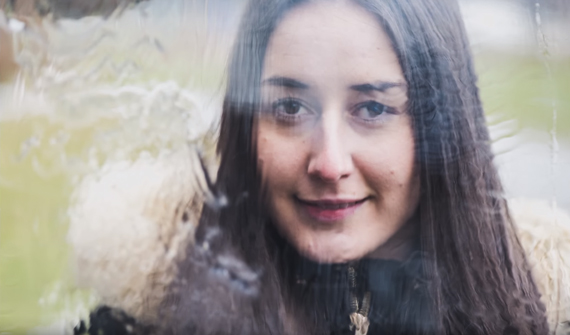
  • Focus on and shoot through a water droplet on a leaf or a twig.
  • Use a high shutter speed for dark and dramatic results.
  • Drip water on a plastic sheet and place it in front of the subject. Frame them within the water drops for a warped effect.
  • Pour water down the plastic and shoot to get a distorted foreground.

model behind water distorted glass

3. Water Bubbles

  • Blow bubbles with a straw in a clear tank of water and shoot through the tank.
  • Use different colored gels to add interest.

macro water bubbles shoot

4. Mix With Oil

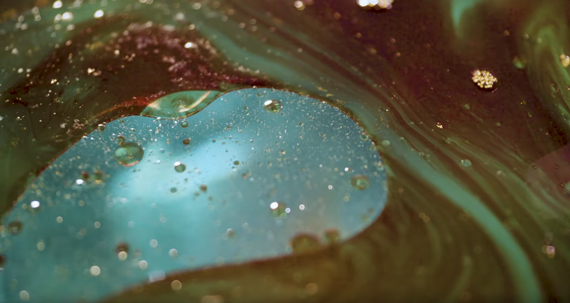
  • Pour some oil into the tank of water to get great patterns on the surface.
  • Shoot through the tank below the surface of the water to capture the oil drops.

macro oil and water shoot

There’s four clever ideas to put into practice on your next macro shoot, and you’ll actually be glad that oil and water don’t mix!


Go to full article: 4 Macro Water Photography Tricks

What are your thoughts on this article? Join the discussion on Facebook

PictureCorrect subscribers can also learn more today with our #1 bestseller: The Photography Tutorial eBook

The post 4 Macro Water Photography Tricks appeared first on PictureCorrect.


from PictureCorrect https://ift.tt/2r4HVV0
via IFTTT

torstai 26. huhtikuuta 2018

PictureCorrect.com: Interesting Photo of the Day: Malibu Sunset

Synonymous with surfers, sandy beaches, and some of Hollywood’s most recognizable films and TV shows, Malibu is more than than the sum of its glitzy parts. This long exposure features a behind-the-scenes perspective—after the sunny skies have faded and the beach-goers have gone—instead offering a view of dark cliffs and wispy tidal streams against a brilliant sunset:

Malibu sunset photo

“Malibu Sunset” by Our Earth in Focus. (Via Imgur. Click image to see full size.)

Mark Lehrbass drove 40 minutes to capture this particular shot, but concluded that braving the Southern California traffic was “absolutely worth it.” Our Earth in Focus, a photography team helmed by friends Mark Lehrbass and Henry Mosier, describes its approach to photography in this way:

“What started out as two friends with an eye for photography and a love for the outdoors, grew over two years into a passion to spend our lives capturing the amazing beauty of our earth. We know a shot when we see it, and we will stop at nothing to capture it; waiting for the right weather, the perfect sunset, doing our research and waiting for the sun to line up perfectly behind the right peak or arch. We aim to inspire our viewers to be in nature and stimulate a sense of yearning for the great outdoors.”

This one-second exposure was taken with a Nikon D810 and a 14–24 mm f/2.8 lens set at f/16 and ISO 64.


Go to full article: Interesting Photo of the Day: Malibu Sunset

What are your thoughts on this article? Join the discussion on Facebook

PictureCorrect subscribers can also learn more today with our #1 bestseller: The Photography Tutorial eBook

The post Interesting Photo of the Day: Malibu Sunset appeared first on PictureCorrect.


from PictureCorrect https://ift.tt/2r1OxUW
via IFTTT

PictureCorrect.com: Panning Photography Basics

Panning is a photography technique often used in sports, fast action, wildlife, and even street photography to an extent. But it can be used in a much wider scope. The basic principles of panning are always the same, as explained by Marcin Lewandowski:

What is Panning?

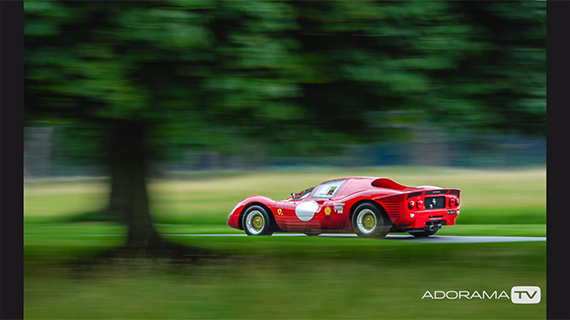
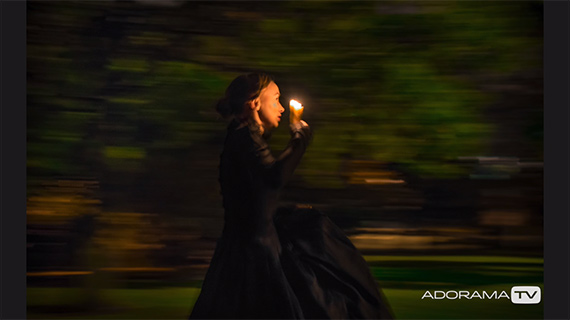
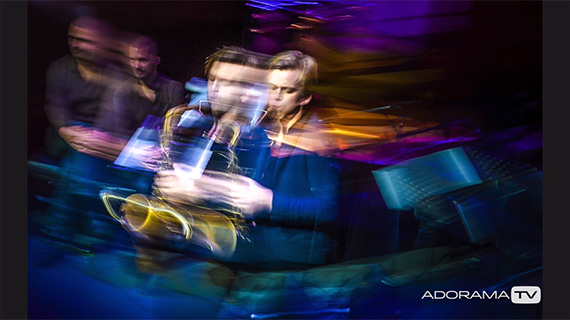
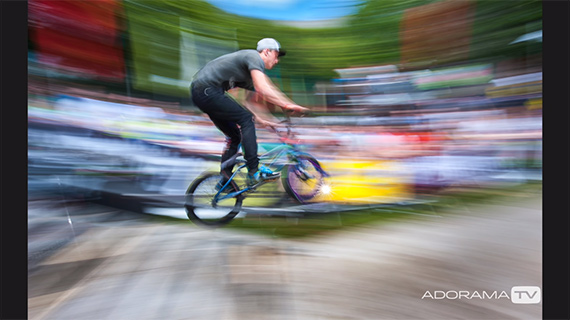
Panning isn’t a new technique. You might have used it yourself without knowing it. You may have seen others use it and admired how they managed such a shot! Panning is tracking a moving subject with a camera that is set to a long exposure. That way the subject you’re photographing remains sharp while the background becomes blurred.

Applications of Panning

When you think of panning, sports photography might come to mind. But this technique can be used in a lot of other genres of photography, as well.

the basics of panning

Just like any other technique in photography, the applications of panning are limited only by your imagination.

how to pan in photography

Any movement that can be predicted and is generally in one direction can be tracked using panning. It’s all about finding the right sync between the movement of the subject and the camera.

Shutter Speed

Much of the success in panning depends on shutter speed. Panning can be used with a shutter speed as fast as 1/100 second—and even faster. But the best results are usually obtained when the shutter speed is slower. Much slower.

photographing moving subjects

The idea is to be able to track the subject for a sufficient amount of time to bring the movement of the two in sync before pressing the shutter release.

Preparing for the Shot

The best way to prepare for a panning shot is to mimic the movement of the subject that you’re about to photograph. When the movement is predictable it’s easy to anticipate and sync your camera movement with it.

what is panning

Having said that, if the subject is moving very slowly and the distance between the subject and the camera is very long you will find it that much harder to get a sharp image of the subject. It’s in moments like this that you need a tripod or a monopod to give yourself some extra stability

panning photography technique

If you don’t have one of these on hand, tuck your elbows into your body or spread your feet wide to give yourself a more stable stance for sharper shots. Additionally, if your lens’s vibration reduction feature doesn’t support panning, disable it.

We’d love to see your panning shots! Share them in the comments below.


Go to full article: Panning Photography Basics

What are your thoughts on this article? Join the discussion on Facebook

PictureCorrect subscribers can also learn more today with our #1 bestseller: The Photography Tutorial eBook

The post Panning Photography Basics appeared first on PictureCorrect.


from PictureCorrect https://ift.tt/2vNo16u
via IFTTT