lauantai 31. maaliskuuta 2018

PictureCorrect.com: How to Sync Strobes to a Camera

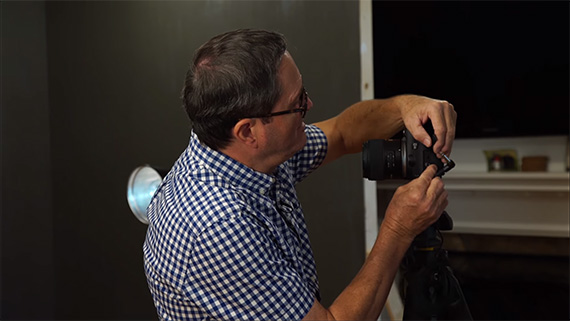
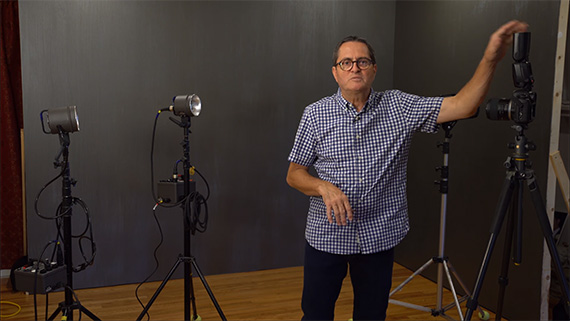
Now that you have your strobes, you must be thinking about the best way to sync them with your camera. Your answer is here. Jay P Morgan from The Slanted Lens demonstrates three ways to sync your camera with your strobes:

1. Using a Sync Cable

The most reliable and the simplest way of syncing your strobe with your camera is using a sync cable. A sync cable usually comes with your strobe, or you can pick one up from your favorite photography store. Whatever the source, a sync cable is extremely reliable; however, you’re limited by its length.

using a sync cable

You also have the major issue of loose cables lying around on the floor and people tripping on them. Additionally, a sync cable will only fire one strobe. So, unless you have a way to connect more than one sync cable to your camera (which is likely) you can only fire one strobe.

2. Using the Built-In Electronic Slave

Most strobes come with an electronic slave mode. It makes the strobe look for a pulse of light. That pulse of light could be the flash from another strobe or the built-in flash on your camera. As soon as the pulse of light is detected, the strobe fires.

syncing with a speedlight

There is one problem, though, and that is directly related to using an on-camera flash. If you bring an on-camera flash into the equation for triggering the strobes set to slave mode, be very careful with the power settings. The power settings should be in manual and in the lowest feasible output. If the power settings are too high, the extra light will impact the overall exposure in the scene.

Another problem with this arrangement is that it is likely not going to work if the source of pulse is too far away. Additionally, if you are shooting under the sun, the pulse may not be detected by the slave at all.

3. Using Radio Slaves or Triggers

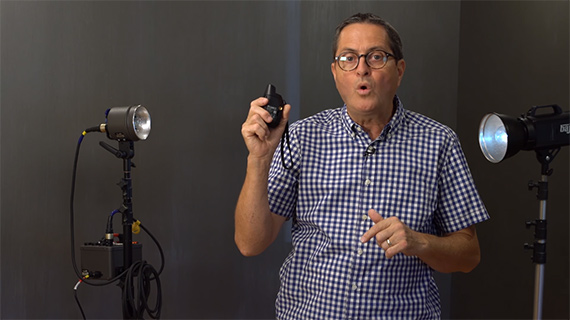
The third method to trigger your strobe is to use some sort of a radio slave or radio trigger.

Using radio slaves

There are many varieties on the market. Radio slaves are the best option when it comes to overcoming the distance problem, the multiple strobe setup, and the outdoor scenarios that were discussed above. The only problem with them is the price. These are way more expensive than a sync cable or an optical slave.

Which of these methods do you prefer, and why?


Go to full article: How to Sync Strobes to a Camera

What are your thoughts on this article? Join the discussion on Facebook

PictureCorrect subscribers can also learn more today with our #1 bestseller: The Photography Tutorial eBook

The post How to Sync Strobes to a Camera appeared first on PictureCorrect.


from PictureCorrect https://ift.tt/2GplTXs
via IFTTT

perjantai 30. maaliskuuta 2018

PictureCorrect.com: Neutral Density Filter Tips for Long Exposures During the Day

In this article, I will discuss an important topic in photography. Although this can be treated as an intermediate to advanced technique, I will try to keep it as simple as possible to make it seem like a piece of cake to all my readers.

ND stands for Neutral Density

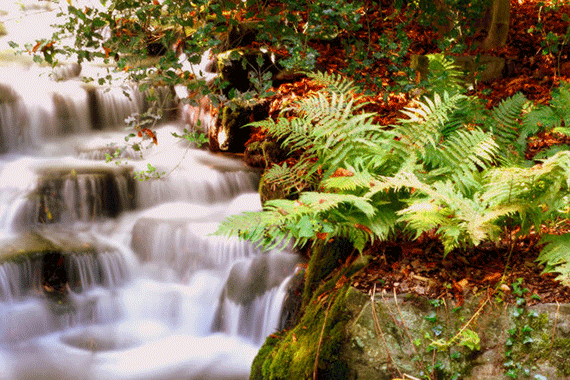
ND filters are useful when you are looking for a specific type of effect under adverse lighting conditions. OK, OK. Let me break that down for you. What do you do when you go out on a sunny day and you know you are going to spend a lot of time outdoors? You get a cap and sunglasses. That’s right. You want to counteract the effect of direct sunlight so that you are not “blinded”. A camera works in a similar way. But not exactly the same way, as we are not “blinded” by continuously looking at a moderately lit scene. Let me explain more on camera terms with an example. Say you are taking a photo of a waterfall and you want to have that “creamy” and “silky” effect of the flowing water.

how to take long exposures with nd filter

Photo by Sarah Fraser63; ISO 50, f/22.0, 30-second exposure.

The enemy of a slow shutter speed is the ambient light. Just try this experiment: Put the camera on a tripod in P mode. Making sure the flash is off, point your camera toward any object, and press the shutter half-way. Record the shutter speed and aperture setting that are automatically selected by the camera. Now change the mode to M and select the same shutter and aperture. Take the photo with this setting–it should not come out that bad. Now the fun part. Slowly reduce the shutter speed one tenth of a second at a time and see how the photo looks. You will notice the photo is becoming brighter and brighter, and at some point everything is so bright that nothing can be seen clearly. Pros refer to this condition as a blown-out photo.

But say you NEED slow shutter speed to get that motion blur. Of course, you can reduce aperture. But how much? F/16, F/22, F/39? There will be a situation in broad daylight when you have the aperture set to the camera-supported minimum, and still you are not able to lower the shutter speed enough to get that motion-blur without blowing-out the photo. Yeah, yeah, now we are talking photography.

You wish somehow you could reduce the amount of light reaching the camera sensor so that the photo isn’t blow-out, yet you can comfortably reduce the shutter speed to achieve motion-blur AND all this at a decent aperture setting.

Ladies and gentlemen, welcome the ND filter.

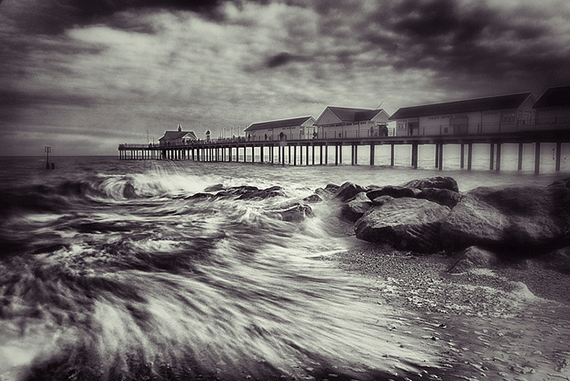
The filter acts like sunglasses on your eyes, limiting the amount of light that reaches the camera sensor, eating up light so that you can take photos in broad daylight and still set the shutter speed as slow as one second (can you believe it? the flowing water will be as creamy as ever) at a reasonable aperture of F/22.
taking amazing photos with a neutral density filter

Photo by Neil Hall; ISO 100, f/8.0, .5-second exposure.

Standard settings I use for the silky/creamy water flow effect putting the ND filter on:

  • Mode: Shutter Priority (TV)
  • Shutter Speed: start with 1/10 secs and reduce it gradually till you get the desired amount of blurriness effect
  • Aperture: F/13-22
  • ISO: 100 or lower
  • White Balance: AWB or Cloudy
  • Metering Mode: Evaluative (if I have bright area in the scene, I do a partial metering)

Consider another situation, where you want to focus only on the subject, keeping the background out of focus. You widen the aperture to the smallest value your camera/lens supports (say F/2.8) and guess what, the photo becomes blown-out. You try to increase the shutter speed, but alas, even the maximum supported shutter speed is producing a blown-out photo. You guessed it right: the ND filter is again our rescue crew. Put on a ND filter and you can keep the minimum F-stop with a reasonable shutter speed and still get the subject in focus with rest of the scene out of focus (I am deliberately avoiding the concept of depth of dield to keep this article simpler.

Of course, you can try lowering the ISO to 50 or lower, but the effect of reduction of light, by lowering ISO sensitivity is negligible compared to ND filters. What I mean is lowering ISO is no match against the ND filter in reducing the impact of “amount of light” on brightness of the photo.

Types of ND filters

There are different types of ND filters available and they are classified based on the amount of light they block (or the darker/denser the glass is).

The greater the optical density, the more light it will absorb. So a ND filter is sometimes classified in terms of density

0.1, 0.2, 0.3, 0.4, 0.5, 0.6, 0.7, 0.8, 0.9, 1.0, 2.0, 3.0, 4.0, and so on.

The light blocking capacity of the ND filters is also measured by the reduction of f-stops. The more f-stops an ND filter will reduce, the less light it will allow to pass. Thus a 2-stop ND filter blocks double the amount of light of a 1-stop ND filter.

So this is one way of specifying the “darkness” of the filter. There’s another. Different manufacturers use different conventions. ND4 filter means a 2 stop ND filter. Huh? A little bit of math here…

best tips for nd filter use in photography

Photo by Neil Howard.

ND2 means 1 stop ND filter (2=2 to the power 1) allowing 50% of light to pass (transmittance). ND4 means 2 stop ND filter (4=2 to the power 2) allowing 25% of light to pass. ND8 means 3 stop ND filter (8=2 to the power 3) allowing 12.5% of light to pass and so on…

If you are a little bit lost, do not worry; all you need to understand is that “darker” ND filters block more light. ND8 is darker, ND2 is less dark. A 0.9 ND Filter is darker and a 0.3 ND filter is less dark. A 3 stop ND filter is darker and a 1 stop ND filter is less dark, and so on and so forth. That should work for now.

Which filter should I use and when?

The ND filter you need depends on how much light you want it to absorb so that you can achieve the desired shutter speed or the desired aperture size at the ambient lighting conditions. (Remember the first statement in this article?) This depends on how much ambient light you are working in. So, overall, this is more or less experimental. The rule of thumb is that if you want a lot of motion blur or absolute silkiness, use the darkest ND filter (ND8) so that you can really slow down the shutter. If it’s dark (overcast, dawn or dusk), you may not need the darkest ND filter, because there is already less light. So you may try a medium dark filter (ND4) to achieve the same effect. For sports, to bring that motion blur, you may need just a slightly dark filter (ND2) if don’t want too much blur.

Do I really need ND filters?

You will most likely need ND filters (of various strengths) if you shoot landscapes a lot (like me, which you can see in my photoblog–75% of my best collections are landscapes). Or if you shoot sports a lot in bright daylight. But, as I said, you will KNOW you need a ND filter when you have reached your camera/lens limit of blocking light and do not have any further options.

why neutral density filters make photos better

Photo by mariusz kluzniak; ISO 100, f19.0, 30-second exposure.

BONUS TIP: You can always “stack” up one filter on the other to increase the darkness even more. But beware of vignetting on wide angle shots (18-20mm) with stacked up filters, along with other “combination” effects.

How many ND filters do I need to buy?

Well… in my opinion, you should get ahold of a 0.9 ND filter first, and then if you need to, go for a 0.6 ND filter. Then you can stack them up to get an even darker filter. I have rarely used my 0.3 ND filter.

When NOT to use an ND filter

A word (or sentence) of caution: Most ND filters are effective only on the visible spectrum of light and do not proportionally reduce ultra-violet or infrared radiation.

This can be specially dangerous if you are using ND filters to view sources like the sun or white/red hot metal or glass which emit intense non-visible radiation that is not blocked by ND filters. This  can seriously damage your eyes, as the source does look dim when viewed through the filter. Do NOT look directly at sun through the viewfinder even with an ND filter. You eyes are precious, especially if you enjoy photography!
simple tips and tricks for neutral density long exposure photos

Photo by Steve Corey; ISO 100, f/20.0, 1/6-second exposure.

Another situation to avoid using an ND filter is when the scene has a mixture of areas with higher and lower brightness (i.e., not uniformly lit). For example, during a sunset the horizon is bright but the ground is dark. Using an ND filter will make the darker spots more dark, thus losing the appropriate detail (this is opposite to being blown-out and is called burn-out).

What are the available varieties?

There are different flavors of ND filters available on the market. To start with, I would always suggest to go for multi-coated filters, as they are better quality than normal glass–and worth the price. The normal glass filters are cheaper and have a lot of side effects (color-casts) associated with them. Of course, there are pro filters that cost a lot, but then they are durable, scratch-resistant, and high quality.

Options include different brands like Hoya, Singh Ray, B+W, Tiffen, and Lee filters. These are GREAT filters with no color casts, but the cost varies with make and model. I own Hoya filter sets, and I am quite happy with the quality of the light reduction at a reasonable price. Singh Ray filters are relatively costly but with high optical precision. For experimental learners, I would recommend getting your hands on Hoya filters.

Why are these sunglasses for cameras called “Neutral”?

Good question. Because these sunglasses (should) “eat up” light of all wavelengths equally. This means during absorbing, no color is given preference over the other. Thus the term “neutral”. But not all ND filters on the market are made perfectly. Especially the cheap ones that create color casts on photos, as they cannot reduce intensity of all wavelengths equally. I recommended getting standard, branded, and quality ND filters (the multi-coated ones). Research on the Internet; read reviews and forums to find out the best ND filter to suit your needs and your wallet.

About the Author:
This article was written by Sudipta Shaw.


Go to full article: Neutral Density Filter Tips for Long Exposures During the Day

What are your thoughts on this article? Join the discussion on Facebook

PictureCorrect subscribers can also learn more today with our #1 bestseller: The Photography Tutorial eBook

The post Neutral Density Filter Tips for Long Exposures During the Day appeared first on PictureCorrect.


from PictureCorrect https://ift.tt/2Go0qdu
via IFTTT

PictureCorrect.com: Interesting Photo of the Day: New Zealand Summer Storm

How many times do you look at a landscape shot and think about how calm everything looks? Other times, you can see the action, whether it be wind, animals, or cloud coverage moving across the image. In this case, the purple flowers calmly stand in unison as the dark clouds approach from the once illuminated skies above. The last rays of sunshine can be seen poking through behind them. As the viewers’ eyes move up the image, the storm cloud draws nearer to the peace below it. This photographer expertly captured the difference between the scene on the ground and the one above it:

lupine flower photography New Zealand landscapes

“Summer Storm, New Zealand” by Will Patino (Via Reddit. Click image to see full size.)

Landscape photographer Will Patino ventured out into a New Zealand storm to set up his equipment and capture this stunning shot of a field of lupine before the flowers were destroyed by the weather. The menacing clouds bearing down on the plants contrast beautifully with the graceful, vibrant nature of the foreground.

When shooting landscapes, a little drama can never hurt. According to Patino, this storm quickly moved past the nearby mountain range, bringing with it hail, lightning, and echoing thunder. Would you dive into the frenzy to attempt a shot like this or run for cover?


Go to full article: Interesting Photo of the Day: New Zealand Summer Storm

What are your thoughts on this article? Join the discussion on Facebook

PictureCorrect subscribers can also learn more today with our #1 bestseller: The Photography Tutorial eBook

The post Interesting Photo of the Day: New Zealand Summer Storm appeared first on PictureCorrect.


from PictureCorrect https://ift.tt/2GLUmyO
via IFTTT

PictureCorrect.com: Why Camera Settings are Sometimes Insignificant

Are you one of those photographers who asks other photographers what their camera settings were when they took a shot you really like? Try not to do that in future, especially around Tony Northrup! In this video, Northrup explains why asking for his camera settings frustrates him and does you no good whatsoever:

Back in the early days of film photography, settings meant everything in order to get correct exposure. Nowadays they aren’t so important, especially if you shoot RAW and fix your photos up in post-processing.

Beginner photographers constantly ask Northrup what settings he used on some of his most popular images. But every shot has a detailed back story; it’s clear that he spent a lot of time and dedication preparing for each shoot.

What he had his camera set at for each one is irrelevant. The important details are in all the months of planning and visiting the places where he took the images before he even set up to take a photo.

He learned everything he could about his subject and the light conditions there, and then one day everything was just aligned right for him to take the shot. Knowing his settings will not get you the same image he did; there are so many other factors that are important.

behind the scenes photo

Composition, art, planning and light are also necessary ingredients to make a great shot. You need to know when to raise your ISO or change your shutter speed, and you can only do that by knowing your camera gear and practicing.

Note in the information underneath the video that Northrup tries to clarify things further. He’s not trying to say that you shouldn’t learn to understand camera settings, or that they don’t matter. What he’s saying is that knowing someone else’s camera settings won’t help you, because you won’t have the same light or circumstances they did, and you probably don’t have exactly the same gear they do either.

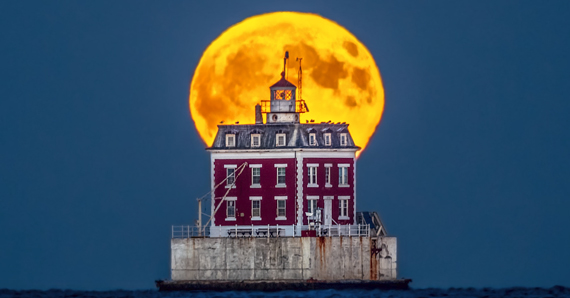
lighthouse with full moon behind camera settings

What’s your opinion? Is it helpful to know someone else’s camera settings?

“You can’t just learn people’s EXIF data and get any useful information out of that; it’s almost always useless.”


Go to full article: Why Camera Settings are Sometimes Insignificant

What are your thoughts on this article? Join the discussion on Facebook

PictureCorrect subscribers can also learn more today with our #1 bestseller: The Photography Tutorial eBook

The post Why Camera Settings are Sometimes Insignificant appeared first on PictureCorrect.


from PictureCorrect https://ift.tt/2GpyPsi
via IFTTT

torstai 29. maaliskuuta 2018

PictureCorrect.com: Slow Shutter Speed Photography

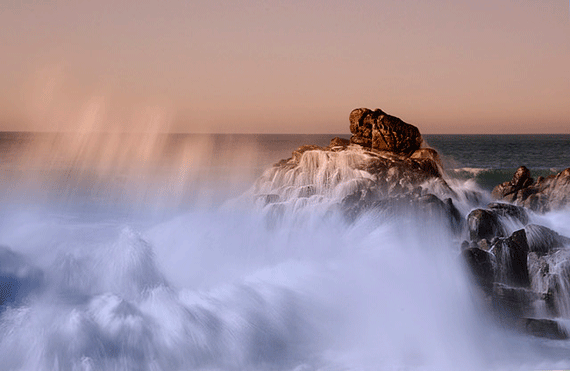
Shutter speed works two ways on your camera: it can be used to freeze motion so everything in the frame is nice and sharp; or it can be used to blur motion so some things in the frame are blurred, giving the picture a unique look. You may be shaking your head at this; but sometimes I want to actually slow down my shutter speed to create blur in my image, giving it somewhat of an artistic expression. These are images that probably don’t exist in the real world, as viewed through a pair of normal eyes; but with a slower shutter speed we can create beautiful, artistic expressions that otherwise might have never been seen.

how to take photos with slow shutter speed

Photo by June Marie; ISO 100, f/22.0, 6-second exposure.

Camera Settings for Blurring Motion

When taking slow shutter speed shots, I sometimes use shutter priority mode on my camera, which is the Tv (time value) setting on my Canon camera and the S setting on Nikon cameras. And now with my camera in shutter priority mode, I’m going to slow my shutter speed down to 1/15 of a second to start. Depending if you’re shooting in daylight or dark, you might have to tweak your f-stop a bit to get the desired effect. In lower light situations, you want to keep the ISO as low as possible—like around 100—because the camera is actually letting more light in with the slower shutter speed. For different effects, you might try using a zoom lens and zoom in and out while you take the shot.

slow shutter speed for beginning photographers

Photo by Sitoo; ISO 160, 1/20-second exposure.

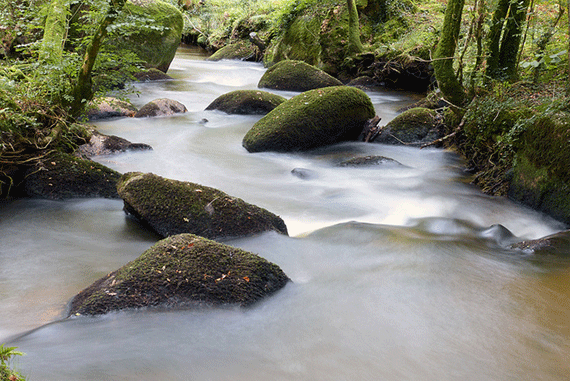
What I like about slow shutter speed photography is getting the contrast between the things that are in motion and the things that are absolutely still in the same shot. This gives you some really neat images—like a river’s water flowing over the rocks.

photography with slow shutter speed method

Photo by Christophe Surman; ISO 640, f/5.0, 1/8-second exposure.

A slow shutter speed might give the water a harsh blur, but at the same time, the landscape around the river water will be in focus. You can make the moving water in a fountain look like glass by using a shutter speed of about 2 seconds or slower with a tripod attached to your camera. This will give your image a unique look of motion being blurred in the water and the fountain and scenery in sharp focus.

photography techniques slow shutter speed

Photo by axbecerra; ISO 200, f/22.0, 13-second exposure.

Preventing Camera Shake

When I use the slower shutter speeds I often set the timer on the camera or use my shutter release cable to eliminate any camera shake when pressing the shutter button. But using the shutter release cable, you may want to go to a manual focus to prevent the camera from refocusing and causing your image to be out of focus.

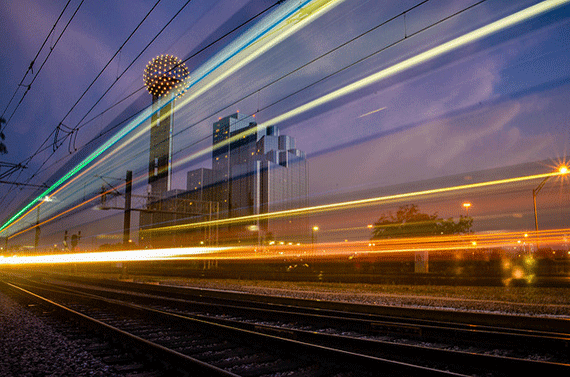
When it comes to night time shooting, I always make sure I have my tripod: this eliminates camera shake from slower shutter speeds, but it also helps achieve shots that include the blurring light motion of passing cars. You can really get some neat shots at a 4 second shutter speed.

use slow shutter speed like a pro

Photo by Chris Dart; ISO 100, f/8.0, 5-second exposure.

Getting More Creative

You’ll notice that when you’re in shutter priority mode, the camera calculates the approximate f-stop when you set you set the camera at a desired shutter speed. If you want to get more creative, you can take those settings and switch your camera to manual mode and put those setting in manually; that will give you a starting point. You can also get some cool shots at night without the tripod by using manual mode and shooting at just under a second while moving the camera around.

slow exposure camera trick

Photo by Andrew Stawarz; ISO 800, f/4.0, 30-second exposure.

Slow shutter speed photography is just another way to be creative with your camera while having a little fun with intentional blur. Keeping an open mind with photographic creativity is what separates photographic art from a plain snapshot.

About the Author:
This articles was written by Alan Slagle. “I’ve been doing photography all my life and it’s a great way to get away from life in general. I believe digital photography has no rules so I do a lot of experimenting and that gives me a chance to write an article about my experiences.”


Go to full article: Slow Shutter Speed Photography

What are your thoughts on this article? Join the discussion on Facebook

PictureCorrect subscribers can also learn more today with our #1 bestseller: The Photography Tutorial eBook

The post Slow Shutter Speed Photography appeared first on PictureCorrect.


from PictureCorrect https://ift.tt/2IeUm7I
via IFTTT

PictureCorrect.com: Interesting Photo of the Day: Manhattan Skyline at Sunset

Is there a more breathtaking, more photographed scene than the Lower Manhattan skyline? Add in a sunset and it magically gets even more stunning. The pink, warm light reflecting off the impressive architecture and the East River adds a dramatic effect for picture-perfect shots. This long exposure of the skyline by photographer Colin Kelly beautifully portrays the calm, peaceful mood as the sun sets against the buildings:

lower manhattan skyline photo

Long Exposure of Manhattan Skyline at Sunset by Colin Kelly (Via Reddit. Click image to see full size.)

This image was taken from Brooklyn Bridge Park after Kelly wandered around the piers looking for the perfect shot. He uses a Nikon D3300 on a tripod with a 16mm Rokinon and 10-stop ND filter.

Camera Settings

  • ISO 100
  • f/11
  • bulb mode
  • 150 seconds

Go to full article: Interesting Photo of the Day: Manhattan Skyline at Sunset

What are your thoughts on this article? Join the discussion on Facebook

PictureCorrect subscribers can also learn more today with our #1 bestseller: The Photography Tutorial eBook

The post Interesting Photo of the Day: Manhattan Skyline at Sunset appeared first on PictureCorrect.


from PictureCorrect https://ift.tt/2pOPaAu
via IFTTT

PictureCorrect.com: Trying new Techniques when Bored with Photography

Has your photography or cinematography work lost its appeal? Photographer Peter McKinnon wants to inspire you with some ideas for breaking out of a creative rut. If you ever fall into a rhythm that becomes repetitive and starts to feel more like work than creativity, these tips could be very useful:

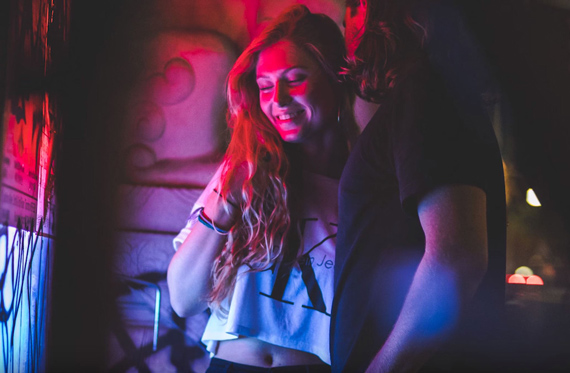
McKinnon normally shoots his portraits during the day for the lighting. To switch it up, he flips the script and ventures out into the night with his subject to find a neon light or brighter location. Changing the scenery and lighting can always help you to appreciate a new look in your work that sets itself apart from your routine portraits. Positioning your subject in front of neon lights and shooting toward them creates an effect that is very popular among Instagram photographers today. Find a friend to work with and give it a try!

inspirational photography tutorial creativity

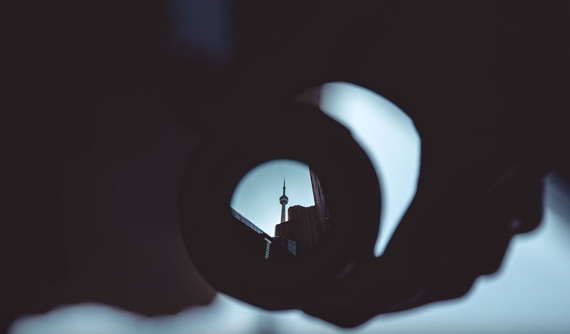
Another tip he shares is to grab an extra lens and try photographing through the back of it. If you have a lens with a wider element in the back, it will work effectively for a completely new look. The composition will be positioned upside down, but you can always flip it right side up when it’s time to sit down and edit. This trick works well for when you have to go out and photograph a subject or scene that you have already worked with countless times. Finding alternative methods of innovation can be tricky, especially when you feel uninspired and stuck on how to find a new viewpoint.

ideas for when you get stuck in a photography rut

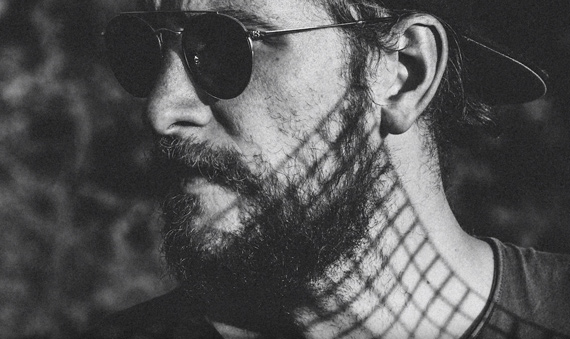
You can also head out to your local department store and scour the shelves for materials that will create an awesome effect in your photos. In his example, McKinnon purchased a cheap piece of plastic with a pattern on it that he used to cast an appealing shadow on anything that the light shone on. Items around the house will work, too!

creative photography ideas to beat boredom

There you have it! Hopefully, these tips help you to look at your creative funk as a temporary setback that can be repaired. Overall, just keep shooting and finding new ways to put a creative spin on the work that you normally do. Creativity knows no bounds!

For more creative ideas: The Long Exposure Photography Guide at 52% Off


Go to full article: Trying new Techniques when Bored with Photography

What are your thoughts on this article? Join the discussion on Facebook

PictureCorrect subscribers can also learn more today with our #1 bestseller: The Photography Tutorial eBook

The post Trying new Techniques when Bored with Photography appeared first on PictureCorrect.


from PictureCorrect https://ift.tt/2GE5YE5
via IFTTT