


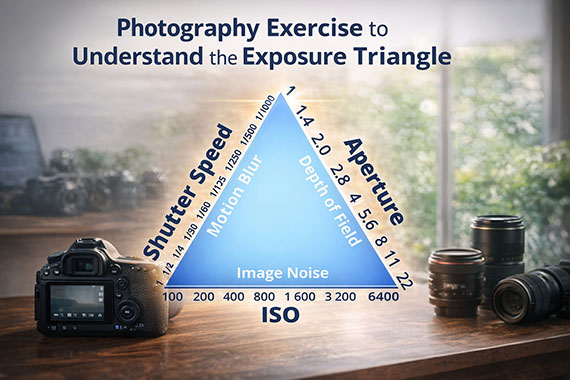
The exposure triangle—aperture, shutter speed, and ISO—is one of the most important concepts in photography, yet it’s also one of the easiest to misunderstand. Many photographers learn what each setting does in isolation, but struggle when it comes to balancing all three in real-world shooting situations. This exercise is designed to help you move beyond theory and build an intuitive understanding of how the exposure triangle actually works in practice.
Instead of memorizing rules, you’ll deliberately change one setting at a time while compensating with the others. By the end of the exercise, you should feel more confident adjusting exposure quickly and intentionally, whether you’re shooting landscapes, portraits, or everyday scenes.
Related: for a printable cheat sheet of the exposure triangle you can keep in your camera bag, the Fundamental Camera Cheat Sheets  Winter Sale is ending soon.
The Goal of This Exercise
The goal is simple: maintain the same overall exposure while changing how the image looks. You’ll see firsthand how aperture affects depth of field, shutter speed affects motion, and ISO affects image quality—while learning how they work together to create a properly exposed photo.
This exercise works best with a camera that allows full manual control, but it can also be adapted to aperture priority or shutter priority modes if needed.
Step 1: Choose a Controlled Scene
Start by photographing a scene with steady, consistent light. A window-lit room, an outdoor scene on an overcast day, or a shaded area works well. Avoid rapidly changing light so your exposure adjustments stay predictable.
Mount your camera on a tripod if possible and keep your composition the same throughout the exercise.
Step 2: Establish a Baseline Exposure
Set your camera to Manual mode. Choose a reasonable starting point, such as:
- Aperture: f/5.6
- Shutter Speed: 1/125 sec
- ISO: 100
Adjust these settings until your exposure meter indicates a balanced exposure. Take a photo—this is your baseline image.
Step 3: Change Aperture, Compensate Elsewhere
Now, open your aperture by one or two stops (for example, from f/5.6 to f/2.8). Your image will be brighter, so compensate by increasing shutter speed or lowering ISO.
Take another photo and compare it to your baseline. Notice how the exposure remains similar, but the depth of field changes. Repeat this step by stopping down the aperture and compensating in the opposite direction.
Step 4: Change Shutter Speed, Observe Motion
Return to your baseline exposure. This time, slow down your shutter speed (for example, from 1/125 sec to 1/30 sec). Compensate by closing the aperture or lowering ISO.
Photograph something with movement—hands, leaves, people walking—and observe how motion blur changes while exposure stays consistent. Then try faster shutter speeds and compare results.
Step 5: Change ISO, Evaluate Image Quality
Once again, return to your baseline settings. Increase your ISO (for example, from 100 to 800) and compensate with aperture or shutter speed.
Compare the images at different ISO values, paying attention to noise, contrast, and detail. This step helps reinforce why ISO is usually adjusted last and why it’s a tradeoff rather than a free exposure fix.
Review and Reflect
After completing the exercise, review your images side by side. Ask yourself:
- Which setting had the biggest creative impact?
- How did compensating settings affect image style?
- Which adjustments felt easiest or hardest to predict?
This reflection is where the real learning happens.
Why This Exercise Matters
Understanding the exposure triangle isn’t about perfect numbers—it’s about control. Once you see how aperture, shutter speed, and ISO work together, you’ll stop guessing and start making deliberate choices based on the look you want, not just the exposure you need.
Repeat this exercise in different lighting conditions and genres, and the exposure triangle will quickly become second nature.
An Exposure Triangle Cheat Sheet for Your Camera Bag:
Have you ever wanted to photograph an amazing moment but missed the shot because you didn’t know the right camera settings to use? That’s where these fundamental Camera Cheat Sheets come in. They are currently 75% off for a Winter Sale if you want to check them out.
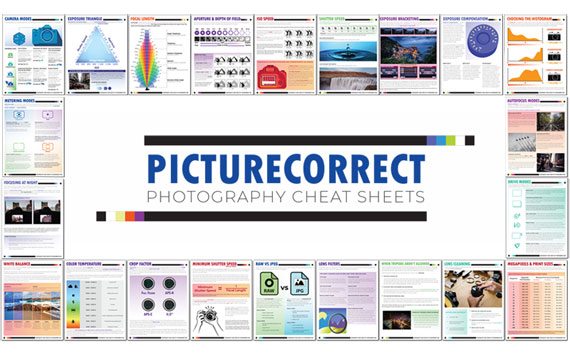
New: Fundamental Photography Cheat Sheets
Whether you’re a seasoned professional or just starting out, photography cheat sheets can be a valuable resource for improving your skills and taking your photography to the next level. The perfect companion for any photographer. Print one out whenever you need it.
Offer ending soon: The Fundamental Camera Cheat Sheets Winter Sale
from PictureCorrect https://ift.tt/9qHYV24
via IFTTT


What a captivating breakdown of such an enchanting natural phenomenon. I love how the article blends scientific insight with practical guidance, making light pillars feel both magical and approachable for photographers. The tips on exposure and composition are especially valuable for night shooting. Enhancing these scenes with a gentle touch inspired by virtual dusk styling can also bring out even more atmosphere in the final image.
VastaaPoista