Beginner photographers often use the terms “blurry” and “out of focus” interchangeably. But in reality, the two have completely different meanings and causes. Photographer Mark Wallace from Adorama explains the differences:
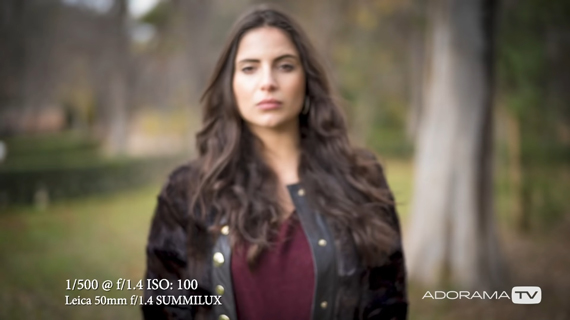
When you focus, the lens forms a sharp image of a subject that is at a specific distance from the camera. If the camera or the subject changes position even a bit after the focus has been locked, the focus will be thrown off. As a result, the image will not turn out to be sharp. However, this is not to say that the image is blurry. It’s actually out of focus.

An example of a portrait that is out of focus
“Blur is when something moves when the shutter is open.”
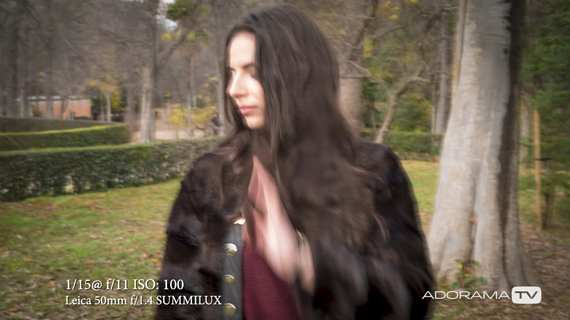
If the subject or camera moves while you’re taking a photograph, then the image will turn out blurry.

An example of a blurry portrait
“Blur is caused by motion. Out of focus is caused by the distance between the subject and the camera changing.”
Fixing Out of Focus Images
When shooting at very wide apertures, like f/1.4 or f/1.2, it’s easy to miss focus. The depth of field is so shallow that even a slight movement will cause the image to be out of focus. Using a tripod restricts camera movement and improves your chances of having the shot in focus.
Once you lock focus on the subject, make sure that the subject doesn’t change position. This will drastically decrease the chances of your images turning out blurry.
Fixing Blurry Images
There are quite a few things that you can do to prevent blurry images.
Stabilize your camera using a tripod or monopod. This will allow you to use very slow shutter speeds without introducing any kind of camera shake. However, if the subject moves while you’re taking the image at a slow shutter speed, the photo will still be blurry.
If using a tripod isn’t your cup of tea, you can use a fast shutter speed instead to freeze the motion. To avoid camera shake, follow a general rule of thumb. Set your shutter speed to a value that is at least the reciprocal of the effective focal length you’re using. For instance, if you’re shooting with a 50mm lens, your slowest shutter speed should be 1/50 second or faster.
Hold your camera steady. It’s good practice to tuck your elbows in and use your left hand to support the camera from below. When using the viewfinder, you can even use your face to support the camera.

If you’re tired of your images coming out blurry or out of focus, give these tips a try!
- - - - - - - - - - - - - - - - - - - - - - - - - - - - - - - - - - - - - - - - - - - - - - - - - - - - - - - - - - - - - - - - - - - - - - - - - -
Did you appreciate this newsletter? Please help us keep it going by Joining Our Patreon Supporters
What are your thoughts on this article? Join the discussion on our Facebook Page
PictureCorrect subscribers can also learn more today with our #1 bestseller: The Photography Tutorial eBook
- - - - - - - - - - - - - - - - - - - - - - - - - - - - - - - - - - - - - - - - - - - - - - - - - - - - - - - - - - - - - - - - - - - - - - - - - -
The post Fixing Blurry or Out of Focus Images appeared first on PictureCorrect.
from PictureCorrect https://ift.tt/5G0Iil2
via IFTTT


0 kommenttia:
Lähetä kommentti