


Aperture plays a key role in photography. Besides helping you decide on how bright or dark you want your photos to be, the aperture also helps you to make creative decisions. And it does so by controlling the depth of field. It is therefore pivotal that you fully understand what aperture to use and what impact it has on your photos. After all, this is how you’ll be able to grow as a photographer.
Today’s video by photographer Alex Kilbee from The Photographic Eye will help you easily decide the right aperture for the type of photo you want to make:
“Aperture is one of the fundamentals in photography and knowing how to employ it properly, which aperture to use is one of the keys to growing as a photographer.”
For a new photographer, aperture and the terms related to it can be really confusing. There are a lot of technicalities associated with this element of the exposure triangle. This is why, as Kilbee rightly points out in the video, aperture has a fearsome reputation amongst beginner photographers.
As we mentioned earlier, the aperture of the lens basically controls two aspects. First, it controls the amount of light that passes on to the sensor, thereby affecting how bright or dark the image appears. Next, it also controls how much of the scene is in focus i.e. the depth of field. To put the two together in context:
- A smaller f-number means a wider opening i.e. a greater amount of light – also a razor-thin depth of field
- A larger f-number means a narrower opening i.e. lesser amount of light – a greater depth of field
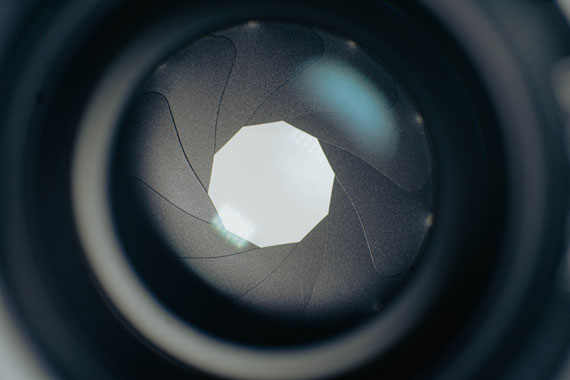
Photo captured by mj tang
Kilbee further talks about the various situations in which you can use the various apertures to get the best results. For instance, you can use wide-open aperture settings like f/1.8 to isolate or emphasize a subject. This is idle for portrait photography. But, depending on the situation, you can also use it for landscape photography. Kilbee shares beautiful examples for each of the scenarios.
Similarly, you can use the mid-range of the aperture like f/8, f/11, or f/16 when you need details not just on the subject but on the context too. Think of street photography, landscape photography, or even group photographs.
Finally, you’d only want to move towards the narrowest settings if you want an image where almost everything is in focus. However, even though Kilbee doesn’t mention it in the video, you run the risk of getting slightly softer images when shooting at an extremely small aperture setting. This is due to a phenomenon called diffraction. Hence, it is advisable that you refrain as much as possible from shooting with the aperture in the narrowest range if you want absolutely sharp and detailed images.
With this understanding in place, it’s now up to you to play around with the different aperture settings and experiment. Then depending on the kind of work you do, you can decide for yourself what works and what doesn’t. Gradually, once you get a hang of it, this will be second nature to you.
- - - - - - - - - - - - - - - - - - - - - - - - - - - - - - - - - - - - - - - - - - - - - - - - - - - - - - - - - - - - - - - - - - - - - - - - - -
Did you appreciate this newsletter? Please help us keep it going by Joining Our Patreon Supporters
What are your thoughts on this article? Join the discussion on our Facebook Page
PictureCorrect subscribers can also learn more today with our #1 bestseller: The Photography Tutorial eBook
- - - - - - - - - - - - - - - - - - - - - - - - - - - - - - - - - - - - - - - - - - - - - - - - - - - - - - - - - - - - - - - - - - - - - - - - - -
The post How to Choose the Right Aperture appeared first in the Photography Tips category on PictureCorrect.
from PictureCorrect https://ift.tt/L7VfCie
via IFTTT


0 kommenttia:
Lähetä kommentti