


While reflectors in photography are mostly used outdoors, they can be equally useful in the studio. Photographer Miguel Quiles with Adorama discusses how you can enhance your portrait photography with a reflector:
For demonstration purposes, Quiles uses his Sony a6500 camera paired with the 100mm f/2.8 STF lens along with a silver reflector. He has his camera set at f/5.6, ISO 400, and a shutter speed of 1/500 seconds for tack sharp images.
Beginners tend to hold the reflector much farther away than they should. To demonstrate how an image looks when taken without a reflector, with a reflector held far, and with a reflector held close, he takes the following three photos:
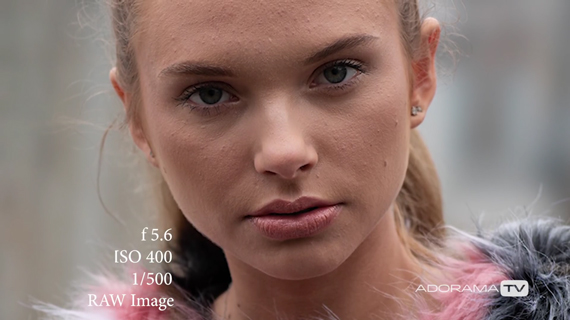
No Reflector
This image taken without a reflector lacks a wow factor. The surroundings don’t reflect any life into the model’s face. This vastly affects the skin tone, as well.
Next, the model holds the reflector at about her waist level. While this does reflect some light onto her face, the image still looks lifeless.
If you’re into portrait photography, then you must have realized that catchlights in the eyes play a huge role in adding life to a portrait. However, by keeping the reflector far away, the image will be devoid of catchlights. Quiles urges beginner photographers to correct this mistake and hold the reflector closer.
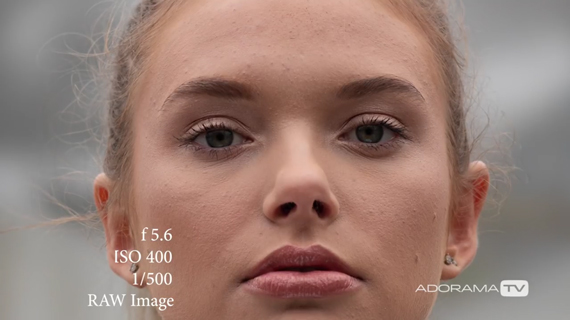
Reflector Held Far Away
Finally, Quiles demonstrates the correct way of placing the reflector: close to your subject. This time, the model holds the reflector at her chest level. While her skin is further illuminated, you also get to see some beautiful catchlights in her eyes. You’ll lose the catchlights if the model has her chin tilted up, so be sure to pose your model accordingly.
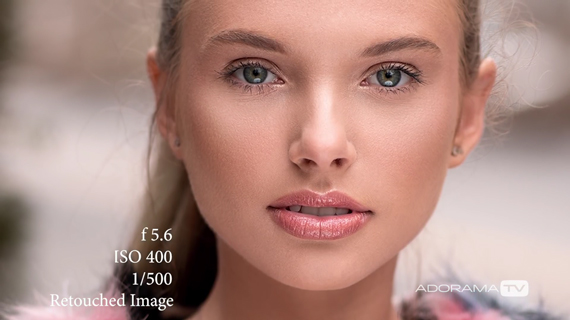
Reflector Held Close
If you happen to be shooting on a bright sunny day, you can still use the reflector for some amazing results. Just be sure to bring the model into some shade and place the reflector close to their face. You’ll end up with images that are tack sharp and interesting to look at.
Now that you know the potential of a simple reflector, we hope that it becomes a part of your photography toolbox. Inexpensive as reflectors are, they can still add the wow factor to your portrait photography.
- - - - - - - - - - - - - - - - - - - - - - - - - - - - - - - - - - - - - - - - - - - - - - - - - - - - - - - - - - - - - - - - - - - - - - - - - -
Did you appreciate this newsletter? Please help us keep it going by Joining Our Patreon Supporters
What are your thoughts on this article? Join the discussion on our Facebook Page
PictureCorrect subscribers can also learn more today with our #1 bestseller: The Photography Tutorial eBook
- - - - - - - - - - - - - - - - - - - - - - - - - - - - - - - - - - - - - - - - - - - - - - - - - - - - - - - - - - - - - - - - - - - - - - - - - -
The post Reflector Lighting Tutorial for Headshots appeared first in the Photography Tips category on PictureCorrect.
from PictureCorrect https://ift.tt/GlnOpwZ
via IFTTT


0 kommenttia:
Lähetä kommentti