Sometimes we just need better light. Not so much a larger amount, but something nicer, portable, adjustable–and something that will just fill in the right places. As we get better at shooting, we start to notice where critical light is missing. But we don’t always need the kind of Hollywood set that Tom Cruise is akin to. You can achieve amazing light using some of the most easily accessible tools that won’t cost you big dollars and, in some cases, won’t cost you anything.
First though, we need to understand that handling this equipment is the latter of two evils. The first is learning to identify light: where it’s coming from, how soft it is, and how it interacts to highlight your subject.
Daylight
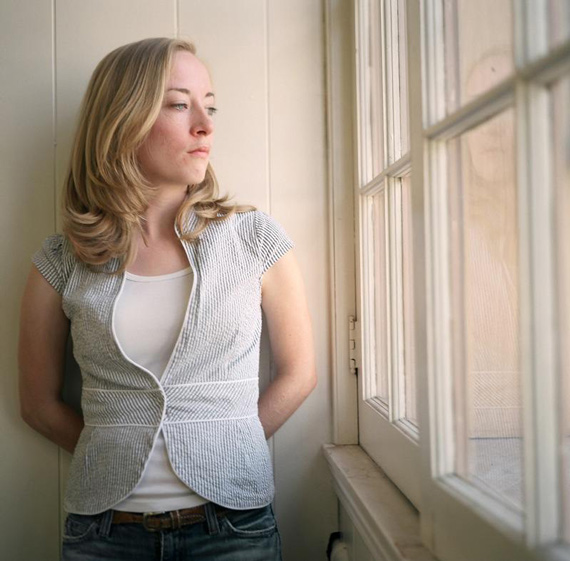
Let’s start with the most available light there is–daylight. It might seem silly, but using the natural daylight will provide you with the best light there is. Studio lights are built to mimic this light in its various forms. Sitting your subject next to a window provides a complimentary color and softness to the light. The softer the light, the more it wraps around your subject. If using the window method, try both direct sunlight and indirect shaded light for different effects. And the best part– it’s free!
Strobes
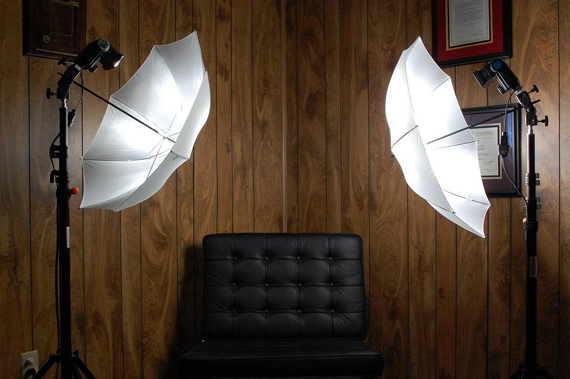
To mimic this kind of light we use studio strobes or “flashes” as they are commonly known. The easiest setup is a single strobe, a large reflector, and a stand. Many places sell these as kits for as little as $600. Sometimes they even include remote wireless triggers, so you don’t even have to be anywhere near the lights when shooting. Compare that to an on-camera flash kit, which can cost $400 and up for a good system, the extra few dollars are going to give you so much more creative freedom to experiment. Look for kits that include the light, stand, remote trigger, and a softbox. You must get a softbox. No softbox, no soft complimenting light. If not included, they start relatively cheap anyway, at around $100–often less.
A system offering around 400 watts of power is plenty for a small studio, but make sure you can adjust the power up or down by at least 1/4 of a stop with each change. Good systems, such as those from Elinchrom and ProFoto, provide great control in tenths of a stop. Small, but often needed for subtle improvements.
Reflectors
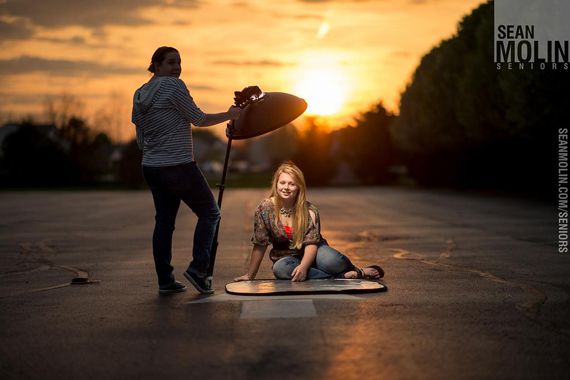
Light with a basic reflector that offers gold, silver, white, black, and translucent, will serve the best. These are known as 5 way reflectors. The gold offers a subtle, warm (orange) tone, whilst the silver cools the light down with a slight blue cast. White adds light to increase the exposure, and black subtracts light, adding a high contrast look. The final element is the translucent disc, acting like a small softbox or cloud. To explain, clouds make for the perfect softener of light, acting as a gigantic diffuser.
The larger the light source, the softer the light becomes, as the further it has to travel across a surface, before spilling into the subject below. As an example, shining a torch through a bed sheet will spread the light evenly, whilst the torch itself will pinpoint the light. A good start for absolute beginners is to get a continuous light kit, instead of a flash kit. With the continuous kit, simply switch it on, look through the viewfinder, and what you see is what you get. The problem with continuous lighting is that it’s often hot. Tungsten lights are noisy, cast a yellow light, and become very hot to the touch within a very short time of turning them on. New manufacturers are making this easier, with cold LED lights that mimic daylight, but have a big check ready if you want a set. A simple strobe kit is not hard to master.
Many studios use multiple lights, white cards, block boards, reflectors and all sorts of gear, but that kind of gear is reserved for very high end commercial and fashion shoots. To get started, a simple light kit with a 5 disc reflector will give you just as soft or dramatic a look. You’ll wow your friends and family or even your clients. Remember, the more gear you have, the more you need to use it, otherwise it’s a costly resource just sitting in storage.
About the Author:
Steve Rutherford is a photographer with a publication based in Australia.
For further training, below is a helpful video on how to setup a studio in your home:
Once you’ve sorted out your studio lights, it’s time to set up your home photo studio. You could use a spare room so it’s more permanent. Or just push the furniture to one side for a couple of hours.
Part 1:
Part 2:
There are various light modifiers you can use such as soft boxes, umbrellas and beauty lights. I’m going to show you the difference between soft boxes and umbrellas.
To get the exposure you will need a flash meter unless you’re using a speedlight on a stand which has a TTL connection to the camera.
So lets see how the light in your home photo studio looks. sit back and enjoy the movie.
Go to full article: How to Set Up a Simple Photography Studio
What are your thoughts on this article? Join the discussion on Facebook
PictureCorrect subscribers can also learn more today with our #1 bestseller: The Photography Tutorial eBook
The post How to Set Up a Simple Photography Studio appeared first on PictureCorrect.
from PictureCorrect https://ift.tt/2zyd7j0
via IFTTT


0 kommenttia:
Lähetä kommentti