The histogram is a really useful tool for photographers. It can provide guidance about whether you’re getting a decent enough exposures, given the lighting and the subject. This saves you from the hassle of having to wait until you get home to check the image in Lightroom or Photoshop. If you understand how the histogram works, you can do a quick check right there and then and adjust the exposure as needed.
So, what exactly is a histogram? Mark Wallace explains:
When you take a picture, your camera not only captures colors, but also tonal values—how much black is in the scene or how much grey or white, as well as other values in between those three markers. The software inside your camera takes all those values and plots them on a histogram. So, the histogram is a charted description of what the camera sees. The number of black, white, and grey pixels.
What a Histogram Says
The right side of the histogram indicates all the whites in an image. The left side of the histogram indicates the black tones, and the middle, the grey tones. Just by looking at the histogram you can see whether the image is overexposed (the histogram is skewed toward the right), or underexposed (skewed toward the left) or properly exposed (clustered more toward the middle, ideally with some space on both sides).
A typical camera sensor is designed to look at everything as if it is middle grey. If it’s not middle grey, the exposure is adjusted to ensure that. This is highlighted with a simple experiment.
First, Wallace took an image of a white door. Then he took an image of a black wall. This is what was captured (side by side comparison):
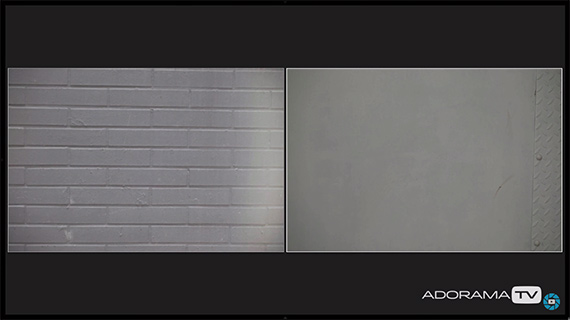
When both the black and the white are pictured together in the same frame, the exposure becomes much more accurate.
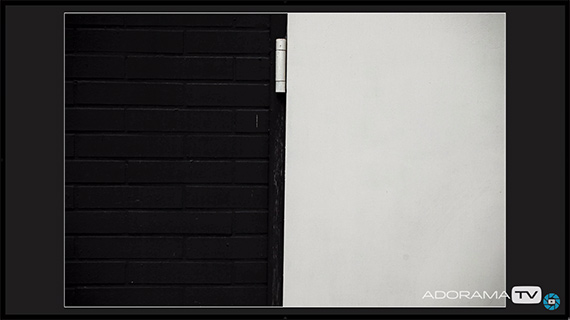
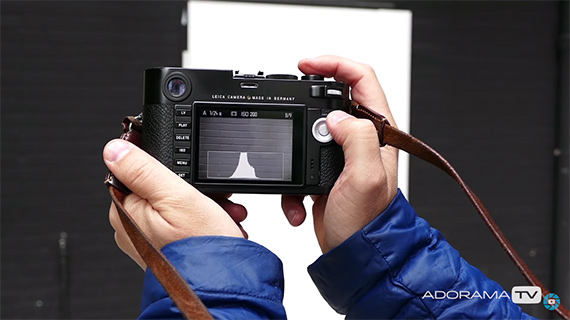
Using the plotted chart (the histogram) that shows up at the back of the camera we can find out whether the camera is exposing it correctly. This is the chart for the black wall.
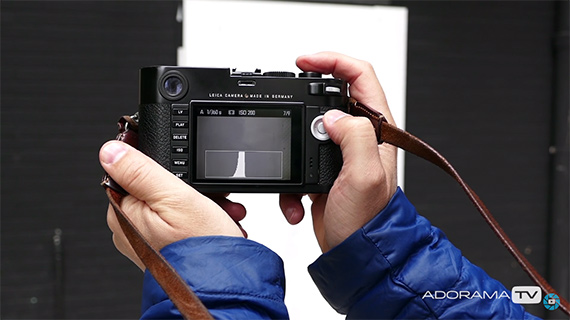
And this is the chart for the white door.
Exposure Compensation
Clearly, in the first case, the image is overexposed, the black wall should have skewed the histogram to the left. And in the second case the image is underexposed, because the white wall should have skewed the histogram to the right, which isn’t the case here. Thus, the corrective measure in the first case should be to use exposure compensation in order to speed up the exposure time. And in the second instance it should be to slow down the exposure time.
Dynamic Range
The histogram also helps us in getting a better dynamic range in our photos. Dynamic range denotes how much of the entire range from the brightest bright to the darkest dark our camera can capture. Anything that is too bright or too dark would fall in that zone of no detail (extreme left and extreme right of the histogram).
The histogram can tell us if there is anything in the frame that falls in those areas. Like in this image.
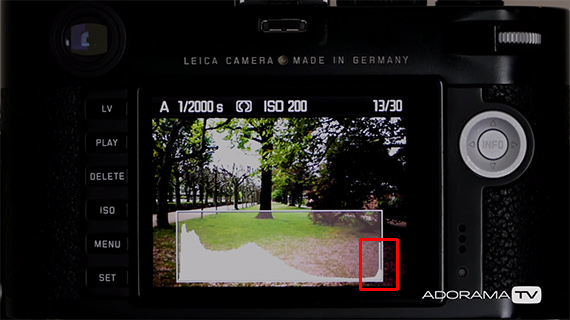
The red bordered area shows the spike or the presence of extremely bright areas in the image. These are areas that are overexposed and are likely to have no detail. When you know that information you can take corrective measures: shoot at a different time of day or shoot in HDR mode, and so on.
Are you in the habit of using your histogram?
Go to full article: How to Use Your Histogram for Better Exposure
What are your thoughts on this article? Join the discussion on Facebook
PictureCorrect subscribers can also learn more today with our #1 bestseller: The Photography Tutorial eBook
The post How to Use Your Histogram for Better Exposure appeared first on PictureCorrect.
from PictureCorrect https://ift.tt/2tk2LQd
via IFTTT


0 kommenttia:
Lähetä kommentti