keskiviikko 30. marraskuuta 2022

PictureCorrect.com: Interesting Photo of the Day: Oregon Sea Stacks

Oregon’s rugged coastline is known for its rocky outcrops and islands — particularly sea stacks. In fact, it’s home to many notable formations, such as Haystack Rock and Twin Rocks. In this scenic photograph taken by Erik Lee, you can spot — not one, two, or three — but dozens.

Plus, an arched stack that very much resembles the twins. For this shoot, Erik even managed to crop himself in wearing a fall-inspired pumpkin-toned rain jacket.

“ITAP of myself and the scenic Oregon coast” by Erik Lee (Via Reddit. Click image to see full size.)

For those wondering what a sea stack is, it’s a column of eroded rock that remains standing in the ocean. In each stack, you can clearly study the exposed striated rock layers from top to bottom.

The Oregon coast is full of amazing sea stacks; this scene is one of my favorites. If you look closely the furthest sea stack even has an arch in it. I chose to shoot at sunrise so that the rocks are lit.

Erik packed his Nikon Z7 and 24-200mm lens and shot at 59mm for this shoot. It appears he also used a tripod to keep the camera steady and in position while he was away. To capture himself and the furthest formations in detail, he created a composite image.

The first image was taken with a longer shutter speed to capture the silky movement of the water. Whereas the second image — with Erik in it — was taken with a shorter shutter speed. Naturally! He would have looked a bit of a blur or cramped up trying to stand still for so long!

- - - - - - - - - - - - - - - - - - - - - - - - - - - - - - - - - - - - - - - - - - - - - - - - - - - - - - - - - - - - - - - - - - - - - - - - - -

Did you appreciate this newsletter? Please help us keep it going by Joining Our Patreon Supporters

What are your thoughts on this article? Join the discussion on our Facebook Page

PictureCorrect subscribers can also learn more today with our #1 bestseller: The Photography Tutorial eBook

- - - - - - - - - - - - - - - - - - - - - - - - - - - - - - - - - - - - - - - - - - - - - - - - - - - - - - - - - - - - - - - - - - - - - - - - - -

The post Interesting Photo of the Day: Oregon Sea Stacks appeared first in the Photography Tips category on PictureCorrect.


from PictureCorrect https://ift.tt/wkXIhf0
via IFTTT

PictureCorrect.com: Avoiding Low Light Street Photography Mistakes

Ever wondered how pro photographers take such stunning night photography? If yours look more like “deer-in-a-headlight” candids or inky Rorschach tests, Jason Vong has some tips for you. In this photography tutorial, he exposes the top mistakes beginners make when photographing in low light — and how best to fix them.

Levitate Towards the Light

Chances are, no matter where you are or what time of the night it is, there is some nearby light available. Perhaps emanating from a neon light, candles, or lanterns, or maybe reflecting from a streetlight, billboard, or floodlight.

Regardless, you should always utilize this illumination when photographing in low-lighting conditions. Though artificial, its unique tone, shade, and glow may even create a striking effect you won’t get during the daytime. Any unique shadows nearby lights cast can also be leveraged.

Take The Light With You

Low light may be a reality, but having no lighting is optional. Professional photographers make sure they always pack a light. Artificial lights come in all shapes and sizes — including easy-to-use and portable options like flash or speed lights.

Jason’s favorites include the following:

  • Aputure Amaran MC
  • Lumecube Mini LED Panel
  • An off-camera flash
  • On-camera flash with a white napkin over it

However, you can even pack a torch or use your phone. You may just need to play around with the settings, angles, and screen background for the best effect.

night street photo

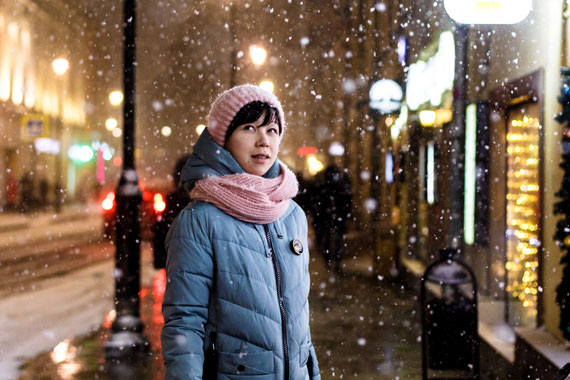
Low light street photo captured by Mikhail Vasilyev

Use a Smaller AF Point

One of the reasons why cameras have trouble capturing night scenes is because low light also affects focus efficiency.

Most cameras have trouble finding focus in the dark. Think of “Where’s Waldo” — you’re scanning… cursing under your breath, where is this guy? That’s what your camera is doing in the dark…

To help your camera out, Jason suggests using a smaller focus area and aiming exactly where you wish to shoot. That way, your camera will quickly pick up your subject and take the image. So, you won’t have to mess around with manual focus or your settings in the dark and risk missing it.

Prioritize Exposing The Brightest Subject

One rookie mistake that beginner low-light photographers make is to over-expose their images in order to improve illumination. Ideally, your highlights should be blown up to prioritize your brightest subject, though — not the dimmest! At night, these subjects would most likely be any street lights and or lit-up billboards.

Set your camera to capture these artificial lights accurately, with all details showing and no light bleeding. Otherwise, you’ll have trouble adjusting your exposure settings and editing any lost or distorted details out — or in — later on. In contrast, you can easily adjust the darker areas without losing clarity or detail — especially if you shoot RAW files, which are much easier to edit.

Wrapping Up

Shooting at night is a whole new world, but not with its challenges. Jason has made it easy for beginner photographers to get the most out of their low-light photography with his tutorial. Try some of these fun tips on your next night street or event photography shoot.

- - - - - - - - - - - - - - - - - - - - - - - - - - - - - - - - - - - - - - - - - - - - - - - - - - - - - - - - - - - - - - - - - - - - - - - - - -

Did you appreciate this newsletter? Please help us keep it going by Joining Our Patreon Supporters

What are your thoughts on this article? Join the discussion on our Facebook Page

PictureCorrect subscribers can also learn more today with our #1 bestseller: The Photography Tutorial eBook

- - - - - - - - - - - - - - - - - - - - - - - - - - - - - - - - - - - - - - - - - - - - - - - - - - - - - - - - - - - - - - - - - - - - - - - - - -

The post Avoiding Low Light Street Photography Mistakes appeared first in the Photography Tips category on PictureCorrect.


from PictureCorrect https://ift.tt/3YJ57RG
via IFTTT

PictureCorrect.com: Silhouette Photography Tips 🌞

This article is based on concepts from The Photography Action Cards which are currently 88% off for a Cyber Monday sale that is ending tonight.

A silhouetted photograph almost always garners immediate and positive attention.

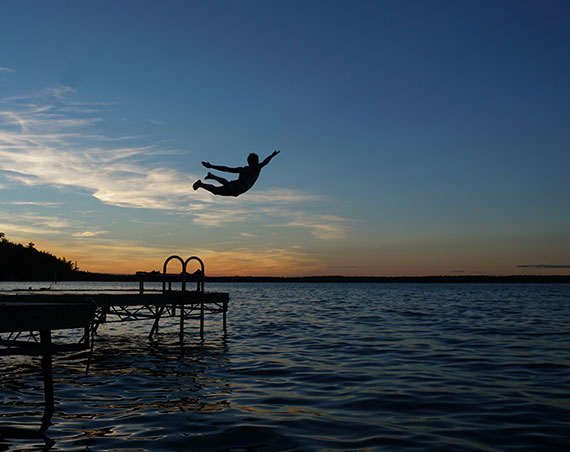
silhouette photo person diving into lake

Photo by Andrew Sharples

There is much confusion out there in Internet-land about the differences between a silhouette, a shadow, and when something is shadowed.

The picture above depicts a silhouette.

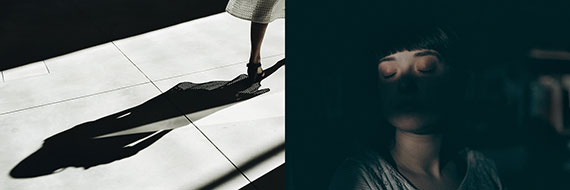
example of a shadow photo and a shadowed photo

Left photo by Martino Pietropoli, Right photo by maxime caron

The photograph on the left is a shadow, and the photo on the right is a woman who is shadowed.

A shadow occurs when light is blocked by an object, and that results in a darkened area on another object. Shadowed is when an object is hit by a shadow so that part of the object is obscured due to a lack of light.

Here’s the definition of a silhouette as taken from a dictionary: a silhouette is a dark shape and outline of a person or object as viewed against a lighter background.

Each of these three results from light has its strengths. Today, I’m going to concentrate on the silhouette.

When you finish this blog post, you’ll realize that the silhouette is one of your most powerful tools as a photographer.

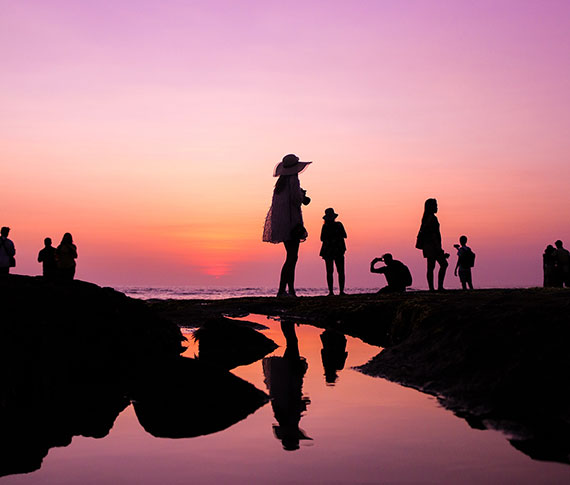
silhouettes are a powerful tool in photography

Photo by Sarah Arista

Key Thought: Silhouettes are powerful because they make use of shape. Recognizing shape is a primal instinct in the human brain. When a viewer perceives a shape within your photo, they can’t help but focus on it.

Secret to Success

The most potent silhouette photos include a storytelling element.

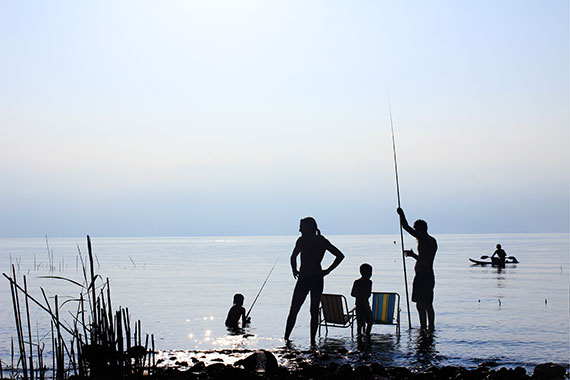
The above image hits every button. It has full silhouettes, a semi-silhouette (more on that in a minute), a strong story element, and fabulous color! What else could you ask for? Creating photos like this will definitely put you into the popular category.

simple silhouette

Photo by Aadesh Choudhari

Here we have what is categorized as a ‘simple’ silhouette. It gives us a clearly defined shape, but it lacks a story element.

Simple silhouettes give little to a viewer other than a brief visual pleasure. This type of silhouette is a great way to begin as you master the basics if you are new to silhouette photography.

Let’s get started!

1. Get some help from a family member or a friend.
2. Take them out on a beautiful evening when the sun is setting.
3. Position them with no direct light source illuminating them on the camera side and a brightly lit sky behind them.
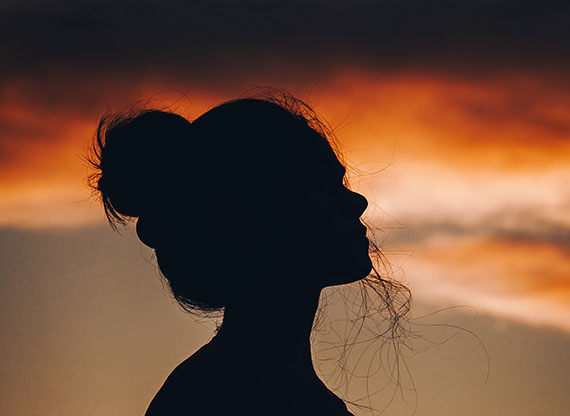
4. Start with a simple profile headshot (as illustrated above).
5. Use manual mode and take your meter reading from the sky behind your subject. Start with an ISO of 200, a shutter speed of 1/125th, and an aperture of f/8. Adjust the ISO as necessary to acquire correct exposure with that combination of shutter speed and aperture.
6. Set your file type to camera raw or .jpeg if not available.
7. Experiment with your exposure, using over and underexposure in ½ stop increments up to 2 stops from the nominal setting.
8. Study your results.

Key Thought: In full silhouette photography, underexposure will almost always work in your favor. It will darken the silhouette, while also adding density and color saturation to the background.

underexposure helps darken a silhouette

Photo by Adam Sherez

Let’s Recap What We’ve Learned so Far

  • A silhouette is the dark shape and outline of a person or object against a brighter background.
  • A silhouette is not a shadow or an object that is shadowed.
  • A simple silhouette displays a shape but has little storytelling value.
  • The best silhouette photography includes a storytelling element for added interest to viewers.

Time to Crank it up a Notch

1. Gather a model or two.
2. Pick out some props that could make exciting storytelling shapes, such as the fishing pole, hats, handbags, tennis racquets, a bicycle, or even a permanent structure like the dock in the opening photo for this post.
3. Plan out your story.
4. Pick a location that will put your models and props against the sky.
5. Set up your shoot time for sunset.
6. Follow the steps from the first challenge in this post.
7. Go for it!

silhouette as a focal point

Photo by guile pozzi

The Silhouette as a Focal Point

Sometimes your silhouette will be the subject of the photograph as displayed in the first four example pictures.

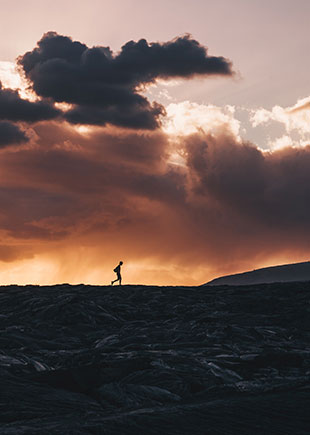
However, another superpower of the silhouette is as a focal point. The image of the lone figure walking along the landscape (above) is a perfect example of a silhouette as a focal point.

The setting sun and stormy clouds over the landscape are the subjects. However, it’s the silhouette that rivets the eyes right where the photographer wants them and adds a storytelling element.

Try This!

Repeat the previous exercises, but now use the model(s) and/or props as a focal point to a landscape photo instead of the silhouette being the subject.

example of a semi-silhouette

Photo by diego acosta

Are there different types of silhouettes?

We often study the topic of light. We’ve come to realize that there are various types of light and that light can be manipulated to create different effects in photography.

There are also three different types of silhouettes.

1. The Full Silhouette
2. The Semi-Silhouette
3. The Translucent Silhouette

The full silhouette is what we’ve discussed so far in this blog post. The full silhouette is a dense black shape with no visual detail facing the camera. This style of silhouette relies entirely on the shape formed to generate a viewer’s interest.

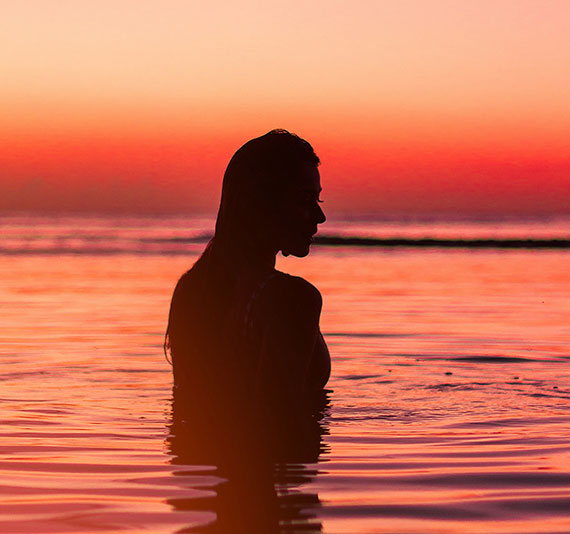
The photo of the woman standing in the water at sunset (above) is an example of a semi-silhouette.

It meets the definition of a silhouette. We have a dark shape and outline against a brighter background.

However, with a semi-silhouette, there’s some degree of detail left within the silhouetted shape. If you look deeply at the woman in the water, you’ll see her arm, her hair, and other defining features of her face.

Semi-silhouettes are much harder to produce. They take greater skill in lighting and exposure control. Many semi-silhouettes are often tweaked in post-production.

When you’re ready, give the semi-silhouette a try!

1. Follow the steps in the previous challenges with the following additions.
2. Bring a photo assistant or two. Your kids can do this!
3. Bring two pieces of cardboard that you have painted white, or get foamboard, which is a bit sturdier, at the local art supply store. The boards should be at least 3 feet wide by 4 feet long.
4. Start with a simple headshot, as displayed in the 4th photo within this article.

Note: With a semi-silhouette, underexposure is not your friend.

5. Set up your model against the sky.
6. Set your meter reading pattern to matrix or evaluative (depending upon your camera)
7. Use aperture priority and set the aperture to f/8.
8. Check the shutter speed. If it’s slower than 1/125th, then raise the ISO setting until you get a shutter speed of at least 1/125th. If the shutter speed is faster than 1/125th, then you can leave it as is.
9. Without your helpers or your reflector boards, start taking pictures and vary the exposure by ½ stop increments, go both over and under by at least 2 stops, using your exposure compensation setting on the camera.
10. Finally, move your helpers into position on either side of the model. They should hold the reflector boards, just outside of the view of the camera, with the white side reflecting the bright background light onto the dark side of your silhouetted model.
11. Again, start with a proper exposure setting and then vary it using the exposure compensation feature of your camera by 2 stops over and under in ½ stop increments.
12. Study your results.

translucent silhouette

Photo by laze.life

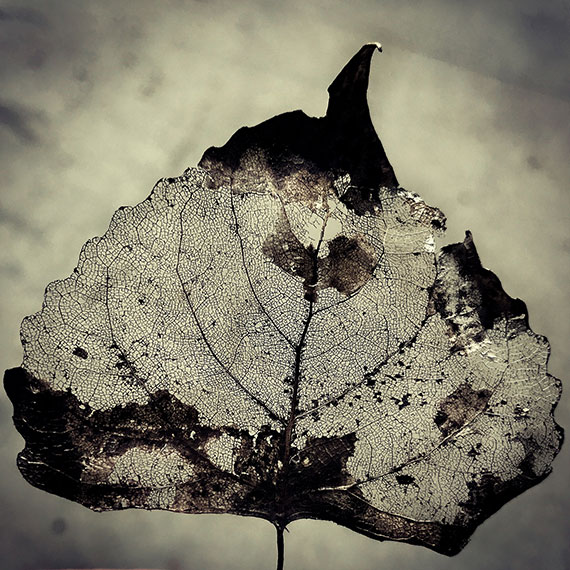
This leaf depicts a translucent silhouette.

The leaf picture (above) meets the definition of a silhouette, but with an added dimension. When the object in silhouette isn’t wholly opaque, some of the brighter background light is going to pass through it.

This is known as translucent light.

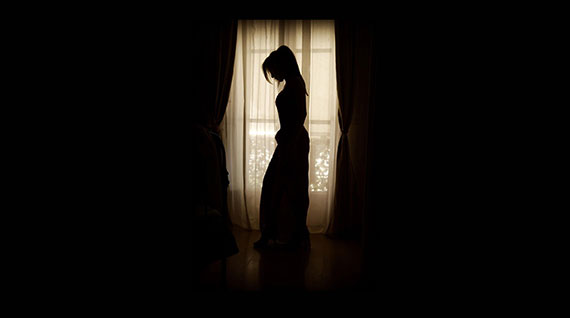
silhouette of woman standing in front of window

Photo by 272447

Idea: Locate a subject you can photograph that’s part opaque and part translucent. Follow the steps in the previous challenges. This type of subject will create new levels of creativity, storytelling, and problem solving for you.

part opaque and part translucent silhouette

Photo by Rene Bohmer

By combining the three different types of silhouettes, you can create masterful pieces of artwork!

Are you up for this challenge?

Create a photograph where you mix all three types of silhouettes. Plus, don’t use the sky as the background. You have to find another background idea!

Post-Processing

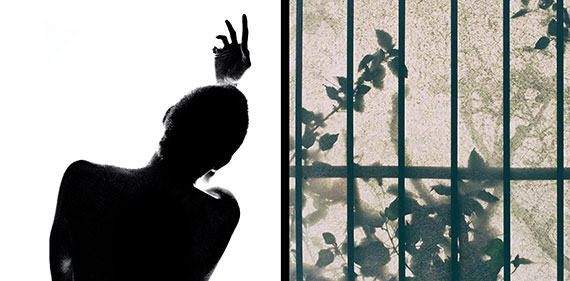
post processing silhouettes

Left photo by Nathan DeFiesta, Right photo by Gabriele Diwald

Post-processing offers additional steps to your creative process.

Silhouettes lend themselves very well toward creating high contrast photos that have a poster-like lithographic film effect.

They also work exceptionally well for double exposure effects as well as texture over overlays.

The Final Challenge

Take some of the silhouettes that you created in the earlier challenges and perform some post-processing magic on them.

A silhouette often works perfectly with various actions and presets. Don’t forget to try some textured overlays.

You can use a mobile phone app for editing if you don’t have a layer editing program like Photoshop. You can import any picture into your phone, and then get creative on your silhouette images with apps like Mextures or Lens Distortions!

When you complete your mobile phone app editing, transfer your picture back to your desktop workstation.

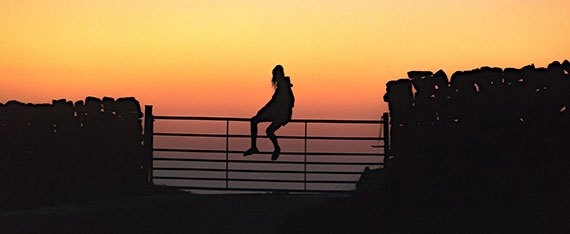
silhouette in front of sunset

Photo by Josh Millgate

How did you do?

  • Do you now understand the difference between a silhouette, a shadow, and being shadowed?
  • Do you now recognize the three different types of silhouettes?
  • Were you able to gain some experience and perspective on how to set up your camera and expose a silhouette picture?
  • Did you accomplish a semi-silhouette photo that made you happy?
  • Do you recognize the importance of adding a story element to a silhouette photo for added impact?
  • Did you try some dazzling effects in post-processing?
  • Did you attempt to create a photograph that included all three silhouette types?
  • Did you discover how slight underexposure can really bump up the color saturation in a silhouette picture?
  • Were you able to complete the challenge where you had to use a different background other than the sky?
  • Are you excited about working with more silhouettes in the future?

About the Author:
Kent DuFault is an author and photographer with over 35 years of experience. He’s currently the director of content at the online photography school, Photzy.

For Further Training, Deal Ending Soon:

With summer here and readers looking for more photography practice near home, we were able to get another huge markdown on the popular Photo Action Cards. Expand your photography skills with 65 printable project sheets that will give you over 200 photography assignments, covering everything you can imagine. They are currently 88% off until tonight for Cyber Monday if you want to try them out.

photo action cards

New: The Photography Action Cards (Click to See How They Work)

These Action Cards discuss a photographic topic, provide you with suggested considerations, and give you specific photographic assignments. They’ll kick you out of the “nest” to go have a personal discovery experience all on your own.

Only hours left: The Photography Action Cards at 88% Off

- - - - - - - - - - - - - - - - - - - - - - - - - - - - - - - - - - - - - - - - - - - - - - - - - - - - - - - - - - - - - - - - - - - - - - - - - -

Did you appreciate this newsletter? Please help us keep it going by Joining Our Patreon Supporters

What are your thoughts on this article? Join the discussion on our Facebook Page

PictureCorrect subscribers can also learn more today with our #1 bestseller: The Photography Tutorial eBook

- - - - - - - - - - - - - - - - - - - - - - - - - - - - - - - - - - - - - - - - - - - - - - - - - - - - - - - - - - - - - - - - - - - - - - - - - -

The post Silhouette Photography Tips 🌞 appeared first in the Photography Tips category on PictureCorrect.


from PictureCorrect https://ift.tt/GJ0WKMY
via IFTTT
tiistai 29. marraskuuta 2022

PictureCorrect.com: Interesting Photo of the Day: Inside an Ice Cave

Of the various landscapes and structures that we can find in nature, ice caves are one of the most interesting and fascinating. Unlike other easily accessible sites, ice caves are less frequently visited by travelers. This is one of the reasons why many of us find it so alluring. Photographer Tristan Todd took the following image of an ice cave in the Coast Mountains of British Columbia, Canada and it’s an excellent example of how beautiful they can be:

inside an ice cave

“Inside an Ice Cave in British Columbia” by Tristan Todd (Via Reddit. Click image to see full size.)

This image is a blend of three exposures. He took the base shot focusing on the ice in the midground and the background. With the second shot, he recovered the highlight details from the bright openings of the cave. For the third shot, he focused on the ice in the foreground. He shot each of these exposures at 19mm, f/13, and ISO 100 with a 1-second base exposure shot.

If someone doesn’t pay close attention to the image, then could easily confuse it with an image of a surf barrel. The uniform blue color tone and the bright openings make them appear very similar. And thanks to the focus stacking that Todd has done in this image, we can clearly see the fine details of the ice. It looks really slippery and cold in there.

Doesn’t this image give you the chills? Would you dare to spend time in a place like this? Let us know in the comments.

- - - - - - - - - - - - - - - - - - - - - - - - - - - - - - - - - - - - - - - - - - - - - - - - - - - - - - - - - - - - - - - - - - - - - - - - - -

Did you appreciate this newsletter? Please help us keep it going by Joining Our Patreon Supporters

What are your thoughts on this article? Join the discussion on our Facebook Page

PictureCorrect subscribers can also learn more today with our #1 bestseller: The Photography Tutorial eBook

- - - - - - - - - - - - - - - - - - - - - - - - - - - - - - - - - - - - - - - - - - - - - - - - - - - - - - - - - - - - - - - - - - - - - - - - - -

The post Interesting Photo of the Day: Inside an Ice Cave appeared first in the Photography Tips category on PictureCorrect.


from PictureCorrect https://ift.tt/y6hxBJa
via IFTTT
PictureCorrect.com: How Flash Duration Affects Subjects in Motion

In poorly lit conditions, slow shutter speeds let ample ambient light into the camera resulting in a good exposure. But the problem with slow shutter speed is that it will make moving subjects appear blurry. However, when a flash is used, even moving subjects appear frozen and sharp. Why does this happen? Photographer Mark Wallace from Adorama explains:

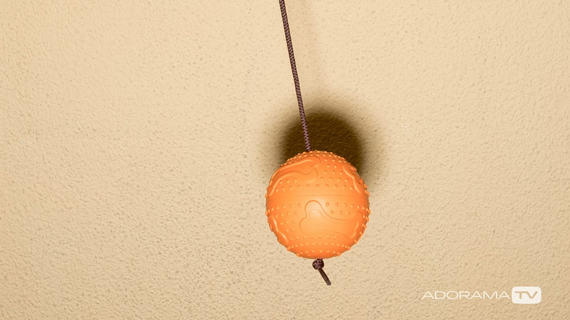
To emulate a subject’s motion, Wallace ties a ball to a shoelace and tapes it to a shelf. This way, the ball can swing around like a pendulum at a consistent rate.

How a Camera Sees Ambient Light

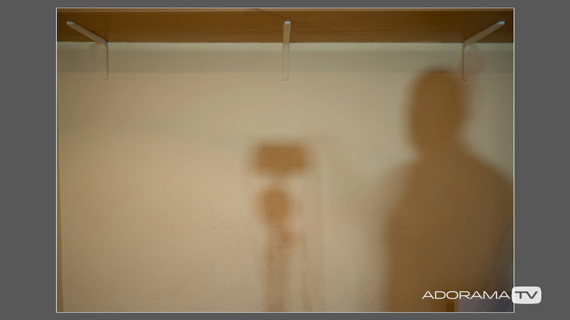
To demonstrate how a camera sees the subject only with ambient light, Wallace has his camera on a tripod and pre-focused on the ball manually. His camera is set to aperture priority mode with the aperture set at f/8. Using these setting and with the flash turned off, , here’s how the image turned out with a 1.5 second exposure:

image of fast moving ball in low ambient light

1.5 seconds

Interestingly we cannot see the ball. Why does this happen? For a camera to record an image, ambient light has to strike the subject and go on to the sensor. But in this case, due to the continuous motion of the ball, it seems as if the ball is continuously dodging light. For the ball to appear in the image, it needs to stay in one place for the exposure duration. But if the ball moves slowly, light has more time to reflect off of it and onto the sensor to form an image. But since the ball is still moving, Wallace ends up getting a blurry image.

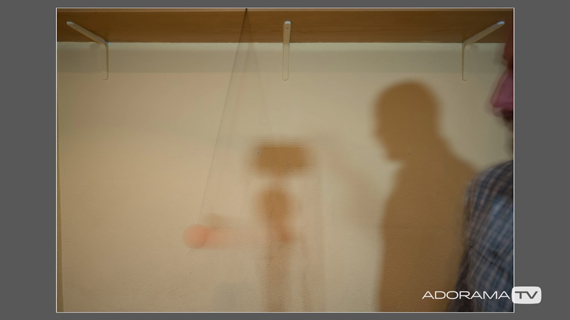
image of slow moving subject in low ambient light

“The faster something moves, the less it’s going to show up in low ambient light. The slower something moves, the more it will show up.”

How a Camera Sees When Flash is Used

While we just saw that ambient light needs some time to soak in, a flash, on the other hand, works differently. All flashes have a flash duration during which they turn on, deliver all the light, and then turn off. For instance, most speed lights have a flash duration of about 1/10,000 second or faster, which is instantaneous.

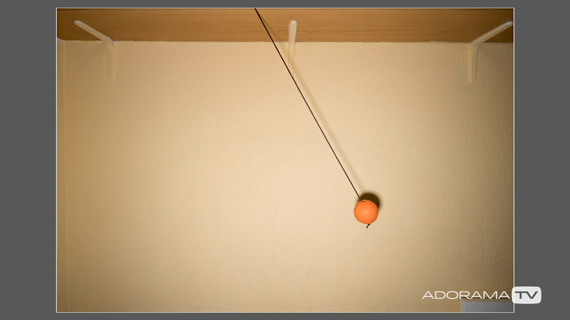
Flash duration has the ability to freeze the motion of a subject. So, if you use flash for a subject in motion, you will be able to freeze the subject and get a sharp image. To demonstrate this, Wallace sets his shutter speed to  1/180 second and aperture to f/8 to cut off all the ambient light. This way, the camera will only be able to capture the light coming off of the flash. With these settings, he’s able to take the following image of the moving ball:

image of fast moving ball using flash

1/180 second plus flash

No matter how fast the ball moves, Wallace is able to get a clear and a sharp image.

sharp image of moving ball using flash

If you’re eager to understand how flash can affect your photography, experiment with different aperture values, shutter speeds, and even different subject to flash distance. See how these changes affect the motion of the subject and you’ll have a clearer idea of how to deliberately freeze or blur motion in your images.

- - - - - - - - - - - - - - - - - - - - - - - - - - - - - - - - - - - - - - - - - - - - - - - - - - - - - - - - - - - - - - - - - - - - - - - - - -

Did you appreciate this newsletter? Please help us keep it going by Joining Our Patreon Supporters

What are your thoughts on this article? Join the discussion on our Facebook Page

PictureCorrect subscribers can also learn more today with our #1 bestseller: The Photography Tutorial eBook

- - - - - - - - - - - - - - - - - - - - - - - - - - - - - - - - - - - - - - - - - - - - - - - - - - - - - - - - - - - - - - - - - - - - - - - - - -

The post How Flash Duration Affects Subjects in Motion appeared first in the Photography Tips category on PictureCorrect.


from PictureCorrect https://ift.tt/16r7F8i
via IFTTT
maanantai 28. marraskuuta 2022

PictureCorrect.com: Interesting Photo of the Day: 28 Day Moon Composite

Determination is the key to success. The same holds true when it comes to making a successful image. This is why some great photographers have a lot of patience when it comes to capturing an image they have in mind. They are ever so willing to invest their time into capturing exactly what they have envisioned. Photographer Giorgia Hofer took a series of photos of the moon throughout an entire year, and ended up capturing this wonderful masterpiece:

moon cycle

“Moon Cycle in One Image” by Giorgia Hofer (Via Reddit. Click image to see full size.)

The image is a composite of 28 shots of the changing phases of the moon that she took over the peaks of the Cridola Group, Italy. To photograph the moon, she used her Nikon D750 with the Sigma 120-400mm lens at 400mm. For the landscape, she used her Nikon D750 with the Nikkor 20mm lens at 8 sec, ISO 800, and f/8. While you’d guess that it should’ve taken Hofer a month to capture this image, it actually took her almost a year in reality; the reason being unfavorable weather.

“The moons in the waning phase, on the left, were captured in January while the moons in the waxing phase, on the right, between July and December.”

The pattern formed by the moon in the sky is pretty interesting, and undoubtedly the focal point in this image. The pattern is actually termed Analemma, and it is formed as a result of the tilt in the earth’s axis, and also due to the fact that our orbit it not perfectly a circular one.

What an amazing example of determination really paying off.

- - - - - - - - - - - - - - - - - - - - - - - - - - - - - - - - - - - - - - - - - - - - - - - - - - - - - - - - - - - - - - - - - - - - - - - - - -

Did you appreciate this newsletter? Please help us keep it going by Joining Our Patreon Supporters

What are your thoughts on this article? Join the discussion on our Facebook Page

PictureCorrect subscribers can also learn more today with our #1 bestseller: The Photography Tutorial eBook

- - - - - - - - - - - - - - - - - - - - - - - - - - - - - - - - - - - - - - - - - - - - - - - - - - - - - - - - - - - - - - - - - - - - - - - - - -

The post Interesting Photo of the Day: 28 Day Moon Composite appeared first in the Photography Tips category on PictureCorrect.


from PictureCorrect https://ift.tt/OyvtspP
via IFTTT

PictureCorrect.com: Studio Automotive Photography Secrets

Have you ever wondered how they take jaw-dropping photos of cars that yell elegance? Looking at the images, it’s not hard to make out that the lighting used to take those photos is very much controlled. You may again ask if the kind of lighting and the camera settings used to shoot a car in a studio is any different from what’s used in photographing a portrait.

To clear any doubts that you might have, today we have photographer Mark McGee who shares his secrets to shooting cars like a pro. He talks about the best studio lighting, and what camera settings you can see to shoot cars:

As you can watch in the video, shooting a car is indeed way different from shooting a portrait. The fact that cars have a reflective surface and that they don’t move around opens up an entirely different dimension to play around with light and creativity.

When McGee is setting up the lights to photograph the cars, there are a few important considerations that he makes:

  • ensure that the light is as soft as possible
  • get rid of any specular highlights
  • set the lights in a way that accentuates the curves and the wheel arches
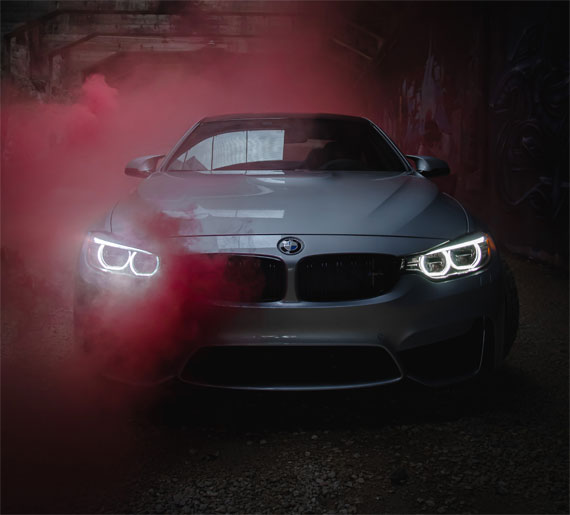
smoke car photo

Photo captured by Luca David

Further to the lighting setups, you can also see in the video how he cleverly makes use of smoke/fog. It adds a sense of atmosphere and depth to the image. He also takes the creative liberty of using an RGB light wand to light paint around the car. And as you can see in the video, the result is absolutely spectacular.

In the video, you’ll also get to see how he edits and composites his images to get the final result. If you’re looking to get into automotive photography, make sure that you watch this short yet informative video. You’ll definitely get to learn a lot.

- - - - - - - - - - - - - - - - - - - - - - - - - - - - - - - - - - - - - - - - - - - - - - - - - - - - - - - - - - - - - - - - - - - - - - - - - -

Did you appreciate this newsletter? Please help us keep it going by Joining Our Patreon Supporters

What are your thoughts on this article? Join the discussion on our Facebook Page

PictureCorrect subscribers can also learn more today with our #1 bestseller: The Photography Tutorial eBook

- - - - - - - - - - - - - - - - - - - - - - - - - - - - - - - - - - - - - - - - - - - - - - - - - - - - - - - - - - - - - - - - - - - - - - - - - -

The post Studio Automotive Photography Secrets appeared first in the Photography Tips category on PictureCorrect.


from PictureCorrect https://ift.tt/0rAkVfG
via IFTTT
sunnuntai 27. marraskuuta 2022

PictureCorrect.com: 10 Techniques for Photographing Birds in Flight

Birds, in general, are quite a challenging subject to photograph. While they’re relatively “easy” to photograph when perched, it’s a daunting task to photograph birds when they’re flying around. You need to take care of things like shutter speed, backlighting, and focus tracking amongst others. In this video, photographer Steve Perry covers everything that you need to know to get started with photographing birds in flight:

When it comes to photographing birds mid-air, settings play an important role. Birds are fast, so you’ll definitely want to remain at the faster end of your shutter speed. Otherwise, blurry shots are all that you’ll get. Equally important is the aperture setting. Using a deep enough depth of field – you’ll get some leeway even if you slightly miss focus. But again, smaller aperture means less light, and that can force you to use a slower shutter speed. This is where ISO steps in. Perry brilliantly explains in the video how you can work to maintain a balance between these three pillars to get well exposed, sharp, and detailed shots of birds in flight.

Besides exposure and focus settings, another very important aspect that Perry touches on is about finding your shot and making it look the best. He explains how studying the behavior of the birds can drastically improve your chances of getting a good composition. When it comes to composition, pay extra attention to your background. Shooting against the sky can make your work easier, but it’s not always interesting.

There are a lot of other important topics that Perry takes you through in his video. If you’ve been struggling to a sharp image of birds mid-air, we highly recommend that you watch the video all the way through. There are tips that’ll definitely help you take better images of birds in flight.

- - - - - - - - - - - - - - - - - - - - - - - - - - - - - - - - - - - - - - - - - - - - - - - - - - - - - - - - - - - - - - - - - - - - - - - - - -

Did you appreciate this newsletter? Please help us keep it going by Joining Our Patreon Supporters

What are your thoughts on this article? Join the discussion on our Facebook Page

PictureCorrect subscribers can also learn more today with our #1 bestseller: The Photography Tutorial eBook

- - - - - - - - - - - - - - - - - - - - - - - - - - - - - - - - - - - - - - - - - - - - - - - - - - - - - - - - - - - - - - - - - - - - - - - - - -

The post 10 Techniques for Photographing Birds in Flight appeared first in the Photography Tips category on PictureCorrect.


from PictureCorrect https://ift.tt/y9CPBoD
via IFTTT
lauantai 26. marraskuuta 2022

PictureCorrect.com: How to Set Up a Nighttime Portrait in 9 Seconds

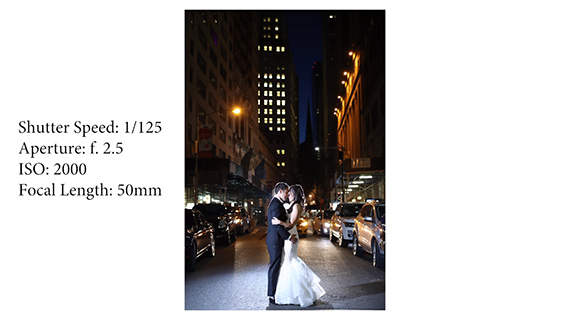
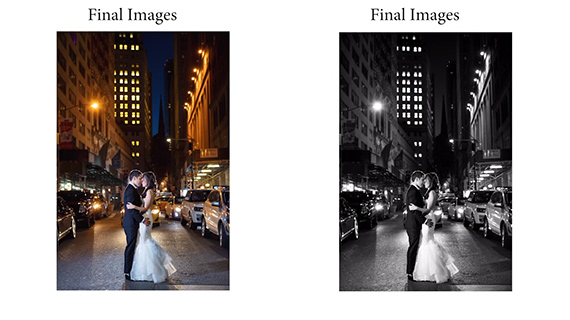
Nine seconds. That’s all the time you have to set up a portrait of the bride and the groom. A tired bride and groom, at that. You have to be precise about the exposure, the light, and the pose. You also need to make sure that you don’t fool around and make an already long day even longer. Of course the right tools will help. But you need to know how to use those tools. Vanessa Joy explains:

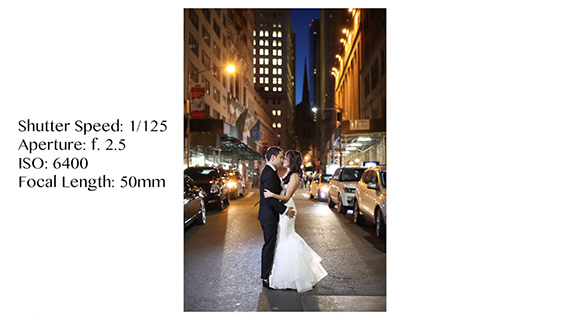
For this shot Joy used two Profoto B1s with TTL, which allowed the power settings to be adjusted wirelessly and quickly. She instructed her  assistant to hold the backlight (in the middle of the street), and she placed the key light on camera left.

Even while instructing the bride and the groom where to stand, Joy was already setting the exposure on her 1D X Mark II using live-view. She then set the lights to TTL and did a test shot very quickly.

set up a night time portrait in 9 seconds

According to Joy, the first shot came out too warm and bright. So, after a little adjustment of white balance and exposure she took a second shot.

portrait photography at night

She took only two shots after the first one, just to ensure that she had at least one in sharp focus. Sometimes even when shooting with a strobe it’s possible to miss focus, especially when using a wide open aperture.

Here’s the final versions that Joy shared with her clients.

fast portrait setup

Pretty great for just three quick shots!

- - - - - - - - - - - - - - - - - - - - - - - - - - - - - - - - - - - - - - - - - - - - - - - - - - - - - - - - - - - - - - - - - - - - - - - - - -

Did you appreciate this newsletter? Please help us keep it going by Joining Our Patreon Supporters

What are your thoughts on this article? Join the discussion on our Facebook Page

PictureCorrect subscribers can also learn more today with our #1 bestseller: The Photography Tutorial eBook

- - - - - - - - - - - - - - - - - - - - - - - - - - - - - - - - - - - - - - - - - - - - - - - - - - - - - - - - - - - - - - - - - - - - - - - - - -

The post How to Set Up a Nighttime Portrait in 9 Seconds appeared first in the Photography Tips category on PictureCorrect.


from PictureCorrect https://ift.tt/L5ep6kP
via IFTTT
perjantai 25. marraskuuta 2022

PictureCorrect.com: How to Photograph Christmas Lights

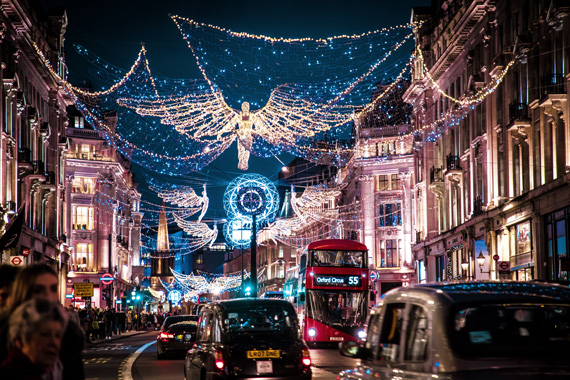
Holiday lights brighten the mood no matter where they are. They might be in a downtown area, at a mall, or even at your own home. For those who love taking pictures, those lights can represent an opportunity to capture beautiful, out of the ordinary images.

Taking pictures of holiday lights can be fun and exciting as well as a little tricky at times. So in this article, we will cover the most important things to know about photographing holiday lights.

christmas dog

Photo by mgstanton; ISO 1600, f/2.8, 1/125-second exposure.

The best time to photograph outdoor holiday lights is after the sun goes down but before it is totally dark. When you take pictures of holiday lights when it is very dark, you will be able to see the lights, but the remainder of the scene will probably be too dark and lack detail in the shadow areas.

The solution to this would be to take the pictures earlier in the evening. Pictures that are taken right after sunset and before total darkness will show the holiday lights as well as details in the shadow areas of the rest of the scene.

That is because during that time period, there is still a touch of ambient light in the atmosphere. Yet it is dark enough so that the lights will not look dull or become overpowered by daylight. That time period is usually less than ½ hour, probably more like 15-20 minutes.

Realistically, unless you plan it out, you might not be able to get to where you want to take your pictures of holiday lights during that time period. However, you can still get some good shots later in the evening. It will depend on your subject.

For instance, if you want to take pictures of a brightly lit Christmas tree late in the evening, and that is your main focus, then your pictures should come out fine. If the tree also happens to be in an area that is somewhat lit, the details of the surrounding area should be visible in your image.

christmas photo tutorial

Photo by Alby Headrick.

Lastly, taking pictures of very bright lights that may be in trees or hung between buildings late in the evening should not be a problem. Especially if there are interesting patterns that look good by themselves. In fact a very dark sky might enhance the lighting itself.

The next item of concern when photographing holiday lights is the camera’s shutter speed. Since it will be practically dark when you are taking the pictures, a slower shutter speed, often ¼ second to 2 seconds or more will be required.

Pictures will come out blurred due to camera shake when the camera is hand held at those shutter speeds. The best solution to avoiding blur in your images due to camera shake is to use a tripod.

If there is no tripod available, try placing the camera on a steady surface when taking the pictures of holiday lights. It’s also a good idea use the camera’s self-timer feature to avoid camera shake that could occur just from pressing the camera’s shutter release.

If neither of those alternatives will work for you, another solution would be to increase your camera’s ISO setting. This will make the camera’s image sensor more sensitive to light, which will allow you to choose a faster camera shutter speed. Hopefully it will be a shutter speed that is fast enough to allow you to hand hold the camera without the camera shake.

photographing christmas

Photo by Hernan Pinera.

Although increasing the ISO setting allows you to use higher shutter speeds, it is preferable to use lower ISO settings around ISO 100 or 200 for better picture quality. Many cameras will begin to show digital “noise” and a decrease in color brightness once ISO settings above ISO 400 are used. However, if using a very high ISO setting is the only way to get the shot, then go for it.

Turn your flash off when taking pictures of outdoor lights. If you’re very close to the lights you’re photographing, it will tend to wash them out. If you’re far away from the subject it will just be ineffective.

When taking pictures of holiday lights indoors, try turning the house lights down so that the holiday lights can stand out more and the effect will be more dramatic. Don’t forget to use a tripod or steady the camera when taking the pictures.

On the other hand, using a flash to take indoor pictures of, let’s say, a Christmas tree with lights won’t necessarily ruin the shot. You will still have a beautiful shot of a nicely decorated tree, but the lights won’t be as dominant in the image.

Also, quite often you might want to include someone in the picture with the lights as the background. Using a flash in that situation is probably the best way to avoid blur from subject movement, particularly with children or pets.

holiday lights using flash

“Munch-kin” captured by Amanda Y.

Neither way of taking those inside pictures is better than the other. You will just have different looks.

As far as exposure settings for taking pictures of holiday lights, there is not a one size fits all solution since light intensities can vary from one scene to another. It is best to take a test shot first and make adjustments after you see the results.

If you’re using a basic compact camera outdoors, try using one of the camera’s scene modes such as Night Landscape. That type of setting will keep the shutter open long enough for a good exposure. Once again, remember to use a tripod or steady surface when taking the picture.

outdoor christmas lights

Photo by Jamie Davies; 105mm; ISO 4000, f/4.0, 1/60-second exposure.

If you’re using a DSLR or some other type of camera in which you can control the exposure settings, take a test shot in one of the semi-automatic modes or in the manual mode. Check the image in your viewfinder and then tweak your aperture and/or shutter speed settings to find an exposure you are satisfied with.

Overall, getting a good shot of holiday lights can sometimes be a challenge, but it can also be fun and rewarding. Just like everything else in photography, being prepared and practicing will get you to your best shot.

About the Author:
For more information on photography related subjects, Keith Jones writes for https://www.easybasicphotography.com/. There are plenty of other photography tips and topics at the site to help you better understand the basics of photography.

- - - - - - - - - - - - - - - - - - - - - - - - - - - - - - - - - - - - - - - - - - - - - - - - - - - - - - - - - - - - - - - - - - - - - - - - - -

Did you appreciate this newsletter? Please help us keep it going by Joining Our Patreon Supporters

What are your thoughts on this article? Join the discussion on our Facebook Page

PictureCorrect subscribers can also learn more today with our #1 bestseller: The Photography Tutorial eBook

- - - - - - - - - - - - - - - - - - - - - - - - - - - - - - - - - - - - - - - - - - - - - - - - - - - - - - - - - - - - - - - - - - - - - - - - - -

The post How to Photograph Christmas Lights appeared first in the Photography Tips category on PictureCorrect.


from PictureCorrect https://ift.tt/bF1jno0
via IFTTT
PictureCorrect.com: Interesting Photo of the Day: Epic Sunrise at Diamond Beach

Watching the sunrise from a beach can be a surreal experience. You get to witness the beginning of a new day with a cool breeze and the sound of crashing waves to accompany you. And if you’re lucky, Mother Nature will bless you with a show that you’ll never forget. Something similar happened to photographer Albert Dros at Diamond Beach in Iceland:

sunrise in diamond beach iceland

“Epic Sunrise at the Diamond Beach, Iceland” by Albert Dros (Via Reddit. Click image to see full size.)

Dros took this long exposure with a Sony A7RIV. He’s creatively used neutral colored elements in the foreground to draw the viewer to the vibrant sky.

Although neutral in color, the foreground is pretty interesting as far as action is concerned. The waves crashing against the icy formation have made for a dynamic and strong foreground. Thanks to the long exposure, Dros captured the trails left by the flowing water. These trails in the foreground work as leading lines to draw viewers into the crashing waves in the mid-ground and then to the magnificent sunrise in the background.

Looking at the image, you can confidently say that nature can get really dramatic sometimes.

- - - - - - - - - - - - - - - - - - - - - - - - - - - - - - - - - - - - - - - - - - - - - - - - - - - - - - - - - - - - - - - - - - - - - - - - - -

Did you appreciate this newsletter? Please help us keep it going by Joining Our Patreon Supporters

What are your thoughts on this article? Join the discussion on our Facebook Page

PictureCorrect subscribers can also learn more today with our #1 bestseller: The Photography Tutorial eBook

- - - - - - - - - - - - - - - - - - - - - - - - - - - - - - - - - - - - - - - - - - - - - - - - - - - - - - - - - - - - - - - - - - - - - - - - - -

The post Interesting Photo of the Day: Epic Sunrise at Diamond Beach appeared first in the Photography Tips category on PictureCorrect.


from PictureCorrect https://ift.tt/LD4fEXm
via IFTTT
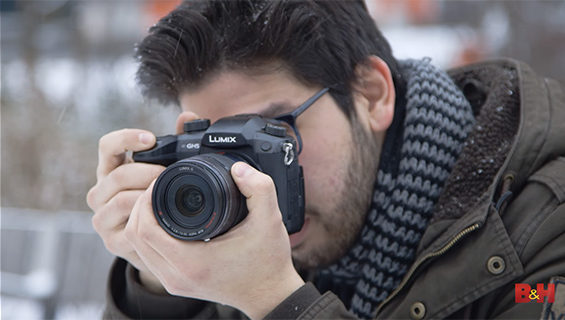
PictureCorrect.com: Photography Tips for Cold Weather

Shooting in cold weather is always challenging. If it’s not the weather alone, the impact it has on photography gear and the lack of contrast can put many photographers off. But winter doesn’t mean that you have to stay indoors. B&H shares these tips to help you along the way:

Dress Appropriately

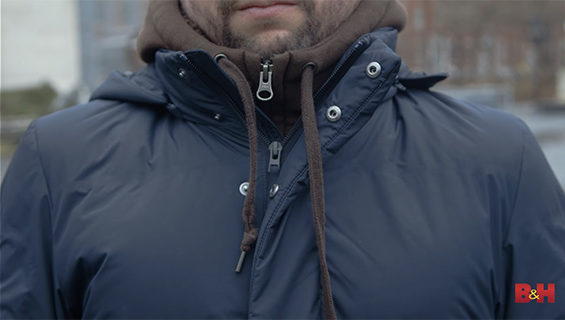
Whatever you do, don’t wear shorts in cold weather.

Tips for shooting in cold weather

Wear clothing made out of water resistant and moisture-wicking material. These materials are great for keeping you dry for long periods of time. Hats and gloves are imperative, too.

Acclimatize Your Gear

Tips for shooting in cold weather

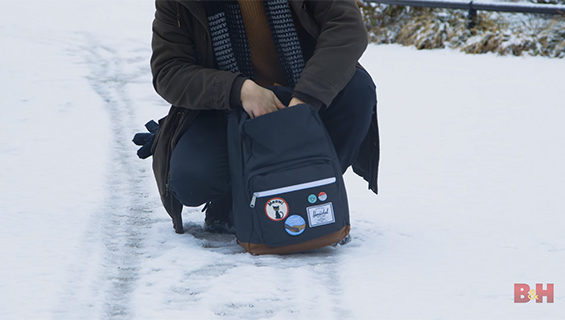
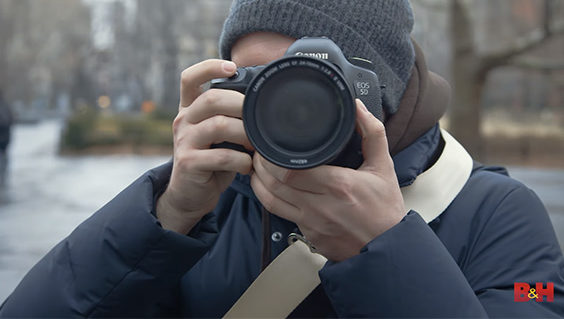
Photo gear doesn’t handle sudden changes in temperature well. Taking your camera out of the warmth of your home and to the chill of the outdoors can create condensation both inside and outside the equipment. You will likely to find it on the viewfinder, the front element of the lens, and even on the LCD screen.

Tips for shooting in cold weather

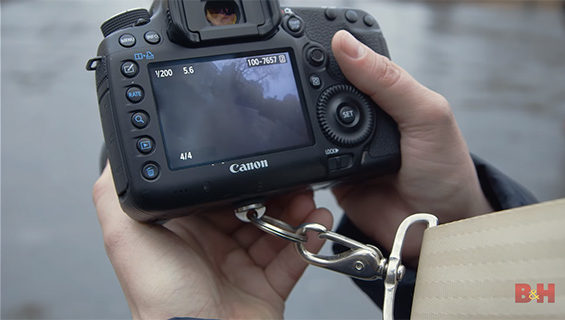
The best way to acclimatize your gear to the outside temperature is to take a short walk with the gear hanging around your neck or shoulders.

Tips for shooting in cold weather

Use the Right Camera

Some cameras come with weather proof construction. The Panasonic GH5 and the Sony a7R III, for example, have great weather sealing. You can shoot with them for long periods of time without any problems, as long as you have spare charged batteries. Cold weather will drain your batteries faster.

Tips for shooting in cold weather

Another tip Flores shares is to use a manual focusing lenses. Manual lenses tend to perform better in cold weather, because they don’t rely on an AF motor to focus.

Use a Camera Bag

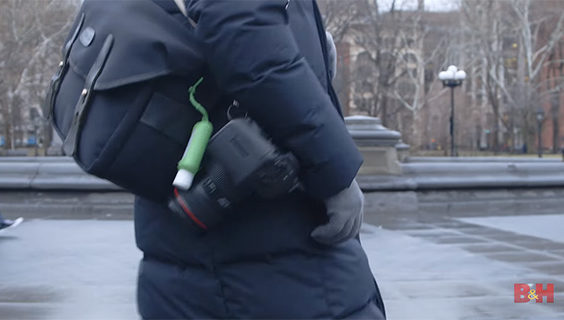
Carrying your camera and lens in your hands at all times can be a hassle. Plus, camera bags provide enough protection to safeguard your gear from the weather and occasional knocks and bumps. Look for a bag with weather-proof material.

Tips for shooting in cold weather

Keep Your Batteries Warm

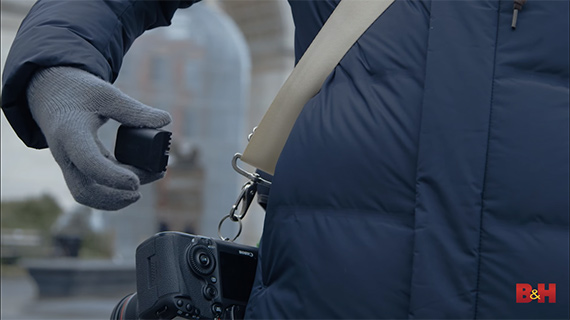
Battery performance tends to take a beating in cold weather. So, you are likely going to get a lot fewer shots than what a fully charged battery should ideally give you. Keeping your batteries warm when not in use tends to improve the performance.

Tips for shooting in cold weather

Make it a point to keep batteries in an inside pocket of your jacket, close to your body. Have a system in place to identify expended batteries from unused ones. When the batteries are fully expended, keep them in a separate pocket.

Find the Right Tripod

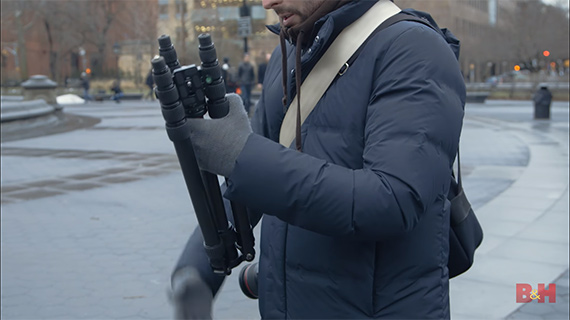
Whether it’s landscape or astrophotography, the right tripod will help you to get the shot.

cold weather tripod

When it comes to the material composition, carbon fiber tripods are better suited for cold weather than their aluminum counterparts.

cold weather tripod choice

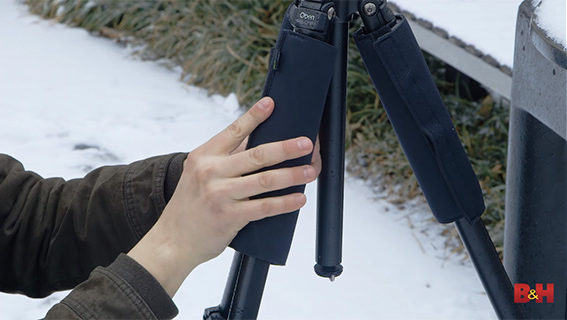
Aluminum gets pretty cold and is likely going to send a chill down your spine if you accidentally touch the metal parts without your gloves on. If you don’t have a carbon fiber tripod, try tripod leg warmers. They comes in many colors and patterns and are great for preventing that cold shock. Plus, they also give you soft padding for when you carry your tripod around.

Mind Your Exposures

With ice and snow in your frame, your camera is undoubtedly going to be fooled into thinking that the subject is too bright. With a DSLR you can always check the shot later on to confirm. As a mirrorless shooter, you can try changing your camera style or film simulation to black and white.

winter photography tips

This is a much better way to check for contrast in your images. With all the color information stored in the RAW files, it’s easy to add the colors back during post-processing.

What other cold weather photography tips do you have to share?

- - - - - - - - - - - - - - - - - - - - - - - - - - - - - - - - - - - - - - - - - - - - - - - - - - - - - - - - - - - - - - - - - - - - - - - - - -

Did you appreciate this newsletter? Please help us keep it going by Joining Our Patreon Supporters

What are your thoughts on this article? Join the discussion on our Facebook Page

PictureCorrect subscribers can also learn more today with our #1 bestseller: The Photography Tutorial eBook

- - - - - - - - - - - - - - - - - - - - - - - - - - - - - - - - - - - - - - - - - - - - - - - - - - - - - - - - - - - - - - - - - - - - - - - - - -

The post Photography Tips for Cold Weather appeared first in the Photography Tips category on PictureCorrect.


from PictureCorrect https://ift.tt/t2B9jxw
via IFTTT
torstai 24. marraskuuta 2022

PictureCorrect.com: Where to Focus for Portrait Photography

Figuring out where to focus when shooting portraits may seem pretty straightforward, but there are a few basic things you should know. In the video below, award-winning photographer David Bergman tells us where to focus and why:

One thing that’s easy to forget when working with a DSLR is that you can tell your camera where to focus. This comes in handy when the place you want to focus (like someone’s eye) is nowhere near the center of the camera.

You can also control whether the sensor focuses primarily on the center or near the center, or tries to keep the entire scene in focus.

Another tip is to focus on the eye closest to the camera, as that’s the eye we humans would naturally focus on in real life.

Focus on the eye nearer to the camera

Focus on the eye that’s closer to the camera.

Of course, this all goes out the window when photographing groups. In those cases, you’ll need a greater depth of field (f/8 to f/10). And if your subject has their eyes covered? Well, as Bergman says, “there are exceptions to every rule.”

- - - - - - - - - - - - - - - - - - - - - - - - - - - - - - - - - - - - - - - - - - - - - - - - - - - - - - - - - - - - - - - - - - - - - - - - - -

Did you appreciate this newsletter? Please help us keep it going by Joining Our Patreon Supporters

What are your thoughts on this article? Join the discussion on our Facebook Page

PictureCorrect subscribers can also learn more today with our #1 bestseller: The Photography Tutorial eBook

- - - - - - - - - - - - - - - - - - - - - - - - - - - - - - - - - - - - - - - - - - - - - - - - - - - - - - - - - - - - - - - - - - - - - - - - - -

The post Where to Focus for Portrait Photography appeared first in the Photography Tips category on PictureCorrect.


from PictureCorrect https://ift.tt/yQBGMOq
via IFTTT
keskiviikko 23. marraskuuta 2022

PictureCorrect.com: 5 Lighting Tips for Food Photography

The notion of photographing food can be an intimidating one. Often times, the task is associated with hours of finessing in the studio and in Photoshop to create something that looks relatively appetizing. However, capturing your favorite meal or snack in camera doesn’t have to be laborious and stressful. Commercial photographer Andrew Scrivani shares simple several tips on just what it takes to remove the headache from food photography:

1. Go natural.

Implementing a single directional light source often creates the ideal lighting situation for food. And what better directional light source than the sun? If a natural light source isn’t available, use studio strobes to create a similar directional light and color temperature.

2. Study the way light falls.

A directional light source can be hard and sharp, creating a look that isn’t flattering or appetizing, A scrim or diffuser can knock down shadows. In addition, take a moment to consider factors such as how translucent or opaque the food is; something as simple as a spray bottle filled with water can create a shimmer that adds depth to an image and makes the food infinitely more appealing.

Food photography set up

3. Shape the highlights and shadows.

Although directional light is often an excellent way of illuminating subjects, it’s important to be aware of areas that might be getting too much or too little light. Bouncing the light with reflectors or cutting down light with dark cards can make a huge difference in the shape and look of an object.

donut environmental shot

4. Get to know your gear.

Every camera processes light just a little bit differently. Use equipment you’re comfortable with if possible and experiment to find the strengths and weaknesses of the camera.

5. Create an environment.

Bringing depth and detail to an image always makes things a bit more interesting. Props can be used to imply a larger, more natural space for food photographs and consequently can evoke certain moods and emotions. Use things outside of the food itself to tell a story and entice viewers.

By following these tidbits, it’s possible to take something complete ordinary and transform it into a scrumptious vignette. Though food photography can certainly be intimidating, the real trick to it is simple enough—just use the tools already at your disposal and pay close attention to the details!

- - - - - - - - - - - - - - - - - - - - - - - - - - - - - - - - - - - - - - - - - - - - - - - - - - - - - - - - - - - - - - - - - - - - - - - - - -

Did you appreciate this newsletter? Please help us keep it going by Joining Our Patreon Supporters

What are your thoughts on this article? Join the discussion on our Facebook Page

PictureCorrect subscribers can also learn more today with our #1 bestseller: The Photography Tutorial eBook

- - - - - - - - - - - - - - - - - - - - - - - - - - - - - - - - - - - - - - - - - - - - - - - - - - - - - - - - - - - - - - - - - - - - - - - - - -

The post 5 Lighting Tips for Food Photography appeared first in the Photography Tips category on PictureCorrect.


from PictureCorrect https://ift.tt/koH7df0
via IFTTT

tiistai 22. marraskuuta 2022

PictureCorrect.com: Family Portrait Photography Ideas

Every family needs a portrait, and not everyone wants the same traditional group photo. These days, people are after a more human touch. And many families are after fun and wacky ideas to make their photo session unique.

Location

Finding the right location can completely change your photo for the better. The background can add contrast and alter the mood of the photo. A photograph tells a story, and you want a location that complements the story. Here are a few ideas to make your family photos more interesting:

Urban: If you’re in town, take a walk down the city streets and look for trendy spots, such as garage fronts, brick buildings, park benches, and sidewalks.

ideas for family portraits

“Beacon Hill Family Portrait Session” captured by Krista Guenin

Grit: Visit your local junkyard and take a few shots between piles of scrap metal and written off cars stacked on top of each other.

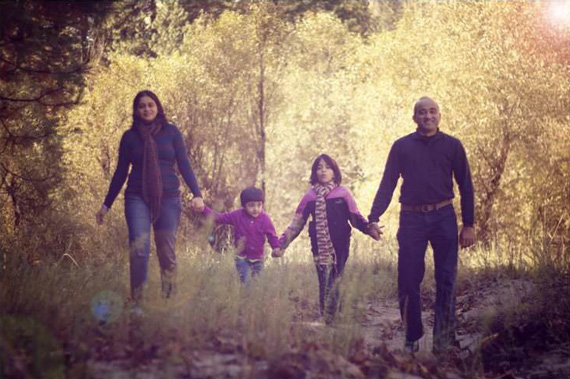
Natural: The best natural shots do not have a lot going on in the background and appear calming and friendly. A great place for a simple, natural shoot is a big open field filled with tall grass. Instead of walking to the park, take a walk down a nature trail, and you will find some amazing spots. Take a few shots with the family leaning on a tree or sitting on fallen trees. Surrounding rivers, lakes, and water beds also add a natural and calming touch.

family photo in the park

“Perfect Family” captured by Yogendra Joshi

Odd: Think outside the square! If you’re looking for an unusual twist, take any of the locations mentioned above and add a couch or chair. Try a contrasting red stool for a forest setting or a plush couch at the junkyard.

creative family portrait

“Family Portrait” captured by Vincent Garcia

Natural Shots

Some of the best photos are natural shots with a shallow depth of field. Aim to get your subjects to be relaxed so their expressions appear genuine.

posing for family portraits

“Chen Family Portraits” captured by Benjamin Chan

Activity: Working with kids can be lovely, or it can turn into a disaster. Forcing kids to stand and pose will only cause fake smiles. Let the kids run around for natural shots, and you will notice their personalities coming alive. Also, getting the family down to the kids’ heights will lower the intimidating effect of adults standing over them.

Pets

Having the family cat or dog in the photo adds warmth to the family portrait.

Natural lighting in open areas or rooms with large windows are great places for the shoot when the family pet is involved. The ample ambient light will help eliminate the need for flash photography, which may upset the pet.

family portrait with pet

“Family Portrait” captured by Glen Peterson

Positioning: As opposed to having the pet sit next to the family, have the family come down to his level. Take the photo at the pet’s eye level or below. Having the family go to the pet will be much easier than trying to stop a dog or cat from wandering around.

About the Author:
A professional photographer knows the tricks that can make any family portrait shine. If you would like to find out more about fun photography then visit the creative and professional Brisbane Photographers at Studio Kirby. As a writer I have published a number of articles in the photography industry and am happy to be working for the team at Studio Kirby, as well as a number of different industries.

- - - - - - - - - - - - - - - - - - - - - - - - - - - - - - - - - - - - - - - - - - - - - - - - - - - - - - - - - - - - - - - - - - - - - - - - - -

Did you appreciate this newsletter? Please help us keep it going by Joining Our Patreon Supporters

What are your thoughts on this article? Join the discussion on our Facebook Page

PictureCorrect subscribers can also learn more today with our #1 bestseller: The Photography Tutorial eBook

- - - - - - - - - - - - - - - - - - - - - - - - - - - - - - - - - - - - - - - - - - - - - - - - - - - - - - - - - - - - - - - - - - - - - - - - - -

The post Family Portrait Photography Ideas appeared first in the Photography Tips category on PictureCorrect.


from PictureCorrect https://ift.tt/KYU8yHL
via IFTTT

PictureCorrect.com: Interesting Photo of the Day: Grand Canyon Stormy Sunset

Nature is unpredictable, which makes landscape photography challenging. A scene that looks flat one moment can turn into a magical one in the blink of an eye. And if you fail to make the most of what’s in front of you, chances are that you’ll have to wait a long time for another chance. Photographer Morgan Tuohy took the following image at just the right moment on the south rim of the Grand Canyon:

storm in the Grand Canyon

“Evening Storm in the Grand Canyon” by Morgan Tuohy (Via Reddit. Click image to see full size.)

Tuohy took the image on his Sony A7III with the 16-35 GM lens. The image is a 1-second exposure that he took at 30mm, f/11, and ISO 100.

“The clouds across the sky had us thinking sunset was going to be a dud, so we didn’t pay much mind to the sky and started making dinner at our cars. Eventually, I looked back towards the canyon and saw this massive column of water begin to fall on the sourth rim of Grand Canyon National Park, just a few miles away. Needless to say, dinner became an after thought, we grabbed our camera gear, and headed back towards the cliff that we’d visited earlier that evening.”

Scenes like this make you pinch yourself to make sure what you’re seeing is actually real. The rain cloud being illuminated by the setting sun against the storm clouds makes it an incredible moment to witness. It seems like, besides the photographer, even nature has put in some effort to make this image look and feel so beautiful.

- - - - - - - - - - - - - - - - - - - - - - - - - - - - - - - - - - - - - - - - - - - - - - - - - - - - - - - - - - - - - - - - - - - - - - - - - -

Did you appreciate this newsletter? Please help us keep it going by Joining Our Patreon Supporters

What are your thoughts on this article? Join the discussion on our Facebook Page

PictureCorrect subscribers can also learn more today with our #1 bestseller: The Photography Tutorial eBook

- - - - - - - - - - - - - - - - - - - - - - - - - - - - - - - - - - - - - - - - - - - - - - - - - - - - - - - - - - - - - - - - - - - - - - - - - -

The post Interesting Photo of the Day: Grand Canyon Stormy Sunset appeared first in the Photography Tips category on PictureCorrect.


from PictureCorrect https://ift.tt/NkjEQor
via IFTTT