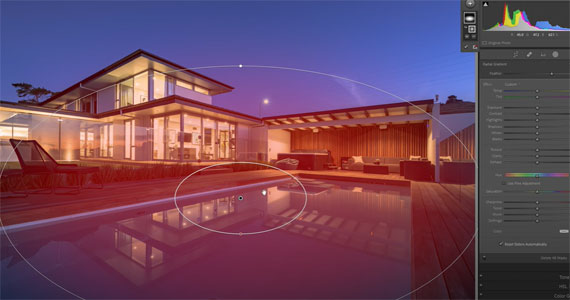
You could consider real estate photography to be a sort of product photography. That’s because the intention of both genres of photography is to help businesses sell. It is thus equally important in architecture photography that you present the final image in the best way possible. Editing thus becomes a key part of the process.
If you’re looking to get started with editing real estate photos, we have the right video for you today. Photographer Anthony Turnham shows you how you can edit architecture photos using Lightroom:
If you’re curious about how professionals edit their real estate photos, you’re in luck. Turnham, in this video, explains in exquisite detail all the steps that he follows when editing real estate photos. In the process, he also talks about why he makes certain decisions. This will further help you understand the editing process in detail and expand your knowledge of the process.
Before jumping into the editing process it is important to know how to take the real estate photos so as to capture maximum details. As Turnham explains in the video, the best choice is to bracket the shots using multiple exposures. Then, using Lightroom, you can use the “Merge to HDR” function to create a single digital negative file that has loads of details for you to play around with.
Moving on, Turnham shows you how he edits the real estate photo in two phases:
- Global adjustment
- Local adjustment
Global adjustment is when you make adjustments that affect the overall look and feel of the image. For instance, if you move over to the Develop module in Lightroom and start playing around with the exposure, contrast, shadows, or any other adjustments, what do you notice? You can see that they affect the overall image. Like Turnham demonstrates in the video, it is a good practice to start with global adjustments to give an overall attractive look to the image.

But when it comes to giving the image a finished look, local adjustments are what you should turn to. Using local adjustment tools like the brush tool and masks, you can ensure that the changes you make affect only a certain region of the image. This makes a whole world of difference and makes the image appear so much more polished. In the video, you can see how Turnham uses multiple local adjustment brushes and masks to fine-tune his image. If you want to be a pro at editing real estate photos, make sure to master this technique.
While we have barely scratched the surface here in this article, you’ll definitely learn a lot more in detail once you watch the complete video. If you’re looking to get started with editing real estate photos, make sure to go through it. You’ll definitely learn a lot.
For further training: Picture Perfect Properties Course
- - - - - - - - - - - - - - - - - - - - - - - - - - - - - - - - - - - - - - - - - - - - - - - - - - - - - - - - - - - - - - - - - - - - - - - - - -
Did you appreciate this newsletter? Please help us keep it going by Joining Our Patreon Supporters
What are your thoughts on this article? Join the discussion on our Facebook Page
PictureCorrect subscribers can also learn more today with our #1 bestseller: The Photography Tutorial eBook
- - - - - - - - - - - - - - - - - - - - - - - - - - - - - - - - - - - - - - - - - - - - - - - - - - - - - - - - - - - - - - - - - - - - - - - - - -
The post Real Estate Photo Editing Tutorial in Lightroom appeared first in the Photography Tips category on PictureCorrect.
from PictureCorrect https://ift.tt/f7Qrwcz
via IFTTT


0 kommenttia:
Lähetä kommentti