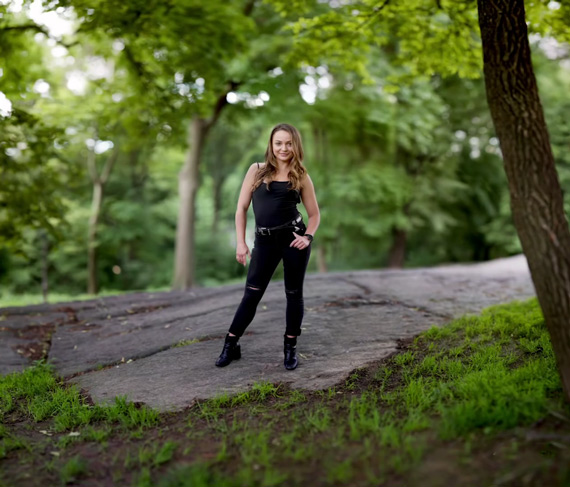
Wedding photographer Ryan Brenizer popularized a method wherein he was able to take very high resolution images of his clients with a very shallow depth of field. The Brenizer method involves taking and stitching multiple frames to get a result with incredible bokeh. It feels as if the image with taken with a lens with an f-stop less than one. In this video, photographer David Bergman with Adorama guides you through the Brenizer method to get a wide-angle image with shallow depth of field:
Using a longer lens at a wide open aperture setting is already a convenient way to blow out the background and draw attention to the subject. Why would you need the Brenizer method? Consider this: you want to shoot wider to show the environment the subject is in while still maintaining focus on the subject. For this, you can back up a little and shoot at a wider aperture or use a fast wide angle prime lens. But both of these methods will have the subject, the foreground, and the background in focus; the subject will not be isolated.
The Brenizer method is the perfect solution. It can give you with a shallow depth of field while still providing a wide angle field of view just like a medium format camera would do. You can follow these steps to take photos with the Brenizer method using your conventional lens wide open:
- Set your focus and exposure to manual to ensure that no settings change throughout the process.
- Lock your focus on the subject and take the first photo with a shallow depth of field.
- Ask the subject to stay as still as possible until you’re done taking photos.
- Move the camera in all directions and take multiple overlapping photos. The aim is to cover a much wider area than you would be able to see from the lens’s perspective.
- Make sure that you are quick while taking shots with the subject in the frame. This is to avoid any movement of the subject that can get problematic while stitching.
- Load all the images to your computer and use a tool like Photoshop’s Photomerge (File > Automate > Photomerge…) to stitch all the photos together.

Once done with the process, you will get an image that has a wide angle and medium format look. So what are you waiting for? Head out and give this artistic method a try.
- - - - - - - - - - - - - - - - - - - - - - - - - - - - - - - - - - - - - - - - - - - - - - - - - - - - - - - - - - - - - - - - - - - - - - - - - -
Did you appreciate this newsletter? Please help us keep it going by Joining Our Patreon Supporters
What are your thoughts on this article? Join the discussion on our Facebook Page
PictureCorrect subscribers can also learn more today with our #1 bestseller: The Photography Tutorial eBook
- - - - - - - - - - - - - - - - - - - - - - - - - - - - - - - - - - - - - - - - - - - - - - - - - - - - - - - - - - - - - - - - - - - - - - - - - -
The post Brenizer Method Photo Tutorial appeared first in the Photography Tips category on PictureCorrect.
from PictureCorrect https://ift.tt/Mw6BSz3
via IFTTT


0 kommenttia:
Lähetä kommentti