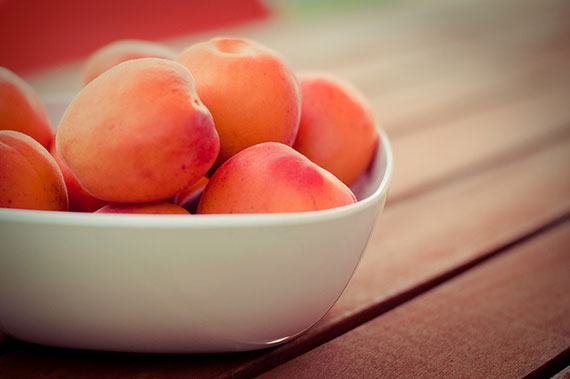
This is a study of an inanimate object, such as a vase of flowers or bowl of fruit.
You’ll need:
- A source of light (a window is good)
- A subject. I suggest a nicely arranged bowl of fruit.

Photo by Janice Cullivan; ISO 200, f/2.8, 1/1000-second exposure.
Camera Setup
- Mode: Aperture Priority (often shown as Av on the mode wheel)
- ISO: 100 or so (there will be lots of light)
- White Balance: Custom
- Aperture: Experiment!
Lighting
Make sure your light has some directionality, coming from the side. Otherwise it will be flat and boring.
White Balance
Take a shot of your grey card or reference paper in front of the subject. Make sure it’s bright grey, and set custom white balance.
The Pose
Arrange the subject so that it’s visually pleasing and there are no stickers on the fruit. You can try a bit of spray water for a fresh look. Arrange yourself and the subject so that some light falls on the item from a side angle. If the light is bright daylight (sun) or a lamp, the shadows will be sharp and harsh. If the light is overcast or through a diffuser (shades, a sheet, etc.), the light will be very soft and spread out.
Framing the Image
You can shoot still life as a centered image, or not—this is your choice. Since a still life print is often used as a “peaceful” image, a centered composition will connote balance and harmony. Watch the background. If your f-stop is not too wide open, you’ll see elements of the background in focus. If it’s a bit busy, consider arranging a dark cloth or other plain background to limit distracting elements. And consider your camera angle—20-30 degrees above horizontal may be the most appealing angle, but you can experiment.
“Fruits d’automne” captured by Didier
Take the Image
Watch your shutter speed here, and stabilize your camera if it gets below 1/60 second.
Analyzing and Improving
Experiment with different light directions, camera angles, and light diffusion. Really look at the light and the shadows before you take the image. This is one of the benefits of this activity—you have the time and a patient subject, so use the opportunity to study the lighting, and the background and the subject.
Advanced Tricks
In post production, you can play with the levels tool or brightness/contrast tool to tweak the brights and darks. You can use the saturation tool to increase the color of the image, but be careful to not overdo it! You can use the soften tools and any available painterly effects, such as watercolor or pastel, to turn your image into a painterly masterpiece!
About the Author:
John Huegel is a photographer in the Erie, Pennsylvania area who specializes in Seniors, Dance Studio, Families and other groups. He operates a blog for professional photographers at http://newphotopro.blogspot.com. He is active in many charitable and volunteer activities in the Erie area.
- - - - - - - - - - - - - - - - - - - - - - - - - - - - - - - - - - - - - - - - - - - - - - - - - - - - - - - - - - - - - - - - - - - - - - - - - -
Did you appreciate this newsletter? Please help us keep it going by Joining Our Patreon Supporters
What are your thoughts on this article? Join the discussion on our Facebook Page
PictureCorrect subscribers can also learn more today with our #1 bestseller: The Photography Tutorial eBook
- - - - - - - - - - - - - - - - - - - - - - - - - - - - - - - - - - - - - - - - - - - - - - - - - - - - - - - - - - - - - - - - - - - - - - - - - -
The post Still Life: Photography Activity appeared first on PictureCorrect.
from PictureCorrect https://ift.tt/dTygbAG
via IFTTT


0 kommenttia:
Lähetä kommentti