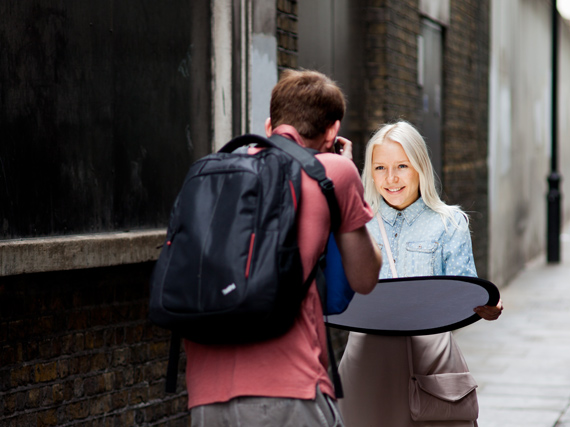
We all know that photography is about capturing light. We all know that the basic setup for a portrait requires three lights. Now for the ugly part: buying good quality studio portrait lights is expensive! Enter photography reflectors.
If you can’t afford to get a top quality three light system, the best option is to buy just ONE good quality light (rather than 3 cheap—and mostly useless—lights). Then replace the other lights with reflectors that cost next to nothing. You can even make them yourself.
Here’s what you do:
1. Set up your one studio light at around 45 degrees between your subject and the camera. Make it about 45 degrees above them as well. That’s your main light (your main light could even be the sun if you are outside).
2. Set up a large white reflector near to the model on the opposite side of your light. This will bounce light back into the shadowed side of the face. That’s light number two—the fill light.
3. Position a mirror above and behind your model. Angle the reflective surface to be pointed at the top and back of the model’s head and reflect light into his or her hair. That’s the hair light—light number three. To avoid accidents and breakage, you can use mirrored plastic. Safety comes first. Or, in a pinch, you could use aluminum foil taped to a piece of poster board.
4. Using a larger mirrored surface (mirrored sheets come in sizes up to 4 feet) angle it to push light onto the background. With the judicious use of gels and cookies, you could “project” colors and patterns on the backdrop, too! This is your separation light. Light number four.
5. Using a smaller piece of the mirrored material, have someone hold it (or mount it on a stand) to kick some additional light onto the face. Now if you expose for the light hitting the face, it is more than the light hitting the rest of the scene. So the rest goes slightly darker and subtly forces attention to the face. This is a major pro tip! This one is called a kicker and it is light number five.
Need I continue?
You could light an entire set, with as many light sources as you want, with only one actual light and homemade or inexpensive photography reflectors. Try it. It’s fun and you will learn a ton!
About the Author:
Dan Eitreim writes for OnTargetPhotoTraining. He has been a professional photographer in Southern California for over 20 years. His philosophy is that learning photography is easy if you know a few tried and true strategies.
- - - - - - - - - - - - - - - - - - - - - - - - - - - - - - - - - - - - - - - - - - - - - - - - - - - - - - - - - - - - - - - - - - - - - - - - - -
Did you appreciate this newsletter? Please help us keep it going by Joining Our Patreon Supporters
What are your thoughts on this article? Join the discussion on our Facebook Page
PictureCorrect subscribers can also learn more today with our #1 bestseller: The Photography Tutorial eBook
Become a photography VIP with the All Access Pass to Photography Training
- - - - - - - - - - - - - - - - - - - - - - - - - - - - - - - - - - - - - - - - - - - - - - - - - - - - - - - - - - - - - - - - - - - - - - - - - -
The post How to Use Photography Reflectors to Save on Lighting Costs appeared first on PictureCorrect.
from PictureCorrect https://ift.tt/FUWTu16
via IFTTT


0 kommenttia:
Lähetä kommentti