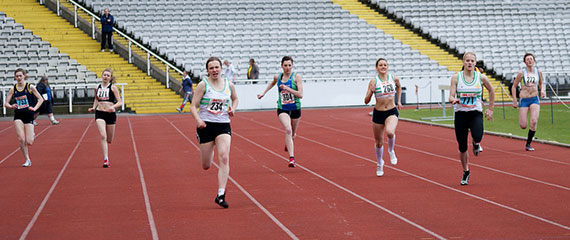
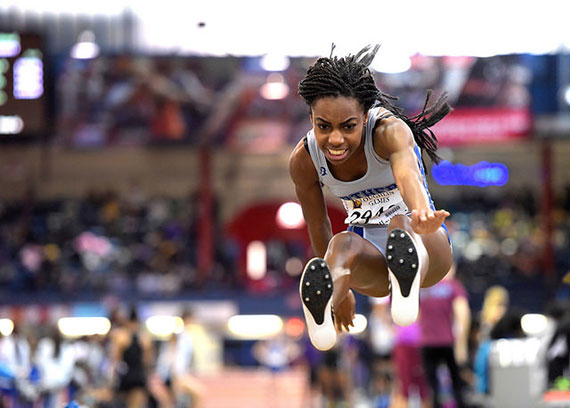
Many photographers spend ages looking for inspiration for a subject to photograph. However with sports photography this changes to being very technically adept and trying to capture the decisive moment that shows the effort and emotion that goes into the physical struggle to be first past the line and the beating or peers. The 12 guidelines here will help you improve your sports photography.

Photo by AdamKR
1. Get a long lens
You will need a telephoto lens for most events, a 400mm focal length lens is common amongst most professional photographers. Try to get a lens with the largest aperture possible to get the most light into the camera. You can buy lenses that can cost the same amount as a new car, buy one that suits your budget or consider renting one for the event.
2. Use a camera with a good frame rate
For most events you will want a camera with a good frame burst rate so when the moment you wish to capture arrives you just hold the shutter release down and take a sequence of pictures. The difference of just half a second can be incredible. If you take a high jumper for example the time between leaving the ground and landing the other side of the bar can be less than a second. By having a high frame rate you should be able to catch the image where the jumper arches their back over the bar.
3. Think about location
Firstly, get accreditation so you are able to wander round the ground. But make sure you are aware you can and cant go. Certain events, especially the throwing events such as hammer, discus, shot and javelin will have certain safety requirements that you must be aware of for your own and others safety. Being hit by a javelin is one sure way of spoiling the rest of your days photography. If in doubt follow the other professionals around, but remember the photographers etiquette of not standing in front of another photographer. There are certain places that are common to stand, such as the track towards the end of the 100m or about 10m back from the sand for the long jump. If you are looking for more creative rather than commercial work you will no doubt want to think about other locations.
4. Go fast for shutter speeds
Remember you are catching action shots of things moving rather quickly. You will therefore need a fast shutter speed to capture the moment so it produces a sharp image. Typically think of using a speed of at least 1/320th of a second. Certain events where there is a large amount of movement will need faster shutter speeds.
5. ISO speed
Use the minimum iso speed that allows you to use the shutter speed you need with the maximum aperture you have. Unless its a day where clouds are moving quickly in front of the sun changing the exposure conditions consider putting the camera to manual. ASA 400 is probably the slowest film speed setting, with 800 and 1000 iso fairly common.

Photo by Steven Pisano; ISO 3200, f/2.8, 1/640-second exposure.
6. Focus
If you camera has a servo mode focusing mode then set the camera to that, especially for track events. Otherwise consider prefocusing at a certain point and taking the picture at the appropriate moment. In automatic focusing mode try tracking the target prior to taking the picture to allow the camera time to focus rather than just pressing the shutter release then waiting until the lens focuses before the photograph is taken.
7. Get a monopod
As you are using a long lens the slightest camera movement is exaggerated. Monopods will enable you to steady the camera to help prevent camera shake blur. Most people will have a tripod however these tend to be impracticable.
8. If In Doubt – Shoot
It costs nothing to take a digital picture unlike traditional film. If in doubt take the picture, you can always discard the images later but you just might get the photograph of the match.
9. Respect the Officials and Athletes
The event you are photographing is for the athletes not for you. Show the athletes the respect they deserve and also obey any instructions the officials might have. You want to build up a reputation as an amiable photographer that helps publicize the event, not someone who is a pain in the &*().
10. Make Sure You Have
Spare batteries, memory cards, lens cleaning material, clothing and equipment if it starts to rain or sun block for you if it is hot and sunny and lots of business cards. The list really is endless, but remember also that you will have to carry the equipment around with you.
11. Know who is competing
It helps if you are familiar with the subject you are shooting. If you are keen on athletics you will probably know who the stars are and who is likely to be worthy of photographing. Knowing who is likely to cross the line first makes life a lot easier by positioning yourself at the appropriate location. Most track and field events are undertaken at the same time so you can’t cover both the field events and the track events. get a program from the event organizer showing the times and participants in the events.
12. Expect the Unexpected
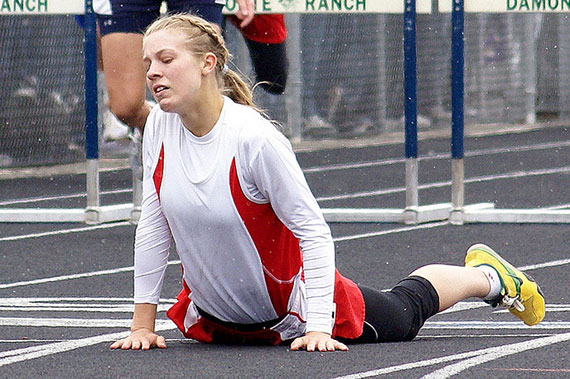
Have your wits about you. Be prepared to rapidly change what you are shooting, the expression on someones face when they realize they have broken a record, the hurdler who catches a hurdle with their foot and goes flying, the discus thrower who trips and falls out of the circle. You will find that there is so much going on that you won’t be able to take everything in. The crowd however is good at alerting you to something significant is happening.

Photo by shortCHINESEguy
Using these 12 guidelines you will find that your success rate in capturing the moment are greatly improved and hopefully with that your enjoyment and possibly profit.
About the Author:
Paul Klein lives and works in Loughborough, Leicestershire. He posts photographs of track and field at the Loughborough University International Athletics.
Go to full article: Track and Field Sports Photography Tips
What are your thoughts on this article? Join the discussion on Facebook
PictureCorrect subscribers can also learn more today with our #1 bestseller: The Photography Tutorial eBook
The post Track and Field Sports Photography Tips appeared first on PictureCorrect.
from PictureCorrect https://ift.tt/3bHqW3e
via IFTTT


0 kommenttia:
Lähetä kommentti