ISO is one of the important settings that you can manipulate in your camera. Understanding how ISO works in digital photography can save you from many difficult low light situations, which is primarily what this setting is used for.

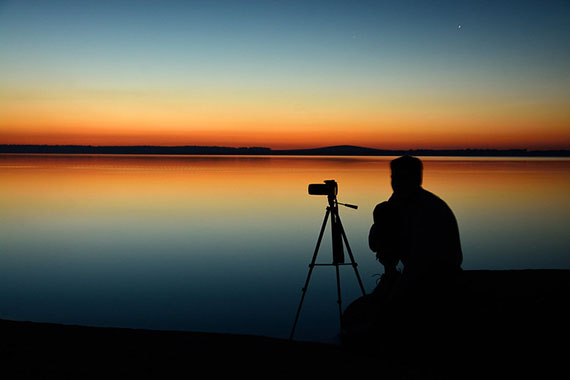
Photo by Nikita Novozhilov; ISO 200, f/5.6, 3-second exposure.
The term ISO has been widely used since the days where film cameras were popular. Those days, the term ISO refered to film speed or how sensitive a film was to light. Film generally comes in various ISO speeds, and photographers can swap films with different film speeds to achieve the desired effect. However, in the digital world, this process has been simplified, as we can adjust the ISO setting with just a few clicks. Today, with digital cameras, we generally refer to ISO as how sensitive the image sensor is to light.
ISO is measured in numbers which can be anywhere from 100 up to 3200 or more. The higher the ISO number, the more sensitive the sensor is to light, while the lower the ISO number, the less sensitive the image sensor is to light. The sensitivity of the image sensor affects your shutter speed and aperture combination in order to obtain a properly exposed picture. When changing your camera’s ISO number, be sure to check your camera’s light meter to ensure that your picture will be properly exposed. If not, you might have to change your shutter speed or aperture so that just enough light will enter and hit the image sensor.
When shooting in higher ISO mode, your picture will contain more grains and will be noisier as the image sensor will be more sensitive to light. When your camera’s image sensor is more sensitive, it will give an artificial boost to the light signal that hits the sensor. This is not clean light, it is amplified light, which also amplifies undesired noise in the light, resulting in grains appearing in your pictures. Shooting in higher ISO mode also allows you to use a smaller aperture or faster shutter speed or a combination of both. Higher ISO mode is typically used when shooting in low light conditions where you need your camera’s image sensor to be more sensitive to light so that the light would be amplified. Although this may produce noisier and grainier pictures, but it will ensure that you are able to capture the scene even in low light.
Example of a High ISO Speed Photo
When shooting in a lower ISO mode, your picture color will be richer and better quality. This is because less noise will be collected by the image sensor as it is less sensitive, thus, resulting in finer grains in your picture. Shooting with a lower ISO also allows you to use a wider aperture or slower shutter speed or a combination of both. An example of using a low ISO number would be when you are shooting in broad daylight. It is a good idea to use a lower ISO number when there is enough light around and you do not need your camera’s image sensor to be more sensitive to light, as this will only create more noise in your picture.

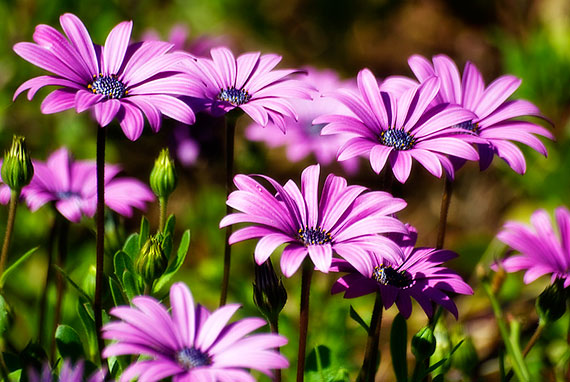
Photo by Riccardo Cuppini; ISO 100, f/5.6, 1/250-second exposure.
As a rule of thumb, your ISO should always be set at the lowest number whenever possible so that higher quality pictures can be produced. However, there are many cases where we need to bump our ISO to a higher number for proper exposure.
A few ISO examples:
1) When you’re trying to capture a moving subject in a low light area (e.g. a concert), you would need to bump your ISO higher, so that you can use a faster shutter speed to freeze the moving subject.
2) There are many places where flash photography is not allowed, such as in museums. You could bring along a tripod, mount your camera on it, and use a slow shutter speed for more light exposure. However, a tripod is not always handy, so we have to rely on our ISO setting. Just bump your ISO higher, and you will be able to use faster shutter speed to reduce the possibility of your hand shaking.
3) There are times when you are gathered in low light areas with friends for a barbecue or in dimly lit restaurants and you wish to capture a special moment. You do not want to spoil the scene with a sudden burst of flash, which would create a very unnatural feel to the picture. Do it without flash and bump your ISO higher with a faster shutter speed, and you will be able to preserve that natural low light mood.
Using ISO to increase the sensitivity of the camera’s image sensor can help boost the brightness of your pictures at the cost of quality. This can be your life saver in many low light situations. You would prefer to have captured a picture that is bright and with some noise in it rather than a picture that is dark with no noise.
About the Author:
Roy Lee is a freelance photographer residing in Malaysia, who specializes in wedding, portrait, and landscape photography.
© Copyright – Roy Lee. All Rights Reserved.
Go to full article: How ISO Works in Digital Photography
What are your thoughts on this article? Join the discussion on Facebook
PictureCorrect subscribers can also learn more today with our #1 bestseller: The Photography Tutorial eBook
The post How ISO Works in Digital Photography appeared first on PictureCorrect.
from PictureCorrect https://ift.tt/2pv8Qc7
via IFTTT


0 kommenttia:
Lähetä kommentti