The exposure of a digital photograph is affected by the camera’s aperture, shutter speed, ISO setting, and of course the amount of light in the scene being photographed. An incorrect exposure will turn an otherwise well composed wildlife image into something mediocre and, at worst, completely ruin a shot.

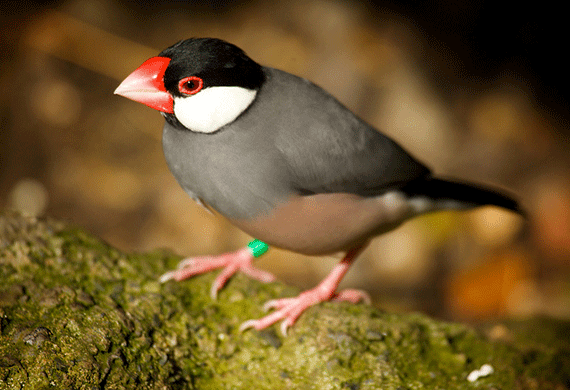
Photo by BRJ INC.; ISO 250, f/6.3, 1/400-second exposure.
All digital cameras have an automatic exposure setting, so it may seem that exposure is something that is best left up to the camera. It’s certainly true that in some situations your camera’s automatic exposure system will produce properly exposed shots, but there are also many situations where it will not.
Automatic exposure systems only tend to work well when a scene and the subject animal consist mainly of mid-tones. This is because automatic exposure averages out the exposure of the scene as a whole, achieving an overall exposure equivalent of a uniform mid-tone grey. Since virtually no real world scenes consist of purely mid-tone grey, this can mean that your wildlife photos may end up incorrectly exposed if you rely purely on your camera’s default exposure settings.
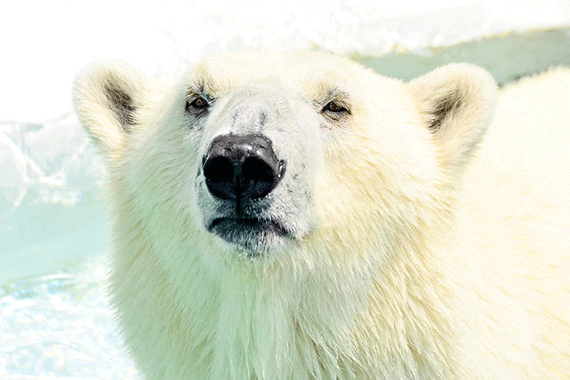
Scenes that consist of mainly very pale colours will come out underexposed (such as a pale animal in the snow) and scenes with very dark colours will come out overexposed. Furthermore, pale animals against dark backgrounds may be overexposed and dark animals against pale backgrounds may be underexposed. Animals with pied markings such as puffins or magpies will usually have their white areas overexposed. Therefore it is often necessary in wildlife photography to adjust your camera’s default settings to correctly expose your shots.

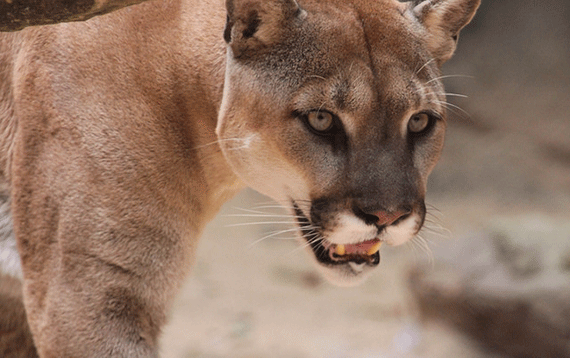
Photo by Doryce S; ISO 1600, f/7.1, 1/400-second exposure.
Exposure Settings
Prosumer and DSLR cameras have three main light metering modes available:
- Multi-Segment or Matrix. This is a camera’s default automatic exposure mode. This divides the image into a number of segments and averages out the exposure for the scene as a whole. This mode can work well for frame filling close-ups of animals and for wider shots of scenes consisting of mainly mid-tones, but as explained in the previous section, this mode will often produce incorrectly exposed images when the scene has significant areas of extreme light or dark.
- Spot Metering. In this mode the camera bases its exposure value on a single point in the image (usually the centre of the image, but this point can be adjusted on most cameras). This is a useful mode for wildlife photography, as it often enables you to achieve the correct exposure for the subject animal. Spot metering should be used with care, however, as the light readings can vary significantly depending on where you point the camera—it is best to choose a point on your subject that has a mid-tone.
- Centre-Weighted. Like multi-segment metering this mode takes an average of the scene as a whole, but in this mode more importance is given to the centre of the image in the averaging process, meaning that the camera tries to ensure the centre of the image is correctly exposed. This is another good setting for wildlife photography that, unlike spot metering, is less sensitive to variations in scene brightness. As centre-weighted metering still uses a form of averaging, it can still produce incorrect exposure if the centre of the image contains extremes of light or dark.
Exposure Compensation
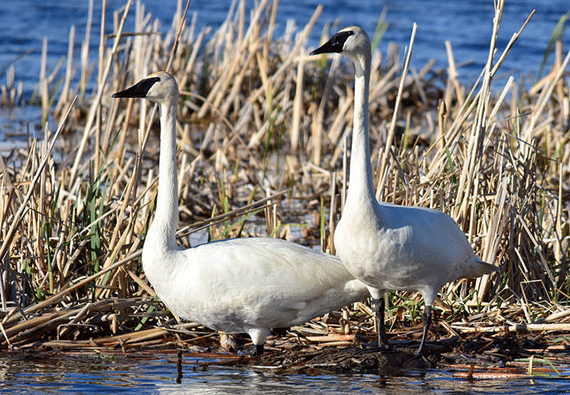
If you find your camera’s metering doesn’t produce good results for a given scene (e.g. when your subject animal is very light or dark) you can use the manual EV Compensation (Exposure Value Compensation) setting on your camera to adjust the exposure it will use. For example, without EV compensation, a spot-metered or centre-weighted picture of a white swan is likely to come out underexposed (as the camera tries to achieve a mid-tone grey for the swan’s white plumage). By setting your camera to a positive EV Compensation you’ll be able to get a picture where the swan’s plumage is exposed correctly. You may need to use a little trial and error to find the exact amount of compensation required.

Photo by USFWS Mountain-Prairie; ISO 800, f/8.0, 1/4000-second exposure.
Bracketing
Another trick you can use to get the correct exposure is to use the exposure bracketing function on your camera. In this mode, the camera takes three shots at different exposure settings: one at the camera’s recommended exposure, one slightly underexposed, and one slightly overexposed. Bracketing increases the likelihood that one will be correctly exposed. It should be noted that because bracketing takes multiple exposures, it is not particularly suitable for shooting animals in action; the animal is likely to move between exposures making each bracketed shot different, and unless you are very lucky, the best exposed shot might not be the shot with the animal in the best position.
Checking For Correct Exposure
You may be tempted to try and check the exposure of a picture after you have taken it by viewing it on your camera’s LCD. While this may give you a rough idea, it is not very reliable; a screen’s brightness can vary and the ambient lighting conditions affect how an image appears on the screen. A far more reliable way of assessing exposure is to look at your camera’s histogram.
The histogram is a graph showing the distribution of tones from light to dark in an image. For most shots you want a bell shaped histogram with the majority of pixels toward the middle of the graph, although this does not necessarily hold true for pictures that have significant light or dark areas.

Photo by Toshihiro Gamo; ISO 800, f/6.7, 1/4000-second.
Another feature most cameras provide for checking exposure is an image playback mode where the massively overexposed parts of the image flash on screen. Massively overexposed means a region of an image is so overexposed that it has gone to pure white—this is referred to as clipped or burned out.
Overexposure to the point where significant portions of the image are clipped is something you should avoid at all costs. Once a portion of an image is clipped, all information in that part of the image is lost; nothing can be done in tools like Photoshop to recover it. It should be noted here that it is fine to clip specular highlights, like those caused by the sun reflecting in the animal’s eyes, but clipping large areas of detail should always be avoided.
The problems associated with clipping mean that it is generally safer to slightly underexpose a digital image than it is to overexpose it, as this will retain more detail in the highlights. Underexposed images can be corrected easily in Photoshop, but if an image is significantly underexposed, the corrected image will have an undesirable grainy texture called ‘noise’. Slight overexposure can also be corrected in Photoshop but only when clipping hasn’t occurred.
Poor exposure can ruin once-in-a-lifetime wildlife shots. Use these tips to ensure you get a correct exposure every time.
About the Author:
Ben Juby is a wildlife photography enthusiast and freelance web developer.
Go to full article: Wildlife Photography Exposure
What are your thoughts on this article? Join the discussion on Facebook
PictureCorrect subscribers can also learn more today with our #1 bestseller: The Photography Tutorial eBook
The post Wildlife Photography Exposure appeared first on PictureCorrect.
from PictureCorrect https://ift.tt/3kOcQk1
via IFTTT


0 kommenttia:
Lähetä kommentti