Portrait photography lighting shouldn’t be an expensive and complicated deal. With a proper understanding of what you’re doing, even a single speedlight can help you achieve great portraits. Photographer Sean Tucker shows you how you can create dramatic portraits with a single speedlight and a cheap modifier:
For a portrait photographer, using strobes can expand the possibilities so much. Using strobes is not only limited to when shooting in a studio but also when you’re doing it outdoors. It adds a different sense of feeling to the final image. If you’re just starting to work with lights, it is a good idea to start off with a single one, and then move on to adding lights to the setup as you get comfortable with it.
Backdrop
Tucker uses a 2m x 1.5m collapsible backdrop with the black surface. If you like colors and patterns, go for it. However, if your shooting location has a proper background already, you can do without a backdrop.
Light and light stand
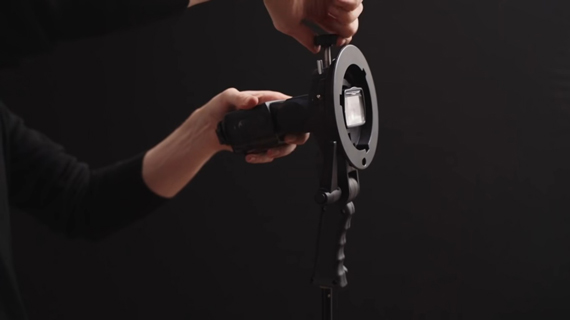
Tucker has a Manfrotto 5001B light stand that he uses to hold his speedlight. He has the Bowens S mount adapter attached to the light stand that mounts his Godox speedlight. The convenience of using the Bowens S mount adapter is that you can easily attach modifiers like softboxes and beauty dishes.
Lighting Modifier
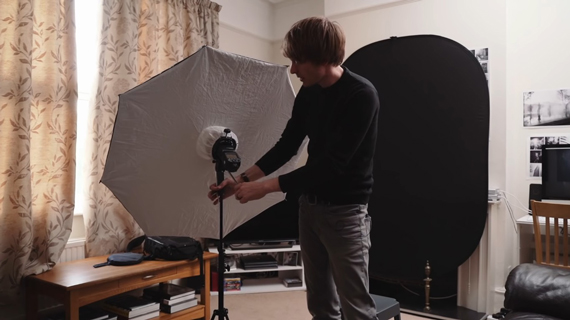
To diffuse the light coming off of the speedlight, Tucker uses the inexpensive Walimex Pro light modifier. When using this modifier, the light from the speedlight bounces off the umbrella and diffuses through the large white material, giving a beautiful, soft light. Also, when using the modifier, he sets the speedlight at the widest setting so that it fills as much of the modifier as possible. This also helps in making the output softer.
Lighting Setup
Once you have the backdrop in place and the modifier placed on the light source, it’s time to set up the lighting. The general rule of thumb is to avoid placing the light directly in front of the subject. The result just ends up looking flat and unflattering. Start by placing the light on the side instead.
“The rough rule is to be 45 degrees off-axis and 45 degrees above.”
This is a general setup for Rembrandt lighting, which lights up one side of the face nicely and has a little light spilling on the opposite cheek to form a little triangle.
If you want to keep the background fairly dark, you can turn the light slightly more away from it. This technique is known as feathering. While the light will still wrap around the subject nicely, the background will turn out looking darker.
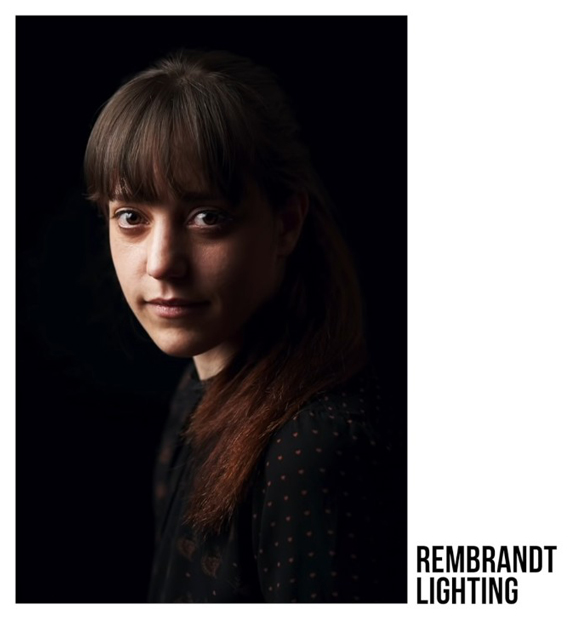
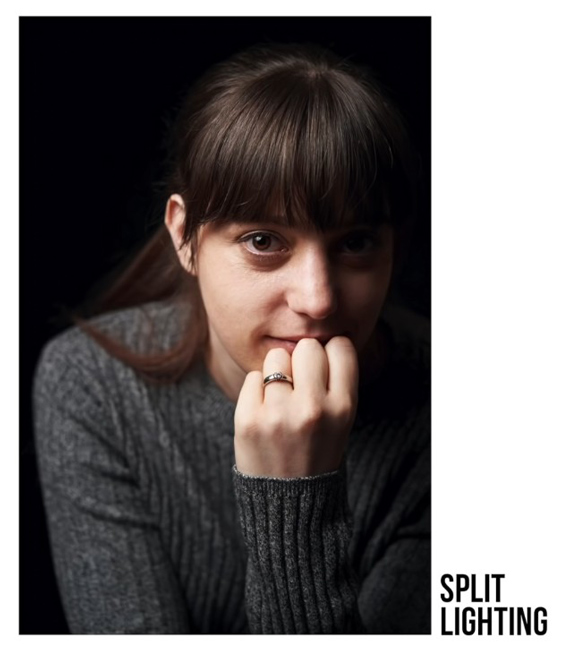
You can also place the lighting on one side of the subject to get a split lighting effect. This will light up one side of the subject’s face properly while the other side will be in shadow.
When placing the light in front of the subject, make sure that it’s slightly above them and not straight on. Doing so will give a beauty lighting effect and with a hot forehead, nose, and cheeks. This lighting setup gives a nice shape to the subject’s face.

Determining Exposure
Using a light meter is a foolproof way of determining your exposure settings. However, if you don’t have one, it’s not the end of the world. Tucker uses a pretty basic and non-technical way to determine the exposure:
- Set your ISO to the lowest value possible for cleaner images. Tucker has his camera set at ISO 100. Feel free to raise it up a bit if you need to, but keep in mind that higher ISO means more digital noise.
- Depending on how much depth of field you need, set your aperture value. For images that have little in focus, set it to lower values like f/1.8. If you want a greater area of the subject in focus, like the entire face from front to back, use higher aperture values like f/8. Tucker sets the aperture at f/2.8.
- With the ISO and f-value set, it’s now time to set the shutter speed and flash power. Use a shutter speed that cuts out all the ambient light. This way, the only light that will affect your image will be the light from your speedlight. A simple way to do this is to turn the speedlight off and take an image. Then, preview the image to see if there is any light appearing. If yes, gradually increase the shutter speed until you get rid of any light. Then, you’re good to go. When you turn the speedlight on, its light will be the only light affecting the image. This is crucial as you really want to be in control of the light.
- To determine the power to set for the speedlight, start from somewhere in the middle like 1/16 or 1/8, and take a test image. Review your image to see if you need to increase or decrease the power and adjust until you’re happy with the final result.
Setting a Correct White Balance
Setting the white balance correctly is important for getting accurate colors. To ensure flexibility over white balance, make sure that you shoot in raw. Then, have your subject hold a grey card while making sure that the light that strikes the subject falls on the grey card as well.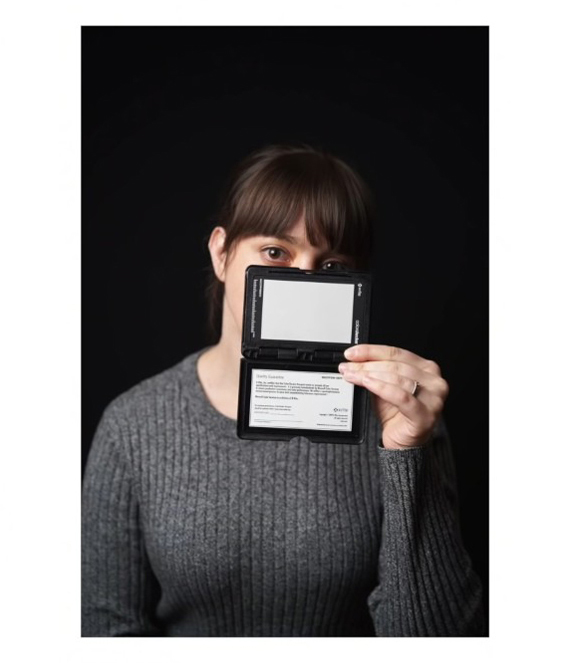
Do this for the first shot, and later, when editing, you can use the white balance picker on the grey card to set the exact white balance.
“Different cameras treat colors slightly differently. This helps you technically to get right where you need to be.”
Filling the Shadows
If the shadows are appearing a little harsh, you can use simple handheld reflectors to fill them up. Pointing a reflector toward the shadows will bounce off some light and make them appear softer. However, be sure not to overdo it. You’d want to keep some shadows to shape the subject.
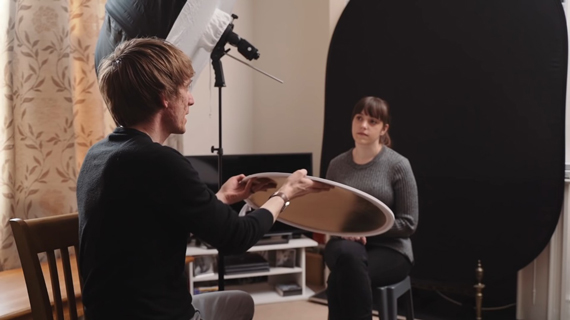
Another benefit of using a reflector is that it adds catchlighs to the subject’s eyes. This makes the eyes pop and adds life to the photo.
As Tucker has demonstrated, with a simple and easy to follow setup, you can easily take better portraits.
“Don’t let lack of money or huge amounts of fancy gear put you off. If you can get together enough just to get this basic kit, you can produce really good images that you can be very proud of.”
Go to full article: Single Speedlight Portrait Tutorial
What are your thoughts on this article? Join the discussion on Facebook
PictureCorrect subscribers can also learn more today with our #1 bestseller: The Photography Tutorial eBook
The post Single Speedlight Portrait Tutorial appeared first on PictureCorrect.
from PictureCorrect https://ift.tt/2Vs2Ikb
via IFTTT


0 kommenttia:
Lähetä kommentti