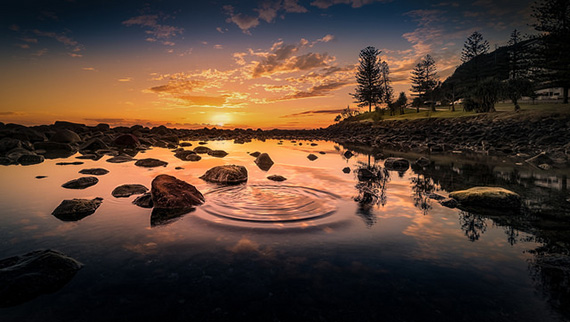
Adobe Photoshop is one of the most well known and most commonly used image editing software programs in the world. It’s used worldwide both personally and professionally. When people see a picture they believe too good to be true, the reply is often the same: “That’s Photoshopped.” What many people don’t realize is that many of the images you think are just perfect shots are touched up using Photoshop, whether that be adding a little brightness or totally removing an undesirable person or section. When Photoshop is used correctly and not over done, it can make amazing imagery even better!

photo by AMINE KAYTONI
While every tool in Photoshop has its use, and, when you know what you’re doing should definitely not be overlooked! One thing you need to remember is that Photoshop isn’t there to “fix” a photograph, a bad photograph is always going to be a bad photograph. Of course the tools you find useful are going to differ to those someone else finds useful, so it’s all a matter of opinion, but if you have a great photograph and it just needs that little touch up, then here are our eight of the most important Photoshop tools for photographers:
1. Hue and Saturation
The Hue and Saturation tool enables you to control the colors in your images based on, well, their hue and saturation. To open the Hue/Saturation tool you can go to Image > Adjustments > Hue/Saturation.
photo by Jeff Kubina
Hue refers to the color in your image. Changing this will change the colors in your photograph and so this setting is usually best left untouched.
The tool you’re more likely to use here is saturation; this is the intensity and richness of the colors in the image. When saturating an image you can use the Master box found at the top of the Hue/Saturation toolbox to choose which colors you’d like to saturate. The colors you’re going to want to saturate most are the reds and yellows in your image rather than the blues. Adjusting the saturation allows you to make it look more natural and dramatic while not changing the colors or image too drastically.
2. Cropping
This is one of the more simple tools you’ll find yourself using, but that doesn’t make it any less valuable. Cropping is a valuable tool for photographers as it allows them to prep an image for posting online or printing: taking an image and changing its size and/or removing unnecessary empty areas. You can save presets for various sizes and resolutions, enabling you to crop images specifically for various reasons.

photo by Thomas Leuthard
3. Layers
Layers are another simple tool that any Photoshop user knows how to use. But while simple, this tool is actually one of the most useful. Layers allow you to work on parts of an image without changing others. There really isn’t much more to say about layers than that, they allow you to layer various edits and section each, remaining its own separate section and having no impact on any other.
4. Levels
The levels tool allows you to correct the tonal range and color balance of an image by adjusting the intensity levels of images shadows, highlights and midtones. When editing the levels of an image you are shown a histogram, which is essentially just a visual guide for adjusting the image tones. You can find the levels tool by going to Image > Adjustments > Levels.
The histogram represents the dark and light tones within the image. If your histogram is mainly pushed to the left hand side it represents darker tones in your image, whereas the right hand side shows brighter tones. This is a tool you’ll likely find hard to use, but with slow adjustments you’ll notice how it can influence your images.
5. Sharpening
Sharpening is a hard tool to use; it requires a lot of practice and a very steady hand with a mouse. Sharpening an image is basically touching up all the lines and increasing their contrast, this will cause smaller features of an image stand out more. Sharpening your image is usually one of the last edits you’ll find yourself doing. The sharpen tool also has an “Auto Sharpen” command which may save you the time. When sharpening an image you should remember there is a fine line between sharpened and over-sharpened; over-sharpening an image will cause it to look unrealistic.

photo by John Flannery
6. Healing Brush
The healing brush is used to replace scratches and small specs you might have noticed in your image. It works like a paintbrush tool but allows you to take a “perfect” part of your image (let’s say you focus on the blue of the sky) and copy that part of your image over the top of the spec or scratch you’ve found within your image. This tool will attempt to blend the section you’re copying with the area you’re covering; this means nothing looks out of place.
7. Exposure
Exposure adjustment corrects the tonal values or lightness of HDR (High Dynamic Range) images. You can find the exposure tool in Images > Adjustments > Exposure. This allows you to edit three settings: Exposure (this adjusts the highlights of your image while ignoring the darker areas of your image), Offset (this darkens the shadows and midtones of your image while ignoring the lighter areas), and Gamma (this adjusts the image’s gamma or midtone values).

photo by cadillacdeville2000
8. Vibrance
The vibrance tool saturates the colors in your image, focusing mainly on increasing the intensity of colors in your image. Vibrance works much like saturation except it avoids skin tones (mainly oranges and yellows), so it’s perfect for images that contain people; it saturates their skin tone without making it seem unrealistic but adds to every other color in your image. A simple rule to follow is to use saturation when removing color from an image as it removes color from all colors, and vibrance when adding color. Vibrance essentially acts as a smart saturation, as it will only add color to the dull colors already in the image and not every color while avoiding skin tones.
About the Author:
Antonio has been an active photographer for more than three decades. An artist, coach, and teacher, he has developed a unique educational philosophy centered on the creative process and the transformational learning experience. He taught photography and digital imaging at The School of Media of LCC (The University of The Arts London) for more than ten years. Antonio has trained and coached people from all over the world to the highly professional standards of National Geographic and he is currently developing new educational projects on photography and creative development. He is now the owner of London School of Photography, where he runs classes and courses for novice photographers.
Go to full article: 8 of the Most Important Photoshop Tools for Photographers
What are your thoughts on this article? Join the discussion on Facebook
PictureCorrect subscribers can also learn more today with our #1 bestseller: The Photography Tutorial eBook
The post 8 of the Most Important Photoshop Tools for Photographers appeared first on PictureCorrect.
from PictureCorrect https://ift.tt/2iFhzbQ
via IFTTT


0 kommenttia:
Lähetä kommentti