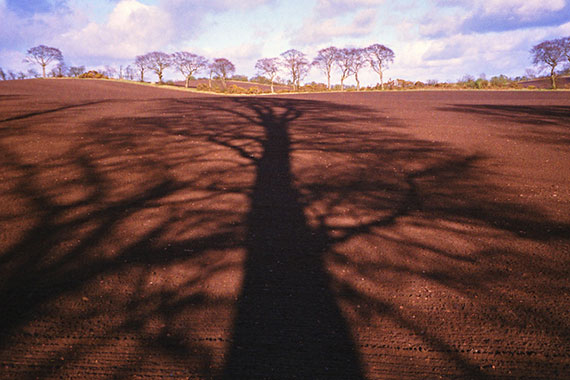
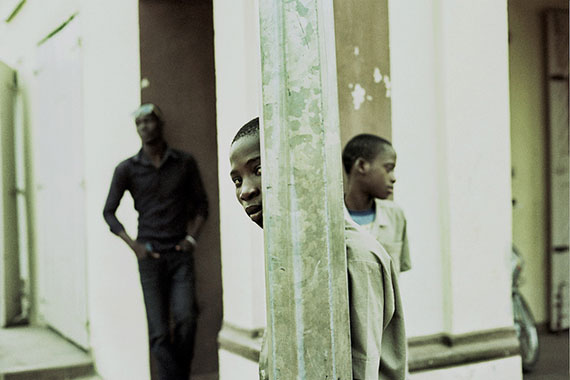
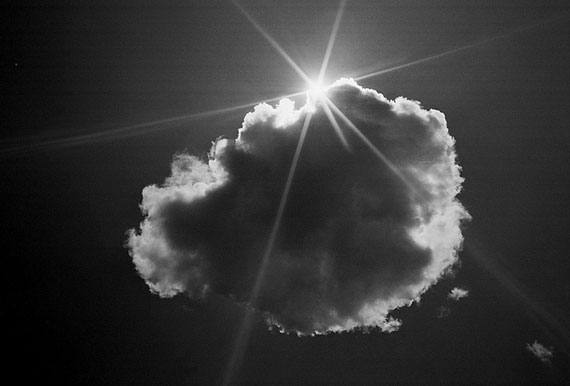
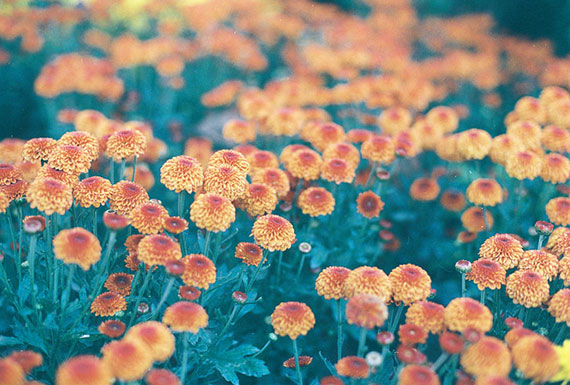
So I’m guessing not many of you are using film cameras these days. The few of you who are, good for you! This dying form of photography is still magical to me. I recently got into it again, on the sideline, and I definitely believe it’s helped me as a photographer in general.

Photo by Faith Hoops
Knowing that you cannot get an instant preview of your image makes you concentrate harder on your composition, exposure, and all other aspects of taking a photograph.
The manual SLR that I’m using makes me concentrate even harder, focusing and exposing manually, and as many people have already said, thinking about a photo BEFORE you take it often results in a much better shot. In addition, using a prime (fixed focal length) lens makes you concentrate even more!
You could be using a vintage Leica rangefinder from the ’50s or ’60s, a Japanese SLR from the ’80s or ’90s, but the film medium still remains the same. Sure, the newer cameras do have autofocus and auto exposure, but other than that, the basic process of using film cameras is pretty much the same. You take your shot, you finish your roll, process it, and get your prints, or as more people do these days, get them scanned. You have no idea what you’ve shot until afterwards.
Processing your own film can also be a very fun experience, especially once you know what you’re doing (and it’s not really that hard, especially when processing black and white film). It also saves quite a bit of money, as photo labs that still do film are able to charge pretty ridiculous amounts for processing and printing/scanning film.
Film comes in many formats, such as 135 (35mm) film, which is the most commonly used today, as well as medium format (120, 220, etc.) which is still used today by professionals.
In this post, I’m going to discuss the common 35mm film, which is what I’ve been using, and the different types, the various brands, and other factors that help explain to you how your photographs can actually vary (and improve) based on the film you use.
First of all, there are two basic kinds of film: negative film and slide film (reversal film).
Negative film is what most of you probably used as a kid, if at all. This film is processed into ‘negatives’, where your images show as an inversion of the normal image, i.e. light is dark, dark is light. Negative film comes in both color and black and white. Color negatives are sometimes known as “C41”. This name comes from the most common process of developing color negative films, which is C41. Black and white film is still called…well, black and white film.

Photo by scott hunter
Slide film (or reversal film) is the other kind of film that I mentioned. Not as commonly used every day as negative film, as far as I know, slide film is processed into color transparencies, not negatives. That is, the developed film strip will have the same colors as the original picture, unlike negatives where the colors are inverted. This is beneficial, as you can simply hold the transparency to a light source, and view the image, albeit in a small (36x24mm frame) size. A slide viewer is a little device with a light source and a magnifying lens: simply pop in your transparencies (slides) into the device, and you see a larger version of the image—no printing or scanning required to preview your shots. As far as I know, only color slide film is being manufactured currently. The last black and white slide film was the Agfa Scala film, has been discontinued for years now. However, if you really wish to get your black and white shots as transparencies, there are quite a few methods of processing ordinary black and white negative film which develops the negative film into a positive strip of transparencies. A lot of people send their black and white negatives to a company called DR5, who specialize in this process; however, do note that this is NOT black and white slide film, but simply a process of creating transparencies from negative film
An important difference between negative and slide film is the exposure tolerance. Negative film is quite flexible, and allows incorrectly exposed shots to be fixed to a great deal. Slide film is generally not so forgiving. This makes sense when you realize that you often view slide film directly (through a slide viewer or something), where as in a negative, you have to either scan it or print it – it’s in this printing or scanning process that the exposure can be fixed. Some say that slides can be exposure-corrected if you print or scan them too, while some still insist that slide film is definitely not as tolerant as negatives. However, as a general rule, remember that negative film is definitely more flexible than reversal slide film, and if you’re using slide film be sure to get your exposure spot on

Photo by james Gordon
Please note that what I’m talking about here is not the process of pushing/pulling film in the development process. You can push or pull both slide and negative film in the development process. For those of you who do not know what this means, push processing refers to a procedure that basically alters the film process so that the resulting negative or transparency is ‘over-developed’, which allows the exposure of an underexposed roll of film to be corrected. Pull processing is the opposite, ‘under-developing’ the film to correct an overexposed roll. For example, if a photographer intentionally (or accidentally) shoots an entire roll at the wrong ISO setting on his camera, it can be corrected via push or pull processing.
When I mention that negative film is flexible, I mean that once a negative film roll has been developed normally, its exposure can STILL be corrected, generally to a greater degree than slide film allows. OK, enough about that. Moving on…
…there are distinguishing features of different types/brands of film that are noticeable in your results that you will learn to see, and form an opinion over. These features include film grain, color saturation, contrast… and work for different types of images, as well as ruin other types of shots. Playing around and experimenting with various types and brands of film will help you realize which film to use for which purpose. Another point to note is that, unlike in digital cameras, your ISO is fixed. You choose the film speed you want, and you’re stuck with it until the roll is over. Don’t buy a slow ISO 100 film roll and go shooting at night!
So, looking at the variables of different films, we have:
Film grain: this is generally based on ISO—as in digital photography, where high ISO speed results in image noise, higher film speed usually results in more film grain. This is suitable for some pictures (e.g., if you’re looking to get a gritty street image) but would not work with a landscape with sky and water where you’re looking for smooth clean textures. Some types of film simply handle grain better than others, so this is where using films and seeing real results helps more than just reading about the theory. For example, Kodak Ektar is supposedly the finest grain color film in the world! Having used both Ektar (ISO 100) and Fuji Reala (ISO 100), I really cannot spot the difference between the two. However, using a black and white Kodak Tri-X 400, and compared to a Kodak T-Max 400, I find the Tri-X to be noticeably grainier than the T-Max. But like I said, some grain will accentuate a photo, and improve it. Don’t be afraid of grain.

Photo by Irina Jazmín
Color saturation: obviously applying only to color film, some film has the tendency to over-saturate and give artificial, fake colors. Some films give beautifully natural colors, saturated just right, and some even have a slightly laid back look to it that looks great. Of course, some look flat and dull—you can safely avoid this type of film if you feel it’s flat. In black and white film too, the tones of the grays vary with each film. Some have harsh tones, and hardly show any definition between black and white, while some have lovely gray mid-tones, and others have a gorgeous silvery look to the grays.
Contrast: yes, contrast varies too. To me, this is especially noticeable and important in black and white film. I prefer my black and white film to have a medium to high contrast. Low contrast doesn’t work for me, although I’ve seen great examples of low contrast black and white shots. So again, experiment!
From the different types of film I’ve used (I’ve been sticking to negatives), here are some characteristics that I’ve noted:
Fuji Superia/Superia X-Tra (200, 400): my standard color film. Cheap, reliable, very good. I love the colors on this. Not too contrasty, not very saturated… in fact I’d say the colors are slightly laid back. Grain is fine, and for ISO 400, I would never call it grainy. For random color shots, and especially to test new cameras/lenses, this is my go-to film.
Fuji Reala (100): a professional grade film, this is one of the finest grain films I’ve used. Colors are more saturated than the Superia, but not too. Quite contrasty, and again, beautiful fine grain. Probably my favorite C41 film.
Kodak Ektar (100): another professional grade color film. I’d say the grain is as fine as the Reala, although Kodak claims this to have grain finer than any other! Great colors too, and nice contrast. Like the Reala, I’d use this for landscapes, and avoid portraits – this sort of saturation is not very flattering for skin.
Kodak Portra (160, 400): as the name suggests, this color film is designed for portraits, aiming at getting skin tones right, and avoiding extra saturation while maintaining nice contrast – it works great for portraits, yes, but I wouldn’t mind using it for other work too. I do not necessarily feel that I need brighter colors for landscape work, as this sort of look works too, sometimes. Always experiment, do not stick to the ‘rules’.
Kodak Tri-X (400): a very grainy black and white negative film, quite contrasty and a bit harsh. Not my favorite. The first roll I tried was a disaster – the tones were too strong, the mid-tones were almost non-existent i.e. black seemed to jump into white…and the grain was too much for my liking. I had a feeling that this roll was expired (I forgot to check, always remember to check!) so I went out n got another – slightly better, but still too grainy for my tastes. The texture just seemed too harsh for me. Like I said, there’s a time for very grainy film too, so by no means am I gonna stop buying Tri-X.
Fuji Neopan Acros (100): my favorite black and white film. The grain is extremely fine, and the grays are lovely, almost silvery, and very, very smooth. Contrast is more than average, quite perfect in my opinion. Great for people photography, as well as street shots.
Kodak T-Max (100, 400): a fine grain black and white film, beautiful contrast, and very nice tones. I suggest T-Max 100 for daylight street shooting: the contrast is not too high, and the tones are dark, darker than the Neopan film that I love, but very controlled and smooth—and at ISO 100, the grain is very fine. If you want to shoot in lower light or you just want a faster film, try the T-Max 400. The grain is still pretty fine, and it’s got the same features as the 100. If you want that real grainy look, try Tri-X instead.
Ilford HP5 400: a high speed black n white film, by the black n white legends Ilford. It’s got the ‘classic’ look – quite hard to explain, really. I just like it. The grain is very controlled, quite fine…medium contrast, I’d say…a very nice general purpose film.

Photo by Rodrigo Sombra
Yeah, I think that’s pretty much all I’ve tried so far. Told you I’m new to film too. Can’t wait to get my hands on some more Ilford, as well as some Kentmere, Fomapan, etc.
I’ll try to end this off by just guiding you guys on how to pick out some film for some random purpose:
Firstly, negative or slide? If you want black and white, it’s gonna be negative. For me, another deciding factor is the film speed. I prefer negatives if I’m buying film over ISO 200 for some reason; grain on slide film is just not my thing. Also, you might want to check on places that process slide film (E6), which is not nearly as common as negative processing. If you can’t find a lab that does E6 slide processing, you have no choice but negative. And lastly, but importantly, remember that rule where we say negative film is more tolerable. If you have a very accurate light meter, and you think your exposure is going to be spot on, you can go ahead with slide. But if you have any doubts, or you want flexibility, definitely go ahead with the trusty negative film.
Next, of course you’re gonna choose black and white or color. Nothing to explain here.
Film speed! Ah, this is crucial. ISO 100, known as daylight film, is obviously for shooting in daylight. Sure, this gives fine grain, but fine grain blurry shots taken at night are not gonna look good at ALL. I’d take sharp but grainy night shots any day over the blurry fine grain ones. So know what you will be shooting, where you will be shooting, and what time you will be shooting. Shooting in daylight does not mean you ONLY need to pick a slow (50, 100) film. Like I mentioned before, try shooting some grainy street shots with a high speed film. But shooting at night SHOULD mean that you need to pick a high speed (400, 800) film.
Lastly, pick out a brand that either you know by experience, or have read about (here, maybe!), that has characteristics that you want for this particular shoot. Colors, contrast, saturation, sharpness, grain/speed performance, texture – depending on what you’re shooting, look at these factors and pick one.

Photo by http://www.labastire.com
And then…stick it in your camera and go shoot!
But…and there’s always a but…remember that in today’s photography world, film is almost always scanned. Even when making prints, your photo lab will usually scan your film and make prints out of the scans, not using the traditional and probably less convenient method of making ‘wet prints’ in the darkroom. What this means is that, even though you will notice characteristics of your types of film, your final output can vary quite a bit in the scanning process. A shot with rather dull and lifeless colors can be enhanced a great deal, regardless of the film type you have used, using scanning software and Photoshop. Another shot of colors that seem over-saturated or gaudy can be controlled, faded, or even made black and white!
Of course, this can be good and bad. If you’re scanning yourself, this gives you greater creative control over the final image, so if you really work at your scanning process, you can end up with some great results. However, if you get them done at the lab, you’re sort of at the mercy of the lab guy. For example, I rescanned a shot that I got scanned at the lab…a shot of a flower, which the lab scanned as a red flower. My scan showed it purple. To this day, I’m not sure what color the flower really was, but this shows what can be done. I can turn the flower red if I want…or leave it purple…or make it pink. I have plenty of options, really. In the end, I just want to make it look how I think it looks best. And that’s what I did (I left it purple), but that really showed me how much of a role scanning plays, and how much your final result can be changed, no matter what the film brand or type that was used.
But (but, again), there’s a limit to what editing your scanned film can do. You’re still gonna notice the characteristics of the particular film type you used, so no matter how good your editing skills are, it’s still better to get a good film that you’ve had good experience with when you shoot with a specific purpose. You might not always be able to fix a flat, dead image with Photoshop. If you want today’s shot to have bright colors, don’t go for film that you know to be rather flat or dull in terms of color saturation—it’ll always be easier to get the image you’re looking for if you start with the right stuff first.

Photo by Khánh Hmoong
And with that, I will shut up about different kinds of 35mm film! Remember that most of this applies to medium format film as well. However, as I’ve not used medium format film cameras (yet), I have refrained from going into medium format-specific details.
This is by no means a comprehensive guide on using film. There’s so much more to the complicated and beautiful art of film photography, which I shall try to cover in more detail later on. But if you’re new to this, I hope this has been enough to get you excited enough to get started!
About the Author:
Heshan C. Jayakody writes for pixelogist.me. He is a photographer based in Singapore.
Go to full article: Film Photography: Why You Should Try It Out
What are your thoughts on this article? Join the discussion on Facebook
PictureCorrect subscribers can also learn more today with our #1 bestseller: The Photography Tutorial eBook
The post Film Photography: Why You Should Try It Out appeared first on PictureCorrect.
from PictureCorrect https://ift.tt/2y7RgR3
via IFTTT


0 kommenttia:
Lähetä kommentti