Taking beautiful images of mist and fog can be challenging, but it’s a skill worth learning. Fog and mist usually form during the night and are seen at their best in the early morning as the sun rises. Be prepared to get up early to catch the best shots!
Use Manual Focus
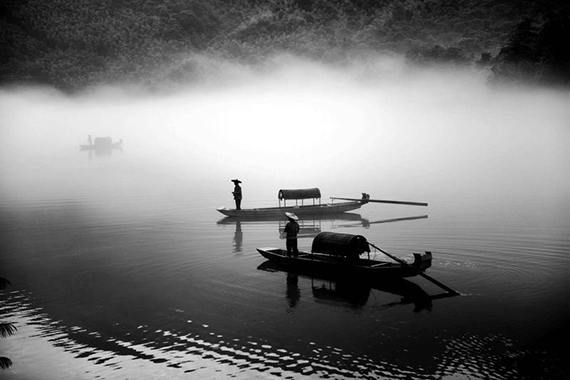
Manual Focus
Your autofocus will probably struggle in mist and fog. The reason being that autofocus needs to find differences in contrast to focus, and fog and mist doesn’t have a lot of contrast. You may struggle to focus on something even in manual—it can help to pre-focus to a set distance, or widen your depth of field by stopping your lens down.
Use a Tripod For Steady Shots

Use a Tripod
If you want to be certain of sharp images, use a tripod instead of hand-holding your camera. This will also help if you need to use slow shutter speeds, as it will reduce camera shake. You’ll need to be ready to shoot when the sun comes up, so it’s wise to get all your gear set up in plenty of time, and this includes your tripod.
Shoot in RAW Format
Shooting in RAW format is best, not only because you have a far higher resolution image than JPEG, which you can post-process without fear of degrading image quality, but because you can fine-tune your white balance in post processing. Fog and mist can sometimes mess with your white balance settings, but if you don’t want to shoot in RAW, put your camera’s WB on overcast or cloudy.
Exposure Issues
Camera metering systems are often confused by mist and fog, as they are with snow, because fog, mist and snow are reflective. This fools your camera into thinking that there’s more light than there actually is. The resulting images can often be underexposed, with the white of the fog becoming dark and not at all how you saw it! If you are using an auto-exposure mode, try using some exposure compensation; try it around a full stop more to start with, but experiment.
Find a Focal Point
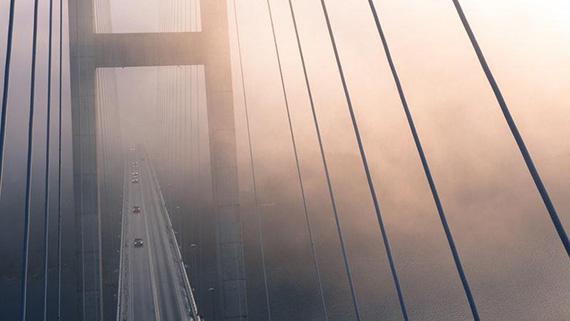
Find a Focal Point
Because fog and mist lower the contrast and warp perspective, you sometimes need something to add a sense of distance or depth in the shot. Try adding leading lines in to the image, such as a fence, hedge, wall or road that leads the eye into the photograph. You can also try framing the fog and mist by using natural features such as tree branches in the foreground of your image.
If you focus on objects that are close to you, the resulting shots will create a sense of distance in the image, as the object in the foreground will have more color and contrast. This saturation and contrast will gradually fall off the further away from the camera the objects in the image are.
Silhouettes
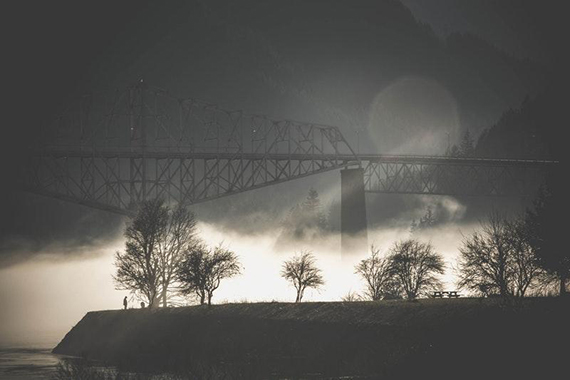
Silhouettes
You can get some great silhouette shots in mist and fog, by working out where the sun is coming up, and putting your subject between you and the sun. If you shoot into the rising sun, your subject will be beautifully backlit against the fog.
Light Rays
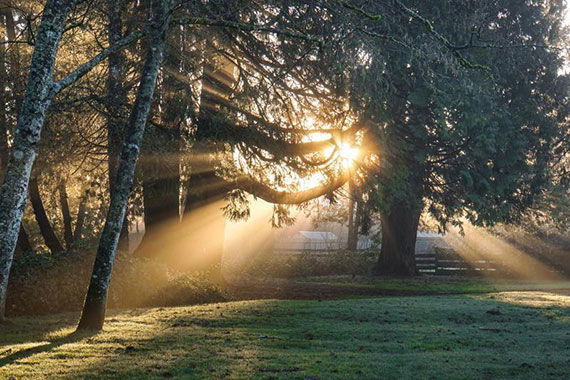
Light Rays
Light rays in a shot of a foggy day can really make an image magical, by shining down on an object or part of a path or road. These light rays coming through the fog can be from the sun, or from any artificial light source, as long as it’s at an angle to your camera. You must be quick, though, before the sun burns the fog away.
Post Processing
Lens Correction
Sometimes, your images will come out with perspective distortions and slanted horizons. It’s easy enough to fix in Photoshop with these simple steps:
- Open the image you want to fix in Photoshop. Right-click on the background layer and choose Convert to Smart Object. This allows you to make non-destructive changes to your image.
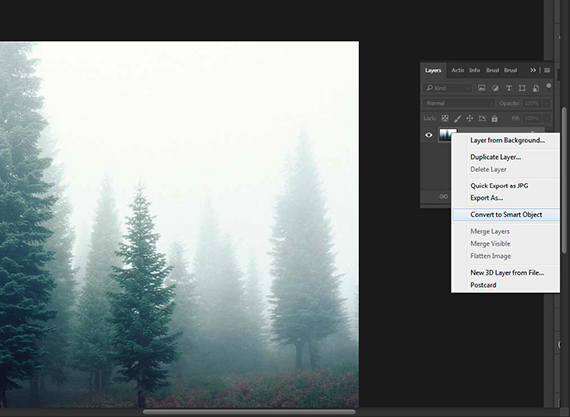
Convert to Smart Object
- Go to the Filter menu, choose Camera Raw Filter. This brings up the Adobe Camera Raw window.
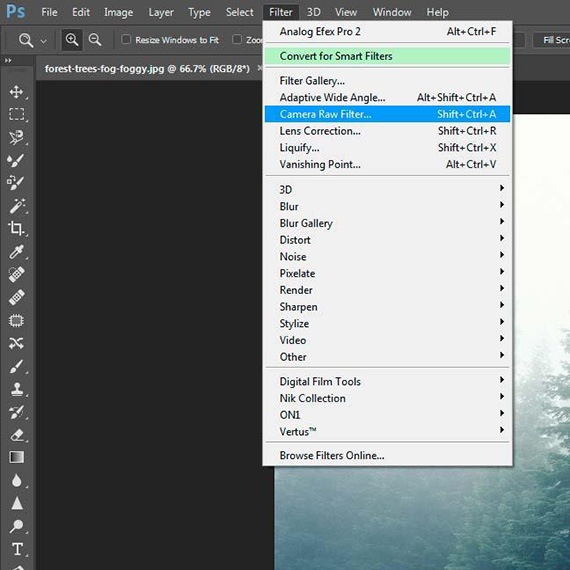
Camera Raw Filter
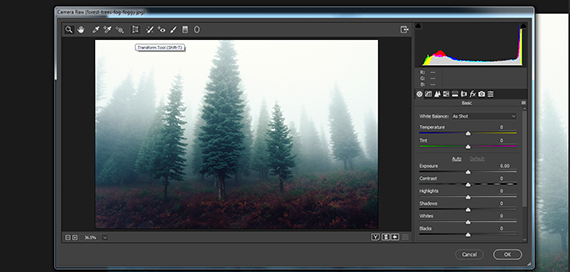
Adobe Camera Raw
- On the top row of icons in the Camera Raw Workspace, there is the Transform tool. Click on that to bring up the full selection of options. This includes Auto, Horizontal, Vertical and Full. Try Auto first, it’s usually fairly accurate, and it should also straighten any wonky horizons. You may end up with parts of your image in a checkerboard pattern after you’ve made these adjustments. You will have to crop these out with the crop tool.
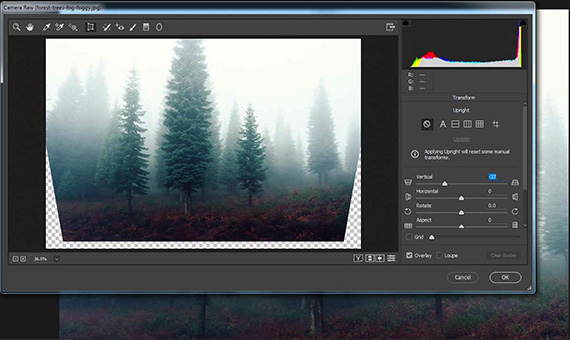
Transform Tool
- If you want to try to correct distortion, go to the Lens Correction icon, which is underneath the histogram on the right-hand side. Move the slider either way so you can see what the distortion will do to your image. Once you’re happy with your image, press OK. As you did the work using a smart filter, the changes you made are non-destructive, and can be changed.
Histogram Adjustment
Your image histogram displays the tonal range of your image. It’s basically a graph which shows how the pixels are distributed by number of pixels at each of the 256 brightness levels in an image. The higher the line from the bottom axis of the graph, the more pixels of that brightness level are present. In this histogram, there is a pretty even distribution of brightness, with no blown highlights at the right end of the scale, and a small amount of dark shadows at the left.
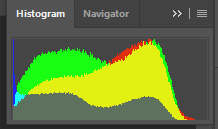
Histogram
From “reading” a histogram, you can decide whether the image contains enough detail in the shadow, midtone and highlight areas, and you can choose which adjustments you need to make from it.
A simple way of adjusting your lights, darks, and shadows is the Levels adjustment tool. Curves adjustment is also used too, but Levels is a quick and easy tool when you are in a hurry.
Create a duplicate layer from the Layers menu. Go to Image/Adjust/Levels in the menu at the top of the window in Photoshop. Choose Levels, and this window will open up over your image:
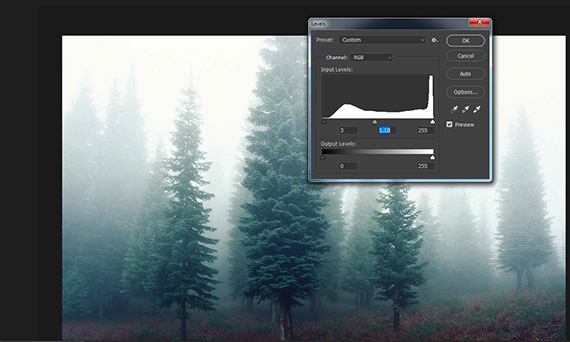
Levels
By adjusting the sliders under the levels histogram, you can lighten or darken your image.
When you are happy with your image, click OK. Your changes have been saved on a duplicate layer, so your original image is still untouched. If you like your changes, you can go to the layer adjustment drop down menu and choose Flatten Image. This will merge the changes on to your original image.
Cropping Your Image
Cropping means using the crop tool to remove unwanted elements from a shot, or to zoom in to a smaller detail and make it larger in the frame. I don’t advise cropping to zoom in on an object, as the more you crop away from the image, the more pixels you remove. Eventually, if you go small enough with your crop, your image will become pixelated at normal viewing size.
In the image below, I decided to crop out the checkerboard pattern left from the lens correction processing:
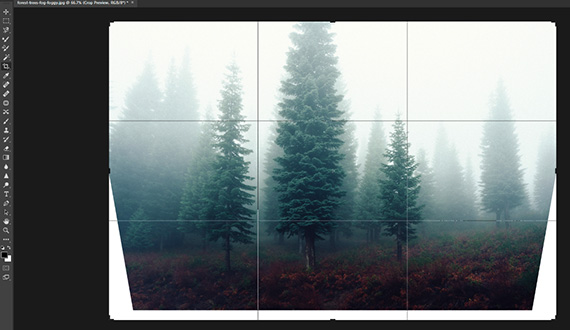
Cropping
Choose the Crop tool from the tool menu running down the left-hand side of the screen in Photoshop. You can choose what ratio to crop at by choosing from the drop-down menu at the top:
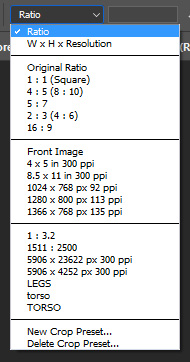
Ratio
- Or you can choose to free crop without being constrained by a ratio.
- Grab one of the little handles at the edges of the crop grid, and start pulling inwards until you’ve removed the distractions at the edges of the image:
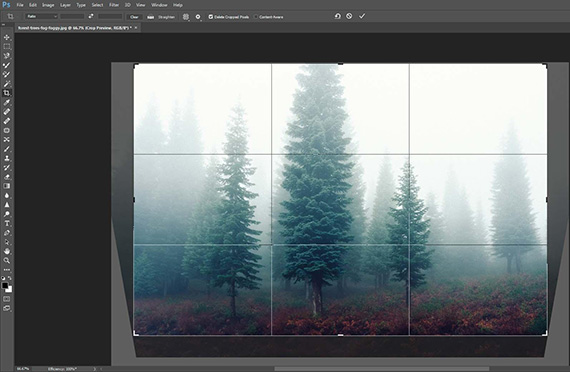
Remove Distractions
- You can also use the mouse pointer to click and drag the crop box around an object in the photo:
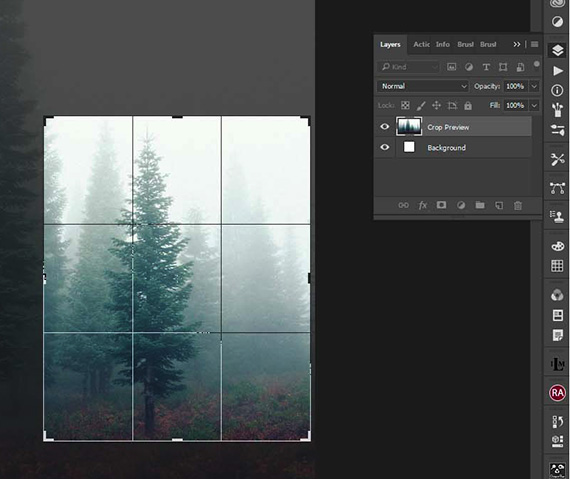
Crop Box
- Click Enter when you’re happy with the crop.
Adjusting Colors
To adjust colors in Photoshop, you can use the Hue/Saturation adjustment layers. Go to the Layer panel on the right in Photoshop, and click the drop-down menu for the adjustment layers:
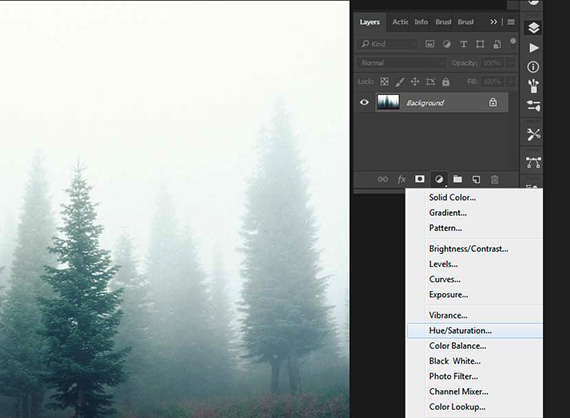
Hue/Saturation
Play around with the sliders until you’re happy with the results, then go back to the layer panel and flatten the image.
You can use a plugin for Photoshop, such as Macphun.com’s Luminar, or the free Nik Effects software to add presets to your images. Presets are basically a recipe for the colors and contrasts etc. in an image, and when you apply one to your image, it will change it according to the ‘pre-set’ parameters.
The good thing about presets is that they apply a uniform look to all the images you apply it to, and that’s good if you have a lot of images to edit. You can get presets for portrait, landscape, urban, weddings, black & white, grunge, and just about any other type of image you can think of. It’s like an Instagram filter for your desktop, but it can be fine-tuned with other adjustments.
Sharpening
Sharpening should be the last thing you do. Sharpening in Photoshop can be done with Smart Sharpen or Unsharp Mask—or indeed any of the other sharpening variations, as well as using the High Pass filter. Unsharp Mask is perhaps the simplest of these, and to get it, go to the Filter menu at the top of Photoshop and choose Sharpen/Unsharp Mask:
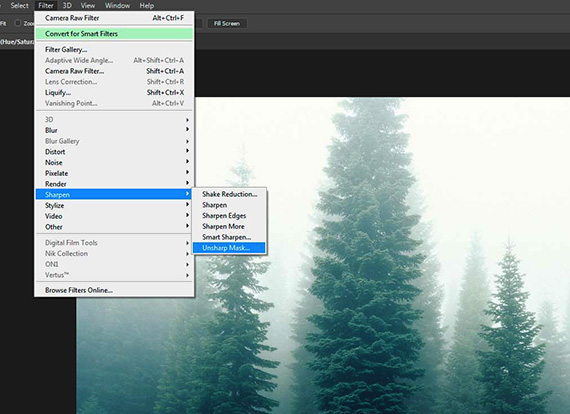
Unsharp Mask
A new dialogue box will open up with options. Play around and experiment with them, but always apply less sharpening than you think you will need. If you keep it at the default settings, drop the amount to about 20–30 percent or less, and keep checking what your image looks like at 100 percent and at 50 percent. Too often images are over-sharpened, and when your image detail goes a little ‘crunchy’ and just looks wrong, then it’s way overdone.
You can get plugins for Photoshop that will take the guesswork out of sharpening, like Plugsandpixels.com’s Focal Blade. Nik Software also has an easy-to-use sharpening tool.
Final Thoughts
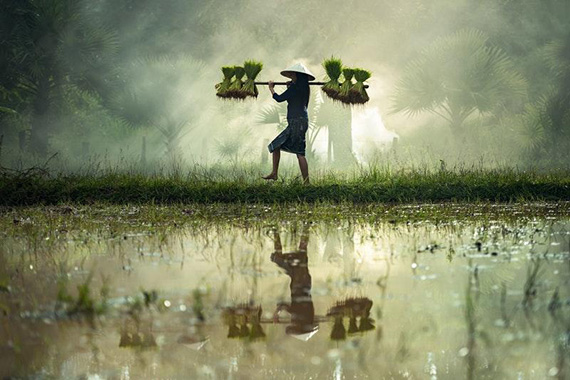
Fog and Mist Photography
Mist and fog photos are wonderfully atmospheric. They can be either sinister and brooding, or light and beautiful, depending on what you are trying to convey. I hope that this article has at least inspired you to set your alarm, get up early, and go take some mist and fog shots!
About the Author
Max Therry‘s passion for photography developed during his time in art school, where he would borrow his friends’ cameras and take photos of everything unusual around him. When this passion gained almost obsession-like traits, he bought his own Sony system and vowed to take as many photos as he could. After about a decade of filling up multiple hard drives, he says it’s time to share his experiences with whoever’s interested.
Go to full article: Taking and Processing Fog & Mist Photos
What are your thoughts on this article? Join the discussion on Facebook
PictureCorrect subscribers can also learn more today with our #1 bestseller: The Photography Tutorial eBook
The post Taking and Processing Fog & Mist Photos appeared first on PictureCorrect.
from PictureCorrect https://ift.tt/2EVaH0D
via IFTTT


0 kommenttia:
Lähetä kommentti