Armed with the four simple, yet very effective strategies that I will share here, you can venture out to capture tulips, or any flowers, in a captivating and impressive manner. These quick tips can be applied to any type of floral photography, of course. By keeping these tips in mind and by applying them, you will find yourself producing fewer average images and many more “keepers.”
1. Consider Your Point of View
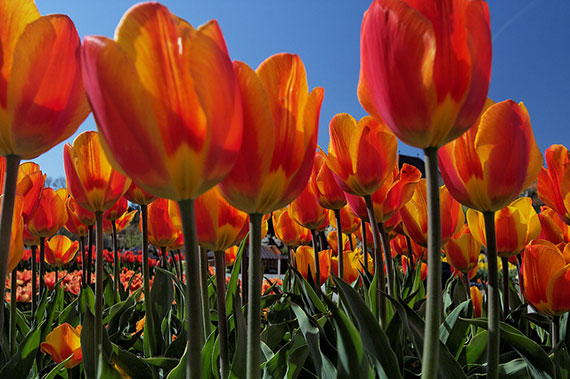
One of the characteristics that makes an image strong is the presentation of a scene in a way that we don’t normally see it. As you walk through life each day, you see everything, for the most part, at eye level. As beautiful as a tulip may be, if you photograph it from your normal standing position, it will look like every other tulip you have seen over the years. Beautiful? Yes. Unique or interesting? Probably not so much.

Photo by Traveller_40; ISO 200, f/8.0, 1/80-second exposure.
Look to present tulips in a way they are not usually seen. When was the last time you got down on your belly on a nice day and gazed upward at the flowers? Maybe never, right? By gaining a different perspective than what you are used to seeing, the image now possesses the unique and interesting factor that makes it visually appealing.
2. Notice Your Backgrounds
If you happen upon a scene that contains a field of tulips as far as the eye can see, or one where there’s a glorious mountain or sunset as the backdrop, well then you’re pretty much golden to start shooting away. However, for the other 99 percent of the time, you will be faced with less than glorious surroundings. This is when it is important to manage the scene. Even the most dazzling flowers will not be as appealing when you see parked cars, campers, stores, etc. behind them. Unless the background elements support your photograph, they should not be included.
There are several ways in which you can remove distractions from your background. One is by simply walking around your scene and finding a vantage point from which the less than desirable background elements are not visible. An example might be to shoot upward from a very low vantage point. By using the sky as the backdrop, you have avoided any existing distractions. In addition to getting down low, you can attempt to photograph the flowers close up with a tight crop. Any items that may have been behind the floral subjects are nowhere to be seen, and the focus of the image is on only the tulips.

Photo by alcidesota@yahoo.com-OFF; ISO 250, f/2.8, 1/250-second exposure.
3. Use Depth of Field to Your Advantage
Depth of Field (or DOF) is basically the distance between the nearest and farthest elements in a photograph that appear sufficiently sharp in focus. When an image has a large depth of field, most elements in the scene from front to back will be in sharp focus. If an image has a shallow depth of field, the subject of the photograph will be sharp, while elements in front or behind it will be out of focus.
Controlling DOF can be a powerful tool in creating strong images. Let’s go back to the previous tip, regarding backgrounds, for example. In addition to the strategies we discussed for removing distracting background elements, you could also use depth of field to your advantage. By throwing a background element out of focus, you will draw less attention to it.
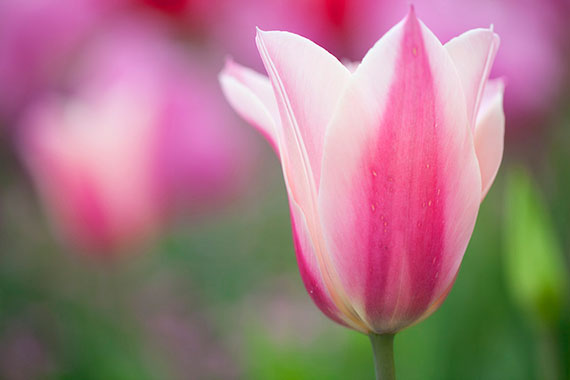
Manipulating the depth of field can assist in producing a strong and dynamic image. For example, with an out of focus foreground and background, you can keep the attention on a single tulip just by keeping it sharply focused.

Photo by Christine Jackowski
Controlling depth of field is a technique that deserves its own article. In short, however, there are a few ways of controlling it. One of the most common ways is to use a large aperture (lower f-stop number) for shallow depth of field and a small aperture (higher f-stop number) for greater depth of field. This means you will have to get yourself out of automatic mode and choose either manual mode or aperture priority mode on your camera.
4. Focus on the Small Details
As mentioned earlier, when you offer the viewer a perspective that is different from what they’re accustomed to, you have a greater chance of producing a unique or interesting photograph. One such way this can be achieved is by focusing in on the small details, or just a part, as opposed to the whole.
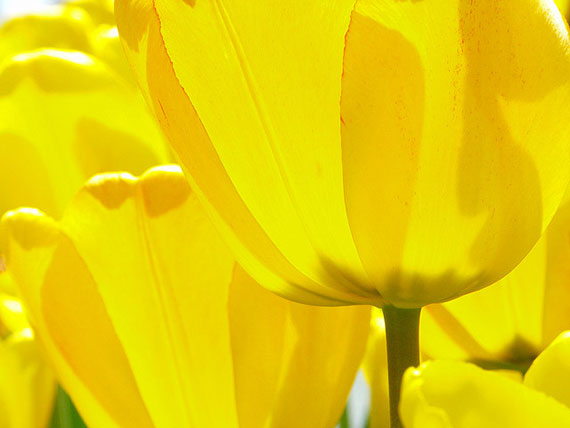
You might aim to fill the frame from edge to edge with color and a close up view that provides an interesting perspective, void of any distracting background elements, all while keeping the depth of field fairly shallow. As a result, the eye will be drawn to one specific area of the tulip (such as the stamen), which becomes the subject of the photograph. The subject matter has now been presented in a unique, interesting, and obvious manner.
There you have it. Keep the ideas presented here in mind as you venture out to capture some stunning floral photographs!
About the Author:
Robert J Rhatigan Jr writes for btphotoschool. Photography first became a passion of his back in the mid 1980s. He spent many hours in the dark room and found that the creative outlet this craft provided stirred his soul. Although the basic principles of photography remain the same today, the technology has changed in unimaginable ways. Now, over 25 years later, the joy of photography continues to stir his soul, while providing him with countless hours of pure enjoyment.
Go to full article: Flower Photography: 4 Quick Tips for Great Tulip Photos
What are your thoughts on this article? Join the discussion on Facebook
PictureCorrect subscribers can also learn more today with our #1 bestseller: The Photography Tutorial eBook
The post Flower Photography: 4 Quick Tips for Great Tulip Photos appeared first on PictureCorrect.
from PictureCorrect http://bit.ly/2SGc1La
via IFTTT


0 kommenttia:
Lähetä kommentti