Drifts of snow and freezing wonderlands are coaxing out photographers to record the beautiful countryside in all its winter glory, but as many of you will find it’s not without its problems.

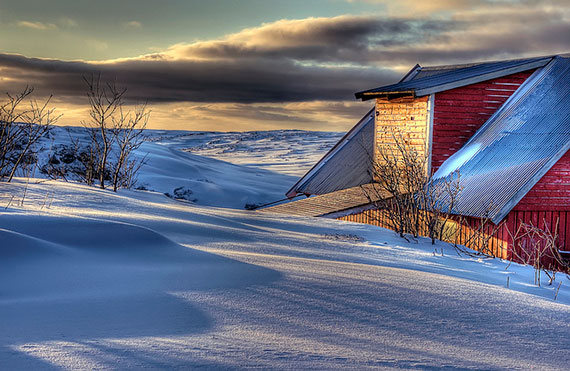
Photo by Christopher; ISO 200, f/22.6, 1/83-second exposure.
We are going to take a look at some of the problems that can get in your way of producing the images that you want and tips for achieving wonderful images.
First off, let’s look at exposure for landscape pictures and then look at lighting for portraits in snowy conditions.
Exposure
Your digital camera will like to do all the work; many of us use the auto light balance option on our cameras. In normal conditions, this works great and is certainly what my camera is set to most of the year, but snow is sneaky and confuses your auto settings, so we need to compensate for this.
When this happens and there is not enough ambient light to correctly light the scene, it is often helpful to overexpose by +0.3 to +1.0 EV for a better exposure value, achieving a truer whiteness but taking care not to overexpose too much and lose any detail. How much of an increase you will need depends on a number of factors, as all cameras have slightly different settings and the light around you is not always the same. So play around.
White Balance
The purpose of white balance is to equalize colors based on the lighting conditions. Snow is very reflective and will cause your DSLR camera sensors to misread the white balance. This will usually cause snow to look grey or blue.
You are not automatically going to know how to set your white balance, so take a number of shots and adjust your white balance; choose the setting where the snow is less grey or blue and closer to white.
Lighting..really? Really!
When lighting a subject for a portrait, you need to get as much of the subject in the frame as possible; this will allow the camera to take a better and more accurate reading and avoid the subject being too backlit, which will cause a silhouette effect. It’s best to take a meter reading from just in front of your subject, then light and set meters accordingly, but for amateur purposes the former is better, especially if you are relying on the camera to do the lion’s share of the metering.

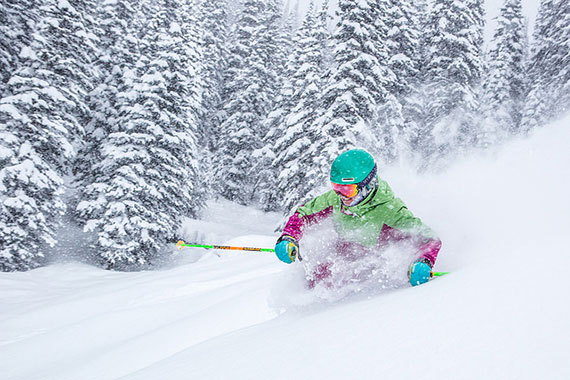
Photo by Zach Mahone Photography; ISO 640, f/5.6, 1/640-second exposure.
Flash is often avoided by photographers when photographing snow, but it can be beneficial in picking up detail that would otherwise be missed. It can add sparkle to a winter scene, and if you have subjects in the frame and are happy to lose some background detail it may make all the difference. Using your fill flash option can help fill in the shadows and the back lit subjects in the foreground.
Of course, much of this may be altered in post production but it would be wise to have the correct information there in the first instance. Once detail is lost from over exposure it is gone forever, and the same can be said for too much shadow. Putting up the exposure in post production may leave you with a grainy image.
If the detail is all there in a picture but you would like more light on the subjects, you can increase the exposure if you are happy to lose some of the background detail.
For static landscape scenes when the light is going using a slower shutter speed will give you a nice effect, however this should only be used in conjunction with a tripod or perhaps using a wall, otherwise too much camera shake will occur.
Other Things to Think About
- Take out lots of batteries; they are used up much faster in freezing conditions. It can be useful to have them in a pocket close to your body heat.
- Use camera cards better suited to extreme conditions, for example SanDisk Extreme.
- Don’t allow your lens cap to get wet and then place it back on your lens, causing spots and condensation.
- It sounds obvious, but keep your camera and lens dry.
- Problems may occur when moving in and out of freezing conditions, so allow your camera to warm up slowly. Even better, if you need to start shooting again indoors then make sure you have a camera inside. Otherwise you may be stuck with a foggy lens while your camera warms up!

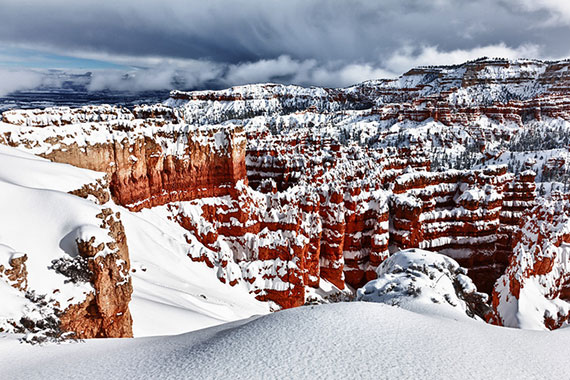
Photo by James Marvin Phelps; ISO 100, f/18.0.
- And the most important… Wear thick socks and gloves. I wear fingerless gloves with grips on the palms.
About the Author:
This article has been written by a professional Wedding Photographer in Gloucestershire, who recently had a lot of fun at a snow covered wedding and decided to share some experience that will hopefully help you to capture some beautiful images before it all melts. Happy shooting!
Go to full article: Winter Photography Tips
What are your thoughts on this article? Join the discussion on Facebook
PictureCorrect subscribers can also learn more today with our #1 bestseller: The Photography Tutorial eBook
The post Winter Photography Tips appeared first on PictureCorrect.
from PictureCorrect http://ift.tt/2oufmjc
via IFTTT


0 kommenttia:
Lähetä kommentti